Adobe Photoshop is an indispensable tool in the digital creative landscape, a powerhouse for image manipulation, graphic design, and photo editing. At its core, understanding how Photoshop handles different types of visual information is crucial for any designer or editor. One of the most fundamental concepts, yet often misunderstood, is rasterization. To truly harness Photoshop’s capabilities, one must grasp what it means for something to be “rasterized,” why it happens, and its profound implications for your workflow and final output.
In essence, rasterization is the process of converting vector graphics or smart objects into a bitmap (or raster) image composed of individual pixels. While this might sound like a simple technical conversion, it’s a pivotal moment in the lifecycle of many design elements within Photoshop, marking a transition from scalable, mathematically defined objects to fixed-resolution pixel data. This article delves deep into the mechanics, implications, and best practices surrounding rasterization in Photoshop, ensuring you can wield this powerful concept to your advantage.
Understanding the Core Concepts: Vector vs. Raster
Before we can fully appreciate rasterization, it’s vital to differentiate between the two primary types of digital graphics: vector and raster. Photoshop, while primarily a raster editor, often interacts with and even generates vector-based elements, making this distinction particularly important.
Vector Graphics: Scalability Without Loss
Vector graphics are built using mathematical equations rather than pixels. They define points, lines, curves, and shapes based on algorithms that describe their position, size, and color. Software like Adobe Illustrator is purpose-built for vector creation, but Photoshop also incorporates vector capabilities through shape layers, text layers, and Smart Objects containing vector data.
The defining characteristic of vector graphics is their infinite scalability. You can enlarge a vector logo from a tiny icon to a massive billboard print without any loss of quality, pixelation, or degradation. The mathematical definitions simply rescale, redrawing the image perfectly at any size. This makes vector formats ideal for logos, illustrations, typography, and any element requiring flexible resizing.
Raster Graphics: Pixels and Precision
In contrast, raster graphics (also known as bitmap images) are composed of a grid of individual colored squares called pixels. Every photograph you take with a digital camera, every scan, and most images found on the web are rasterized. Each pixel contains color and luminosity information, and together, these millions of tiny squares form a complete image.
The critical limitation of raster graphics is their resolution dependence. They have a fixed number of pixels per inch (PPI) or dots per inch (DPI). When you zoom in on a raster image beyond its native resolution, the individual pixels become visible, resulting in a “pixelated” or blurry appearance. While this makes them less suitable for large-scale resizing, raster graphics excel in displaying complex images with subtle color gradients, photographic realism, and intricate detail, which is where Photoshop truly shines.
Why the Distinction Matters in Photoshop
Photoshop operates predominantly in the raster domain. While it can import, create, and manipulate vector data, its core strengths lie in pixel-level editing. The need for rasterization arises when you want to apply pixel-based operations (like filters, brushes, or specific blending modes) to elements that are inherently vector or smart objects. Photoshop needs to convert these non-pixel-based elements into a pixel grid to perform its magic, and this conversion is precisely what rasterization accomplishes. Ignoring this distinction can lead to irreversible loss of quality or unexpected workflow hurdles.
The Process of Rasterization in Photoshop
Rasterization isn’t just a single command; it’s a fundamental process that happens both automatically and through deliberate user action, depending on the type of layer and the operations being performed.
When Does Photoshop Rasterize? Automatic Conversions
Photoshop intelligently rasterizes content in several scenarios without explicit user command, often when a vector element needs to interact with the pixel grid. For instance, when you save a Photoshop document (PSD) as a JPEG or PNG, all layers are implicitly rasterized down to a single background layer to create the final flat image. Similarly, if you try to apply certain pixel-based filters (e.g., Gaussian Blur, Sharpen) directly to a text layer or a shape layer without converting it, Photoshop will often prompt you to rasterize the layer first.
Another common scenario is when you transform Smart Objects that contain vector data or imported external files. While Smart Objects are designed to preserve scalability, complex transformations or certain effects might require Photoshop to “render” or effectively rasterize the Smart Object’s content at its current display size to apply the effect, though the original Smart Object data remains intact for later re-editing.
Manually Rasterizing Layers: Practical Applications
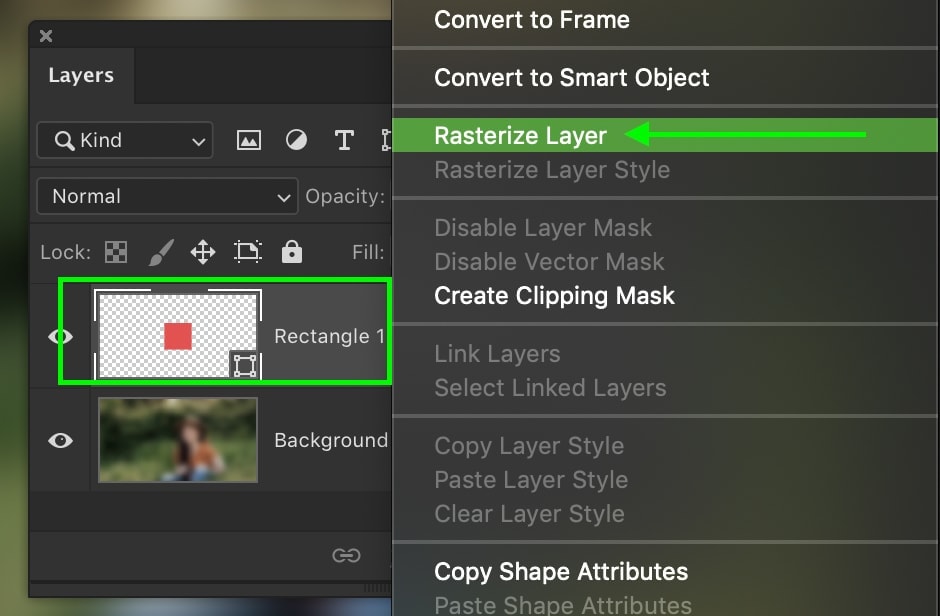
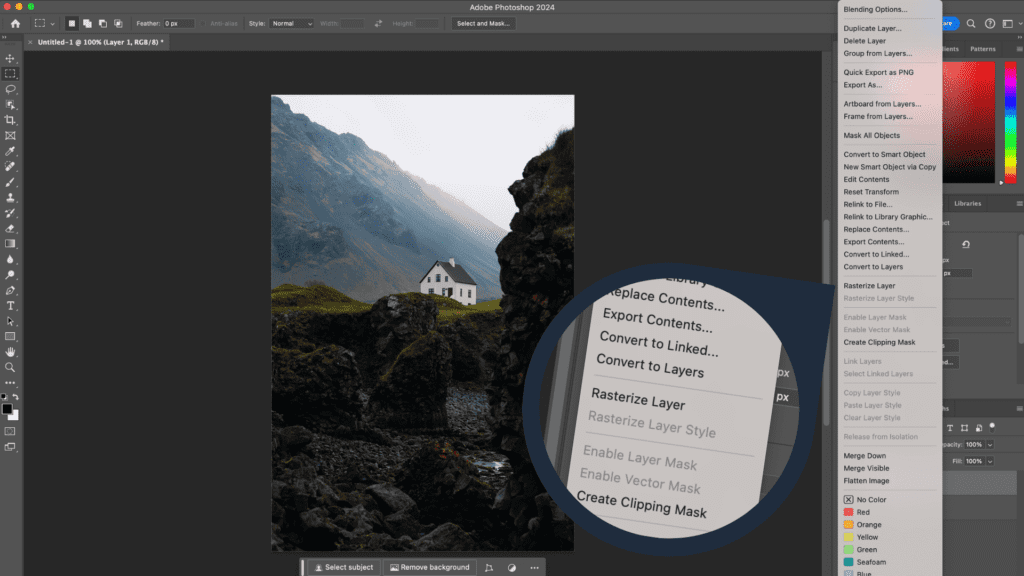
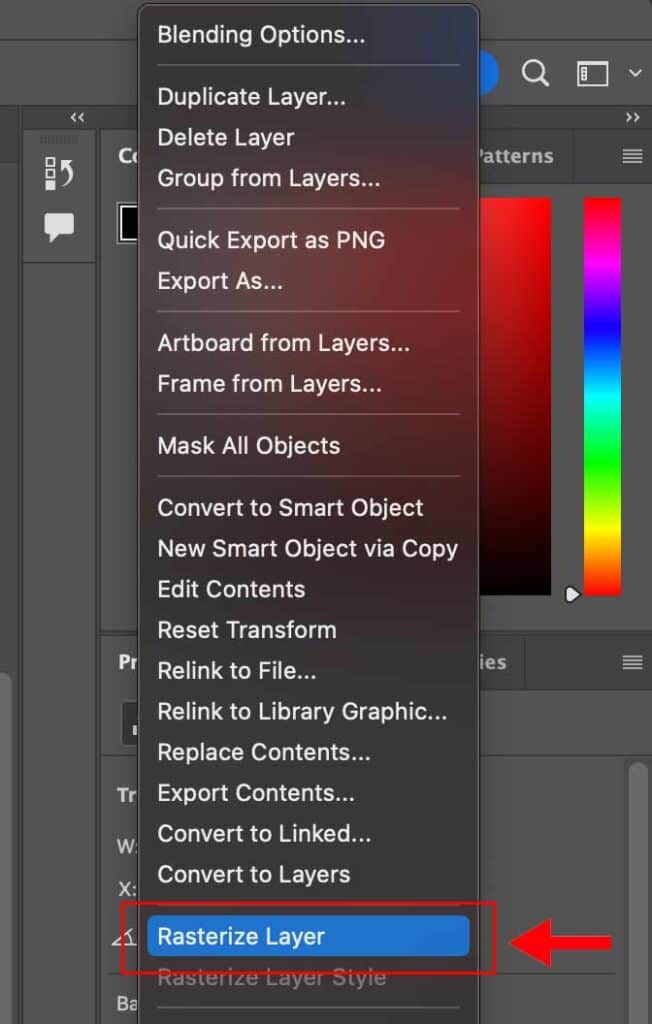
While automatic rasterization occurs, there are many instances where you’ll deliberately choose to rasterize a layer. This is typically done by right-clicking on a layer in the Layers panel and selecting “Rasterize Layer” or one of its specific sub-options (e.g., “Rasterize Type,” “Rasterize Shape”).
The primary reasons for manual rasterization include:
- Applying Pixel-Based Filters and Effects: Many of Photoshop’s powerful filters and effects are designed to work on pixels. To apply these to text, shape layers, or Smart Objects, you must first rasterize them.
- Brushwork and Eraser Tool: If you want to paint directly onto a text or shape layer, or use the eraser tool to modify its content, it must be rasterized into pixels.
- Simplifying Layer Structure: Sometimes, complex Smart Objects or multiple shape layers can slow down performance. Rasterizing them can consolidate data and improve responsiveness, especially in documents with many layers.
- Cropping and Resizing: While Smart Objects can be non-destructively resized, rasterizing them at a desired final size can commit those changes and free up resources.
Specific Layer Types and Their Rasterization Needs
- Text Layers: When you create text in Photoshop, it’s initially a vector object. This means you can edit the font, size, kerning, and color without pixelation. However, if you want to paint on it, distort it with a mesh, or apply most filters, you’ll need to “Rasterize Type.” Once rasterized, the text becomes a pixel image and is no longer editable as text.
- Shape Layers: Similar to text, shapes created with Photoshop’s shape tools (rectangle, ellipse, custom shapes) are vector-based. They have a fill and stroke that can be infinitely scaled. Rasterizing a shape layer converts its vector path and fills into pixels, allowing for pixel-level editing but sacrificing scalability.
- Smart Objects: These are special containers that can hold raster or vector data (e.g., another PSD file, an AI file, a RAW image). Smart Objects are designed to be non-destructive; transformations and filters applied to them are initially smart filters or non-destructive adjustments. However, if you need to perform direct pixel editing within a Smart Object’s content, you’d have to edit the Smart Object itself (which opens in a new tab) or rasterize the Smart Object entirely, losing its smart properties.
- Fill Layers (Solid Color, Gradient, Pattern): These are generated dynamically. While they don’t have vector paths in the traditional sense, they are resolution-independent. If you want to apply pixel-based tools directly to them, they need to be rasterized.
Practical Implications and Workflow Considerations
Understanding when and how to rasterize is not just technical knowledge; it’s a strategic decision that impacts the flexibility, quality, and performance of your design work.
The Point of No Return: What Happens After Rasterization?
The most critical implication of rasterization is its destructive nature. Once a vector object (like text or a shape) is rasterized, it ceases to be a mathematical description and becomes a fixed set of pixels. This means:
- Loss of Scalability: You can no longer scale it up without pixelation.
- Loss of Editability: For text, you can no longer change the font, character spacing, or actual words. For shapes, the vector paths are gone, and you can’t easily modify corner radii or anchor points.
- Permanent Changes: While you can undo recent rasterization (Ctrl+Z/Cmd+Z), saving and reopening the file makes the rasterization permanent for that layer.
This makes the decision to rasterize an important one. It’s often referred to as “committing” the layer, locking in its current appearance at a specific resolution.
File Size and Performance Impact
Rasterization can have a nuanced effect on file size and performance.
- File Size: A complex vector path or a Smart Object containing multiple layers can sometimes be smaller than a fully rasterized version of the same element, especially if the rasterized version is very large (high resolution). Conversely, a simple raster layer might be smaller than a Smart Object that needs to retain links to external files or a complex history of non-destructive edits. Generally, a simple, flat raster layer at a moderate resolution often results in a smaller file size than a heavily layered PSD with many Smart Objects.
- Performance: While vector layers and Smart Objects offer flexibility, they can sometimes demand more processing power, especially when applying complex transformations or effects that need to be re-rendered on the fly. Rasterizing layers can occasionally improve performance by simplifying the data Photoshop needs to calculate, making the document feel snappier, particularly on older or less powerful machines.
Best Practices for Maintaining Flexibility
Given the destructive nature of rasterization, it’s wise to adopt strategies that preserve flexibility for as long as possible:
- Duplicate Before Rasterizing: Always duplicate a layer (Ctrl+J/Cmd+J) before rasterizing it. This creates a backup of the original vector or Smart Object layer, allowing you to go back and make changes if needed without restarting from scratch. You can even hide the original and work on the rasterized copy.
- Utilize Smart Objects: For elements that need to be scaled or repeatedly edited, always convert them to Smart Objects. This allows you to apply transformations and filters non-destructively. If you need to edit the pixels within a Smart Object, double-click its thumbnail to open its contents in a new document, edit there, save, and the changes will update in your main document.
- Group and Organize: Keep your layers well-organized. Use layer groups to manage related elements, and name your layers clearly to distinguish between original vector versions and rasterized copies.
Advanced Scenarios and Common Pitfalls
Rasterization is not a one-size-fits-all solution; its application varies significantly depending on the final output and specific design challenges.
Rasterizing for Web vs. Print
The choice to rasterize, and at what resolution, is heavily influenced by the intended output:
- Web (Screen Display): For web graphics, images are typically displayed at 72 PPI (pixels per inch). When preparing graphics for the web, you’ll eventually rasterize all elements to this resolution. However, it’s still best to work at a higher resolution initially (e.g., 300 PPI) and then scale down and rasterize for web export, as this provides more detail and flexibility during the design phase. Final rasterization for web ensures predictable display across different browsers and devices.
- Print: Print requires much higher resolutions, typically 300 PPI or even higher for large format prints. When preparing for print, ensuring all elements are properly rasterized at the correct print resolution is critical to avoid fuzzy or pixelated results. You’ll often rasterize text and shapes at 300 PPI to ensure sharp edges when printed.
The Impact on Filters and Effects
Many of Photoshop’s powerful filters, especially those in the “Blur,” “Sharpen,” “Stylize,” or “Pixelate” categories, operate on pixel data. If you apply these to a Smart Object, Photoshop often creates a “Smart Filter,” which is non-destructive and can be re-edited. However, if you apply them to a regular text or shape layer, Photoshop will prompt you to rasterize first, making the effect permanent and tying it to the pixel resolution. Understanding this interaction is key to maintaining an efficient and non-destructive workflow.
Troubleshooting Rasterization Issues
Common issues arise from a misunderstanding of rasterization:
- “Could not complete your request because the type layer is not directly editable.” This is Photoshop telling you the text is still vector and needs to be rasterized to perform the desired pixel-based operation (e.g., using the eraser).
- Pixelated Edges After Scaling: If you scale up a rasterized layer, you will see pixelation. The solution is to work with Smart Objects or vector layers for as long as possible, only rasterizing at the final desired resolution.
- Unexpected File Size Bloat: Sometimes, rasterizing a complex Smart Object into a very high-resolution layer can significantly increase file size if the original Smart Object was more efficiently stored. Conversely, having many unrasterized complex Smart Objects might also bloat the file. It’s about finding the right balance for your project.
Mastering Rasterization for Optimal Design
Rasterization is not a hurdle but a tool. When understood and applied strategically, it becomes an integral part of a sophisticated Photoshop workflow.
When to Rasterize and When to Delay
The golden rule is: delay rasterization for as long as possible. Work with text layers, shape layers, and Smart Objects as long as you can maintain flexibility. Only rasterize when:
- You absolutely need to apply a pixel-based operation (e.g., a specific filter, brushwork).
- You are preparing the final output for export (e.g., flattening for web, converting to print-ready PDF/TIFF).
- You have a backup of the original editable layer.
This approach ensures you retain maximum editability and quality control throughout the design process.
Integrating Rasterization into Your Creative Workflow
A typical workflow might look like this:
- Start with Vector Elements: Create logos, text, and shapes as vector layers or Smart Objects.
- Import Raster Imagery: Place photographs and scanned images as Smart Objects.
- Apply Non-Destructive Edits: Use adjustment layers, layer masks, and Smart Filters for color correction and effects.
- Strategic Rasterization: When specific pixel-based effects are required on vector elements, duplicate the layer, then rasterize the copy.
- Final Output: Once the design is complete and approved, consider flattening or rasterizing layers for the final export to web or print formats, ensuring it’s at the correct resolution and color profile.
The Future of Pixel-Based Editing
While new technologies and AI tools are constantly enhancing Photoshop’s capabilities, the fundamental distinction between vector and raster, and the process of rasterization, remains a cornerstone. Understanding it empowers designers to make informed decisions, optimize their files, and produce high-quality output consistently. As Photoshop continues to evolve, incorporating more AI-powered features and non-destructive workflows, the core principle of converting adaptable vector information into fixed pixel data will persist, underscoring its importance for anyone serious about digital image manipulation.
In conclusion, rasterization is more than just a menu command; it’s a critical concept that defines how Photoshop handles and processes visual information. By mastering when and how to rasterize, you unlock a deeper understanding of Photoshop’s power, allowing for more efficient workflows, higher quality results, and greater control over your creative vision.
aViewFromTheCave is a participant in the Amazon Services LLC Associates Program, an affiliate advertising program designed to provide a means for sites to earn advertising fees by advertising and linking to Amazon.com. Amazon, the Amazon logo, AmazonSupply, and the AmazonSupply logo are trademarks of Amazon.com, Inc. or its affiliates. As an Amazon Associate we earn affiliate commissions from qualifying purchases.