The blinking lights, the hum of the fans, the intricate circuitry – your computer is a marvel of modern engineering. At its heart, controlling the fundamental operations of your hardware before your operating system even boots, lies the BIOS (Basic Input/Output System). Often an enigmatic component for many users, the BIOS is a crucial piece of firmware that dictates how your computer starts up and interacts with its components. But what exactly does “flashing” this firmware entail, and why would you ever need to do it? This article delves deep into the world of BIOS flashing, demystifying the process and explaining its implications for the everyday tech enthusiast and power user alike.
![]()
Understanding the BIOS: The Computer’s Gatekeeper
Before we can understand flashing, it’s essential to grasp what the BIOS is and its role in your system. The BIOS is stored on a non-volatile memory chip (typically EEPROM or Flash memory) on your motherboard. It’s the first software that runs when you power on your computer, acting as an intermediary between the hardware and the operating system.
The Bootstrapping Process: From Power On to OS Load
When you press the power button, it’s the BIOS that springs into action. Its primary responsibilities include:
- Power-On Self-Test (POST): The BIOS initiates a series of checks to ensure that essential hardware components, such as the CPU, RAM, graphics card, and keyboard, are present and functioning correctly. If it detects any critical errors, it will typically alert you with a series of beeps or error codes.
- Initialization: It initializes the hardware, making it ready for the operating system to take over. This includes setting up basic configurations for the CPU, memory controller, and other essential chipsets.
- Boot Device Selection: The BIOS determines which storage device (e.g., hard drive, SSD, USB drive) contains the operating system and initiates the boot process from that device. This is where the boot order setting, accessible in the BIOS setup utility, comes into play.
- Handover to the OS: Once the operating system’s bootloader is loaded into memory, the BIOS hands over control, and the OS takes over the management of the system.
The BIOS Setup Utility: Your Interface to Core Settings
Accessible during the POST sequence (usually by pressing a specific key like DEL, F2, F10, or F12), the BIOS setup utility allows you to configure various fundamental hardware settings. These can include:
- System Time and Date: Setting the accurate time and date for your system.
- Boot Order: Prioritizing which devices your computer attempts to boot from.
- Hardware Configurations: Enabling or disabling certain onboard devices (like integrated graphics or audio), adjusting memory timings, and setting CPU features.
- Security Settings: Setting a BIOS password to prevent unauthorized access to the setup utility.
- Overclocking (Advanced Users): In some motherboards, basic CPU and RAM overclocking options might be available.
It’s important to note that the BIOS is a low-level interface. While it provides crucial control, it’s not designed for day-to-day user interaction. Most user-facing settings are managed by the operating system.
What is BIOS Flashing? The Firmware Update Process
BIOS flashing, also known as “updating the BIOS” or “flashing the firmware,” is the process of replacing the existing BIOS software on your motherboard with a newer version. This is typically done by writing a new firmware image to the BIOS chip.
The Purpose of BIOS Updates: Why Bother?
Motherboard manufacturers release BIOS updates for several key reasons, each aimed at improving the functionality, stability, and security of your system:
Enhancing Hardware Compatibility
One of the most common reasons for a BIOS update is to improve compatibility with newer hardware components. As new CPUs, RAM modules, graphics cards, and storage devices are released, motherboard manufacturers need to update their BIOS to recognize and support these advancements. For instance, if you purchase a new generation CPU that wasn’t available when your motherboard was manufactured, a BIOS update is often required for your system to boot and function correctly with that CPU.
Improving System Stability and Performance
BIOS updates can often address bugs and glitches that may cause system instability, such as random crashes, freezes, or unexpected reboots. Manufacturers might release updates to optimize how the BIOS interacts with specific hardware, leading to smoother operation and potentially minor performance improvements. This can include refinements in memory management, power delivery, and component initialization.
Addressing Security Vulnerabilities
Just like any other software, the BIOS can be susceptible to security vulnerabilities. These vulnerabilities, though often low-level and difficult to exploit, can potentially compromise the integrity of your system. BIOS updates are crucial for patching these security holes, protecting your computer from potential threats that could target the boot process or firmware itself.
Enabling New Features and Functionality
Occasionally, BIOS updates can introduce new features or unlock latent capabilities of your motherboard. This might include support for new technologies like NVMe SSDs (if not previously supported), improved fan control options, or enhanced power management settings.
The Risks Involved: Proceed with Caution
While beneficial, BIOS flashing is not without its risks. It’s a process that requires careful attention and should only be undertaken when necessary. The primary risk associated with BIOS flashing is bricking your motherboard.
Bricking the Motherboard: A Catastrophic Failure
“Bricking” refers to rendering your motherboard completely unusable. If the BIOS flashing process is interrupted or fails for any reason, the BIOS chip can become corrupted, preventing the system from booting up altogether. In such a scenario, the motherboard essentially becomes an expensive paperweight, as it’s often uneconomical to repair.
Common Causes of Flashing Failure:
- Power Interruption: A sudden power outage during the flashing process is the most common cause of failure.
- Incorrect BIOS File: Using a BIOS file designed for a different motherboard model or revision can lead to corruption.
- Interrupted Process: Aborting the flashing process mid-way, either intentionally or accidentally.
- Software Glitches: Although rare, a bug in the flashing utility itself could cause problems.
- Hardware Issues: A faulty BIOS chip or other motherboard component could contribute to a failed flash.
The BIOS Flashing Process: Step-by-Step
The process of flashing a BIOS typically involves downloading the correct BIOS file from the motherboard manufacturer’s website, preparing a bootable medium, and then executing the flashing utility. Modern motherboards often offer more user-friendly methods.
Preparing for the Flash: Crucial Pre-Flight Checks
Before you even think about initiating a flash, thorough preparation is paramount:
- Identify Your Motherboard: Accurately identify your motherboard model and revision number. This information is usually printed directly on the motherboard itself, or you can find it using system information tools within your operating system (like CPU-Z or your OS’s System Information utility). Using the wrong BIOS file is a recipe for disaster.
- Download the Correct BIOS File: Visit the official support website of your motherboard manufacturer. Navigate to the support or downloads section for your specific motherboard model. Download the latest stable BIOS version. Avoid beta or experimental releases unless you understand the associated risks.
- Read the Release Notes: Carefully read the release notes accompanying the BIOS update. These notes will detail what the update addresses, any specific instructions, and potential prerequisites.
- Ensure Stable Power: Connect your computer to a reliable power source, ideally a UPS (Uninterruptible Power Supply). This protects against power outages during the critical flashing process.
- Backup Important Data: While BIOS flashing doesn’t directly affect your storage drives, it’s always good practice to back up any critical data before any significant system changes.
- Disable Overclocking: If you have any overclocking settings applied to your CPU or RAM, revert them to their default values. Overclocking can sometimes introduce instability that might interfere with the flashing process.
- Disconnect Unnecessary Peripherals: It’s often recommended to disconnect any non-essential peripherals (like external hard drives, printers, or USB devices) to minimize potential conflicts.
Methods of BIOS Flashing: From Legacy to Modern Convenience
There are several ways to perform a BIOS flash, ranging from older, more manual methods to more integrated and user-friendly approaches.
Traditional Method: Using a Bootable USB Drive
This method has been a standard for many years and is still widely supported.
- Format a USB Drive: Format a USB flash drive (usually FAT32) as a bootable device. You might need to use a tool like Rufus or the built-in Windows diskpart utility for this.
- Copy the BIOS File: Copy the downloaded BIOS file to the root directory of the bootable USB drive.
- Enter BIOS Setup: Restart your computer and enter the BIOS setup utility (usually by pressing DEL, F2, or another designated key during boot).
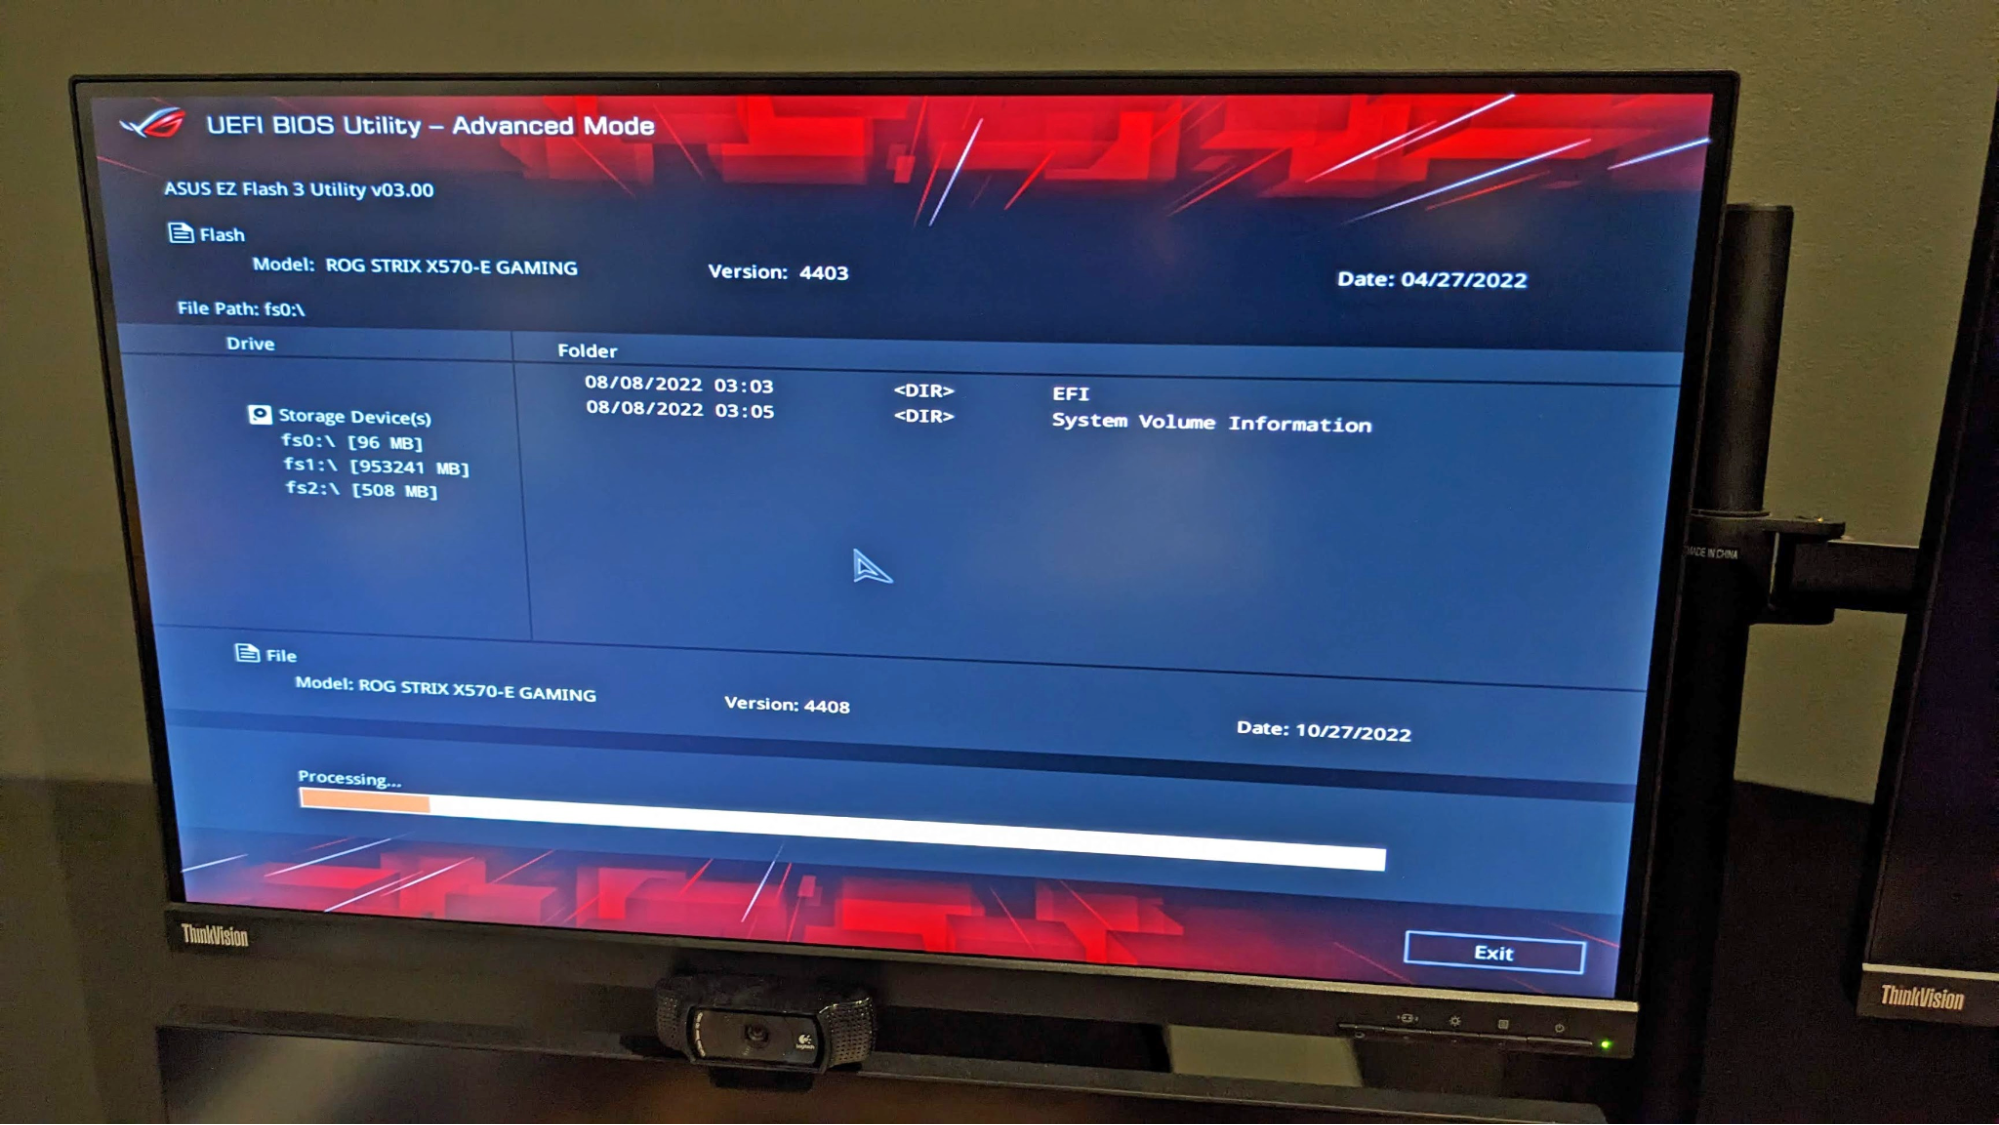
- Locate the Flashing Utility: Within the BIOS setup, find the built-in BIOS flashing utility. This is often named “EZ Flash,” “Q-Flash,” “M-Flash,” “BIOS Update,” or similar, depending on your motherboard manufacturer.
- Select the BIOS File: Navigate to the option to load a BIOS file and select the BIOS file you copied to your USB drive.
- Execute the Flash: Confirm the update. The utility will then proceed to read the new BIOS file and write it to the BIOS chip. Do not interrupt this process. The computer will typically restart automatically upon completion.
Modern Method: BIOS Flashback / Direct BIOS Update (Without CPU/RAM)
Many newer motherboards feature a “BIOS Flashback” or similar technology. This allows you to update the BIOS without needing a CPU or RAM installed in the motherboard, which is incredibly useful if you’ve just installed a new CPU that isn’t supported by the current BIOS.
- Prepare the USB Drive: Download the correct BIOS file and rename it according to the manufacturer’s specific instructions (e.g.,
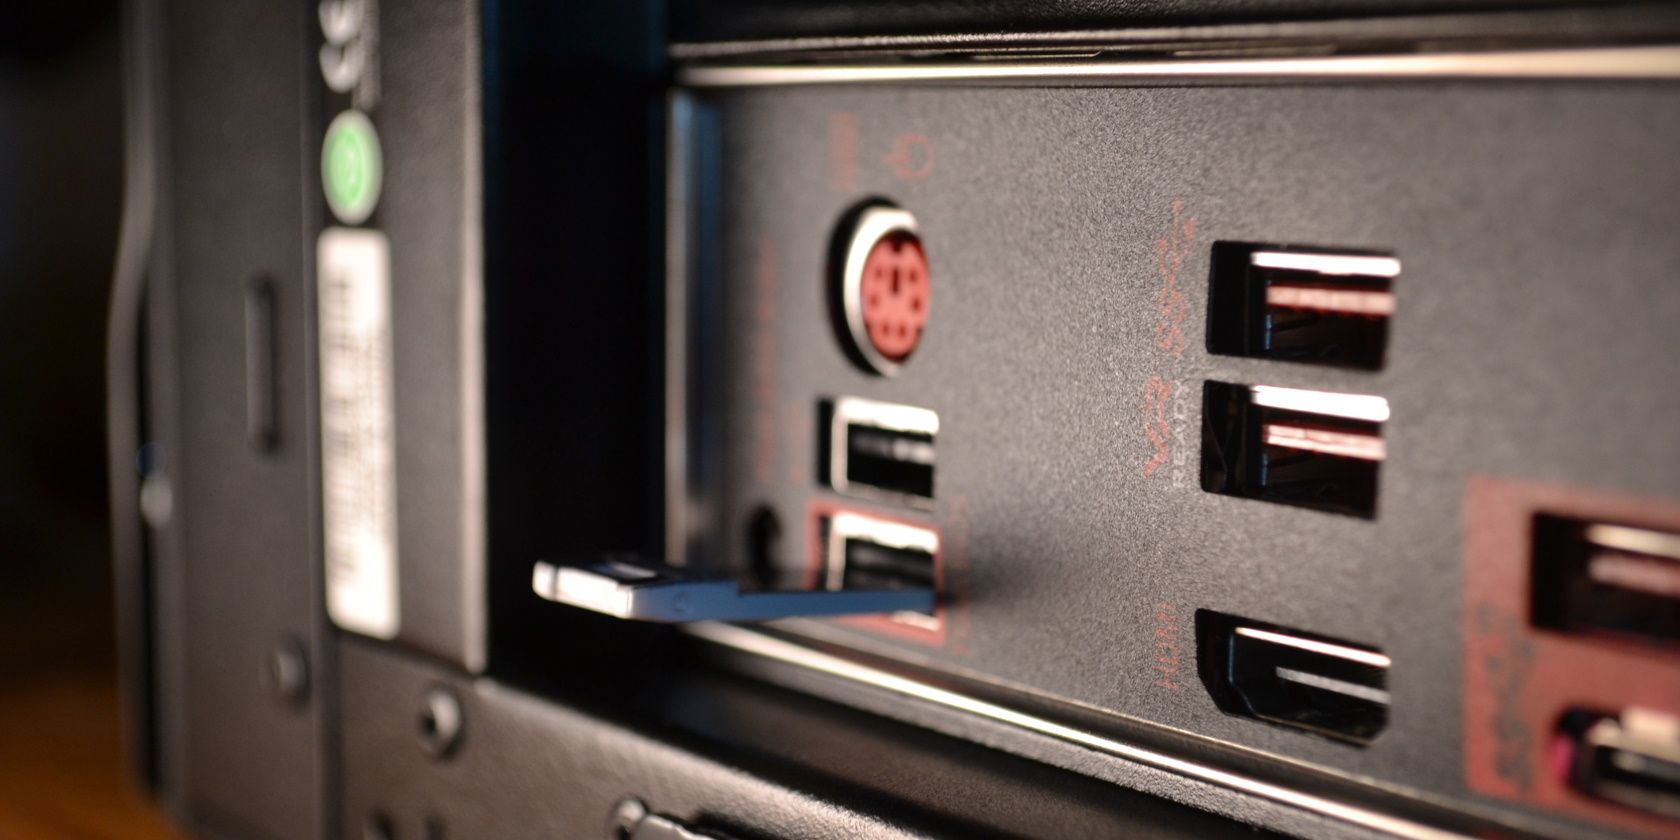
MSI.ROMfor MSI boards). Place this renamed file on a FAT32 formatted USB drive. - Locate the BIOS Flashback Port: On the rear I/O panel of your motherboard, there will be a dedicated USB port specifically for BIOS flashing. It’s often labeled “BIOS Flashback” or similar.
- Power On (Sometimes): Depending on the motherboard, you may need to have the computer connected to power but not necessarily powered on, or you might need to press a specific button on the rear I/O panel. Check your motherboard manual.
- Initiate the Flash: Insert the prepared USB drive into the designated BIOS Flashback port and press the BIOS Flashback button (if applicable). An LED indicator near the port will typically start blinking, signifying that the flashing process is underway.
- Wait for Completion: The LED will stop blinking when the process is complete. This method is often robust and can recover from certain errors.
Integrated Flashing Utilities (Within BIOS)
Many motherboard manufacturers embed their flashing utilities directly within the BIOS itself, as described in the “Traditional Method.” These are generally the most straightforward and recommended approach when a CPU and RAM are installed.
Windows-Based Flashing Utilities
Some manufacturers provide Windows-based utilities that can perform the BIOS flash from within the operating system. While convenient, these are generally considered riskier than flashing from within the BIOS itself, as the operating system introduces more variables and potential points of failure. It is strongly recommended to avoid these unless explicitly advised by the manufacturer and you fully understand the risks.
When Should You Consider Flashing Your BIOS?
Flashing your BIOS is not a routine maintenance task. It’s a process undertaken for specific reasons. Here’s when you should consider it:
Upgrading to a Newer CPU
This is arguably the most common and compelling reason for a BIOS update. If you purchase a new CPU that is on your motherboard’s compatibility list but requires a newer BIOS version than what you currently have, flashing is essential for your system to boot.
Resolving Specific Stability Issues
If you’re experiencing persistent and unexplained system instability – such as random shutdowns, BSODs (Blue Screen of Death), or freezing – and you’ve ruled out other hardware or software issues, a BIOS update might contain a fix for the underlying problem. Always check the release notes for any mention of stability improvements or bug fixes related to your symptoms.
Adding Support for New Hardware Technologies
If you plan to install new hardware that requires updated BIOS support, such as a very new NVMe SSD that wasn’t supported by the original BIOS, a flash might be necessary.
Addressing Critical Security Vulnerabilities
If a significant security vulnerability is discovered and patched by the manufacturer via a BIOS update, it’s prudent to apply the update to protect your system.
When Recommended by Manufacturer for Specific Features
Occasionally, a manufacturer might release a BIOS update to enable specific features or optimizations for their hardware. This is less common but can be a valid reason to update.
When to Avoid Flashing Your BIOS
Unless there’s a clear and compelling reason, it’s best to leave your BIOS as it is.
If Your System is Running Fine
If your computer is operating perfectly, without any issues or planned hardware upgrades that necessitate an update, there is no need to flash your BIOS. Flashing carries inherent risks, and if it’s not broken, don’t fix it.
For Minor Performance Gains
While some BIOS updates might offer minor performance improvements, these are often negligible and not worth the risk involved. Significant performance gains are usually achieved through hardware upgrades or system tuning within the OS.
Without Understanding the Process
If you’re unfamiliar with the BIOS or the flashing process, it’s best to seek assistance from a knowledgeable friend or a professional technician. A misunderstanding can lead to a bricked motherboard.
In conclusion, flashing the BIOS is a powerful tool that can significantly enhance your computer’s functionality, compatibility, and stability. However, it is a process that demands precision and caution. By understanding the role of the BIOS, the purpose of flashing, the inherent risks, and the proper procedures, you can confidently approach this advanced technical task, ensuring your PC continues to perform at its best or can embrace new hardware. Always prioritize safety, accuracy, and follow manufacturer guidelines to avoid turning your sophisticated machine into an expensive paperweight.
aViewFromTheCave is a participant in the Amazon Services LLC Associates Program, an affiliate advertising program designed to provide a means for sites to earn advertising fees by advertising and linking to Amazon.com. Amazon, the Amazon logo, AmazonSupply, and the AmazonSupply logo are trademarks of Amazon.com, Inc. or its affiliates. As an Amazon Associate we earn affiliate commissions from qualifying purchases.