
The allure of Windows 11, with its revamped interface, enhanced security features, and promised performance boosts, has many eager to upgrade. However, the journey from an older operating system or a fresh installation can sometimes be a hurdle. While Microsoft provides its own Media Creation Tool, many users discover that Rufus, a popular and versatile utility, offers a more flexible and often more straightforward approach to creating bootable USB drives for operating system installations, especially for Windows 11. This guide will walk you through the process of using Rufus to prepare a bootable Windows 11 USB drive, ensuring a smooth and efficient installation experience.
Understanding Rufus and Why It’s a Great Choice for Windows 11
Rufus is a free and open-source utility that’s been a go-to for IT professionals and tech enthusiasts for years. Its primary function is to format and create bootable USB flash drives, but its capabilities extend far beyond that. For Windows 11 installations, Rufus shines due to several key advantages:
- Flexibility and Control: Unlike Microsoft’s Media Creation Tool, which can be quite rigid, Rufus offers a granular level of control over the creation process. You can select specific partition schemes, file systems, and even customize options that bypass certain Windows 11 installation requirements, such as the TPM 2.0 and Secure Boot checks, or the need for a Microsoft Account.
- Speed and Efficiency: Rufus is renowned for its speed. It can often format and copy files to a USB drive faster than alternative methods, saving you valuable time during the preparation phase.
- Support for Various Windows Versions: While this guide focuses on Windows 11, Rufus is equally adept at creating bootable media for older Windows versions, Linux distributions, and other bootable utilities.
- Lightweight and Portable: Rufus is a small, standalone executable. This means it doesn’t require a complex installation process; you can simply download it and run it directly from your computer.
Before we dive into the step-by-step process, it’s crucial to ensure you have the necessary prerequisites in place for a successful Windows 11 installation using Rufus.
Prerequisites for a Smooth Windows 11 Installation with Rufus
To get started with Rufus and your Windows 11 installation, you’ll need a few things readily available:
1. A USB Flash Drive
The most critical component is a USB flash drive. For Windows 11, Microsoft recommends a minimum of 32GB of storage space. While some older guides might suggest 16GB, it’s best to stick with 32GB to accommodate the operating system files and any potential updates that might be included in the ISO.
Important Considerations for Your USB Drive:
- Data Loss: All data on the USB drive will be erased during this process. Make sure to back up any important files before proceeding.
- Speed: A USB 3.0 or higher drive will significantly speed up the creation of the bootable media and, consequently, the installation process itself.
- Reliability: Use a reputable brand of USB drive to avoid potential corruption or read/write errors.
2. A Windows 11 ISO File
You’ll need the Windows 11 ISO image file. This is a disk image containing all the necessary files to install Windows 11. You can obtain this legally and directly from Microsoft:
- Microsoft’s Download Page: Visit the official Microsoft Windows 11 Download page. Look for the “Download Windows 11 Disk Image (ISO)” section. You’ll be prompted to select the edition (Windows 11, multi-edition ISO) and the language. Once you’ve made your selections, you can download the ISO file.
Ensure you download the correct version that matches your desired Windows 11 edition (e.g., Home, Pro).
3. Rufus Application
Download the latest version of Rufus from its official website: https://rufus.ie/. It’s a portable application, so no installation is required. Simply download the .exe file and run it.
4. A Working Computer
You’ll need a computer with a stable internet connection to download the ISO and Rufus, and a USB port to create the bootable drive. This computer can be the one you intend to install Windows 11 on, or another machine.
Step-by-Step Guide: Creating Your Bootable Windows 11 USB with Rufus
Now that you have all your tools and ingredients ready, let’s get started with the actual creation of your bootable Windows 11 USB drive using Rufus.
Step 1: Launch Rufus and Select Your USB Drive
- Connect your USB flash drive to your computer.
- Run the Rufus executable you downloaded. You might see a User Account Control (UAC) prompt; click “Yes” to allow it to run.
- Rufus will automatically detect your connected USB drive. In the “Device” dropdown menu, ensure that your correct USB drive is selected. If you have multiple USB drives connected, double-check this to avoid accidentally formatting the wrong one.
Step 2: Select Your Windows 11 ISO Image
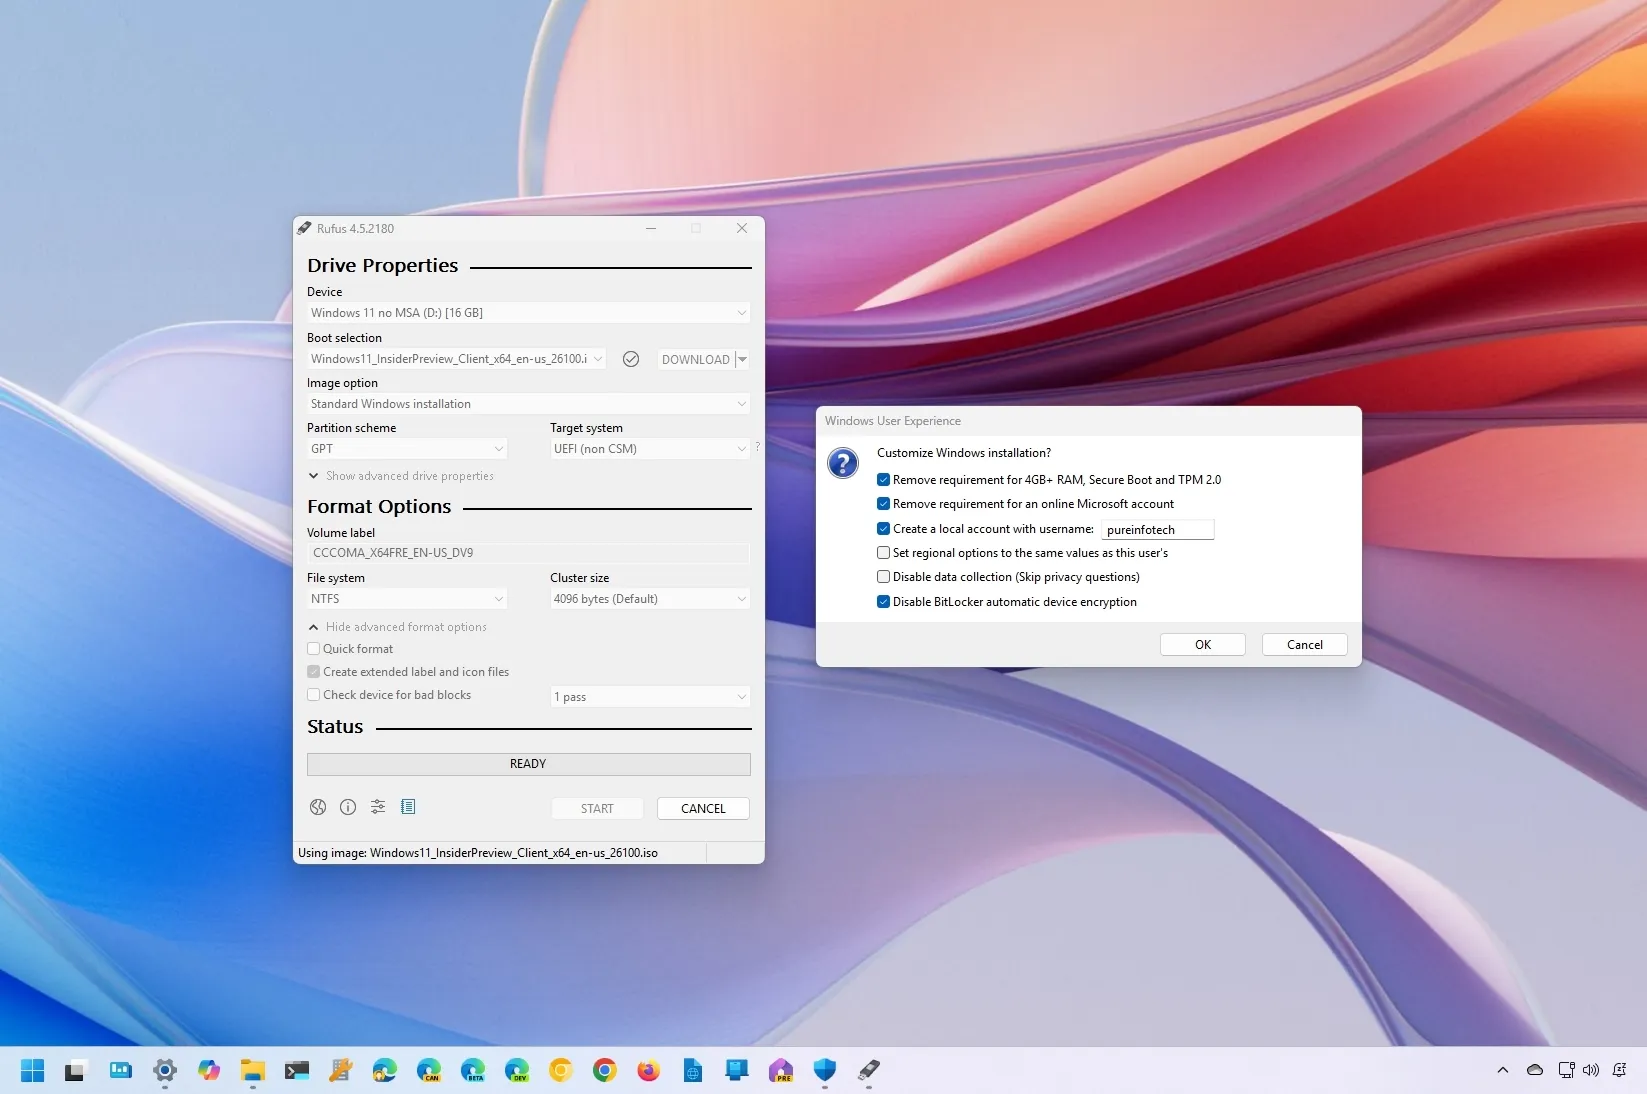
- Under the “Boot selection” section, click the “SELECT” button.
- Navigate to the location where you saved your Windows 11 ISO file, select it, and click “Open”. Rufus will then analyze the ISO and populate other fields accordingly.
Step 3: Configure Partition Scheme and Target System
This is a crucial step that determines how Rufus prepares your USB drive, and it’s where you have more control than with the Media Creation Tool.
- “Image option”: For a standard Windows 11 installation, select “Standard Windows installation”. Rufus also offers “Windows To Go,” which allows you to run Windows from your USB drive, but that’s a different use case.
- “Partition scheme”: This is where you choose between GPT (GUID Partition Table) and MBR (Master Boot Record).
- GPT is the modern standard and is required for UEFI boot, which is the default and recommended boot mode for Windows 11. Most modern computers (manufactured in the last decade or so) use UEFI and GPT. If your target PC uses UEFI, choose GPT.
- MBR is an older standard and is typically used with BIOS or UEFI-CSM (Compatibility Support Module) mode. If you know your target PC is very old or specifically requires MBR for compatibility, select MBR.
- “Target system”: This will usually adjust automatically based on your “Partition scheme” selection (e.g., “UEFI (non CSM)” for GPT, or “BIOS (or UEFI-CSM)” for MBR). For Windows 11, UEFI is strongly recommended.
Step 4: File System and Cluster Size
- “File system”: For Windows 11 installations, NTFS is the standard and recommended file system.
- “Cluster size”: You can usually leave this at the default value.
Step 5: Advanced Format Options and Bypass Checks
This is where Rufus truly distinguishes itself, especially for Windows 11, which has strict hardware requirements.
-
“Format Options”:
- “Quick format”: This should be checked for a faster process.
- “Create extended label and icon files”: Generally safe to leave checked.
- “Check device for bad blocks”: You can skip this for a faster process, as modern USB drives are very reliable. If you suspect your USB drive might be faulty, you can enable this, but it will significantly increase the time taken.
-
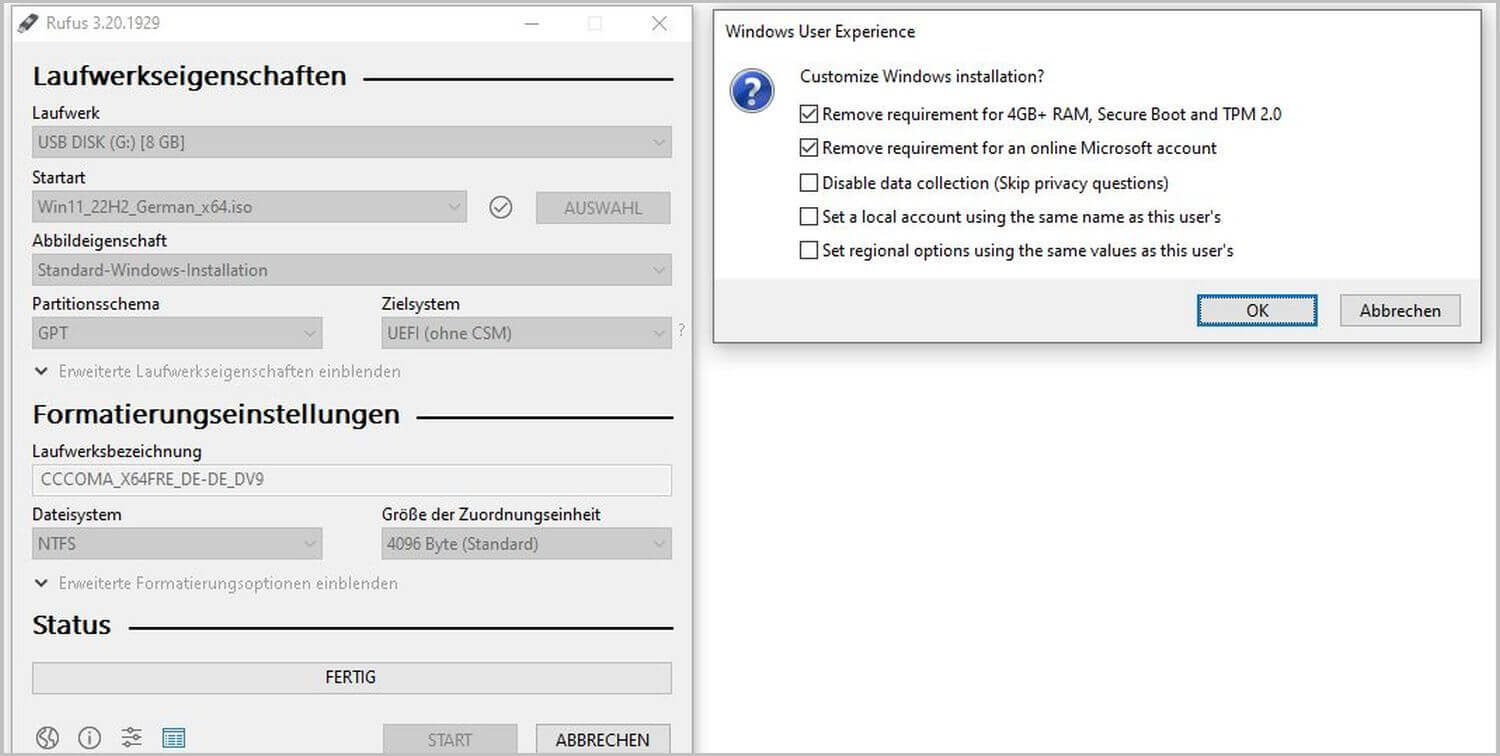
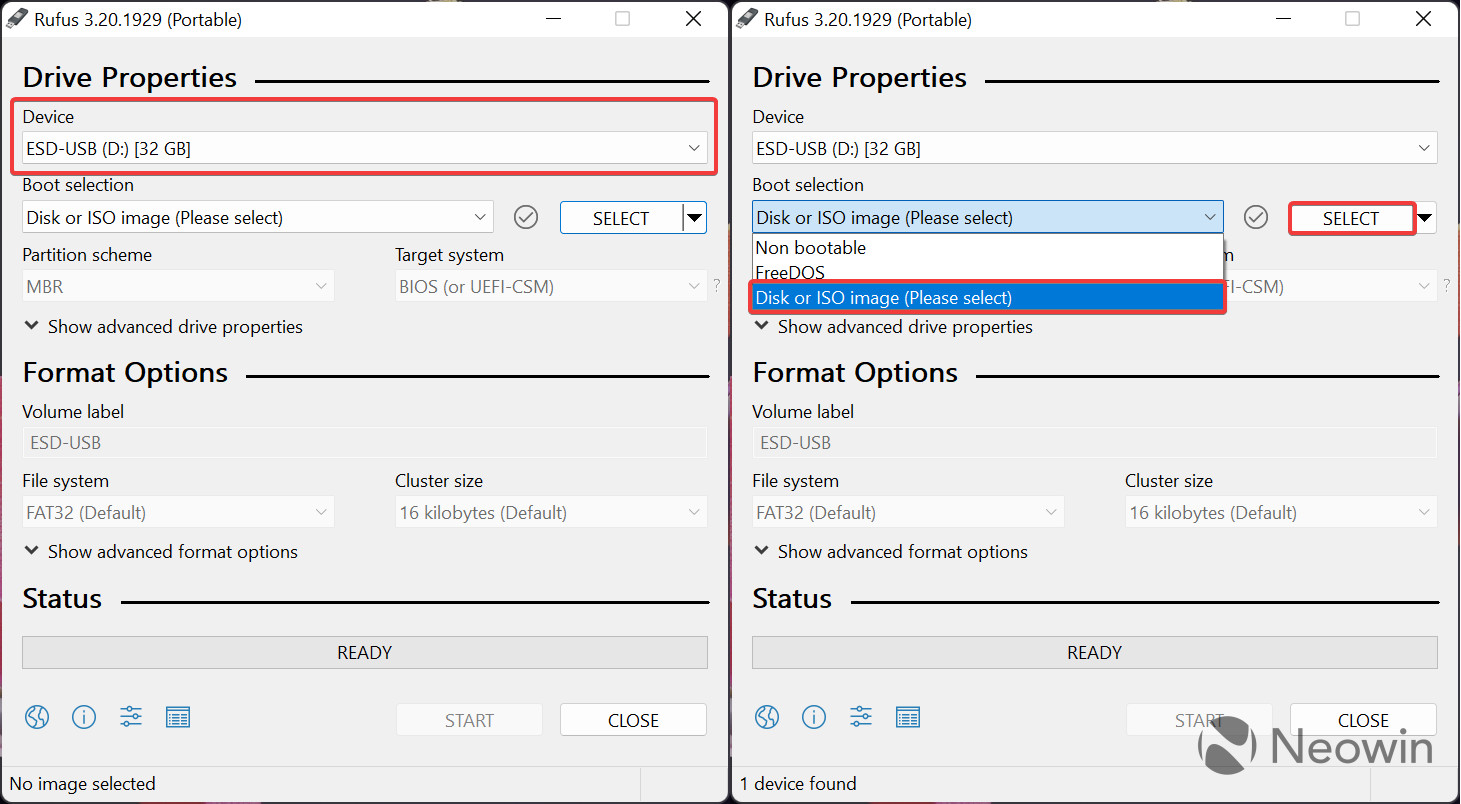
Windows 11 Specific Options (Important!): After selecting your Windows 11 ISO and clicking “START,” Rufus will present you with a “Windows User Experience” dialog box if it detects it’s a Windows 11 ISO. This dialog offers critical bypass options:
- “Remove requirement for 4GB+ RAM, Secure Boot and TPM 2.0”: This is a game-changer. If your hardware doesn’t meet the official Windows 11 requirements, checking this box will allow you to proceed with the installation. It removes the strict checks during the setup process.
- “Remove requirement for an online Microsoft account”: If you prefer to set up Windows 11 with a local account initially, or if you don’t have an internet connection during setup, check this box.
- “Disable data collection (Skip privacy questions)”: This option helps streamline the initial setup by skipping some of the telemetry and privacy-related questions.
Carefully consider these options. While bypassing requirements can be very convenient, be aware that installing Windows 11 on unsupported hardware might lead to a less stable experience or potential issues with future updates. However, for many users, this is the only way to install Windows 11 on their existing machines.
Step 6: Start the Process and Wait
- Once you’ve configured all the settings and selected your desired bypass options (if applicable), click the “START” button.
- Rufus will display a final warning that all data on the USB drive will be destroyed. Confirm by clicking “OK”.
- Rufus will begin formatting the USB drive and copying the Windows 11 files. You’ll see a progress bar indicating the status. This process can take anywhere from 10 to 30 minutes or more, depending on the speed of your USB drive, your computer, and the size of the ISO.
- When the process is complete, the status bar will turn green and say “READY”. You can then click “CLOSE”.
Your bootable Windows 11 USB drive is now ready!
Booting from Your USB Drive and Installing Windows 11
With your bootable USB drive created, the next phase is to use it to boot your computer and begin the Windows 11 installation.
Step 1: Access Your Computer’s BIOS/UEFI Settings
- Insert the bootable USB drive into the computer where you want to install Windows 11.
- Restart or turn on the computer.
- As the computer starts, you’ll need to press a specific key to enter the BIOS/UEFI setup utility. This key varies depending on your computer’s manufacturer (e.g., Delete, F2, F10, F12, Esc). Look for a message on the screen during the initial boot-up that says something like “Press [Key] to enter Setup” or “Press [Key] for Boot Menu.”
- If you miss the prompt, restart the computer and try again.
Step 2: Change the Boot Order
Once you’re in the BIOS/UEFI settings:
- Navigate to the “Boot” or “Boot Order” section. The exact terminology might differ.
- You’ll need to set your USB drive as the first boot device. Look for an entry corresponding to your USB drive (it might be listed by brand name or as “USB HDD,” “Removable Device,” etc.).
- Use the arrow keys and designated function keys (usually indicated on the screen) to move the USB drive to the top of the boot priority list.
- Save your changes and exit the BIOS/UEFI. This is typically done by pressing a key like F10 and confirming with “Yes” or “Y.”
Step 3: Initiate Windows 11 Installation
- After saving and exiting the BIOS/UEFI, the computer will restart again. This time, it should boot from your USB drive.
- You’ll see the Windows Setup screen.
- Select your language, time and currency format, and keyboard input method, then click “Next”.
- Click “Install now”.
- If prompted for a product key, you can enter it now or click “I don’t have a product key” to proceed and activate Windows later (especially if you’re reinstalling on a machine that was previously activated).
- Select the edition of Windows 11 you want to install.
- Accept the license terms and click “Next”.
- Choose the “Custom: Install Windows only (advanced)” option.
- Now you’ll see a list of drives and partitions. Select the drive where you want to install Windows 11. If it’s a new drive, you’ll likely need to create a new partition. If you’re upgrading, you can select the existing Windows partition and format it. Be extremely careful at this stage to avoid data loss on the wrong drive.
- Click “Next”, and Windows 11 installation will begin. The computer will restart several times during this process. Crucially, remember to remove the USB drive once the installation reaches the point where it restarts for the first time after copying files. If you don’t, the computer might boot from the USB again and restart the installation. You can also adjust the boot order back to your hard drive in the BIOS/UEFI after the initial setup is complete.
Conclusion: Unlocking a Smoother Windows 11 Experience
Using Rufus to create a bootable Windows 11 USB drive offers a level of control and flexibility that can be invaluable. Whether you’re performing a clean installation on new hardware, upgrading an older machine, or even installing Windows 11 on systems that don’t officially meet the stringent requirements, Rufus empowers you to tailor the process. By understanding the options, particularly the Windows 11 specific bypasses, you can ensure a smoother journey to experiencing the latest that Microsoft has to offer. Remember to always back up your data, download your ISO from official sources, and proceed with caution during the partitioning and installation phases. With Rufus, the path to Windows 11 becomes more accessible and user-friendly than ever.
aViewFromTheCave is a participant in the Amazon Services LLC Associates Program, an affiliate advertising program designed to provide a means for sites to earn advertising fees by advertising and linking to Amazon.com. Amazon, the Amazon logo, AmazonSupply, and the AmazonSupply logo are trademarks of Amazon.com, Inc. or its affiliates. As an Amazon Associate we earn affiliate commissions from qualifying purchases.