
In the ecosystem of modern computing, the Graphics Processing Unit (GPU) has evolved from a simple component designed to render 2D images into a powerhouse of parallel processing capable of driving complex artificial intelligence, high-fidelity gaming, and professional-grade creative workflows. However, the hardware itself is only half of the equation. The software bridge that communicates between your operating system and your hardware—the driver—is what determines the efficiency, stability, and feature set of your NVIDIA card.
Upgrading your NVIDIA drivers is not merely a maintenance task; it is a critical optimization process that ensures your system stays compatible with the latest software releases and security protocols. This guide provides a comprehensive technical walkthrough on how to upgrade your drivers, the differences between driver types, and how to troubleshoot common installation issues.
Why Keeping Your NVIDIA Drivers Current is Essential
The rapid pace of software development means that games, creative suites like Adobe Premiere, and 3D rendering engines like Blender are constantly being updated to leverage new hardware capabilities. Without the corresponding driver updates, your GPU may fail to recognize new instruction sets or may perform sub-optimally.
Performance Gains and Optimization
One of the primary drivers for updates is “Day 0” optimization. NVIDIA works closely with developers months before a major game or software release. Driver updates often include specific profiles that tell the GPU how to manage resources for a particular application. These updates can lead to double-digit percentage increases in frame rates or significant reductions in render times. Furthermore, updates frequently refine the performance of features like Deep Learning Super Sampling (DLSS) and Ray Tracing, which are heavily dependent on software-side algorithms.
Security and Stability
Like any complex software, drivers can contain vulnerabilities. NVIDIA regularly patches security holes that could potentially be exploited by malicious software to gain elevated privileges on your system. Additionally, older drivers may suffer from “memory leaks” or compatibility conflicts with newer versions of Windows or Linux. Regular updates ensure that the communication between the kernel and the hardware remains robust and crash-free.
Access to New Features
NVIDIA frequently introduces new technologies through driver updates that were not available when the hardware was first purchased. This includes tools like NVIDIA Reflex for reduced latency, NVIDIA Broadcast for AI-enhanced streaming, and various filters within the GeForce Experience overlay. By skipping updates, users essentially leave part of their hardware’s value on the table.
Primary Methods for Upgrading NVIDIA Drivers
There are three main avenues for updating NVIDIA drivers, ranging from automated convenience to granular manual control. Choosing the right method depends on your technical comfort level and your specific system requirements.
Method 1: Using NVIDIA GeForce Experience
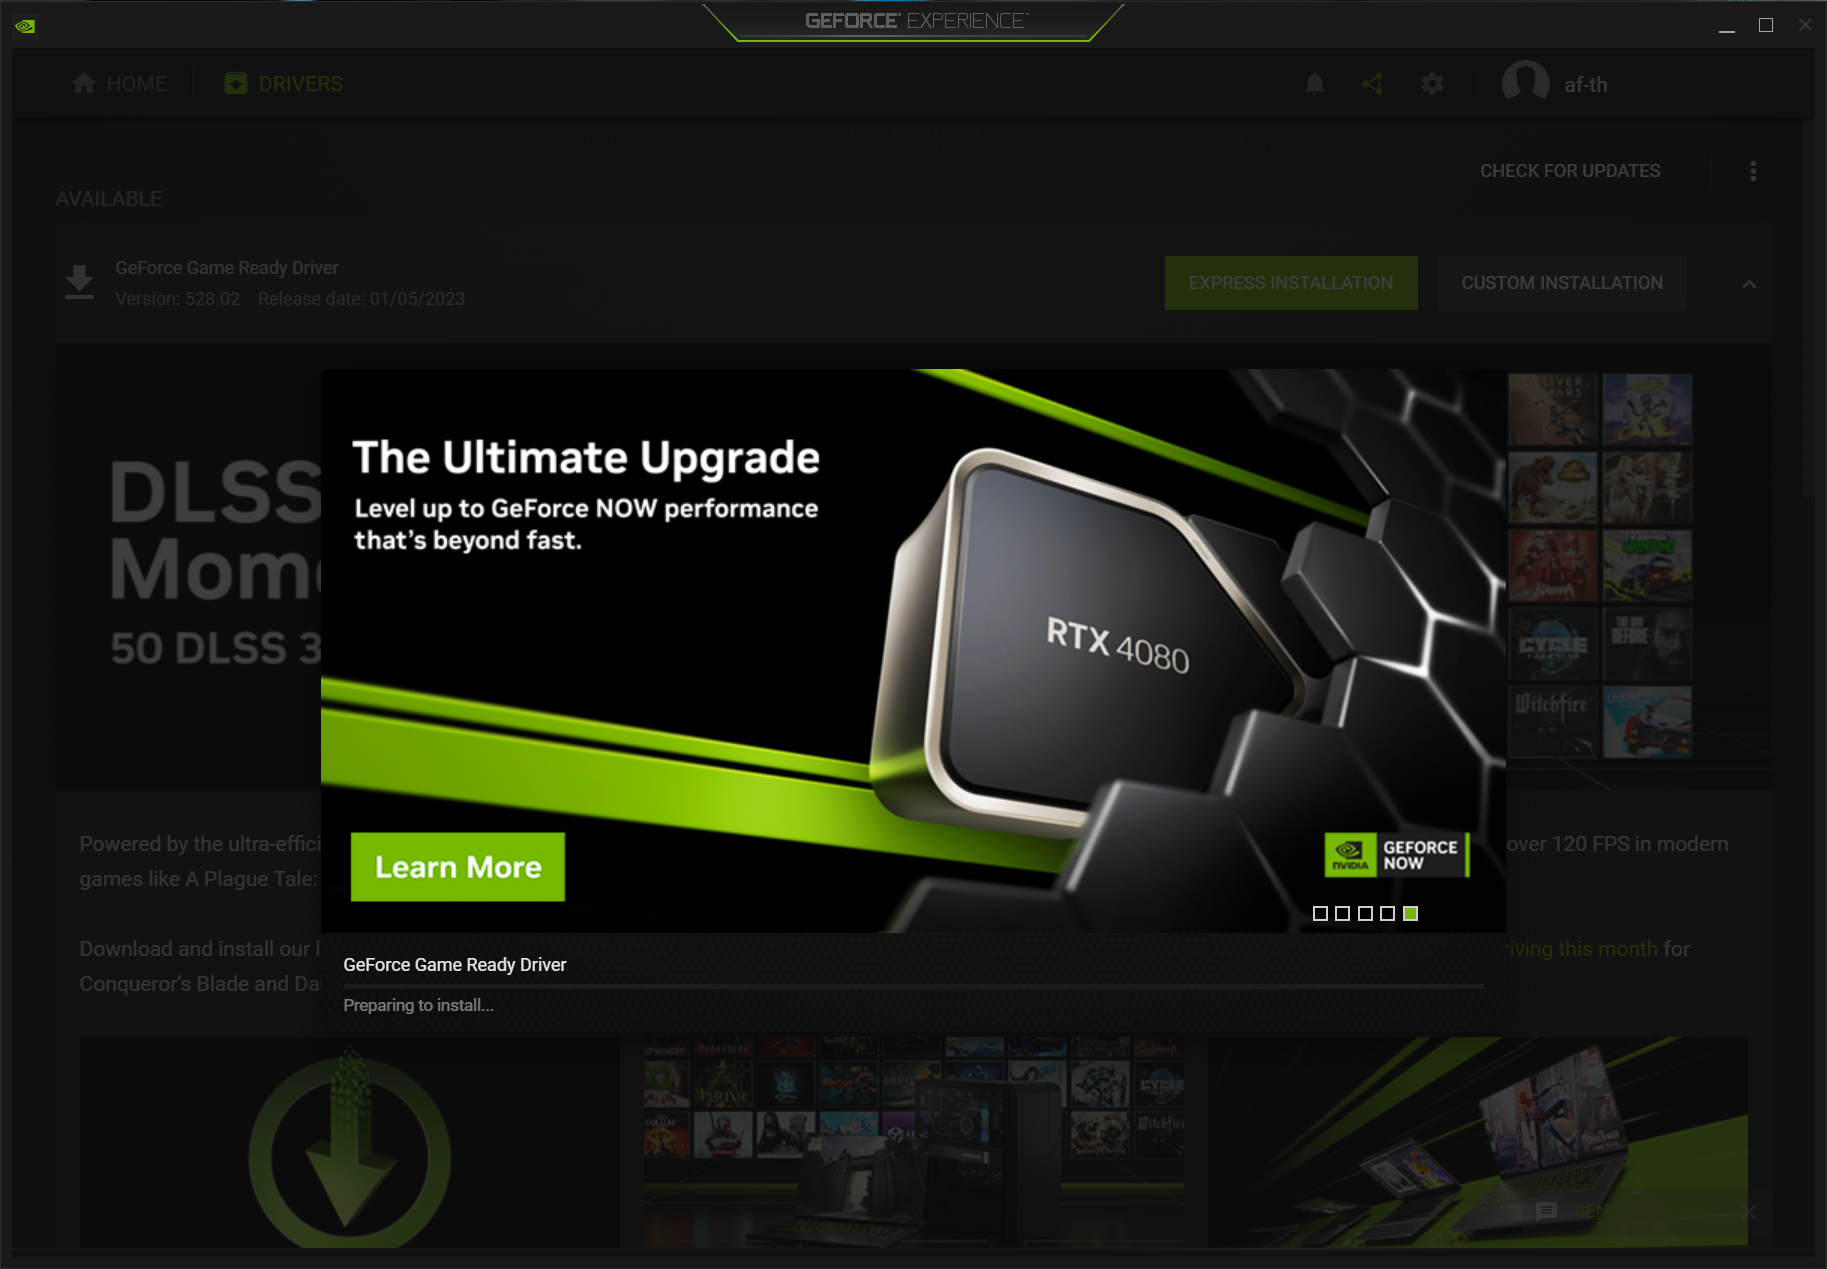
For the vast majority of users, GeForce Experience (GFE) is the most efficient tool. It is a companion application that automatically scans your hardware and notifies you when a new driver is available.
-
Launch and Login: Open GeForce Experience. If you do not have it installed, it can be downloaded from the official NVIDIA website.
-
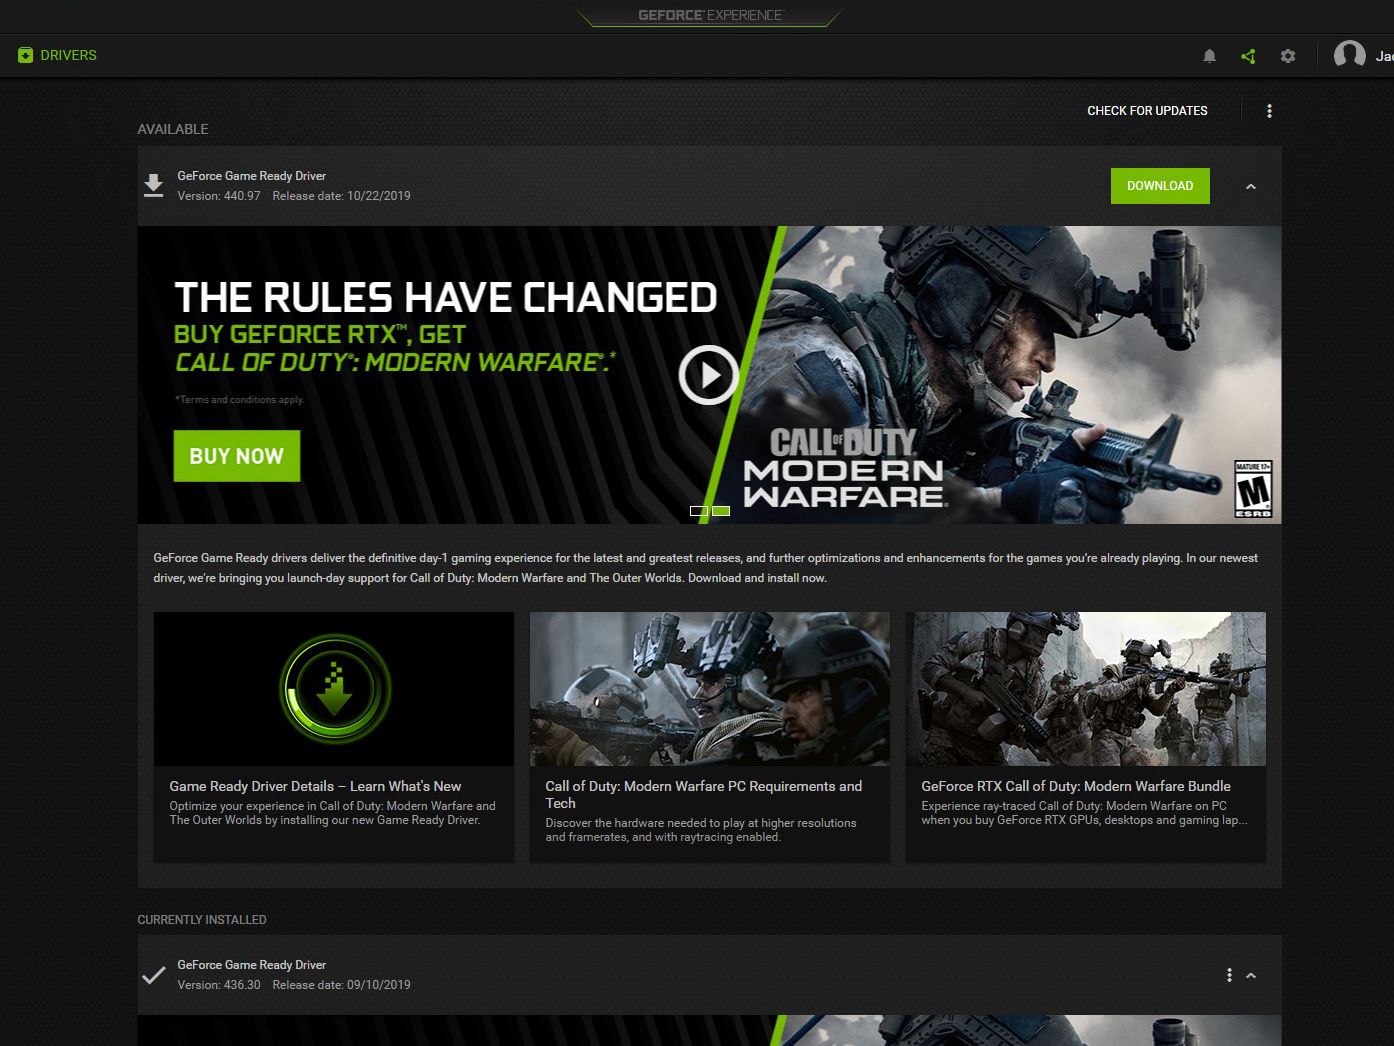
Check for Updates: Navigate to the “Drivers” tab in the top-left corner. Click the “Check for Updates” button.
-
Download and Express Installation: If an update is available, click “Download.” Once the download completes, you will have the option for “Express Installation” or “Custom Installation.” Express is recommended for most users as it carries over your existing settings.
-
Completion: The screen may flicker or turn black momentarily during the process. This is normal as the old driver is swapped for the new one. Once finished, a “Driver Installed” message will appear.
Method 2: Manual Installation via the NVIDIA Website
Advanced users or those who prefer not to use an account-based application like GFE often opt for manual downloads. This is also the preferred method for IT professionals managing multiple systems.
-
Identify Your Hardware: Ensure you know your GPU model (e.g., RTX 4080, GTX 1660) and your operating system version.
-
Navigate to the Download Page: Go to the NVIDIA Driver Downloads page.
-
Filter Your Selection: Use the dropdown menus to select the Product Type, Product Series, and Product. Be careful to select the correct Operating System (Windows 10 64-bit vs. Windows 11).
-
Download and Run: Download the executable (.exe) file. Run it as an administrator and follow the on-screen prompts. This method allows you to archive specific driver versions in case you need to revert to them later.
Method 3: Windows Update
Windows Update serves as a fail-safe. While Microsoft does push NVIDIA drivers through its update service, these are often “WHQL” (Windows Hardware Quality Labs) certified versions that may be several months old. This method is best for stability-focused office machines but is generally discouraged for gamers or creators who need the latest performance tweaks.
Choosing Between Game Ready and NVIDIA Studio Drivers
A common point of confusion during the upgrade process is the choice between “Game Ready” Drivers (GRD) and “Studio” Drivers (SD). While both are built on the same core architecture, they are tuned for different workloads.
Game Ready Drivers (GRD)
Game Ready Drivers are released frequently, often coinciding with the launch of major video game titles. They prioritize the latest optimizations, support for the newest titles, and cutting-edge features. If your primary use case is gaming or if you want to try the latest experimental features, GRD is the correct choice.
NVIDIA Studio Drivers (SD)
Studio Drivers undergo a more rigorous testing cycle against professional creative applications such as the Adobe Creative Cloud, Autodesk, DaVinci Resolve, and Cinema 4D. They are released less frequently but offer a higher degree of stability for long-term projects. If your livelihood depends on video editing, 3D modeling, or CAD work, the Studio Driver is the superior option as it minimizes the risk of software crashes during critical render tasks.
Advanced Techniques: Performing a Clean Driver Installation
Occasionally, a standard update can result in “driver bloat” or corrupted files, leading to stuttering, “Blue Screen of Death” (BSOD) errors, or the GPU not being recognized. In these instances, a “Clean Installation” is necessary.
Using the Built-in Custom Installation
Within the NVIDIA installer (either via GFE or the manual executable), you can select “Custom (Advanced)” and check the box that says “Perform a clean installation.” This will delete your current profiles and reset the NVIDIA Control Panel settings to factory defaults, which often resolves minor conflicts.
The DDU (Display Driver Uninstaller) Method
For persistent issues, the gold standard is using a third-party utility called Display Driver Uninstaller (DDU).
-
Preparation: Download the latest NVIDIA driver and the DDU utility. Disconnect your internet to prevent Windows from automatically installing a generic driver during the process.
-
Safe Mode: Boot your PC into Safe Mode. This ensures that no GPU drivers are currently in use by the system.
-
Clean and Restart: Run DDU, select “GPU” and “NVIDIA,” then click “Clean and restart.” This utility removes every trace of the driver from the registry and the system folders.
-
Fresh Install: Once the computer restarts in normal mode, run the NVIDIA driver installer you downloaded earlier. This provides the “cleanest” possible environment for the new driver.
Post-Upgrade Optimization and Troubleshooting
Once your drivers are updated, there are a few final steps to ensure your hardware is performing at its peak.
Verification
Check the NVIDIA Control Panel (right-click on the desktop) and navigate to “System Information” in the bottom left. Verify that the driver version listed matches the version you intended to install.
Reconfiguring Settings
If you performed a clean installation, your global settings will have reset. You may need to re-enable certain features:
-
Power Management Mode: Set to “Prefer maximum performance” for gaming desktops.
-
Vertical Sync: Configure based on your monitor’s capabilities (G-SYNC, etc.).
-
Refresh Rate: Occasionally, driver updates can reset your monitor’s refresh rate to 60Hz. Ensure it is set back to your monitor’s native high refresh rate (e.g., 144Hz or 240Hz) in the Windows Display settings or NVIDIA Control Panel.
Rolling Back Drivers
If you find that a new driver causes stability issues in a specific application, you can “Roll Back” to the previous version. In Windows, this is done via the Device Manager under the “Display Adapters” section. Right-click your GPU, select “Properties,” go to the “Driver” tab, and select “Roll Back Driver.” If that option is greyed out, you will need to manually download and install the older version from the NVIDIA website.
Staying updated with NVIDIA’s latest driver releases is a fundamental aspect of maintaining a high-performance PC. Whether you are chasing the highest possible frames per second in a competitive shooter or ensuring a stable environment for a multi-hour 8K video render, the driver is the key to unlocking the true potential of your silicon. By following the methods outlined above, you can ensure a seamless, secure, and optimized computing experience.
aViewFromTheCave is a participant in the Amazon Services LLC Associates Program, an affiliate advertising program designed to provide a means for sites to earn advertising fees by advertising and linking to Amazon.com. Amazon, the Amazon logo, AmazonSupply, and the AmazonSupply logo are trademarks of Amazon.com, Inc. or its affiliates. As an Amazon Associate we earn affiliate commissions from qualifying purchases.