
In the dynamic world of computing, where software constantly evolves and hardware pushes new boundaries, keeping your system optimized is paramount. Among the many components that contribute to a smooth and powerful computing experience, the graphic driver stands out as a critical, yet often overlooked, element. Far from being a mere background utility, your graphic driver is the essential software interface that allows your operating system and applications to communicate effectively with your graphics card (also known as a GPU – Graphics Processing Unit). Whether you’re a hardcore gamer, a professional video editor, a graphic designer, or simply someone who enjoys a fluid desktop experience, ensuring your graphic driver is up-to-date is not just advisable; it’s fundamental.
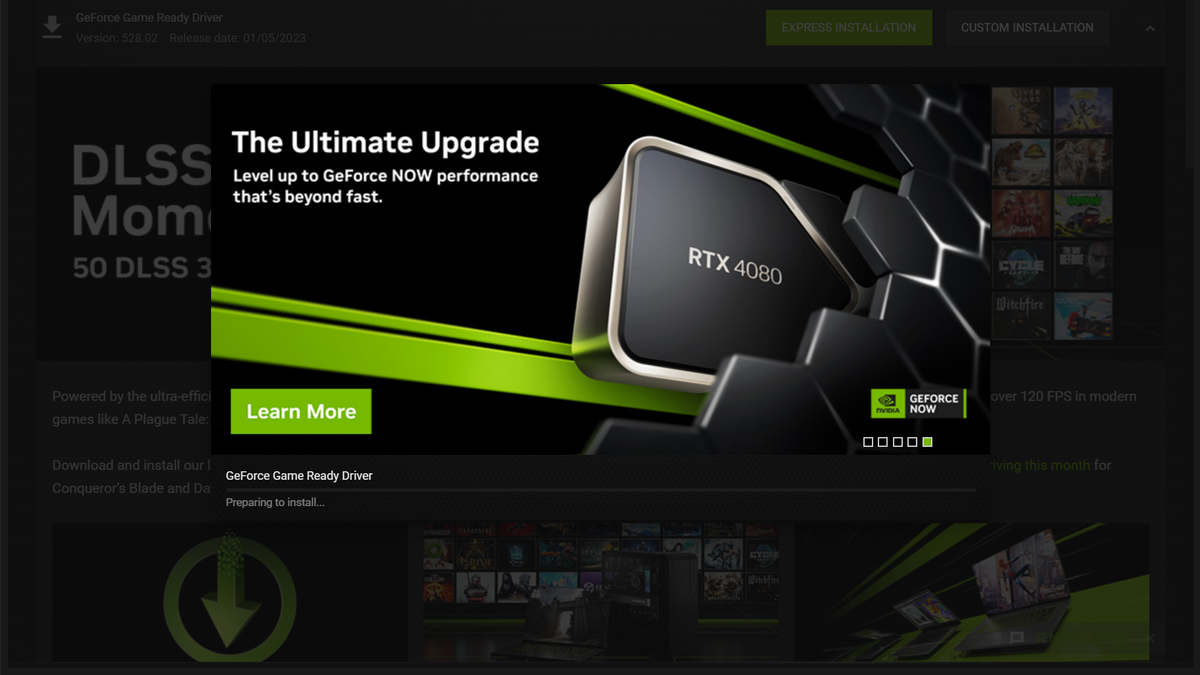
This comprehensive guide delves into the significance of graphic drivers, walks you through the various methods of updating them, and equips you with the knowledge to maintain peak performance and stability for your system. We will explore why these updates matter, how to identify your current hardware, and provide step-by-step instructions for a seamless update process. By the end of this article, you’ll possess a clear understanding and the practical skills to manage your graphic drivers confidently, transforming a potentially intimidating task into a straightforward routine for system optimization.
The Indispensable Role of Up-to-Date Graphic Drivers
Graphic drivers are the unsung heroes behind every pixel rendered on your screen. They act as translators, converting high-level commands from applications into low-level instructions that your graphics card can understand and execute. Without a well-functioning, current driver, your GPU cannot operate at its full potential, leading to a cascade of performance bottlenecks and system instabilities. Understanding the tangible benefits of keeping these drivers updated illuminates why this maintenance task is so crucial.
Enhanced Performance and Stability
One of the most immediate and noticeable benefits of updating your graphic driver is the significant boost in performance, particularly for graphically intensive applications such as video games, CAD software, and video editing suites. Manufacturers like NVIDIA, AMD, and Intel constantly release new driver versions that include optimizations for the latest game titles and software. These optimizations can translate into higher frame rates, smoother gameplay, faster rendering times, and improved responsiveness across the board. Furthermore, updated drivers often contain critical bug fixes that address stability issues, preventing crashes, freezes, and graphical glitches that can disrupt your workflow or gaming session. A stable system is a reliable system, and current drivers are a cornerstone of that reliability.
Unlocking New Features and Optimizations
Beyond raw performance, driver updates frequently introduce support for new features and technologies. This could range from supporting new display standards like HDMI 2.1 or DisplayPort 1.4, to enabling advanced rendering techniques like Ray Tracing or DLSS (Deep Learning Super Sampling) that can dramatically enhance visual fidelity without a proportional hit to performance. For creative professionals, new drivers might unlock specific hardware acceleration features in their favorite software, dramatically cutting down render times or enabling more complex real-time previews. Manufacturers also use driver updates to fine-tune power efficiency, potentially leading to lower energy consumption and reduced heat generation, which is particularly beneficial for laptops and small form-factor PCs. Staying current ensures you’re getting the most out of your hardware investment, leveraging every innovation the industry introduces.
Addressing Security Vulnerabilities
While often associated with performance, graphic drivers also play a crucial role in system security. Like any complex piece of software, drivers can contain vulnerabilities that malicious actors could exploit to gain unauthorized access to your system, compromise data, or even take control of your hardware. Graphics card manufacturers are diligent in identifying and patching these security flaws as they are discovered. Regular driver updates include these vital security patches, closing potential backdoors and protecting your system from emerging threats. Neglecting driver updates leaves your system exposed to known vulnerabilities, making it an easier target for cyberattacks. Therefore, updating your graphic driver is not just about performance; it’s an integral part of maintaining a secure computing environment.
Identifying Your Graphics Hardware and Current Driver Status
Before you embark on the journey of updating your graphic driver, the first and most crucial step is to accurately identify what graphics card your system possesses and what driver version it is currently running. This information is vital for downloading the correct driver package from the manufacturer’s website and avoiding compatibility issues that could lead to system instability or non-functional graphics. Fortunately, Windows offers several straightforward ways to gather this information.
Using Windows Device Manager
The Device Manager is a powerful built-in utility in Windows that provides a centralized view of all hardware components connected to your computer and their driver status. It’s the most common starting point for identifying your graphics card.
- Access Device Manager: Right-click on the Start button (or press
Win + X) and select “Device Manager” from the context menu. - Locate Display Adapters: In the Device Manager window, expand the “Display adapters” category.
- Identify Your GPU: You will see the name of your graphics card(s) listed here (e.g., NVIDIA GeForce RTX 3070, AMD Radeon RX 6800, Intel UHD Graphics). If you have both integrated graphics (common in laptops and some desktops) and a dedicated graphics card, both will be listed. Focus on the dedicated card if you have one, as it’s typically the more performance-oriented GPU.
- Check Driver Version: Right-click on your graphics card’s name and select “Properties.” Navigate to the “Driver” tab. Here, you’ll find details such as the “Driver Provider,” “Driver Date,” and “Driver Version.” Note down the Driver Provider and Driver Version, as this will confirm if it’s an official driver from the manufacturer or a generic one provided by Microsoft.
Leveraging DirectX Diagnostic Tool (DxDiag)
DxDiag is another excellent Windows utility that provides detailed information about your system’s multimedia hardware, including your graphics card. It offers a more comprehensive overview and can be particularly useful for troubleshooting.
- Open Run Dialog: Press
Win + Rto open the Run dialog box. - Execute DxDiag: Type
dxdiagand press Enter. Click “Yes” if prompted to check if your drivers are digitally signed. - Navigate to Display Tab: Once the DirectX Diagnostic Tool loads, go to the “Display” tab (or “Display 1,” “Display 2,” etc., if you have multiple monitors or GPUs).
- Gather Information: Under the “Device” section, you’ll find the name of your graphics card. In the “Drivers” section, you’ll see the “Driver Version,” “Driver Date,” and other relevant details. This tool often provides more detailed technical specifications than Device Manager.
Utilizing Manufacturer-Specific Software
If you already have manufacturer-specific software installed (e.g., NVIDIA GeForce Experience, AMD Radeon Software Adrenalin Edition, Intel Graphics Command Center), these applications can often provide the most accurate and detailed information about your installed graphics card and its current driver version, as well as offering direct update capabilities.
- Launch the Software: Open the respective application (usually found in your system tray, Start menu, or desktop shortcut).
- Navigate to System Info/Drivers: Look for a section related to “System Information,” “Drivers,” or “Hardware.”
- Review Details: These interfaces typically display your GPU model, current driver version, and sometimes even a notification if an update is available.
Once you have identified your graphics card model and confirmed your current driver version, you are well-equipped to proceed with the update process, ensuring you download the correct and most beneficial driver for your specific hardware.
The Primary Methods for Updating Your Graphic Drivers
Updating your graphic driver can be approached in several ways, each with its own advantages and recommended use cases. While Windows offers built-in mechanisms for driver management, the most reliable and performance-oriented updates often come directly from the graphics card manufacturer. Understanding these distinct methods will empower you to choose the best approach for your system.
Method 1: Automatic Updates via Windows Update (or macOS equivalent)
For many users, especially those with integrated graphics (like Intel HD/UHD graphics) or systems relying on basic functionality, Windows Update can provide sufficiently up-to-date drivers. Windows Update periodically checks for and downloads new drivers for various hardware components, including display adapters.
- How it works: Windows Update typically installs “WHQL” (Windows Hardware Quality Labs) certified drivers. These drivers have undergone extensive testing by Microsoft to ensure stability and compatibility with the Windows operating system.
- Pros: It’s convenient, hands-off, and ensures a basic level of functionality and stability. It’s often the simplest way for non-power users to keep drivers relatively current.
- Cons: Drivers provided through Windows Update are often not the very latest versions available from the manufacturer. They may lack the newest game optimizations, feature enhancements, or critical bug fixes that hardcore gamers or creative professionals might require. For dedicated GPUs (NVIDIA, AMD), relying solely on Windows Update is generally not recommended if you seek peak performance.
- To check: Go to
Settings > Update & Security > Windows Updateand click “Check for updates.” Optional updates may include driver updates.
Method 2: Manual Update via Device Manager
The Device Manager allows you to manually instruct Windows to search for and install an updated driver for a specific hardware component. This method can be useful if you’ve already downloaded a driver file package or if you want Windows to attempt to find a newer driver online, but it’s still not the most robust method for dedicated GPUs.
- How it works:
- Open Device Manager (as described in the previous section).
- Expand “Display adapters” and right-click on your graphics card.
- Select “Update driver.”
- You’ll be presented with two options:
- “Search automatically for updated driver software”: Windows will try to find a newer driver online or in your system. This often points to the same drivers Windows Update would provide.
- “Browse my computer for driver software”: If you have already downloaded a driver file (e.g., an
.inffile or a folder containing driver components), you can direct Windows to that location.
- Pros: Offers slightly more control than Windows Update, especially if you have a specific driver package.
- Cons: The “search automatically” option rarely finds the latest manufacturer drivers. The “browse my computer” option requires you to already have the correct driver package, and the process can be less intuitive than using a dedicated installer.
Method 3: Direct Download from Manufacturer’s Website (Recommended)
This is the gold standard for updating graphic drivers, especially for dedicated NVIDIA, AMD, or even Intel graphics cards that you want to perform at their absolute best. Manufacturers consistently release the newest drivers directly on their websites, often bundled with their own control panel software (e.g., GeForce Experience, Radeon Software).

- How it works:
- Identify your GPU: As discussed, confirm your exact graphics card model (e.g., NVIDIA GeForce RTX 4070, AMD Radeon RX 7900 XT, Intel Iris Xe Graphics).
- Visit the manufacturer’s official driver download page:
- NVIDIA: www.nvidia.com/drivers
- AMD: www.amd.com/drivers
- Intel: www.intel.com/drivers
- Use the driver search tool: On the manufacturer’s website, you will typically find a section where you can select your product type, series, and specific model. Be very precise with your selection.
- Download the latest driver: Once you’ve selected your hardware, the website will present you with the latest compatible driver package for your operating system (e.g., Windows 10/11 64-bit). Download the executable file.
- Pros: Always provides the absolute latest drivers with all performance optimizations, bug fixes, and new features. It often includes companion software that enhances control and functionality. This is the recommended method for gamers and professionals.
- Cons: Requires manual effort and accurate identification of your hardware. The downloaded file can be large.
While automatic and Device Manager updates offer convenience, for optimal performance, stability, and access to the latest features, directly downloading and installing drivers from your graphics card manufacturer’s website is the unequivocally recommended approach.
A Step-by-Step Guide to Manual Driver Installation
Once you’ve identified your graphics card and chosen to download the latest driver directly from the manufacturer, the installation process requires a few deliberate steps to ensure a clean and successful update. A proper installation minimizes the risk of conflicts and maximizes the benefits of the new driver.
Preparation: Backing Up and Uninstalling Old Drivers
Before installing any new driver, it’s a good practice to prepare your system. While not always strictly necessary, performing a “clean” installation by first removing old driver components can prevent potential conflicts and ensure the new driver is installed without residual issues.
- Create a System Restore Point: This is your safety net. If anything goes wrong, you can revert your system to its previous state. Search for “Create a restore point” in Windows, then click “Create…” and follow the prompts.
- Download the New Driver: Ensure you have the full driver installation package downloaded to your desktop or an easily accessible folder. Do NOT run it yet.
- Uninstall Old Drivers (Optional but Recommended for Clean Install):
- Using Manufacturer Software: If you have NVIDIA GeForce Experience or AMD Radeon Software, these usually have an option to perform a “clean installation” during the update process, which handles the uninstallation automatically. This is generally the easiest method.
- Manual Uninstallation (more thorough):
- Open
Settings > Apps > Apps & features. - Find any entries related to your graphics card (e.g., “NVIDIA Graphics Driver,” “AMD Software,” “Intel Graphics Driver”).
- Click “Uninstall” on each. You might need to restart your computer.
- For a truly pristine clean slate, consider using a specialized tool like Display Driver Uninstaller (DDU) in Windows Safe Mode. DDU is highly effective at removing all remnants of old drivers, but it’s an advanced step for troubleshooting persistent issues.
- Open
- Disconnect from the Internet (Optional): After uninstalling, Windows might try to automatically install a generic driver. Disconnecting from the internet can prevent this temporarily, allowing you to install your specific driver first.
Downloading the Correct Driver Package
This step was largely covered in the previous section, but it bears repeating due to its critical importance. Always ensure you are downloading the driver that precisely matches your:
- Graphics Card Model: (e.g., GeForce RTX 4070, Radeon RX 7900 XT).
- Operating System: (e.g., Windows 10 64-bit, Windows 11 64-bit).
- Driver Type (if applicable): Sometimes there are “Studio Drivers” (for content creators) or “Game Ready Drivers” (for gamers) from NVIDIA. Choose the one that suits your primary usage.
Visit the official NVIDIA, AMD, or Intel driver download pages, use their auto-detect tools if available, or manually select your hardware to find the latest recommended driver package.
The Installation Process: Standard vs. Custom Installation
Once the old drivers are gone (or you’ve decided to let the new installer handle the clean install) and you have the new driver package, you’re ready to install.
- Run the Installer: Double-click the downloaded executable file.
- Extraction Location: The installer will first ask where to extract the files. The default location is usually fine.
- License Agreement: Accept the End-User License Agreement (EULA).
- Installation Options (Crucial Step): This is where you typically choose between a “Standard” (or “Express”) installation and a “Custom” (or “Advanced”) installation.
- Standard/Express Installation: This is the easiest option. It installs the driver and all bundled software (e.g., GeForce Experience, Radeon Software Adrenalin). For NVIDIA and AMD, this option often includes a “Perform a Clean Installation” checkbox, which you should check if you didn’t manually uninstall drivers.
- Custom/Advanced Installation: This gives you more control. You can select specific components to install (e.g., just the graphics driver, without 3D Vision drivers or other utilities you don’t use). Crucially, this option almost always offers a “Perform a Clean Installation” checkbox. Always select this if available and you want to ensure a fresh install.
- Installation Progress: The screen may flicker or go black momentarily during installation. This is normal as the display driver is being updated.
- Restart Your System: After the installation completes, the installer will usually prompt you to restart your computer. Do not skip this step. A restart is essential for the new drivers to fully integrate and take effect.
Post-Installation Verification
After the restart, it’s good practice to verify that the new driver has been successfully installed and is functioning correctly.
- Check Device Manager: Go back to Device Manager, expand “Display adapters,” right-click your GPU, go to “Properties,” and then the “Driver” tab. Confirm that the “Driver Version” matches the one you just installed and the “Driver Date” is recent.
- Check Manufacturer Software: Open NVIDIA GeForce Experience or AMD Radeon Software. These applications usually display the installed driver version prominently and confirm that your drivers are up-to-date.
- Test Applications: Launch a graphically intensive application (a game, video editor, etc.) that you use frequently. Ensure it runs smoothly and without any new issues. Look for performance improvements if you had any before the update.
By following these steps meticulously, you can ensure a smooth, clean, and effective graphic driver update, allowing your system to benefit fully from the latest optimizations and features.
Troubleshooting Common Issues and Best Practices
While updating graphic drivers is usually a straightforward process, occasional hiccups can occur. Knowing how to troubleshoot common problems and adhering to best practices can save you time and frustration, ensuring your system remains stable and performs optimally.
Dealing with Installation Errors
Sometimes, a driver installation might fail, or you might encounter error messages.
- “Driver not compatible with this version of Windows”: This usually means you downloaded the wrong driver for your operating system (e.g., a Windows 10 driver for Windows 11, or a 32-bit driver for a 64-bit system). Double-check your OS version and download the correct driver.
- “Installation failed” without specific reason:
- Antivirus/Firewall Interference: Temporarily disable your antivirus or firewall during the installation. Remember to re-enable them afterward.
- Corrupt Download: The downloaded driver file might be corrupt. Delete it and download a fresh copy.
- Existing Driver Conflict: This is where a clean installation (using DDU in Safe Mode if necessary) becomes crucial. Residual files from previous drivers can block the new installation.
- Insufficient Permissions: Ensure you are running the installer as an administrator. Right-click the installer file and select “Run as administrator.”
- Black Screen/No Display after Installation: If your screen goes black permanently after a driver update, this is usually a sign of a severely incompatible or corrupted driver installation.
- Reboot into Safe Mode: During boot-up, repeatedly press F8 or Shift+F8 (or use the advanced startup options in Windows 10/11) to access Safe Mode.
- Uninstall Driver in Safe Mode: Once in Safe Mode, use Device Manager to uninstall the problematic graphics driver. This will revert to a basic display driver, allowing you to boot normally.
- Re-download and Reinstall: Download a fresh copy of the correct driver and attempt installation again, perhaps with a more thorough clean-up beforehand.
Reverting to a Previous Driver Version
If a new driver update causes unexpected issues – performance degradation, crashes, or glitches – reverting to a previous, stable driver version is a vital troubleshooting step.
- Using Device Manager’s “Roll Back Driver” Feature:
- Open Device Manager (
Win + X > Device Manager). - Expand “Display adapters,” right-click your graphics card, and select “Properties.”
- Go to the “Driver” tab. If the “Roll Back Driver” button is active, click it. Windows will revert to the previous driver.
- Open Device Manager (
- Manual Installation of an Older Driver: If “Roll Back Driver” is unavailable or doesn’t resolve the issue, you might need to manually download and install an older, known-stable driver version from your manufacturer’s website. Most manufacturers keep an archive of previous driver versions available for download. Follow the clean installation steps outlined previously for this process.
The Importance of a Clean Installation
We’ve touched upon it repeatedly, but the concept of a “clean installation” cannot be overstressed. Over time, successive driver installations can leave behind fragmented files, registry entries, and conflicting components from older versions. These remnants can lead to system instability, performance issues, or even prevent new drivers from installing correctly.
- What it means: A clean installation completely removes all traces of previous graphics drivers before installing the new one.
- How to achieve it:
- Manufacturer Installers: Most modern NVIDIA and AMD installers offer a “Perform a Clean Installation” option. Always check this box.
- DDU (Display Driver Uninstaller): For the most thorough clean-up, DDU is a free utility that removes all graphic driver remnants. It should be used in Windows Safe Mode for maximum effectiveness. This is generally reserved for troubleshooting persistent issues or when switching between different GPU manufacturers (e.g., from AMD to NVIDIA).

Regular Maintenance and Monitoring
Keeping your graphic drivers updated should be part of your routine system maintenance.
- Schedule Checks: Aim to check for new driver updates monthly, or whenever a major new game or software update is released.
- Stay Informed: Follow tech news outlets, manufacturer blogs, or forums that announce new driver releases and highlight their benefits or known issues.
- Manufacturer Software: Tools like NVIDIA GeForce Experience and AMD Radeon Software Adrenalin Edition not only provide easy access to the latest drivers but also offer features like game optimization, recording, and streaming, streamlining your system management.
- Monitor Performance: Pay attention to your system’s performance. If you notice a sudden drop in frame rates, unusual graphical artifacts, or frequent crashes, an outdated or corrupted graphic driver should be one of the first things you investigate.
By understanding these best practices and troubleshooting techniques, you can ensure that your graphic drivers consistently contribute to a smooth, high-performing, and reliable computing experience. Regularly updating this critical software component is a small effort that yields significant rewards in the long run, safeguarding your digital productivity and entertainment.
aViewFromTheCave is a participant in the Amazon Services LLC Associates Program, an affiliate advertising program designed to provide a means for sites to earn advertising fees by advertising and linking to Amazon.com. Amazon, the Amazon logo, AmazonSupply, and the AmazonSupply logo are trademarks of Amazon.com, Inc. or its affiliates. As an Amazon Associate we earn affiliate commissions from qualifying purchases.