
Navigating the cryptocurrency ecosystem often involves managing assets across various platforms. For many digital asset holders, Coinbase and Coinbase Wallet represent two distinct yet interconnected services within the same brand family. Understanding the mechanics and implications of transferring funds between these two platforms is crucial for effective personal finance management in the crypto space. While both bear the Coinbase name, they serve fundamentally different purposes, influencing how users interact with their digital wealth. This guide provides a comprehensive overview of the transfer process, emphasizing financial security and strategic asset management.
Understanding Coinbase Wallet vs. Coinbase Exchange
Before initiating any transfer, it’s vital to grasp the core differences between Coinbase Wallet and the Coinbase exchange platform. This distinction underpins the entire transfer process and highlights important aspects of financial control and risk management.
The Self-Custody Principle
Coinbase Wallet operates on a self-custody or non-custodial principle. This means that you, and you alone, hold the private keys to your cryptocurrency. The wallet itself is merely an interface that allows you to interact with various blockchain networks. Your assets are not held by Coinbase as a company; they reside directly on the blockchain, accessible only through the private keys stored on your device. This offers a high degree of autonomy and security, shielding your funds from potential centralized exchange hacks or regulatory interventions. However, it also places the full burden of security on the user, as losing your private keys (or seed phrase) means permanent loss of access to your funds. For individuals prioritizing maximum financial independence and direct control over their digital assets, a self-custody wallet like Coinbase Wallet is an indispensable tool. It connects users directly to the decentralized web (Web3), enabling participation in DeFi, NFTs, and various dApps without intermediaries.
The Centralized Exchange Advantage
In contrast, Coinbase (the exchange platform) is a centralized, custodial service. When you hold cryptocurrency on Coinbase, the company acts as a custodian for your assets, similar to how a bank holds your traditional currency. While you have an account and can trade, buy, and sell assets, Coinbase retains control of the private keys. This model offers several conveniences: ease of use, integrated trading features, fiat on/off-ramps, and the company handling the complexities of blockchain security. For many, the simplicity and familiarity of a centralized exchange make it an ideal entry point into crypto investing and a convenient platform for active trading. It simplifies tax reporting, offers customer support, and often includes features like staking or earning interest on holdings. However, it also introduces counterparty risk – if Coinbase were to face a security breach or regulatory issue, your funds could be affected. The transfer from Coinbase Wallet to Coinbase is essentially moving assets from your direct, self-custodied control to the custodial control of the Coinbase exchange, usually for trading, selling, or consolidating holdings.
Preparing for Your Transfer: Key Considerations
A successful and secure crypto transfer requires careful preparation. Overlooking critical details can lead to delays, lost funds, or unnecessary expenses. Prioritizing these considerations will safeguard your financial assets.
Verify Addresses and Networks
The most critical step in any crypto transfer is ensuring you have the correct recipient address and that it operates on the correct blockchain network. Sending assets to the wrong address or, more commonly, to the correct address but on an incompatible network, can result in irreversible loss of funds. For example, sending an ERC-20 token (like ETH) to a Bitcoin address, or sending a Solana token to an Ethereum network address, will almost certainly lead to irretrievable loss.
When transferring from Coinbase Wallet to Coinbase, always:
-
Confirm the Asset Type: Ensure you are selecting the exact cryptocurrency you intend to transfer (e.g., Ethereum, Bitcoin, USDC).
-
Obtain the Correct Coinbase Exchange Address: On the Coinbase exchange, navigate to the “Receive” or “Deposit” section for the specific cryptocurrency you wish to transfer. Coinbase will provide a unique wallet address for that asset.
-
Match the Network: Pay close attention to the network specified by Coinbase for deposits. For instance, if you’re depositing ETH, ensure you’re sending it via the Ethereum mainnet. If you’re depositing USDC, Coinbase might offer options like Ethereum (ERC-20) or Solana. Crucially, your Coinbase Wallet must send on the identical network that your Coinbase exchange address is configured to receive. A mismatch here is a common cause of lost funds.
Transaction Fees and Speed
Blockchain transactions incur fees, often referred to as “gas fees” on networks like Ethereum. These fees compensate network validators for processing and securing your transaction. The amount of the fee can fluctuate significantly based on network congestion. Higher fees generally result in faster transaction processing.
Consider these financial implications:
-
Estimate Fees: Coinbase Wallet usually displays an estimated network fee before you confirm a transaction. Review this fee carefully.
-
Network Congestion: If the network is highly congested, fees can spike, making transfers more expensive. You might choose to wait for a period of lower congestion if the transfer is not time-sensitive to reduce costs.
-
Impact on Investment: Factor these fees into your overall financial calculations. If you’re transferring a small amount, a high fee could significantly diminish the value of your transfer.
Security Best Practices
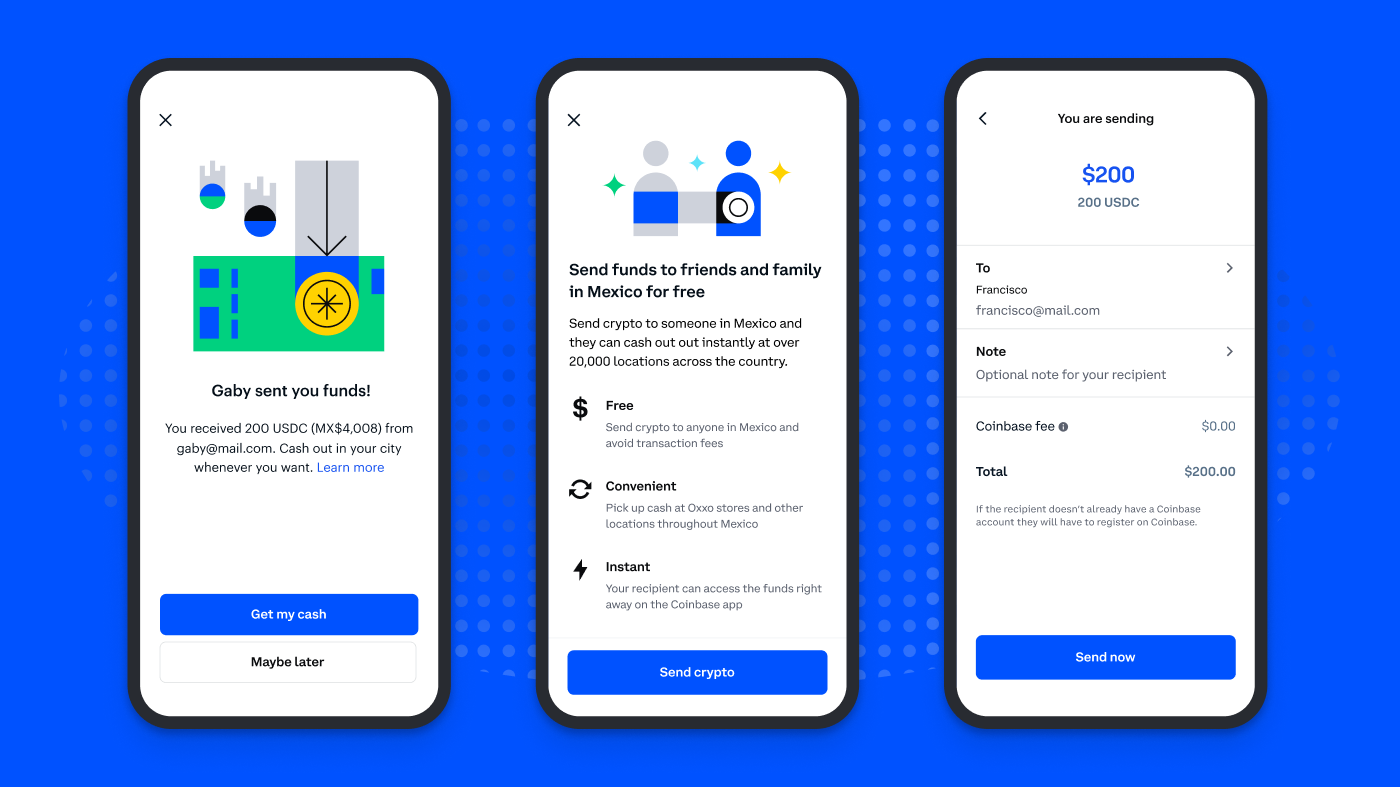
Protecting your financial assets is paramount. Adhering to robust security practices during transfers mitigates risks.
-
Small Test Transactions: For larger sums, especially if you’re new to the process or sending to a new address, consider sending a very small, negligible amount first. Once this test transaction successfully arrives, you can proceed with the larger transfer with greater confidence. This is an inexpensive insurance policy against significant financial loss.
-
Double-Check Everything: Before hitting “send,” meticulously review the recipient address, the amount, and the selected network at least twice. Copy-pasting addresses is generally safer than manual entry, but still verify the pasted address matches the source.
-
Beware of Scams: Only send crypto to addresses you explicitly intend to. Be wary of phishing attempts or social engineering scams that try to trick you into sending funds to malicious addresses. Coinbase Wallet will never ask for your seed phrase.
Step-by-Step Guide: Transferring Your Crypto
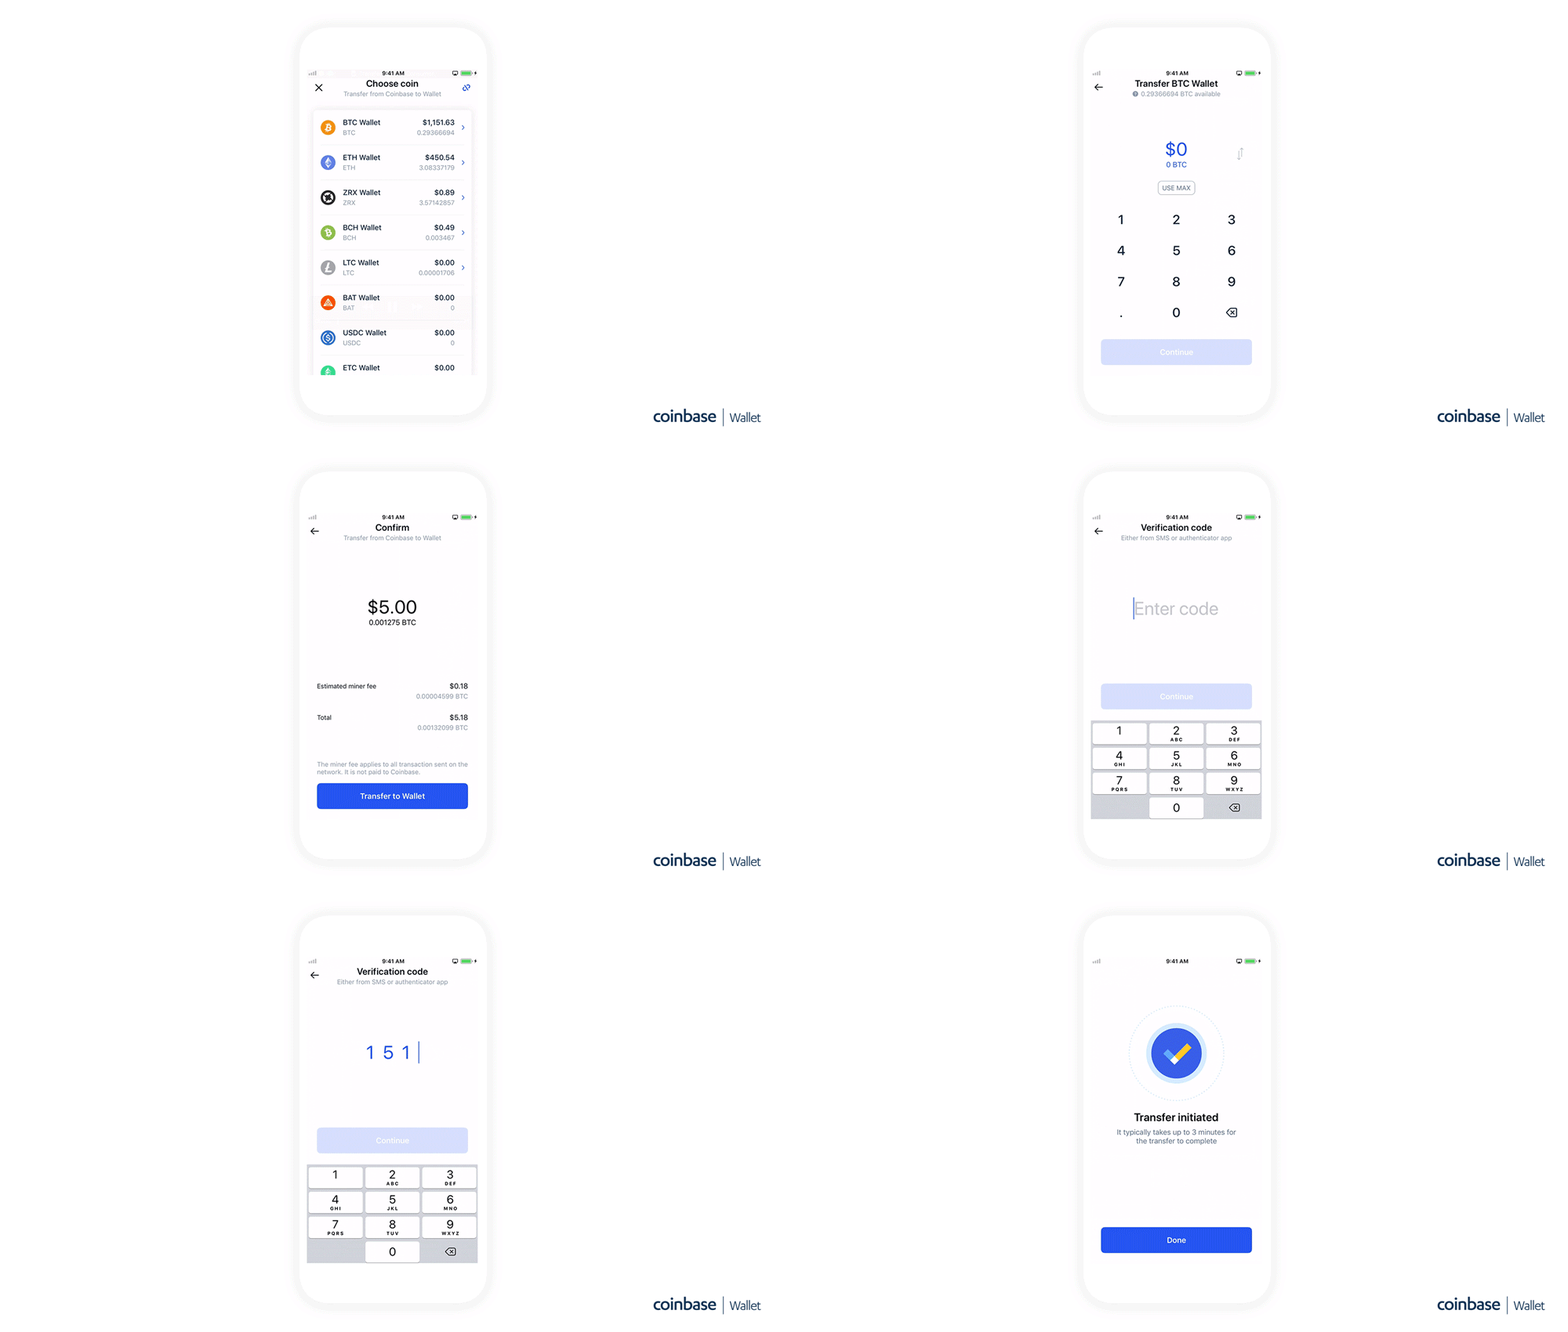
Once prepared, the actual transfer process is straightforward, involving actions within both your Coinbase Wallet and the Coinbase exchange.
Initiating the Transfer from Coinbase Wallet
-
Open Coinbase Wallet: Launch the Coinbase Wallet app on your mobile device or browser extension.
-
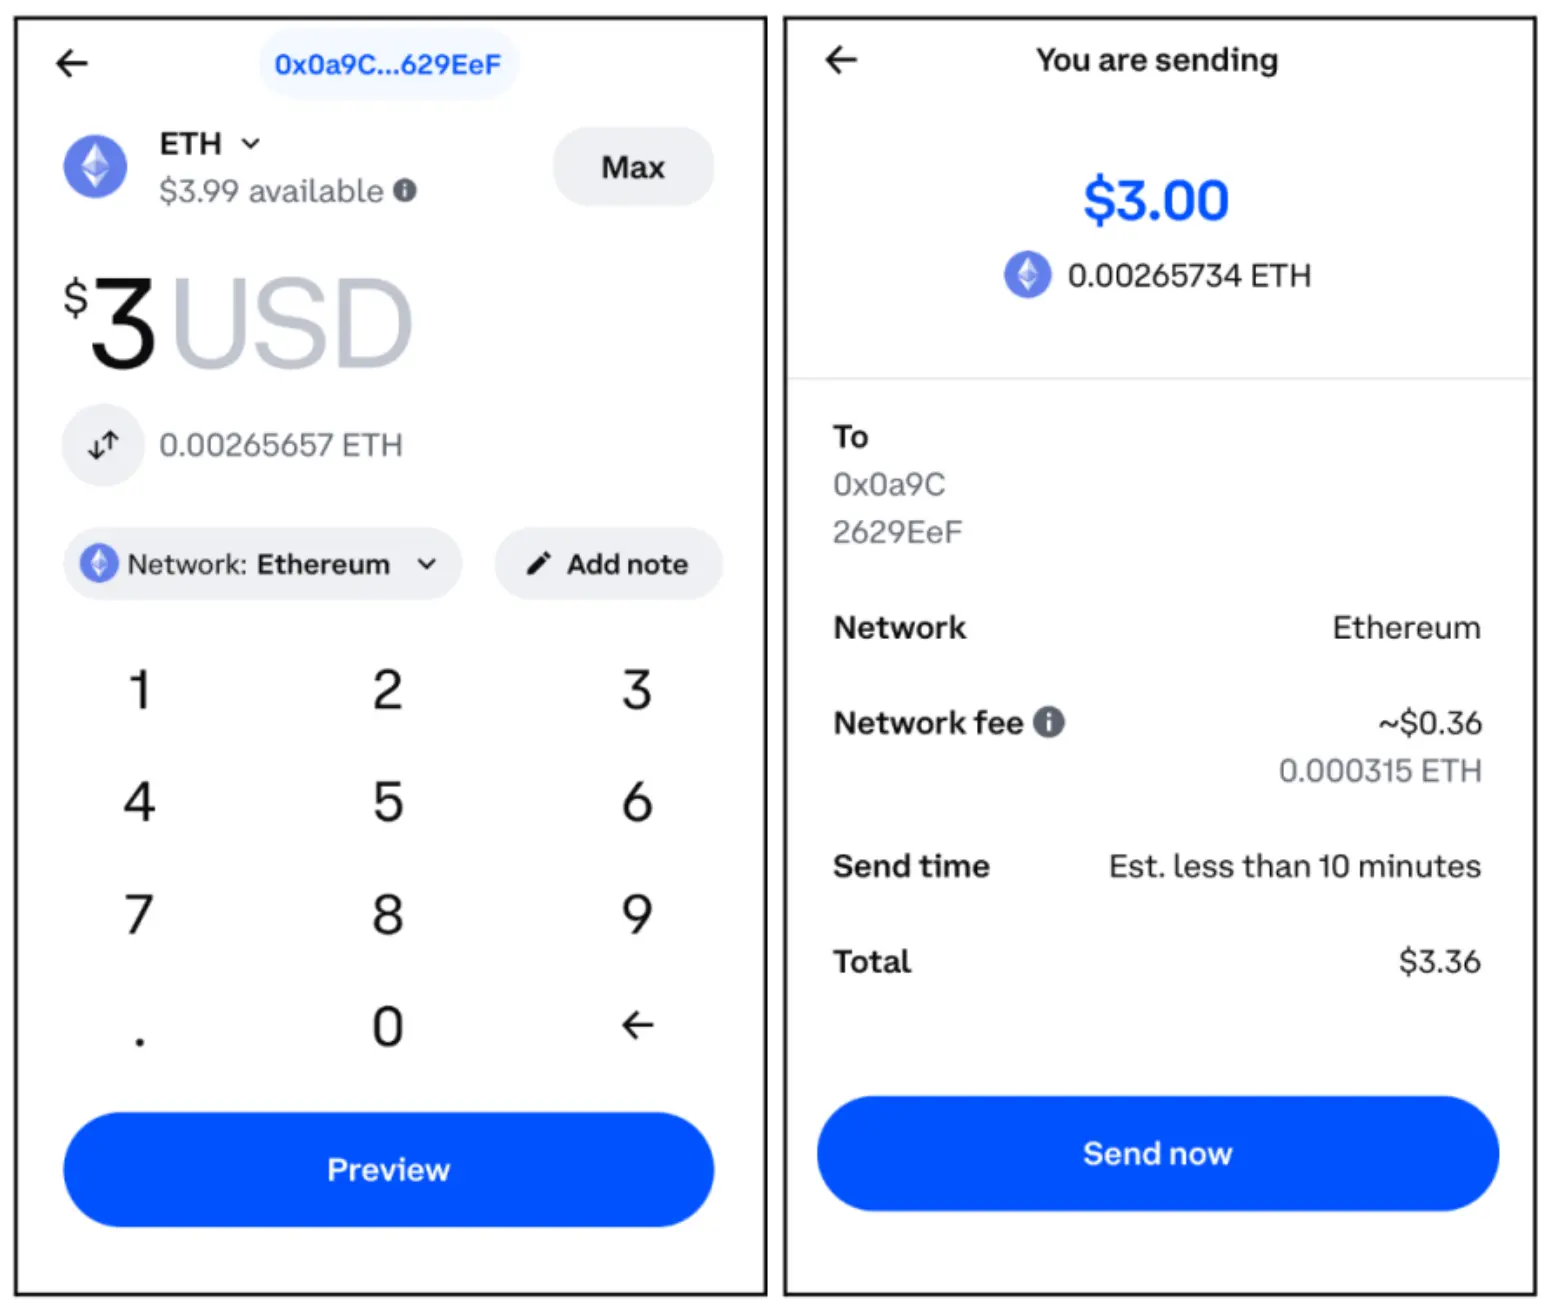
Select the Asset: From your wallet’s main screen, tap on the specific cryptocurrency you wish to send. This will open its dedicated page showing your balance and transaction history.
-
Tap “Send”: Locate and tap the “Send” button (often represented by an upward-pointing arrow or similar icon).
-
Enter Recipient Address: In the recipient field, paste the deposit address you obtained from your Coinbase exchange account. Confirm this address carefully.
-
Enter Amount: Input the amount of cryptocurrency you wish to transfer. You can usually choose to send a specific amount of crypto (e.g., 0.5 ETH) or an equivalent fiat value (e.g., $100 USD worth of ETH).
-
Review Network Fee (Gas Fee): The wallet will typically display the estimated network transaction fee. Review this and confirm it’s acceptable.
-
Confirm Transaction: Review all details one final time: asset type, amount, recipient address, and network fee. If everything is correct, confirm the transaction. You may need to authorize it with your wallet’s PIN, biometric authentication, or password.
-
Monitor Transaction Status: After confirmation, the transaction will be broadcast to the blockchain. You can often view its status (pending, confirmed) within your Coinbase Wallet or by using a blockchain explorer with the transaction ID (TxID).
Confirming Receipt on Coinbase Exchange
-
Log in to Coinbase Exchange: Access your Coinbase account via the website or mobile app.
-
Navigate to Asset Portfolio: Go to your portfolio or the specific asset’s page that you expect to receive.
-
Check Transaction History: Your incoming transfer should appear as a pending deposit in your transaction history. The time it takes for the transaction to be confirmed and reflected in your Coinbase balance depends on network congestion and the number of confirmations required by Coinbase for that specific asset.
-
Balance Update: Once the required network confirmations are met, the funds will be credited to your Coinbase balance and become available for trading, selling, or withdrawal. Coinbase will usually notify you via email or in-app notification when the deposit is complete.
Common Issues and Troubleshooting Tips
While the process is generally smooth, issues can arise. Knowing how to troubleshoot common problems can save time and prevent panic.
Delayed or Missing Transactions
-
Check Blockchain Explorer: Use the transaction ID (TxID) provided by your Coinbase Wallet to check the status of your transaction on a relevant blockchain explorer (e.g., Etherscan for Ethereum, BTCScan for Bitcoin). If it shows as “pending” for an extended period, the network might be congested, or the gas fee you paid might have been too low.
-
Network Congestion: High network activity can significantly slow down transaction processing. Patience is often key.
-
Coinbase Confirmation Times: Centralized exchanges like Coinbase typically require a certain number of blockchain confirmations before crediting funds. This can vary by asset and network. Check Coinbase’s support documentation for specifics.
-
Contact Support: If a significant amount of time has passed and the transaction isn’t showing up on the blockchain explorer or has enough confirmations but isn’t reflected on Coinbase, contact Coinbase support with your TxID.
Incorrect Network Selection
This is the most critical and often irreversible error. If you sent assets on one network (e.g., BNB Smart Chain) to an address expecting a different network (e.g., Ethereum), the funds are likely lost.
-
Immediate Action: If you realize this error immediately, some highly advanced users might attempt to retrieve funds if the receiving address’s private keys are accessible on the incorrect chain, but this is highly complex and rarely successful, especially when sending to a centralized exchange.
-
Contact Coinbase Support (Limited Hope): While rare, you can contact Coinbase support to see if they can assist. However, centralized exchanges often cannot recover funds sent on an incompatible network because they don’t control the corresponding private keys on every possible blockchain. This is why verifying the network is paramount.
Gas Fees and Network Congestion
If your transaction is perpetually pending:
-
Insufficient Gas: You might have set too low a gas fee during a period of high network activity. Some wallets allow you to “speed up” or “cancel” a pending transaction by submitting a new transaction with a higher gas fee (nonce management). Check if your Coinbase Wallet offers this functionality.
-
Wait It Out: If the transaction is not urgent, waiting for network congestion to subside might eventually lead to its confirmation, though this could take hours or even days. Alternatively, the transaction might eventually fail, and the funds would return to your wallet.
Maximizing Your Crypto Management Strategy
Transferring assets between Coinbase Wallet and Coinbase is a fundamental skill for anyone serious about managing their digital finances. By understanding the custodial differences, meticulously preparing for each transaction, and knowing how to troubleshoot potential issues, you gain greater control and confidence in your crypto journey. This financial literacy empowers you to utilize both the autonomy of self-custody and the convenience of a centralized exchange strategically, optimizing your investment management, security posture, and overall engagement with the evolving world of decentralized finance. Always prioritize verification, understand the associated costs, and leverage security best practices to protect your valuable digital assets.
aViewFromTheCave is a participant in the Amazon Services LLC Associates Program, an affiliate advertising program designed to provide a means for sites to earn advertising fees by advertising and linking to Amazon.com. Amazon, the Amazon logo, AmazonSupply, and the AmazonSupply logo are trademarks of Amazon.com, Inc. or its affiliates. As an Amazon Associate we earn affiliate commissions from qualifying purchases.