In the contemporary digital landscape, YouTube has evolved from a simple video-sharing repository into a sophisticated software ecosystem. For developers, content creators, and technical professionals, setting up a YouTube account is no longer a matter of simply clicking a “sign up” button. It requires a strategic understanding of Google’s underlying infrastructure, data security protocols, and the technical nuances of the YouTube Studio interface. This guide provides an exhaustive technical walkthrough for establishing a robust presence on the platform, focusing on the software configurations and digital security measures necessary for a professional deployment.

1. The Foundation: Integrating with the Google Infrastructure
The technical genesis of any YouTube presence lies in its integration with the broader Google account framework. Because YouTube operates as a service layer on top of a Google Account, the initial configuration determines the long-term scalability and security of the channel.
Choosing Between Personal and Brand Accounts
From a technical standpoint, the most critical decision during setup is the choice between a Personal Account and a Brand Account. A Personal Account is hard-coded to a single Google identity; the channel name is synonymous with the account holder’s name, and access cannot be shared without compromising the primary Google credentials.
In contrast, a Brand Account functions as a separate entity linked to one or more personal accounts. This architecture allows for “Role-Based Access Control” (RBAC). By utilizing a Brand Account, you can assign different levels of permissions (Owner, Manager, Communications Manager) to various team members without sharing passwords. This technical separation is vital for maintaining account integrity and ensuring that the primary administrative email remains obscured from the public-facing channel.
Configuring Two-Factor Authentication (2FA) and Digital Security
Security is the cornerstone of technical setup. Given the prevalence of “channel hijacking” via session token theft and phishing, implementing Advanced Protection is mandatory. When setting up the account, one must navigate to the Google Security dashboard to enable Two-Factor Authentication (2FA).
For high-stakes accounts, relying on SMS-based 2FA is discouraged due to the risk of SIM-swapping. Instead, the technical recommendation is to use FIDO-compliant hardware security keys (like YubiKeys) or an encrypted authenticator app. Furthermore, establishing a dedicated recovery email—hosted on a separate domain and protected by its own unique security protocols—creates a “redundancy loop” that can prevent total account loss in the event of a primary breach.
2. Navigating the YouTube Studio Interface and Backend Logic
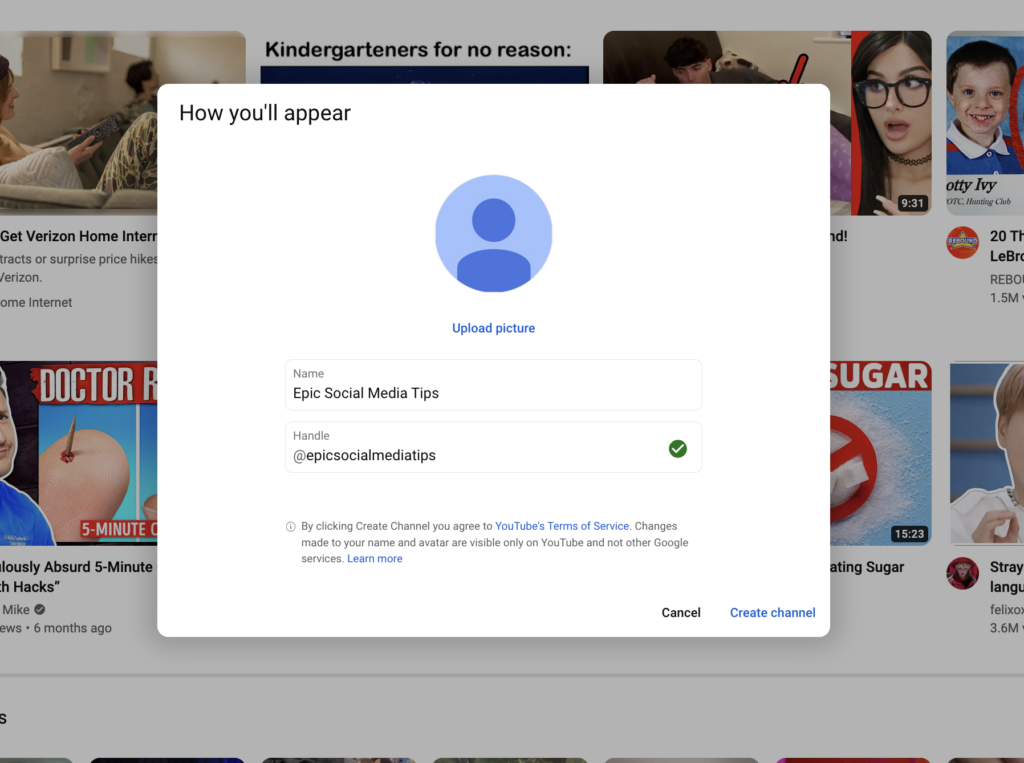
Once the account is authenticated, the focus shifts to YouTube Studio—the primary Command Center for channel management. This web-based application serves as the interface between the user and YouTube’s vast database.
Customizing the Technical Layout and Navigation
The “Customization” tab within YouTube Studio is more than an aesthetic tool; it is a structural configuration area. Here, you define the “Site Map” of your channel. Setting up the layout involves configuring the “Home” tab via modular sections. Technically, this involves organizing your content into playlists which act as logical directories. By structuring your videos into thematic playlists, you are essentially creating a tiered data architecture that helps the YouTube algorithm crawl and categorize your content more efficiently.
Managing Permissions and API Access
Under the “Settings” menu, the “Permissions” tab is where the technical management of the Brand Account takes place. This is where you can see the invited users and their specific access tokens. For organizations using third-party software for video management or analytics, understanding “Scopes” and “API permissions” is essential. When you link an app like TubeBuddy or VidIQ, you are granting specific OAuth 2.0 permissions to your YouTube data. Periodically auditing these third-party connections in the “Security” section of your Google Account ensures that no deprecated software retains access to your channel’s backend.
3. Optimization Through Advanced Channel Settings
A professional setup requires a deep dive into the “Advanced Settings” to ensure the channel is optimized for global distribution and compliant with digital regulations.
Configuring Global Metadata and Search Indexing
In the “Channel” settings under “Basic Info,” you must select your country of residence. This is a critical data point for YouTube’s content delivery network (CDN) and localization algorithms. Furthermore, adding “Channel Keywords” is a technical necessity. These keywords function as meta-tags for the entire channel entity, signaling to the search engine’s indexing service what the overarching niche of the channel is. This isn’t just about SEO; it’s about providing the machine-learning model with the necessary training data to categorize your content correctly from day one.
Compliance and Automated Filtering
Under the “Advanced Settings” tab, you must declare the channel’s status regarding the Children’s Online Privacy Protection Act (COPPA). This is a legal and technical requirement. Setting this at the channel level provides a global default, reducing the risk of manual errors during individual video uploads.
Additionally, setting up automated community filters is a key step in digital hygiene. By navigating to the “Community” tab, you can input “Blocked Words.” This serves as a client-side regex filter that automatically holds comments containing specific strings for review. For technical channels, this is often used to filter out spam bots or malicious links that could compromise the safety of the viewing audience.
4. Audio-Visual Technical Standards and Upload Defaults
The quality of a YouTube channel is often judged by its adherence to technical broadcast standards. Configuring these defaults during setup saves time and ensures consistency across the media library.
Understanding Resolution, Bitrate, and Codec Compatibility
When preparing to upload your first video, the setup process involves understanding YouTube’s transcoding pipeline. YouTube uses different codecs (VP9, AV1, and H.264) depending on the popularity and resolution of the video. To ensure the highest quality during the initial setup phase, creators should target 4K resolution (3840×2160) even if the source is 1080p, as this often triggers a higher bitrate VP9 encode. Understanding the relationship between Bitrate and Codec is essential for minimizing compression artifacts during the platform’s ingestion process.
Automating Metadata with Upload Defaults
Efficiency in a technical workflow is achieved through automation. The “Upload Defaults” section in YouTube Studio allows you to pre-configure metadata fields. You can set a default description template containing links to documentation, social handles, and standard disclaimers. You can also pre-select the video language, caption certification, and recording date settings. By automating these fields, you ensure that every piece of content uploaded to the server carries a consistent set of metadata, which is vital for maintaining a clean data structure as the channel scales.
5. Analytics and Performance Monitoring Tools
The final phase of a technical YouTube setup is the configuration of monitoring tools. Data-driven decision-making is only possible if the tracking mechanisms are correctly calibrated.
Real-Time Data Tracking and Metrics
The “Analytics” tab in YouTube Studio is a powerful data visualization tool. During the setup, you should familiarize yourself with the “Advanced Mode,” which allows for multi-metric comparisons. You can track “Impressions Click-Through Rate” (CTR) against “Average View Duration” (AVD) using scatter plots. This level of technical analysis is necessary to understand how the recommendation system is responding to your content.
Integrating External Analytics and Google Tags
For those who operate a website alongside their YouTube channel, the setup should include the integration of Google Analytics. By linking the YouTube channel to a Google Ads account (even if not running ads), you unlock deeper “Remarketing” data. Furthermore, for those interested in the technical journey of a viewer, implementing UTM parameters in the channel’s “About” links allows you to track traffic flow from YouTube to external domains within your own web analytics suite.
In conclusion, setting up a YouTube account from a technical perspective is an exercise in systems administration and digital strategy. By choosing the right account architecture, implementing high-level security protocols, optimizing metadata for indexing, and establishing automated workflows, you create a scalable and secure digital asset. As the platform continues to integrate more AI-driven tools and complex transcoding standards, a solid technical foundation ensures that your channel remains resilient and performant in the competitive digital landscape.
aViewFromTheCave is a participant in the Amazon Services LLC Associates Program, an affiliate advertising program designed to provide a means for sites to earn advertising fees by advertising and linking to Amazon.com. Amazon, the Amazon logo, AmazonSupply, and the AmazonSupply logo are trademarks of Amazon.com, Inc. or its affiliates. As an Amazon Associate we earn affiliate commissions from qualifying purchases.