
In an increasingly digital world, peer-to-peer (P2P) payment applications have revolutionized how we manage and transfer funds. Among these, Venmo stands out as a dominant player, offering a user-friendly interface for sending and receiving money with remarkable ease. Whether you’re splitting a dinner bill, contributing to a group gift, or simply paying back a friend, Venmo streamlines these transactions, often integrating a social element that distinguishes it from traditional banking apps.
This comprehensive guide delves into the technical intricacies and user experience of sending money via Venmo. We’ll explore everything from initial setup and navigating the app’s interface to understanding its core functionalities, managing privacy, and adhering to best practices for secure digital transactions. Our focus will remain strictly on the technology, providing an insightful tutorial into mastering this popular financial tool.

Getting Started with Venmo: Setting Up Your Digital Wallet
Before you can harness Venmo’s payment capabilities, a foundational setup process is required. This involves installing the application, creating a secure user profile, and linking a financial instrument to facilitate transactions. Adhering to these initial steps correctly ensures a smooth and secure experience.
Downloading and Installing the App
The journey begins by acquiring the Venmo application. Compatible with both iOS and Android devices, Venmo is readily available on the Apple App Store and Google Play Store, respectively. Search for “Venmo” and look for the distinctive blue logo. Once located, proceed with the download and installation. Ensure you have a stable internet connection for a swift download. After installation, launch the app to begin the registration process.
Creating Your Account and Profile
Upon launching Venmo for the first time, you’ll be prompted to sign up. This typically involves providing essential personal information such as your full legal name, email address, phone number, and a secure password. Venmo uses this information to establish your unique user identity and comply with financial regulations. You’ll also be asked to create a username, which serves as your public identifier within the Venmo ecosystem. Choose a username that is easy for others to find and recognize you by. During this phase, Venmo often requests verification of your phone number or email through a one-time passcode (OTP) to enhance security and confirm ownership of your provided contact details.
Linking Your Bank Account or Debit Card
To send money, you need a funding source. Venmo allows users to link either a bank account (via instant verification services like Plaid or manual verification through micro-deposits) or a debit card. Linking a debit card provides immediate access to funds for sending payments, though some transactions might incur a small fee (e.g., for instant transfers out of Venmo balance). Linking a bank account offers greater flexibility, usually with no fees for standard transfers, but can take a few business days for funds to clear. Credit cards can also be linked, but sending money from a credit card typically incurs a 3% fee, making it less ideal for casual P2P payments. Navigate to the “Settings” menu within the app, select “Payment Methods,” and follow the prompts to add your preferred funding source securely. Venmo employs encryption and robust security protocols to protect your financial information during this process.
The Mechanics of Sending Money: Step-by-Step Tutorial
Once your Venmo account is set up and funded, sending money becomes a straightforward process. The app’s intuitive interface is designed for efficiency, guiding users through each step of a transaction.
Initiating a Payment
To begin a payment, tap the “Pay/Request” icon, usually located at the bottom of the app’s home screen. This action opens a new transaction screen, preparing you to input the necessary details for your payment. The design emphasizes ease of access, making it quick to initiate new transfers.
Finding and Selecting Your Recipient
The next crucial step is identifying who you want to pay. Venmo offers several methods to find recipients:
- Username Search: If you know their Venmo username, simply type it into the search bar. This is the most common and reliable method.
- Phone Number/Email: You can also search for recipients using the phone number or email address associated with their Venmo account.
- Scanning QR Code: For in-person payments, Venmo allows you to scan another user’s unique QR code directly from their app, instantly populating their profile as the recipient.
- Friends List: If the person is already a Venmo contact or a Facebook friend connected to your Venmo account, they might appear in your suggested recipients list.
Once found, tap on their profile to select them as the recipient.
Entering the Amount and Adding a Note
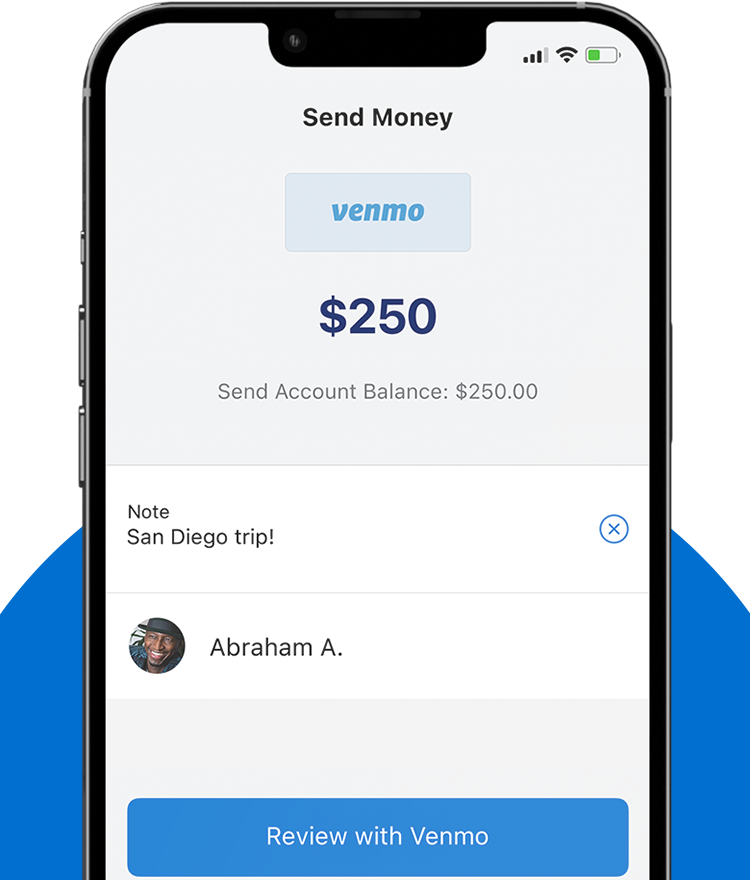
After selecting the recipient, you’ll be prompted to enter the dollar amount you wish to send. Type the numerical value into the designated field. Below the amount, there’s a crucial section for adding a note or description for the payment. While seemingly minor, this field is central to Venmo’s social and functional aspects. You can describe the purpose of the payment (e.g., “dinner,” “rent,” “concert tickets”) and even include emojis for a more personalized touch. This note also determines the payment’s visibility:
- Public: Anyone on Venmo can see the transaction description and participants (but not the amount).
- Friends: Only your Venmo friends can see the transaction.
- Private: Only you and the recipient can see the transaction details.
Carefully choose your privacy setting based on the nature of the transaction.
Reviewing and Confirming the Transaction
Before finalizing the payment, Venmo provides a summary screen where you can review all the details: the recipient’s name, the amount, the note, and the selected privacy setting. Crucially, this is also where you confirm the funding source (e.g., your linked debit card or Venmo balance). Double-check every detail, especially the recipient and amount, to prevent errors. Once satisfied, tap the “Pay” button (often colored green) to initiate the transfer. Venmo typically processes these transactions instantly, and both you and the recipient will receive notifications confirming the successful transfer.
Beyond Basic Transfers: Exploring Venmo’s Additional Features
Venmo is more than just a payment-sending platform; it integrates several features designed to enhance its utility as a digital financial tool. Understanding these extended functionalities can significantly enrich your experience.
Requesting Money and Splitting Bills
Just as easily as you can send money, you can also request it. Tapping the “Pay/Request” icon allows you to switch to the “Request” tab. You can then select individuals or groups, enter the amount, add a note, and send a request. This feature is particularly useful for splitting bills (e.g., dinner, utilities) among friends. Venmo’s bill-splitting function streamlines this by allowing you to select multiple recipients for a single request, calculating individual shares, and tracking who has paid. This removes the awkwardness and complexity often associated with group expenses.
Managing Your Venmo Balance and Transfers to Bank
Any money you receive on Venmo is deposited into your Venmo balance. This balance can then be used to send future payments or be transferred out to your linked bank account.
- Using Venmo Balance: When making a payment, your Venmo balance is automatically prioritized as the funding source if sufficient funds are available.
- Transferring to Bank: To move funds from your Venmo balance to your bank account, navigate to the “Me” tab (your profile) and tap “Transfer Money.” You’ll have two options:
- Standard Transfer: Typically free, but takes 1-3 business days for funds to appear in your bank account.
- Instant Transfer: Usually incurs a small fee (e.g., 1.75% with a minimum fee), but funds arrive in your linked debit card or eligible bank account within minutes.
Managing your balance efficiently is key to leveraging Venmo’s full potential as a flexible digital wallet.
Enhancing Your Venmo Experience: Privacy and Security Settings
While Venmo simplifies transactions, understanding and utilizing its privacy and security features is paramount for protecting your digital financial interactions. The platform offers several configurable options to empower users with control over their data and transactions.
Understanding Venmo’s Privacy Controls
Venmo’s social feed is a core feature, but users have significant control over the visibility of their transactions. As discussed, each payment has a privacy setting (Public, Friends, Private). Beyond individual transactions, you can also set a default privacy preference for all future payments in your app settings. Regularly reviewing your default privacy settings ensures your financial interactions align with your comfort level regarding public visibility. This technological design allows users to curate their digital footprint within the app.
Implementing Two-Factor Authentication (2FA)
Two-factor authentication adds an essential layer of security to your Venmo account. By enabling 2FA (found in your account settings under “Security”), you require a second verification step – typically a code sent to your phone – in addition to your password when logging in or performing sensitive actions. This significantly reduces the risk of unauthorized access, even if your password is compromised. It’s a critical digital security feature that should be activated by all users.
Recognizing and Avoiding Common Scams
Despite Venmo’s robust security infrastructure, users remain the first line of defense against social engineering and phishing attempts. Common tech-related scams include:
- Phishing Emails/Texts: Imposters send fake Venmo notifications requesting login credentials or personal information. Always verify the sender and URL before clicking links.
- Overpayment Scams: A sender “accidentally” sends more money than owed and asks for the difference back. This is often a precursor to a chargeback, leaving you liable.
- Requests for Personal Information: Venmo will never ask for your password, PIN, or full bank account number via email or text.
Always use strong, unique passwords, be wary of unsolicited communications, and verify requests directly with the sender through an alternative channel before acting. Report suspicious activity immediately through the app’s support features.
Troubleshooting and Support: Navigating Common Issues
Even with a well-designed app, occasional technical hiccups can occur. Knowing how to troubleshoot common Venmo issues and access support efficiently is crucial for a smooth user experience.
Failed Transactions and Payment Holds
Transactions can fail for several reasons, often related to technical checks:
- Insufficient Funds: The most common reason. Ensure your linked bank account or card has enough money, or that your Venmo balance is sufficient.
- Expired or Invalid Card: Double-check your payment method details in the app settings.
- Bank Restrictions: Your bank might flag the transaction as suspicious. Contact your bank directly if you suspect this is the case.
- Security Holds: Venmo’s automated security systems might temporarily hold a payment if they detect unusual activity. This is a protective measure.
If a transaction fails, Venmo usually provides an error message indicating the problem. Review these messages carefully as they often contain clues to resolution.
Contacting Venmo Support
For issues that cannot be resolved through basic troubleshooting, Venmo provides several support channels:
- In-App Help Center: Access FAQs and troubleshooting guides directly within the app.
- Email Support: For non-urgent issues, you can submit a support ticket via email.
- Phone Support: For more urgent or complex issues, Venmo offers phone support during business hours.
When contacting support, be prepared to provide relevant details such as transaction IDs, dates, and clear descriptions of the problem. This will help the technical support team diagnose and resolve your issue more efficiently.

Conclusion
Venmo has cemented its position as an indispensable tool in the landscape of digital payments, fundamentally changing how individuals send and receive money. Its intuitive interface, coupled with features like bill splitting and social transaction feeds, makes it incredibly convenient for a wide array of P2P financial interactions. By understanding the technical setup, navigating its core payment mechanics, leveraging its additional functionalities, and diligently managing your privacy and security settings, users can fully harness Venmo’s capabilities. As technology continues to evolve, mastering apps like Venmo is not just about convenience; it’s about confidently participating in the modern digital economy.
aViewFromTheCave is a participant in the Amazon Services LLC Associates Program, an affiliate advertising program designed to provide a means for sites to earn advertising fees by advertising and linking to Amazon.com. Amazon, the Amazon logo, AmazonSupply, and the AmazonSupply logo are trademarks of Amazon.com, Inc. or its affiliates. As an Amazon Associate we earn affiliate commissions from qualifying purchases.