
Venmo, a popular peer-to-peer payment application, has revolutionized the way individuals exchange money. Whether you’re splitting a dinner bill, receiving payment for a freelance gig, or getting a birthday gift from a friend, understanding how to efficiently receive funds on Venmo is crucial. This guide will walk you through the essential steps and considerations for seamlessly accepting money through the platform, ensuring you have a smooth and secure experience.
Understanding Venmo’s Payment Flow
At its core, Venmo acts as a digital wallet and a social network for payments. When someone sends you money, it typically lands in your Venmo balance. From there, you have several options: keep it within Venmo for future transactions, transfer it to your linked bank account, or even request a physical Venmo card for spending. Understanding this flow is the first step to mastering how to receive money on Venmo.

The Venmo Balance: Your Digital Holding Account
Once a payment is successfully sent to you on Venmo, the funds are credited to your Venmo balance. This balance is displayed prominently within the app, allowing you to see your available funds at a glance. It’s important to note that your Venmo balance isn’t a traditional bank account; it’s a balance held within the Venmo system. This means that while you can use it for in-app purchases or to send money to others, there are limitations and specific procedures for accessing these funds in your physical bank account.
The Venmo balance is designed for convenience, allowing for quick re-use of funds without the need for external transfers for every small transaction. Think of it as a temporary holding zone for your incoming payments. This immediate availability is a key feature that makes Venmo so popular for everyday exchanges.
Initiating a Transfer to Your Bank Account
When you’re ready to access your Venmo balance in your traditional banking system, you can initiate a transfer. Venmo offers two types of transfers: standard and instant.
Standard Transfers: Free and Predictable
Standard transfers are free of charge and typically take 1-3 business days to appear in your linked bank account. This is the most common method for users who don’t need immediate access to their funds. To initiate a standard transfer, navigate to your Venmo balance, select “Transfer to Bank,” choose “Standard,” enter the amount you wish to transfer, and confirm the transaction. Venmo will then process the request, and the funds will be deposited into your designated bank account.
It’s essential to ensure your bank account is correctly linked to your Venmo profile to avoid any delays or errors during the transfer process. Double-checking your routing and account numbers is always a good practice.
Instant Transfers: For Immediate Access
For those who need their money right away, Venmo offers an “Instant Transfer” option. This service typically incurs a small fee (usually 1.75% of the transfer amount, with a minimum fee) but ensures that your funds are deposited into your linked bank account within minutes. To use this feature, follow the same steps as a standard transfer, but select “Instant” as your transfer type. The fee will be clearly displayed before you confirm the transaction.
Instant transfers are invaluable for urgent expenses or when you need to quickly move funds for a specific purpose. However, it’s important to weigh the convenience against the cost, especially for larger amounts.
Setting Up Your Venmo Profile to Receive Payments
Receiving money on Venmo is largely automated once your account is set up. However, optimizing your profile and understanding a few key settings can enhance your experience and ensure you receive payments smoothly. This includes linking your bank account, setting up your username, and managing your privacy settings.
Linking Your Bank Account and Debit Card
The foundation of receiving and accessing funds on Venmo is linking a bank account or a debit card. This is how Venmo verifies your identity and provides a secure channel for fund transfers.
Connecting Your Bank Account
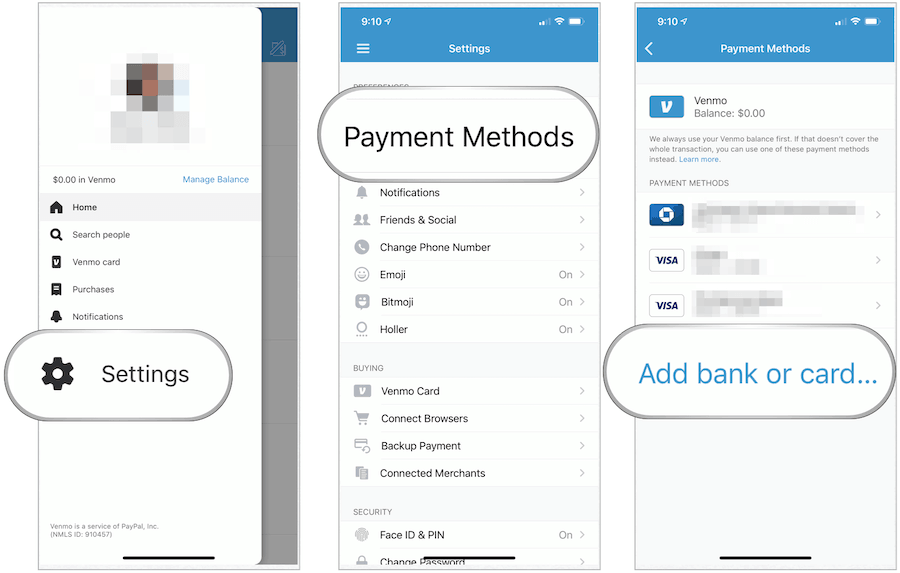
To link your bank account, go to the “Settings” menu in the Venmo app, select “Bank and Cards,” and then “Add Bank or Debit Card.” You’ll be prompted to enter your bank’s routing number and your account number. Venmo uses a secure third-party service to verify your bank details. Once linked, you can seamlessly transfer funds from your Venmo balance to your bank account. It’s crucial to ensure you have the correct routing and account numbers, as an error can lead to significant delays or the rejection of your transfer.
Adding a Debit Card
Similarly, you can link a debit card to your Venmo account. This can be useful for receiving instant transfers or for using your Venmo balance with your linked debit card. The process is similar to linking a bank account, requiring you to enter your debit card details. Note that using a credit card to add funds to your Venmo balance or to send payments may incur cash advance fees from your card issuer.
Choosing Your Username and QR Code
Your username is your unique identifier on Venmo. When someone wants to send you money, they can search for you by your username, phone number, or email address. A clear and memorable username can make it easier for people to find and pay you.
Crafting a Memorable Username
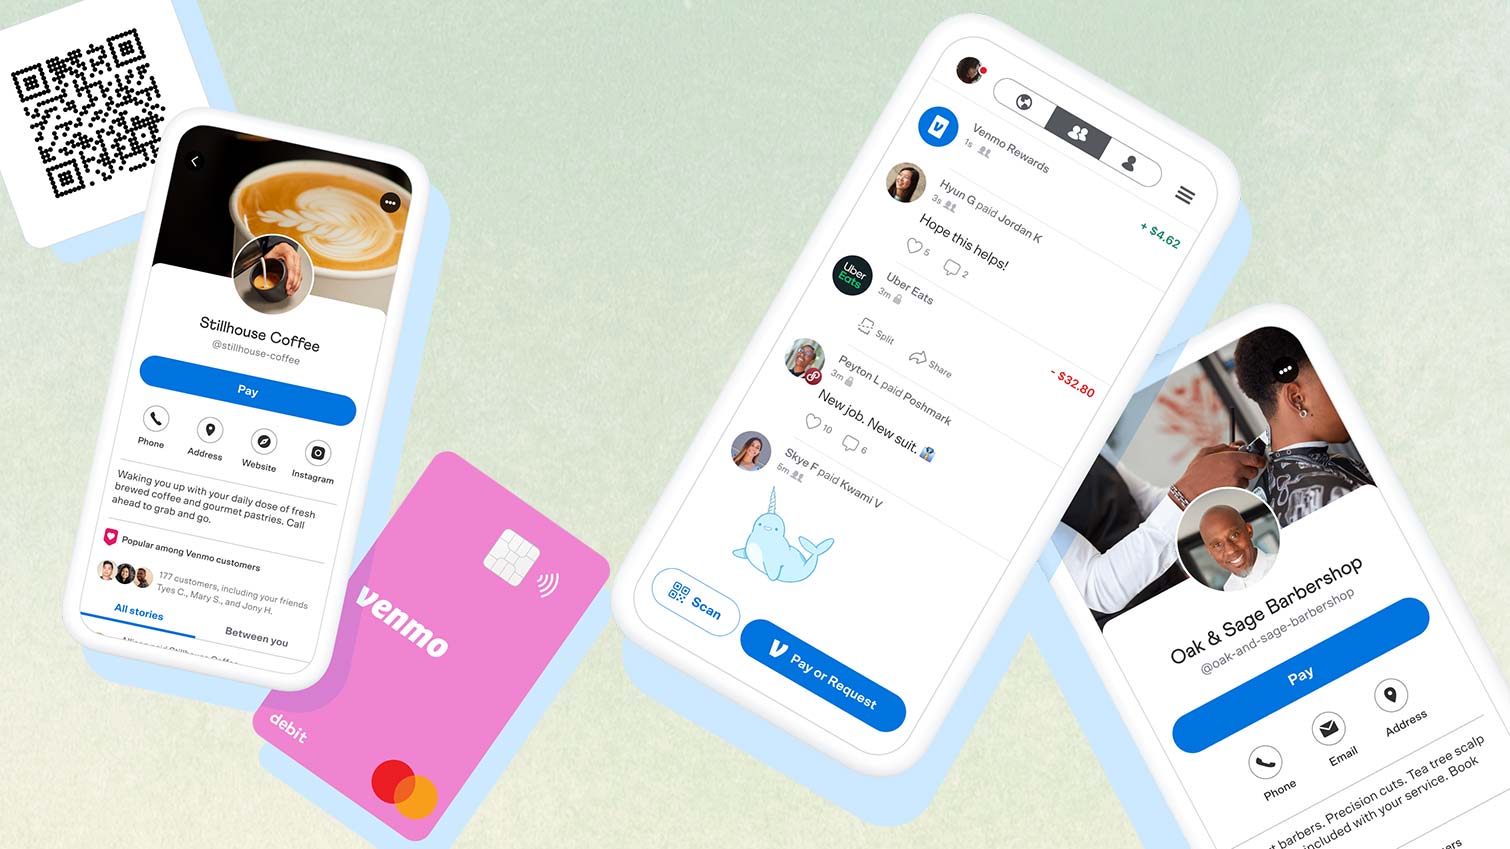
Your username is how others will identify you on the platform. While Venmo allows you to use your real name, many opt for a distinct username. This can be anything from your initials and a number to a creative nickname. The key is to make it recognizable and easy for the sender to input correctly. If your desired username is taken, Venmo will suggest alternatives.
Utilizing Your Personal QR Code
Every Venmo user has a unique QR code. This QR code can be found within your profile. When someone is physically with you, they can scan your QR code to quickly access your profile and send you money without needing to type your username. This is particularly useful in social settings, at events, or when you’re exchanging payment for goods or services in person. Simply open your Venmo app, go to your profile, and your QR code will be displayed.
Ensuring Secure and Efficient Payment Reception
While Venmo is generally a secure platform, taking proactive steps can further enhance your security and ensure you’re receiving payments as intended. This includes understanding payment verification, managing your privacy settings, and being aware of potential scams.
Verifying Incoming Payments
When someone sends you money on Venmo, you’ll typically receive a notification within the app. The payment will then appear in your transaction history and be added to your Venmo balance. For larger amounts or for payments that might be part of a business transaction, it’s always a good idea to confirm with the sender that the payment has been sent and received correctly, especially if you have any doubts.
Notifications and Transaction History
Venmo’s notification system is designed to keep you informed about all your account activity, including incoming payments. Make sure your notification settings are enabled for payments. Your transaction history provides a detailed record of all payments sent and received, serving as a valuable reference point. Regularly reviewing your transaction history can help you spot any discrepancies or unauthorized activity.
Confirming with Senders
In situations where clarity is paramount, direct communication with the sender is the most reliable method. A quick message or call to confirm that the funds have been sent and have appeared in your Venmo balance can prevent misunderstandings and ensure a smooth transaction, especially when dealing with new contacts or for significant sums.
Managing Your Privacy Settings
Venmo has a social component, meaning your transactions can be visible to your friends or even publicly, depending on your settings. Understanding and managing these settings is vital for both your privacy and security when receiving money.
Public, Friends, and Private Transactions
Venmo allows you to control the visibility of your transactions. You can set your default transaction privacy to “Public,” “Friends,” or “Private.”
- Public: Your transactions are visible to anyone on or off Venmo. This is often used for social interactions, like sending a friend money for lunch.
- Friends: Your transactions are visible only to your Venmo friends.
- Private: Your transactions are visible only to you and the person you are transacting with.
For receiving payments, especially those related to business or personal exchanges where you don’t want details shared, setting your default to “Private” is highly recommended. You can also set the privacy for individual transactions as they occur.
Protecting Your Account
Beyond transaction privacy, securing your Venmo account itself is paramount. Use a strong, unique password for your Venmo account and enable two-factor authentication if available. Be wary of unsolicited requests for your login information, and never share your personal details or bank account information with anyone claiming to be from Venmo support unless you have initiated the contact through official channels. Always use the official Venmo app and website.
Understanding Payment Holds and Limitations
In certain circumstances, Venmo may place a hold on funds you receive or impose limitations on your account. Understanding these situations can help you avoid unexpected issues.
When Funds Might Be Held
Venmo might place a temporary hold on incoming payments for various reasons. This can include new account activity, unusual transaction patterns, or if the payment is flagged for review. While these holds are typically short-lived, they can be a point of confusion. If you believe a payment has been incorrectly held, contacting Venmo support is the best course of action.
Account Limits and Verification
Venmo has certain limits on how much money you can send or receive within specific periods. These limits often depend on your account’s verification status. For higher transaction volumes, Venmo may require further identity verification, such as providing a Social Security number or other government-issued identification. Meeting these verification requirements can increase your sending and receiving limits, making it easier to manage larger sums of money.
By familiarizing yourself with these aspects of Venmo’s payment system, you can confidently and securely receive money, making your interactions on the platform efficient and hassle-free.
aViewFromTheCave is a participant in the Amazon Services LLC Associates Program, an affiliate advertising program designed to provide a means for sites to earn advertising fees by advertising and linking to Amazon.com. Amazon, the Amazon logo, AmazonSupply, and the AmazonSupply logo are trademarks of Amazon.com, Inc. or its affiliates. As an Amazon Associate we earn affiliate commissions from qualifying purchases.