In an increasingly digital world, the need for a reliable physical output might seem diminished, yet printers remain indispensable tools for students, professionals, and home users alike. From printing crucial documents and creative projects to archiving digital information and managing everyday tasks, a functioning printer is a cornerstone of productivity. However, setting up a new printer can sometimes feel like navigating a complex maze of cables, drivers, and network settings. This comprehensive guide aims to demystify the process, providing clear, step-by-step instructions to ensure a smooth installation of your printer to your computer, regardless of its type or your operating system. We’ll delve into the technological nuances, offering insights that not only get your device running but also enhance your understanding of modern peripherals within the broader tech landscape.
The Essential Pre-Installation Checklist: Paving the Way for Success
Before you even think about connecting wires or clicking installation prompts, a little preparation goes a long way. This initial phase is critical for preventing common frustrations and ensuring the installation proceeds without a hitch. By systematically going through these preliminary steps, you’ll save time, reduce stress, and set the stage for a successful setup.
Unboxing and Physical Setup
The journey begins the moment your new printer arrives. Take your time with this step, as careful handling can prevent damage and ensure all components are accounted for.
- Careful Unpacking: Gently remove the printer from its packaging. Retain the box and all packing materials until you’re certain the printer is working correctly, in case a return is necessary.
- Removing Protective Materials: Most new printers come with a plethora of tapes, plastic wraps, and foam inserts designed to secure moving parts during transit. Consult your printer’s manual to identify and remove all these protective elements, especially inside the cartridge area and paper tray. Failing to do so can cause serious damage to the printer upon first use.
- Placing the Printer: Choose a stable, flat surface near your computer or wireless router (if it’s a wireless printer) that has access to a power outlet. Ensure there’s adequate space around the printer for proper ventilation and for opening trays and access panels. Consider the ergonomics and accessibility for loading paper and changing cartridges.
- Loading Paper and Installing Cartridges: Follow the manufacturer’s instructions to load paper into the input tray. Then, carefully install the ink or toner cartridges into their designated slots. Many modern printers feature intuitive designs that make cartridge installation straightforward, often with color-coding or clear labels. Once cartridges are in, some printers may perform an initial alignment or calibration process – let it complete uninterrupted.
Gathering Your Essentials: Tools and Information
With the printer physically ready, turn your attention to gathering the necessary tools and information that will facilitate the software and connection setup.
- Power Cable: Locate the power cable that came with your printer. Connect one end to the printer and the other to a grounded electrical outlet. Avoid using surge protectors or power strips that are already overloaded, as this can lead to power fluctuations affecting the printer’s performance.
- USB Cable (if applicable): If you’re planning a wired connection, ensure you have a standard USB A-to-B cable. Most new printers include this, but older models or specific types might require you to purchase one separately.
- Network Information (for wireless printers): For Wi-Fi connections, you’ll need your wireless network name (SSID) and password. Make sure your computer is connected to the same Wi-Fi network that you intend to connect your printer to.
- Printer Manual and Installation Disc: While many installations are now driverless or involve downloading software, the manual is an invaluable resource for specific instructions, troubleshooting tips, and error code explanations. If your printer comes with an installation CD/DVD, keep it handy, though downloading the latest drivers online is often preferable.
- Computer Requirements: Ensure your computer meets any minimum system requirements specified by the printer manufacturer, although most modern printers are compatible with current operating systems. Verify that your operating system (Windows, macOS) is up-to-date to minimize compatibility issues.
Connecting Your Printer: Wired vs. Wireless Solutions
The method you choose to connect your printer to your computer significantly impacts its flexibility, speed, and network integration. Modern technology offers several reliable options, each with its own set of advantages. Understanding these connection types is crucial for choosing the best setup for your home or office environment.
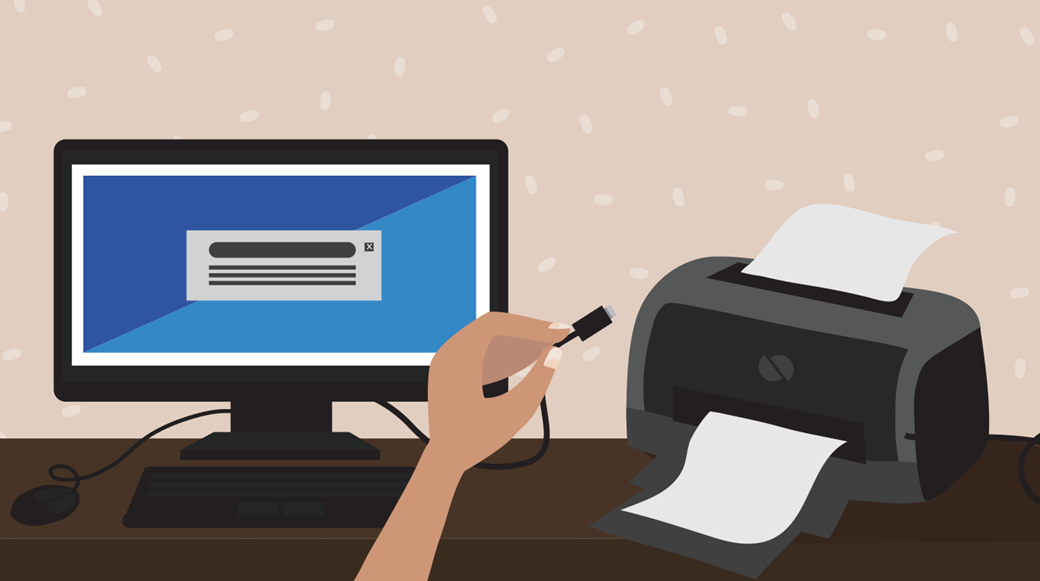
USB Connection (Wired)
The Universal Serial Bus (USB) connection is the simplest and most direct method for connecting a printer to a single computer. It’s a classic for a reason: reliable, fast, and generally hassle-free.
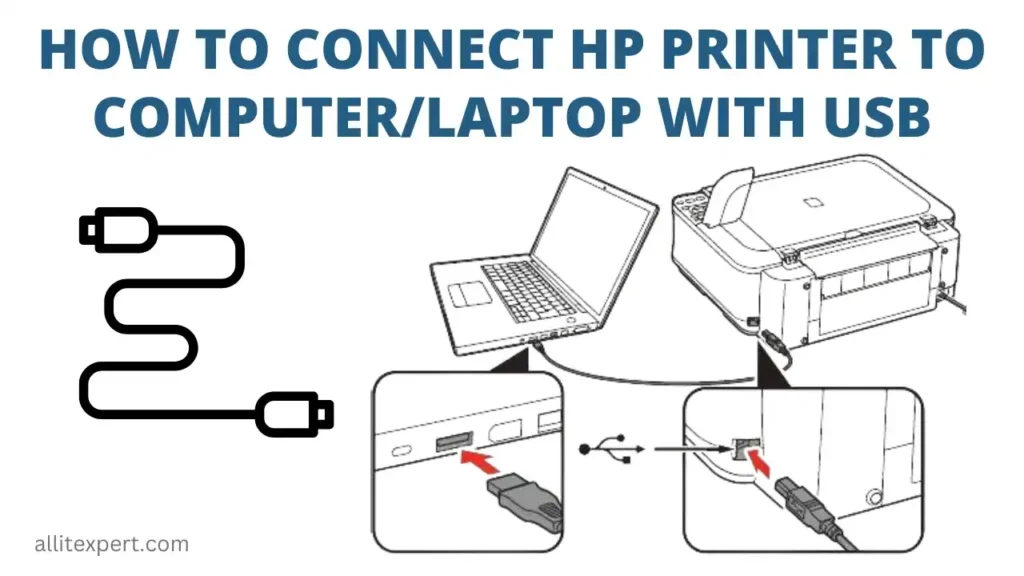
- Step-by-Step USB Connection:
- Power On: With the printer plugged into a power source, turn it on. Wait for it to fully boot up and settle into a ready state.
- Connect the USB Cable: Plug the square-ended (Type-B) connector of the USB cable into the corresponding port on the back of your printer. Then, plug the rectangular-ended (Type-A) connector into an available USB port on your computer.
- Automatic Detection: Most modern operating systems (Windows, macOS) will immediately detect the new hardware. You might see a notification indicating “Device driver software installed successfully” or a prompt to install the necessary drivers.
- Driver Installation: If drivers don’t install automatically, proceed to the “Driver Installation” section below, typically by using the provided installation disc or downloading drivers from the manufacturer’s website.
Wireless Connection (Wi-Fi)
Wireless connectivity offers unparalleled convenience, allowing you to place your printer almost anywhere within your network’s range and print from multiple devices without physical tethering. This is particularly beneficial in a collaborative or smart home environment, aligning with the website’s focus on technology trends and productivity.
- Methods for Wi-Fi Setup:
- WPS (Wi-Fi Protected Setup):
- Check Compatibility: Both your printer and wireless router must support WPS. Look for a WPS button on both devices, often indicated by a symbol of two arrows chasing each other.
- Initiate WPS on Printer: Press the WPS button on your printer’s control panel (or navigate its menu to find the WPS option).
- Activate WPS on Router: Within two minutes, press the WPS button on your wireless router. The devices should then automatically connect and exchange network information. You’ll typically see a confirmation message on the printer’s display.
- Manual Wi-Fi Setup via Printer’s Control Panel:
- Access Network Settings: On your printer’s control panel (LCD screen), navigate to the “Setup,” “Network Settings,” or “Wireless Settings” menu.
- Select Wi-Fi Setup Wizard: Choose the “Wi-Fi Setup Wizard” or similar option. The printer will scan for available wireless networks.
- Select Your Network: From the list, select your home or office Wi-Fi network’s SSID (name).
- Enter Password: Use the printer’s keypad or touchscreen to enter your Wi-Fi password (WPA2 key). This can be tedious, so double-check for accuracy.
- Confirm Connection: Once entered, the printer will attempt to connect. A successful connection will be confirmed on the display, and the Wi-Fi indicator light on the printer will usually turn solid.
- Software-Assisted Wireless Setup:
- Install Printer Software: Install the printer’s software on your computer using the installation disc or downloaded package.
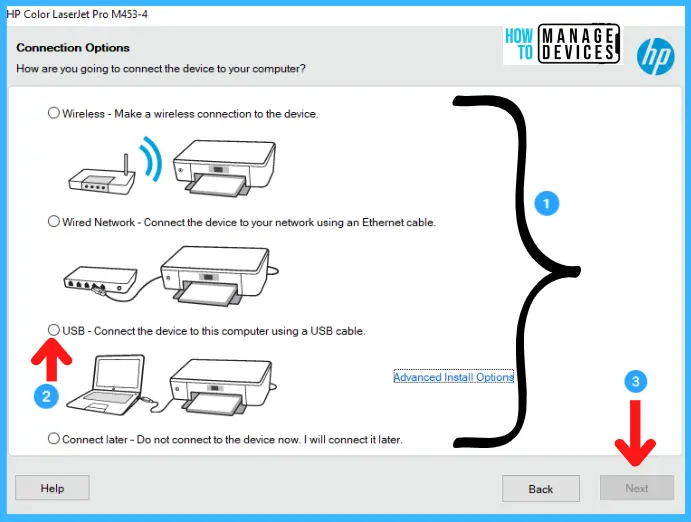
- Choose Wireless Option: During the installation process, you’ll be prompted to select a connection type. Choose “Wireless Connection” or “Network Connection.”
- Follow On-Screen Prompts: The software will guide you through connecting the printer to your Wi-Fi network, often by temporarily connecting via USB to transfer network settings, or by detecting the printer on the network if it was already set up manually.
- WPS (Wi-Fi Protected Setup):
Network Connection (Ethernet)
For situations requiring robust, high-speed, and stable connectivity, especially in office environments, an Ethernet connection is an excellent choice. This method provides consistent performance and enhanced digital security, important considerations for corporate identity and business finance.
- Step-by-Step Ethernet Connection:
- Connect Ethernet Cable: Plug one end of a standard Ethernet cable into the Ethernet port on your printer and the other end into an available LAN port on your wireless router or network switch.
- Power On: Turn on the printer.
- Automatic IP Assignment: Most routers use DHCP (Dynamic Host Configuration Protocol) to automatically assign an IP address to the printer.
- Driver Installation: Install the printer’s drivers and software on your computer. During the setup, choose “Network Connection” or “Ethernet.” The software will typically scan your network, detect the printer by its IP address, and allow you to complete the setup. If prompted, you might need to manually input the printer’s IP address, which can usually be found by printing a network configuration page from the printer’s control panel.
Operating System Specific Driver Installation
Once your printer is physically connected (via USB, Wi-Fi, or Ethernet), the next crucial step is ensuring your computer has the necessary software – known as drivers – to communicate effectively with the printer. Drivers act as translators, allowing your operating system to understand and control the printer’s functions.
Windows Installation Guide
Windows users have several methods to install printer drivers, ranging from automatic detection to manual installation.
- Automatic Driver Installation (Windows Update):
- After connecting the printer, Windows often automatically detects new hardware and attempts to find and install the appropriate drivers through Windows Update. You’ll typically see a notification in the taskbar.
- Wait for the process to complete. Once done, the printer should appear in “Devices and Printers” or “Printers & Scanners” in your Windows settings.
- Using the Manufacturer’s Installation Disc:
- Insert the installation CD/DVD into your computer’s optical drive.
- The setup program should autorun. If not, open “This PC” or “My Computer,” locate the CD/DVD drive, and double-click the
setup.exeorinstall.exefile. - Follow the on-screen instructions. This often includes accepting terms, selecting connection type, and choosing desired software components.
- Downloading Drivers from the Manufacturer’s Website:
- This is generally the recommended method as it ensures you get the latest drivers, which can offer improved performance, new features, and critical security updates (a nod to digital security).
- Open your web browser and go to your printer manufacturer’s official support website (e.g., HP Support, Epson Support, Canon Support).
- Navigate to the “Support” or “Drivers & Downloads” section.
- Enter your printer’s model number or select it from a list.
- Make sure to select the correct operating system (e.g., Windows 11 64-bit).
- Download the full software package or the essential driver-only package. The full package often includes utility apps and additional features that can enhance productivity.
- Run the downloaded installer and follow the on-screen prompts.
- Manually Adding a Printer (Windows Settings):
- Go to
Start > Settings > Bluetooth & devices > Printers & scanners. - Click “Add a device.” Windows will search for available printers.
- If your printer is detected, select it and click “Add device.”
- If not detected, click “The printer that I want isn’t listed.” You’ll then have options to:
- “Add a Bluetooth, wireless or network discoverable printer.”
- “Add a printer using a TCP/IP address or hostname.”
- “Add a local printer or network printer with manual settings.”
- “Add a printer using an IP address” (useful for Ethernet connections).
- Follow the prompts, selecting the correct port and pointing to the downloaded driver files if necessary.
- Go to
macOS Installation Guide
macOS boasts a reputation for user-friendliness, and printer installation is typically a smooth experience thanks to robust built-in support for many printer models.
- Automatic Driver Installation (AirPrint & Software Update):
- For USB Printers: Connect the USB cable. macOS will usually detect the printer and prompt you to install drivers via Apple’s Software Update.
- For Network Printers (Wi-Fi/Ethernet): Ensure the printer is powered on and connected to the same network as your Mac. macOS, especially with AirPrint-compatible printers, often detects network printers automatically.
- Using “Printers & Scanners” System Settings:
- Go to
Apple menu > System Settings(orSystem Preferenceson older macOS versions). - Click on “Printers & Scanners.”
- Click the
+(plus) button at the bottom of the list of printers. - Default Tab: For most network or USB printers, they will appear in the “Default” tab. Select your printer from the list.
- Use Dropdown: In the “Use” dropdown menu, macOS will usually auto-select the correct driver (e.g., “AirPrint” or the specific manufacturer’s driver). If it doesn’t, you might need to manually select a driver if you’ve downloaded it, or choose “Generic PCL Laser Printer” or “Generic PostScript Printer” if a specific driver isn’t available.
- Click “Add.”
- Go to
- Downloading Drivers from the Manufacturer’s Website:
- Similar to Windows, this is the best way to get the latest macOS-specific drivers and utility software.
- Visit your printer manufacturer’s support site.
- Find your printer model and select your macOS version.
- Download the recommended driver package or full software suite.
- Run the installer and follow the on-screen instructions. Some macOS installers might guide you through connecting the printer to your Wi-Fi network as part of the setup.
Post-Installation and Troubleshooting Common Issues
Successfully installing your printer is a significant step, but ensuring it works consistently and addressing any hiccups is equally important for maintaining productivity and maximizing your investment. This section focuses on verifying the installation and providing solutions to common problems.
Testing Your Printer
After installation, it’s crucial to perform a test print to confirm everything is working as it should.
- Print a Test Page:
- Windows: Go to
Settings > Bluetooth & devices > Printers & scanners, select your printer, click “Printer properties,” then in the “General” tab, click “Print Test Page.” - macOS: Go to
System Settings > Printers & Scanners, select your printer, click “Printer Queue…”, then in the menu bar,Printer > Print Test Page. - Alternatively, open any document (e.g., Word, Notepad, TextEdit) and choose
File > Print. Select your newly installed printer from the list and print a simple page.
- Windows: Go to
- Check Printer Status: Verify that the printer’s status light is green (or steady blue for Wi-Fi), indicating it’s ready. Check the printer’s display for any error messages.
Troubleshooting Common Printer Issues
Even with careful installation, printers can sometimes be temperamental. Here are solutions to frequently encountered problems, helping you restore functionality quickly.
- “Printer is Offline” Error:
- Check Power and Cables: Ensure the printer is turned on and all cables (power, USB, Ethernet) are securely connected.
- Wi-Fi Connection: For wireless printers, check that it’s connected to the correct Wi-Fi network and that the Wi-Fi signal is strong. Restart your router and printer.
- Printer Status (Windows): In
Printers & scanners, select your printer, click “Printer properties,” then in the “Ports” tab, ensure the correct port is selected (e.g., USB port for USB, TCP/IP port for network). Also, check in the “General” tab if “Use Printer Offline” is unchecked. - Restart Everything: Sometimes, simply restarting your computer, printer, and router in sequence can resolve temporary communication glitches.
- Printing is Extremely Slow or Not Responding:
- Check Print Queue: Open the print queue (click the printer icon in the taskbar or access via
Printers & Scanners) and cancel any stuck print jobs. Restart the printer. - Driver Issues: Ensure you have the latest drivers installed. Outdated or corrupted drivers can cause performance problems.
- Network Congestion: For wireless printers, a congested Wi-Fi network can slow down print jobs.
- Printer Resources: The printer might be low on ink/toner or experiencing a minor hardware issue.
- Check Print Queue: Open the print queue (click the printer icon in the taskbar or access via
- Poor Print Quality (Streaks, Fading, Incorrect Colors):
- Ink/Toner Levels: Check ink or toner levels. Low cartridges are a common cause of poor quality.
- Print Head Cleaning/Alignment: Most printers have a utility function to clean print heads or align cartridges. Consult your printer’s manual or software utility.
- Paper Type: Ensure you’re using the correct paper type for your print settings.
- Cartridge Installation: Reinstall cartridges to ensure they are seated correctly.
- “Driver Not Found” or “Unable to Install Driver”:
- Download Latest Drivers: Always try downloading the latest drivers directly from the manufacturer’s website.
- Compatibility: Double-check that you downloaded the driver specific to your printer model and operating system version (e.g., Windows 64-bit).
- Antivirus/Firewall: Temporarily disable your antivirus or firewall during installation, as they can sometimes block driver installation. Re-enable them immediately afterward.
- Administrator Rights: Ensure you are logged in with administrator privileges on your computer.
Maintaining Your Printer for Optimal Performance and Longevity
Beyond the initial installation and troubleshooting, proactive maintenance is key to extending your printer’s lifespan, ensuring consistent print quality, and ultimately saving money on repairs and replacements. This aligns with themes of personal finance and investing in durable tech, recognizing that a well-maintained gadget is a valuable asset.
- Regular Cleaning: Dust is a printer’s enemy. Regularly wipe down the exterior with a soft, lint-free cloth. For inkjet printers, consider cleaning the print heads and nozzles using the printer’s built-in utility. For laser printers, be careful with internal components and consult the manual for recommended cleaning procedures.
- Firmware Updates: Printer manufacturers periodically release firmware updates to improve performance, add features, and address security vulnerabilities. Regularly check your manufacturer’s website for these updates and follow their instructions for installation (a crucial digital security practice).
- Use Quality Consumables: Investing in genuine or high-quality compatible ink/toner cartridges and appropriate paper stock can prevent clogs, jams, and poor print quality, which might otherwise lead to costly repairs. While third-party consumables can sometimes be cheaper upfront, they can cost more in the long run if they cause issues or damage your printer.
- Proper Shutdown: Instead of just pulling the plug, use the printer’s power button to turn it off. This allows the print head to park correctly (for inkjets) or other internal processes to complete, preventing drying out of ink and potential damage.
- Environmental Considerations: Keep your printer in a stable environment, away from direct sunlight, extreme temperatures, and excessive humidity. This protects internal components and ink integrity.
- Don’t Let It Sit Idle: For inkjet printers, occasional use (even just printing a test page once a week) can help prevent ink from drying out and clogging the print heads.
Conclusion: Your Printer, A Gateway to Productivity
Successfully installing your printer is more than just connecting a device; it’s about enabling a critical facet of your digital workflow and enhancing your overall productivity. Whether you opted for the simplicity of a USB connection, the flexibility of Wi-Fi, or the stability of Ethernet, mastering the installation process equips you with the confidence to handle future tech setups.
By adhering to a meticulous pre-installation checklist, understanding the nuances of different connection methods, and navigating operating system-specific driver installations, you’ve transformed a potentially daunting task into a straightforward one. Furthermore, recognizing the importance of post-installation testing and proactive maintenance ensures your printer remains a reliable workhorse, contributing to both your personal and professional endeavors for years to come. In an era where technology constantly evolves, a well-integrated printer is not just a gadget, but a strategic tool that bridges the digital and physical, proving its enduring value in our tech-driven lives.
aViewFromTheCave is a participant in the Amazon Services LLC Associates Program, an affiliate advertising program designed to provide a means for sites to earn advertising fees by advertising and linking to Amazon.com. Amazon, the Amazon logo, AmazonSupply, and the AmazonSupply logo are trademarks of Amazon.com, Inc. or its affiliates. As an Amazon Associate we earn affiliate commissions from qualifying purchases.