In an increasingly interconnected digital world, the lines between operating systems often blur, driven by user needs for specific software, gaming capabilities, or simply a preferred user interface. For many Apple MacBook owners, the allure of macOS is undeniable, offering a seamless user experience, robust security, and a beautifully designed ecosystem. Yet, there are times when the powerful hardware of a MacBook could benefit from the versatility and broader software compatibility that Windows provides. Perhaps you need to run a critical Windows-only application for work, enjoy the vast library of PC games, or develop software across different platforms. Whatever the reason, installing Windows on your MacBook is not only possible but also a relatively straightforward process, transforming your sleek Apple machine into a dual-boot powerhouse.
This comprehensive guide will walk you through the various methods, necessary preparations, and step-by-step instructions to successfully bring the world of Windows to your MacBook. We’ll explore both Apple’s native Boot Camp solution and popular virtualization software options, helping you decide which approach best suits your individual needs and technical comfort level. By the end, you’ll have the knowledge and confidence to unlock the full potential of your MacBook, bridging the divide between two of the most popular operating systems in the world.
Why Bridge the Divide? The Appeal of Windows on Your Mac
While macOS excels in many areas, there are compelling reasons why a MacBook user might consider installing Windows. Understanding these motivations can help you choose the most appropriate installation method.
Unlocking Software Compatibility: Professional Tools and Niche Applications
One of the primary drivers for installing Windows on a Mac is software compatibility. Despite macOS’s robust application ecosystem, a significant number of professional-grade tools, specialized engineering software, legacy applications, and niche industry-specific programs are still exclusively designed for Windows. For architects, engineers, graphic designers working with specific CAD or rendering software, or even students needing particular educational tools, having access to Windows ensures they aren’t limited by their operating system choice. Instead of investing in a separate Windows machine, their MacBook can serve dual duty, providing the best of both worlds.
Gaming and Entertainment: Broader Library, Enhanced Performance
PC gaming has a vast and vibrant community, with an enormous library of titles, many of which are either Windows-exclusive or perform optimally on Windows. While macOS gaming has seen improvements, it still lags behind Windows in terms of sheer game availability and optimization for high-performance graphics. Installing Windows on your MacBook, especially via Boot Camp, allows you to tap into this extensive gaming library, often with better frame rates and compatibility with the latest graphics technologies than running games through compatibility layers on macOS. For gamers, this means transforming their MacBook into a formidable gaming rig when desired.
Development and Testing: Cross-Platform Environments
For software developers and IT professionals, the ability to run both macOS and Windows on a single machine is invaluable. It facilitates cross-platform development, allowing for testing applications in both environments without needing multiple physical devices. This setup is particularly useful for web developers, mobile app developers, and system administrators who need to ensure their solutions function correctly across different operating systems. Virtual machines, in particular, shine in this scenario, offering isolated environments for testing and development.
Personal Preference and Familiarity: Easing Transitions
Sometimes, the reason is as simple as personal preference or familiarity. Users transitioning from a long history with Windows might find certain aspects of macOS challenging to adapt to initially. Having Windows available can ease this transition, providing a comfortable and familiar environment for specific tasks while they gradually familiarize themselves with macOS. Similarly, businesses or educational institutions that heavily rely on Windows-based infrastructure might require their employees or students to use Windows for certain tasks, making a dual-boot MacBook a practical solution.
Essential Prerequisites and Preparations
Before embarking on the installation process, thorough preparation is key to a smooth and successful outcome. Skipping these crucial steps can lead to data loss or installation failures.
System Requirements and Compatibility: Knowing Your Mac
Not all MacBooks are created equal, and compatibility varies based on the model year and processor type.
- Intel-based MacBooks (2012-2020): These models typically support Boot Camp Assistant and various virtualization solutions, allowing you to install Windows 10 or 11. Boot Camp is the most straightforward and officially supported method for these machines.
- Apple Silicon MacBooks (M1, M2, M3 chips – 2020 and later): Boot Camp Assistant is not available for these models. Installing Windows on an Apple Silicon Mac requires virtualization software (like Parallels Desktop or VMware Fusion) and a specific ARM-based version of Windows 11 (Windows on ARM). This is a more complex setup, and performance may vary compared to native Intel installations.
Always ensure your macOS is updated to the latest version for optimal compatibility and security.
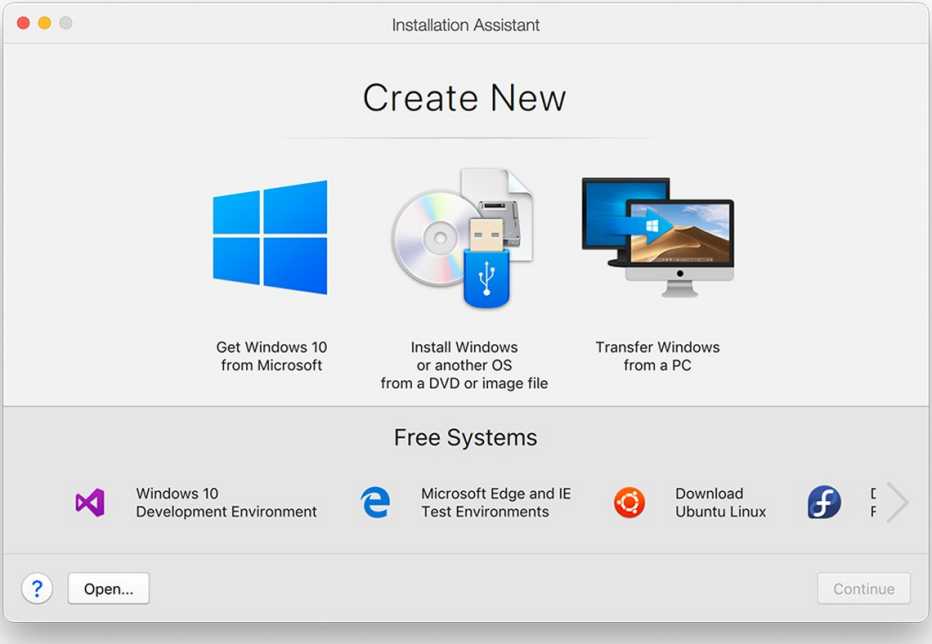
Acquiring Windows: ISO File and Product Key
You will need a legitimate copy of Windows.
- Windows ISO File: Download the official Windows 10 or Windows 11 ISO file directly from Microsoft’s website. This file contains the installation media for the operating system. Ensure you download the correct architecture (64-bit for Intel Macs; ARM-based for Apple Silicon Macs with virtualization).
- Windows Product Key: You’ll need a valid product key to activate Windows. While you can install Windows without immediate activation, many features will be restricted until activated. You can purchase a key directly from Microsoft or an authorized retailer.
Storage Considerations: Planning Your Partitions
Windows requires a significant amount of disk space.
- Minimum for Boot Camp: Apple recommends at least 64GB, but 128GB or more is highly recommended, especially if you plan to install applications and games. More space will ensure better performance and longevity.
- Minimum for Virtual Machines: At least 60GB for the virtual disk file is advisable, in addition to the space required for the VM software itself. The VM software usually allows dynamic allocation, meaning it only uses space as needed, up to a set maximum.
- Free Space on Mac: Ensure you have enough free space on your MacBook’s primary drive before you start partitioning or creating a VM. A cluttered drive can hinder performance and prevent proper installation.
Backup Your Mac: A Crucial Safety Net
Before making any significant changes to your disk partitions or system, always back up your MacBook. Use Time Machine, iCloud, or a third-party backup solution to create a complete backup of your macOS data. While the installation process is generally safe, unexpected issues can occur, and having a recent backup ensures you won’t lose your precious files.
Power Supply and Internet: Stable Environment
Ensure your MacBook is connected to its power adapter throughout the entire installation process. Running out of battery mid-installation can lead to corrupted data or an unusable system. A stable internet connection is also crucial for downloading the Windows ISO, necessary drivers, and any updates.
Choosing Your Path: Boot Camp vs. Virtual Machine
The method you choose to install Windows on your MacBook largely depends on your specific needs, your Mac’s processor, and your performance expectations. Each approach has its distinct advantages and disadvantages.
Boot Camp Assistant: Native Performance for Windows (Intel Macs Only)
Boot Camp Assistant is Apple’s built-in utility that allows Intel-based Macs to dual-boot Windows. When you use Boot Camp, Windows is installed directly onto a separate partition of your Mac’s hard drive, allowing it to run natively.
- Pros:
- Native Performance: Windows runs directly on your Mac’s hardware, offering the best possible performance for demanding applications and games. Your Mac’s CPU, GPU, and RAM are fully dedicated to Windows when it’s running.
- Full Hardware Access: All hardware components, including dedicated graphics cards, are fully accessible and optimized for Windows.
- Free: Boot Camp Assistant is a free utility included with macOS.
- Cons:
- Requires Rebooting: To switch between macOS and Windows, you must restart your MacBook. You cannot run both operating systems simultaneously.
- Dedicated Disk Space: Windows requires a fixed partition of your hard drive, which cannot be dynamically adjusted without reinstalling. This space is effectively “lost” to macOS when you’re not using Windows.
- Intel Macs Only: Not available for Apple Silicon (M-chip) MacBooks.
Virtual Machine Software (Parallels Desktop, VMware Fusion, UTM/VirtualBox): Running Windows Concurrently
Virtualization software allows you to run Windows as a “guest” operating system within macOS. The virtual machine (VM) creates a simulated hardware environment, enabling Windows to operate in a window on your macOS desktop, side-by-side with your Mac applications.
- Pros:
- Concurrent Operation: You can run macOS and Windows simultaneously, easily switching between them without rebooting.
- Isolation and Safety: The VM environment is isolated from your macOS, meaning any issues within Windows are less likely to affect your main operating system.
- Portability: Virtual machines can be easily backed up, moved, or even run on other machines.
- Apple Silicon Support: Parallels Desktop and VMware Fusion support Windows on ARM for M-chip MacBooks.
- Cons:
- Performance Overhead: Since both OS’s are running concurrently, performance for intensive tasks (like gaming or heavy video editing) within the VM will be lower than with Boot Camp, as resources are shared.
- Resource Demanding: Requires sufficient RAM and CPU power on your Mac to run both operating systems smoothly.
- Cost: Most high-performance VM software (Parallels Desktop, VMware Fusion) is paid. Free options like VirtualBox exist but might offer less seamless integration or advanced features.
Deciding the Best Fit for Your Needs
- Choose Boot Camp if: You have an Intel Mac, prioritize maximum Windows performance (especially for gaming or demanding software), and don’t mind rebooting to switch OS.
- Choose Virtual Machine if: You have an Apple Silicon Mac, need to run both OS concurrently, require easy switching, prioritize isolation and portability, and performance for Windows isn’t the absolute highest priority (e.g., for light productivity, web browsing, or testing).
Step-by-Step Installation Guide: Boot Camp Method (Intel MacBooks)
This section details the process for Intel-based MacBooks using Apple’s official Boot Camp Assistant.
Using Boot Camp Assistant: The macOS Utility
- Open Boot Camp Assistant: Navigate to
Applications > Utilities > Boot Camp Assistant. - Introduction and Requirements: Read the introduction. Boot Camp Assistant will then prepare your system, checking for necessary updates and compatibility.
- Partition Your Drive: The assistant will ask you to specify the size of the Windows partition. Drag the divider to allocate the desired amount of space for Windows. Remember, 128GB or more is recommended. Once set, click
Install. - Insert Windows ISO/USB: Boot Camp Assistant will prompt you to select the Windows ISO file you downloaded earlier. If you’re using an older Mac that requires a bootable USB, it might ask you to create one. For newer Macs, it often integrates the ISO directly.
- Download Windows Support Software: Boot Camp Assistant will download necessary drivers and support software from Apple, which are crucial for Windows to properly recognize your Mac’s hardware (Wi-Fi, trackpad, keyboard, graphics, etc.). This step requires an internet connection and may take some time.
- Start the Windows Installer: Once the support software is downloaded and your disk is partitioned, your Mac will restart and boot into the Windows installer.
Navigating the Windows Installation Process
- Language and Keyboard: Follow the on-screen prompts to select your language, time and currency format, and keyboard layout.
- Product Key: Enter your Windows product key when prompted. You can often skip this step and enter it later, but full functionality requires activation.
- Choose Installation Type: Select
Custom: Install Windows only (advanced). - Select BOOTCAMP Partition: You will see a list of partitions. Carefully select the partition labeled “BOOTCAMP” or “BOOTCAMP (Primary).” It’s crucial not to select any other partition, as this could erase your macOS installation.
- Format the Partition: With the BOOTCAMP partition selected, click
Format. This will prepare the partition for Windows. - Begin Installation: Click
Nextto start the Windows installation. Your Mac will restart multiple times during this process. - Initial Windows Setup: Once Windows is installed, you’ll go through the standard Windows setup: connect to Wi-Fi, create a user account, set privacy settings, and so on.
Post-Installation: Installing Apple Drivers
After Windows has loaded to the desktop:
- Install Boot Camp Drivers: A Boot Camp installer should automatically launch. If it doesn’t, navigate to the USB drive you created (or the mounted ISO) and locate the “Boot Camp” folder, then run
setup.exe. This installer will install all the necessary Apple drivers for your Mac’s hardware to function correctly in Windows. This includes drivers for your keyboard, trackpad, Wi-Fi, Bluetooth, sound, and graphics. - Restart: After the drivers are installed, Windows will likely prompt you to restart.
- Check for Updates: Once restarted, open Windows Update and install any pending updates for Windows and its drivers.
- Switching Between OS: To switch back to macOS, restart your MacBook and hold down the
Option(Alt) key immediately after the startup chime (or when the screen goes black during a restart). This will bring up the Startup Manager, where you can select between your macOS and Windows partitions. You can also set a default startup disk in Windows (via the Boot Camp Control Panel) or macOS (via System Settings/Preferences > Startup Disk).
Step-by-Step Installation Guide: Virtual Machine Method (General Approach)
This method applies to both Intel and Apple Silicon Macs and offers the flexibility of running Windows alongside macOS.
Selecting and Installing VM Software
- Choose Your Software:
- Parallels Desktop: Excellent performance, seamless integration with macOS, supports Windows on ARM for Apple Silicon. (Paid)
- VMware Fusion: Robust, great for IT professionals, also supports Windows on ARM for Apple Silicon. (Paid, with a free personal use license available for some versions).
- VirtualBox: Free and open-source, less integrated than paid options, but a viable choice for basic needs. (Supports Intel Macs and some experimental ARM versions).
- UTM: Free, open-source virtualization software that supports ARM virtual machines on Apple Silicon Macs.
- Download and Install: Download the installer for your chosen VM software and follow its instructions to install it on your macOS.
Creating a New Virtual Machine
- Launch VM Software: Open your chosen virtualization application.
- Create New VM: Look for an option like “Create New Virtual Machine” or “New.”
- Select OS and ISO: The wizard will guide you to select the operating system you want to install (Windows 10/11) and point to your downloaded Windows ISO file. For Apple Silicon Macs, ensure you have the Windows on ARM ISO.
- Allocate Resources: This is crucial for performance.
- RAM: Allocate at least 4GB of RAM (8GB+ recommended for better performance) to the VM. Do not allocate more than half of your Mac’s total RAM.
- CPU Cores: Allocate 2-4 CPU cores, again, not exceeding half of your Mac’s physical cores.
- Hard Disk Space: Allocate at least 60GB for the virtual hard disk. Most VM software uses “dynamically expanding” disks, meaning the virtual disk file grows as you use it, up to the maximum size you set.
- Configure Networking: Choose “Bridged” or “NAT” networking. NAT is usually simpler and works well for most users.
Installing Windows Within the VM
- Start the VM: Power on the newly created virtual machine. It will boot from the Windows ISO, just like a physical computer.
- Standard Windows Installation: Follow the standard Windows installation steps as outlined in the “Navigating the Windows Installation Process” section for Boot Camp (selecting language, entering product key, custom installation). The difference here is that you’ll be installing Windows into the virtual hard disk you created within the VM software, not a physical partition.
- Install “Guest Additions” or “Tools”: Once Windows is installed and booted to the desktop, the VM software will prompt you to install its “Guest Additions” (VirtualBox), “Parallels Tools” (Parallels), or “VMware Tools” (VMware Fusion). These are crucial drivers and utilities that enhance performance, enable features like seamless mouse integration, shared clipboards, shared folders, and dynamic screen resolution.
- Restart: Restart the virtual machine after installing the tools.
Configuration and Optimization
- Shared Folders: Set up shared folders between macOS and your Windows VM to easily transfer files.
- Drag-and-Drop/Copy-Paste: These features are typically enabled by guest tools, allowing seamless interaction.
- Display Settings: Adjust the display resolution for optimal viewing within the VM window or in fullscreen mode.
- Snapshots: Most VM software allows you to take snapshots of your VM, which are essentially save points you can revert to if something goes wrong. This is incredibly useful for testing.
Conclusion: Unlocking Dual-OS Potential
Installing Windows on your MacBook, whether through Boot Camp or a virtual machine, transforms your powerful Apple hardware into a versatile and adaptable computing platform. You gain the flexibility to run Windows-exclusive software, enjoy a broader range of games, and facilitate cross-platform development, all while retaining the elegant user experience of macOS.
Remember, preparation is paramount. Always back up your data, ensure you have a legitimate Windows license, and understand the specific requirements for your MacBook model. Whether you opt for the raw performance of Boot Camp or the concurrent convenience of virtualization, the effort invested will open up a world of possibilities, empowering you with choice and maximizing the utility of your investment in a MacBook. Embrace the dual-OS lifestyle and enjoy the best of both worlds.
aViewFromTheCave is a participant in the Amazon Services LLC Associates Program, an affiliate advertising program designed to provide a means for sites to earn advertising fees by advertising and linking to Amazon.com. Amazon, the Amazon logo, AmazonSupply, and the AmazonSupply logo are trademarks of Amazon.com, Inc. or its affiliates. As an Amazon Associate we earn affiliate commissions from qualifying purchases.