
The process of installing an operating system is a foundational skill for any tech enthusiast or professional. While modern computers have largely transitioned to UEFI (Unified Extensible Firmware Interface), millions of legacy systems and specific hardware configurations still rely on the traditional BIOS (Basic Input/Output System). Understanding how to install Windows on a BIOS-based system is essential for reviving older hardware, managing specific server environments, or troubleshooting systems that do not support modern firmware standards.
In this comprehensive guide, we will walk you through the entire process—from preparing your installation media to configuring your hardware settings—ensuring a smooth and successful Windows installation.
Essential Preparation and System Requirements
Before you begin the installation process, it is vital to ensure that your hardware is capable of running the version of Windows you intend to install. Whether you are installing Windows 10 or an older version like Windows 7 (for legacy compatibility), the preparation phase determines the success of the project.
1. Check Hardware Compatibility
Modern versions of Windows have specific requirements. For a BIOS-based installation, you generally need:
- Processor: 1 GHz or faster compatible processor.
- RAM: 1 GB for 32-bit or 2 GB for 64-bit.
- Hard Drive Space: At least 16 GB for 32-bit or 20 GB for 64-bit.
- Graphics Card: DirectX 9 or later with WDDM 1.0 driver.
2. Back Up Your Data
Installing a new operating system usually involves formatting the primary partition of your hard drive. This means all existing data on that partition will be erased. Ensure you have backed up your documents, photos, and critical files to an external hard drive or cloud storage before proceeding.
3. Identify Your Firmware Type
Confirm that your motherboard actually uses a Legacy BIOS or has a “Legacy/CSM” (Compatibility Support Module) mode. If your motherboard is strictly UEFI and does not offer a Legacy mode, the steps for a BIOS installation will not work, as BIOS requires an MBR (Master Boot Record) partition scheme, whereas UEFI requires GPT (GUID Partition Table).
Creating Bootable Media for Legacy BIOS
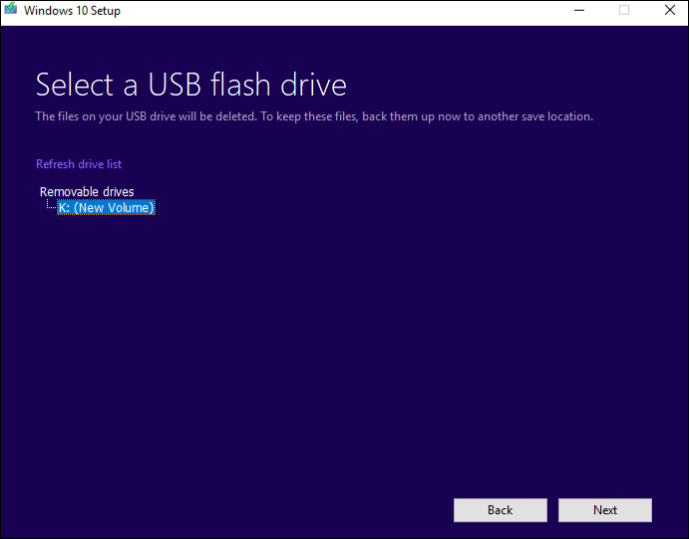
To install Windows, you need a bootable USB flash drive or a DVD. For BIOS systems, the way you create this media is critical because the bootloader must be configured for the MBR partition style.
Using the Windows Media Creation Tool
Microsoft provides an official tool for Windows 10 and 11. While this tool often defaults to UEFI/GPT, it can create a dual-boot media that works with BIOS. However, for older BIOS systems, a third-party tool is often more reliable.
Using Rufus for Precise BIOS Configuration
Rufus is the industry-standard tool for creating bootable USB drives. To ensure it works with a Legacy BIOS:
- Download the Windows ISO: Obtain the official ISO file for the Windows version you wish to install.
- Select the Device: Insert a USB drive (8GB or larger) and select it in Rufus.
- Partition Scheme: This is the most important step. Select “MBR” from the dropdown menu.
- Target System: Select “BIOS (or UEFI-CSM).”
- File System: Usually, NTFS is the standard for Windows installation media on BIOS systems.
- Start: Click start to format the drive and write the ISO files.
By selecting MBR, you ensure that the legacy BIOS can recognize the bootloader on the USB drive.
Configuring BIOS Settings for Installation
Once your bootable media is ready, you must instruct your computer to boot from the USB drive rather than the internal hard drive. This requires entering the BIOS setup utility.
1. Accessing the BIOS
Restart your computer. As it begins to power on, you will need to press a specific key repeatedly. Common keys include F2, F10, F12, or Delete. The exact key depends on your motherboard manufacturer (e.g., Dell usually uses F2 or F12, while HP uses F10 or Esc).
2. Adjusting the Boot Priority
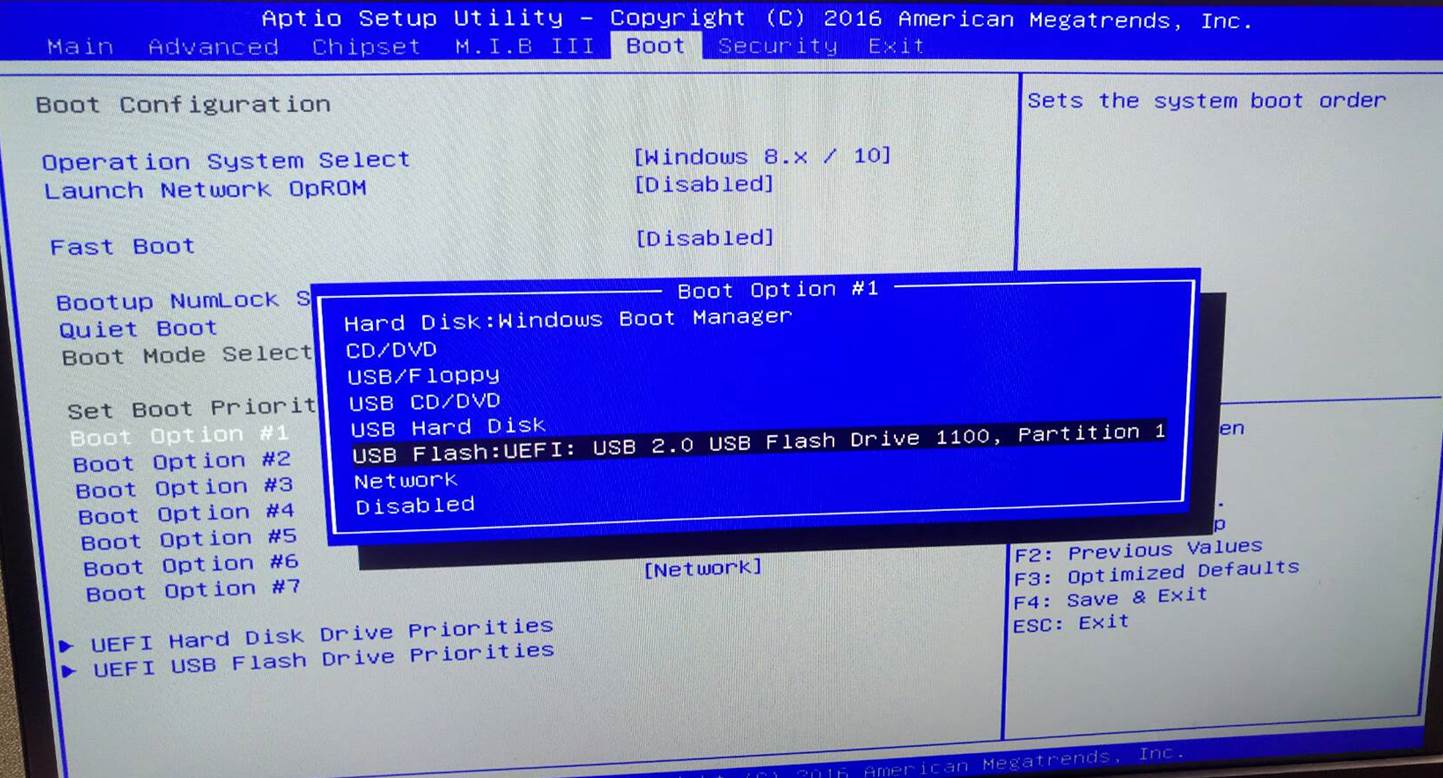
Navigate to the “Boot” or “System Configuration” tab using your keyboard. Look for the “Boot Order” or “Boot Priority” list. Move your USB Flash Drive (sometimes listed as “USB HDD” or “Removable Device”) to the top of the list.
3. Enabling Legacy Support (CSM)
If you are using a newer machine that supports both UEFI and BIOS, look for a setting called “CSM” (Compatibility Support Module) or “Legacy Support.” Ensure this is set to “Enabled.” Additionally, disable “Secure Boot,” as this feature is designed for UEFI and will often prevent a BIOS-style installation from initiating.
4. Save and Exit
Once the changes are made, navigate to the “Exit” tab and select “Save Changes and Reset.” Your computer will now restart and attempt to boot from the USB drive.
The Windows Installation Process
If you have configured everything correctly, the screen will display “Press any key to boot from USB…” Press a key, and the Windows Setup environment will load.
Step 1: Language and Region Selection
The first screen will ask you to select your language, time and currency format, and keyboard method. Choose your preferences and click Next, then click Install Now.
Step 2: Product Key
You will be asked to enter a product key. If you are reinstalling Windows on a machine that was previously activated, you can click “I don’t have a product key,” and Windows will usually activate automatically via a digital license once you connect to the internet.
Step 3: Installation Type
You will be presented with two options: “Upgrade” and “Custom.”
- For a clean BIOS installation, always choose “Custom: Install Windows only (advanced).” This gives you full control over your hard drive partitions.
Step 4: Partitioning the Drive
This is where many users run into issues. On a BIOS system, your hard drive must use the MBR partition table.
- If the drive is currently empty, select the unallocated space and click “New” to create a partition.
- If you see an error saying “Windows cannot be installed to this disk. The selected disk is of the GPT partition style,” you will need to delete all existing partitions on the drive until it shows as “Unallocated Space.” (Warning: This erases all data on the disk).
- Once the drive is unallocated, click Next. Windows will automatically initialize the disk as MBR and create the necessary system partitions.
Step 5: Finalizing the Installation
Windows will now begin copying files, getting files ready for installation, installing features, and installing updates. This process may take anywhere from 10 minutes to an hour depending on your hardware speed. The computer will restart several times. Do not press any keys during these restarts; let the system boot from the internal hard drive to complete the setup.
Post-Installation: Drivers and Optimization
Once the installation reaches the desktop, your work isn’t quite finished. To ensure the system runs efficiently on legacy hardware, a few final steps are required.
1. Windows Update
The first thing you should do is connect to the internet and run Windows Update. This will download essential security patches and, more importantly, generic drivers for your hardware components.
2. Installing Manufacturer Drivers
BIOS-based systems are often older, meaning Windows Update might not find all the necessary drivers. Visit the manufacturer’s website (e.g., Lenovo, ASUS, Gigabyte) and download the latest drivers for:
- Chipset: Essential for communication between the CPU and other hardware.
- Display Adapter: To ensure correct resolution and GPU performance.
- Audio and LAN/Wi-Fi: To ensure connectivity and sound.
3. Verifying the Boot Mode
To confirm that you have successfully installed Windows in BIOS mode, press Windows Key + R, type msinfo32, and press Enter. In the System Summary, look for “BIOS Mode.” It should say “Legacy.” If it says “UEFI,” then the installation was performed using the modern firmware standard instead.
Troubleshooting Common BIOS Installation Issues
Despite following the steps, you may encounter obstacles. Here are the most common issues and how to fix them.
- “No Bootable Device Found”: This usually means the BIOS did not recognize the USB drive. Re-check the boot order and ensure the USB was created using the MBR partition scheme in Rufus.
- Stuck at the Windows Logo: This can indicate a hardware incompatibility or a corrupted installation file. Try recreating the bootable USB or checking your RAM for errors.
- Disk Cannot be Installed (GPT Error): As mentioned earlier, BIOS requires MBR. You must use the “Delete” function in the Windows Setup partition screen to remove the GPT partitions from the drive before Windows can create the MBR structure.
- Missing Drivers During Setup: If the installation asks for a driver before it even shows the hard drive, you may be using a RAID configuration or a modern NVMe drive on an old BIOS. You will need to load the “SATA/RAID” driver onto a separate USB and click “Load Driver” during the partition stage.

Conclusion
Installing Windows on a BIOS-based system is a straightforward process once you understand the relationship between MBR partitioning and legacy firmware. While UEFI is the modern standard, mastering the BIOS installation method ensures you can maintain and revive a vast array of hardware. By carefully preparing your bootable media with Rufus, configuring your BIOS settings correctly, and managing your partitions, you can provide a fresh lease on life to older computers, ensuring they remain productive and secure for years to come.
aViewFromTheCave is a participant in the Amazon Services LLC Associates Program, an affiliate advertising program designed to provide a means for sites to earn advertising fees by advertising and linking to Amazon.com. Amazon, the Amazon logo, AmazonSupply, and the AmazonSupply logo are trademarks of Amazon.com, Inc. or its affiliates. As an Amazon Associate we earn affiliate commissions from qualifying purchases.