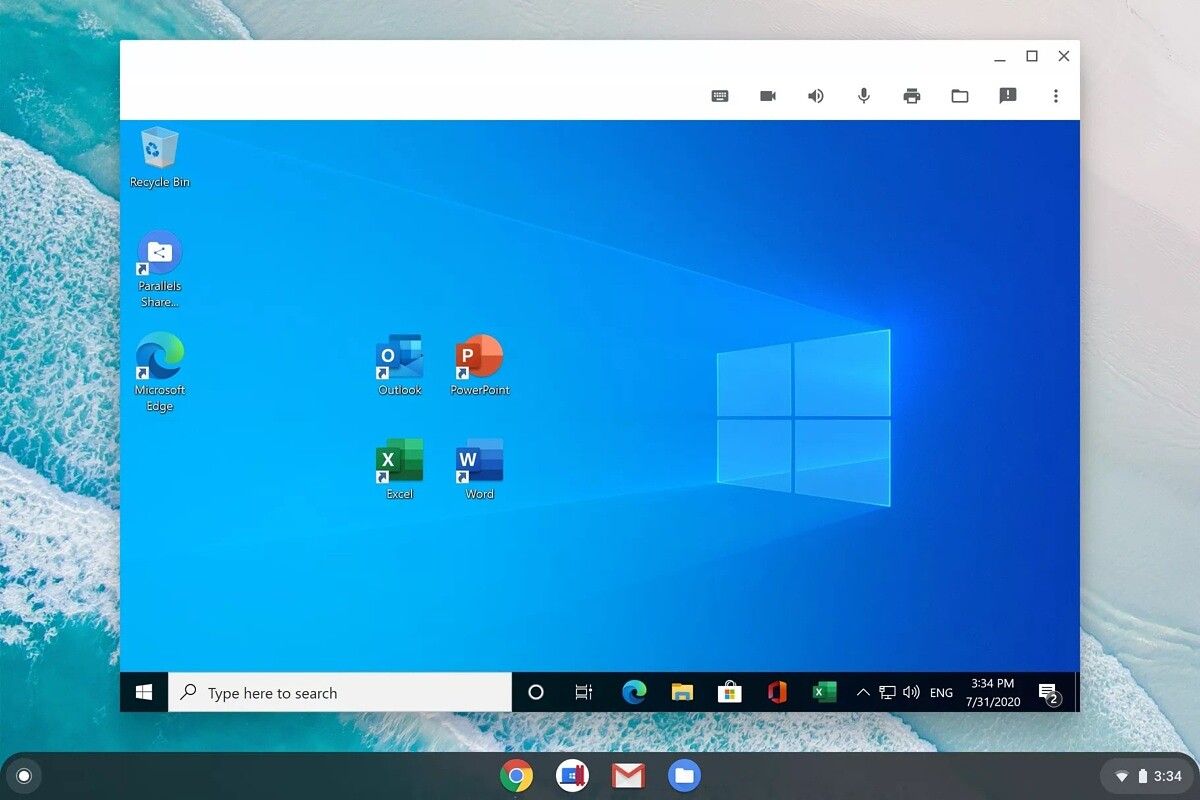
The Chromebook has long been celebrated for its simplicity, speed, and security. Designed primarily as a portal to the Google ecosystem, ChromeOS is an efficient operating system for web-based tasks. However, for many power users, the limitations of ChromeOS can be a significant hurdle. Whether it is the need for the full desktop version of Microsoft Office, specialized creative software like the Adobe Creative Suite, or even native PC gaming, there are moments when the “browser-first” approach simply isn’t enough.
For those who possess a high-quality Chromebook but require the versatility of a Windows environment, the question arises: is it possible to bridge the gap? The answer is a resounding yes, though the process is far more involved than a standard software update. This technical guide provides a deep dive into the methodology, risks, and post-installation optimization required to successfully install Windows on a Chromebook.

Understanding the Architecture: Why Windows Isn’t Native to ChromeOS
Before diving into the “how,” it is crucial to understand the “why” regarding the complexity of this task. Chromebooks are built with a specific firmware architecture designed to boot ChromeOS quickly and securely. Unlike a standard PC, which uses a traditional BIOS (Basic Input/Output System) or UEFI (Unified Extensible Firmware Interface), Chromebooks use a specialized bootloader known as Coreboot.
The BIOS vs. UEFI Bridge
Standard Windows installations require a UEFI environment to communicate with the hardware during the boot process. Because Chromebooks lack a traditional UEFI, you cannot simply plug in a Windows USB drive and expect it to run. To install Windows, we must replace the existing Google-signed firmware with a custom UEFI firmware. This process effectively “tricks” the hardware into behaving like a standard laptop, allowing it to recognize and execute non-ChromeOS bootloaders.
Hardware Limitations and CPU Architectures
Not all Chromebooks are created equal. The success of a Windows installation depends heavily on the processor architecture. Windows is designed primarily for x86 processors (Intel and AMD). If your Chromebook runs on an ARM-based processor (such as those from MediaTek, Rockchip, or Qualcomm), installing a standard version of Windows is currently impractical and often impossible. This guide focuses on Intel and AMD-based Chromebooks, which offer the most reliable path to a functional Windows environment.
Pre-Installation: Risks, Backups, and Developer Mode
Modifying a device at the firmware level is a high-stakes endeavor. Before proceeding, you must acknowledge that this process involves significant risks, including the potential to “brick” your device (making it permanently unbootable) and the certain voiding of your manufacturer’s warranty.
Assessing the Risks of Firmware Modification
When you overwrite the factory firmware, you are removing the safety nets provided by Google. Features like Verified Boot will be disabled. Additionally, hardware compatibility is not guaranteed. While the operating system may install, specific components like the internal speakers, microphone, or trackpad may require third-party drivers that are not always available for every Chromebook model.
Enabling Developer Mode
The first technical step is transitioning your device into Developer Mode. This is not the same as a standard powerwash. It is a state that allows for deeper access to the system’s underlying Linux kernel and shell.
- Turn off your Chromebook.
- Press and hold the Esc + Refresh (F3) keys, then press the Power button.
- When the Recovery screen appears, press Ctrl + D.
- Confirm the prompt to enter Developer Mode. The system will wipe all local data and take approximately 10–15 minutes to reconfigure.
Disabling Hardware Write Protection
To flash new firmware, you must bypass the hardware write protection. In older Chromebook models, this involved physically removing a specific “Write Protect Screw” from the motherboard. In newer models (roughly 2017 and later), Google utilizes a protocol called CR50. To disable write protection on these newer devices, you typically need to disconnect the internal battery and run the device via the power adapter during the firmware flash, or use a specialized CCD (ChromeOS Case Closed Debugging) cable.
The Core Modification: Flashing Custom UEFI Firmware
Once the hardware is prepared and Developer Mode is active, the next phase is the firmware replacement. This is the most critical stage of the installation.
Utilizing the MrChromebox Firmware Utility
The community standard for this process is the Firmware Utility Script created by the developer known as MrChromebox. This script automates the complex task of downloading and installing the correct UEFI for your specific hardware.
- Boot into ChromeOS and set up a basic guest profile.
- Open a terminal (Ctrl+Alt+T) and type
shellto enter the command line. - Execute the script command provided on the official MrChromebox.tech website.
- Select the option for “Install/Update UEFI (Full ROM) Firmware.”
- Follow the prompts to back up your original firmware to an external USB drive. Do not skip this step. This backup is your only lifeline if you ever want to return the device to ChromeOS.
Creating a Windows 10/11 Installation Media
While the firmware is flashing, you should prepare your bootable media using a separate Windows PC. Use the official Microsoft Media Creation Tool to download the ISO for Windows 10 or 11. It is recommended to use a high-speed USB 3.0 drive with at least 16GB of capacity. Because Chromebook storage is often limited (32GB or 64GB on budget models), consider using a “Lite” version of the Windows ISO if you are concerned about disk space.
The Windows Installation Walkthrough
With the custom UEFI firmware successfully flashed, your Chromebook is no longer a “Chromebook” in the eyes of the software—it is a generic PC.
Booting from USB
- Insert your Windows installation USB into the Chromebook.
- Power on the device. You should now see a custom boot logo (usually a rabbit or a Coreboot logo) rather than the standard “OS Verification is Off” screen.
- Press the appropriate key (usually Esc or F2) to enter the boot menu.
- Select your USB drive as the primary boot device.
Navigating the Setup and Partitioning
The Windows Setup environment will load. From here, the process mirrors a standard PC installation:
- Language and Keyboard: Select your preferences.
- Activation: Click “I don’t have a product key” to proceed to the installation (you can activate it later).
- Custom Installation: You must choose “Custom: Install Windows only (advanced).”
- Drive Partitioning: You will see several partitions created by ChromeOS. To ensure a clean installation, delete every single partition until you have one block of “Unallocated Space.” Select this space and click “Next.”
Windows will begin copying files and expanding the installation. The device will restart several times. During these restarts, ensure you do not boot back into the USB drive; allow the system to boot from the internal storage.
Post-Installation: Bridging the Driver Gap
Installing Windows is only half the battle. Because Chromebook hardware is highly specialized, Windows will likely lack the drivers for your keyboard, trackpad, touchscreen, and audio components upon the first boot.
The Challenge of Specialized Hardware
Windows Update will catch many basic drivers, such as the GPU and Wi-Fi, but it will almost certainly fail to recognize the Chromebook’s custom I2C and SMBus controllers. This often results in a non-functional trackpad and silent speakers.
Finding Community Drivers
This is where the developer community is indispensable. Projects like CoolStar and Chrultrabook provide custom-signed drivers for various Chromebook components.
- Keyboard: You may need a remapping tool to make the “Search” key behave like the Windows key and to enable the top-row media keys.
- Audio: This is often the most difficult hurdle. Many Chromebooks use specialized audio amplifiers that do not have Windows drivers. In some cases, you may need to rely on Bluetooth headphones or a USB sound card if native audio drivers are unavailable for your specific motherboard.
Performance Optimization and Maintenance
Chromebooks often have modest hardware. To ensure Windows runs smoothly:
- Disable Transparency: Go to Personalization > Colors and turn off “Transparency effects.”
- Manage Startup Apps: Minimize the number of applications that launch on boot.
- Virtual Memory: If your Chromebook has only 4GB of RAM, manually increase the Windows Pagefile size to help handle multitasking.
Ultimately, installing Windows on a Chromebook is a masterclass in hardware-software interaction. While it requires patience and a willingness to troubleshoot, the result is a unique, portable device that defies its original purpose, offering the best of Google’s hardware engineering with the vast software library of Microsoft Windows.
aViewFromTheCave is a participant in the Amazon Services LLC Associates Program, an affiliate advertising program designed to provide a means for sites to earn advertising fees by advertising and linking to Amazon.com. Amazon, the Amazon logo, AmazonSupply, and the AmazonSupply logo are trademarks of Amazon.com, Inc. or its affiliates. As an Amazon Associate we earn affiliate commissions from qualifying purchases.