Installing a new operating system on a fresh hard drive might seem like a daunting task, but it’s a fundamental skill for any tech enthusiast, PC builder, or individual looking to upgrade their system. Whether you’re replacing a faulty drive, upgrading to a faster SSD, or building a brand-new computer from scratch, understanding this process is crucial. This comprehensive guide will walk you through every step of installing Windows on your new hard drive, transforming your blank slate into a fully functional and secure computing environment. We’ll cover everything from initial preparations to post-installation optimizations, ensuring a smooth and successful transition.
Preparing for a Seamless Installation
Before you even think about inserting a USB stick, a solid preparation phase is key to avoiding common pitfalls and ensuring the installation goes off without a hitch. This involves gathering the necessary tools, understanding your hardware, and making critical decisions about your Windows version.
Essential Prerequisites
The success of your Windows installation hinges on having the right components and information readily available. Here’s what you’ll need:
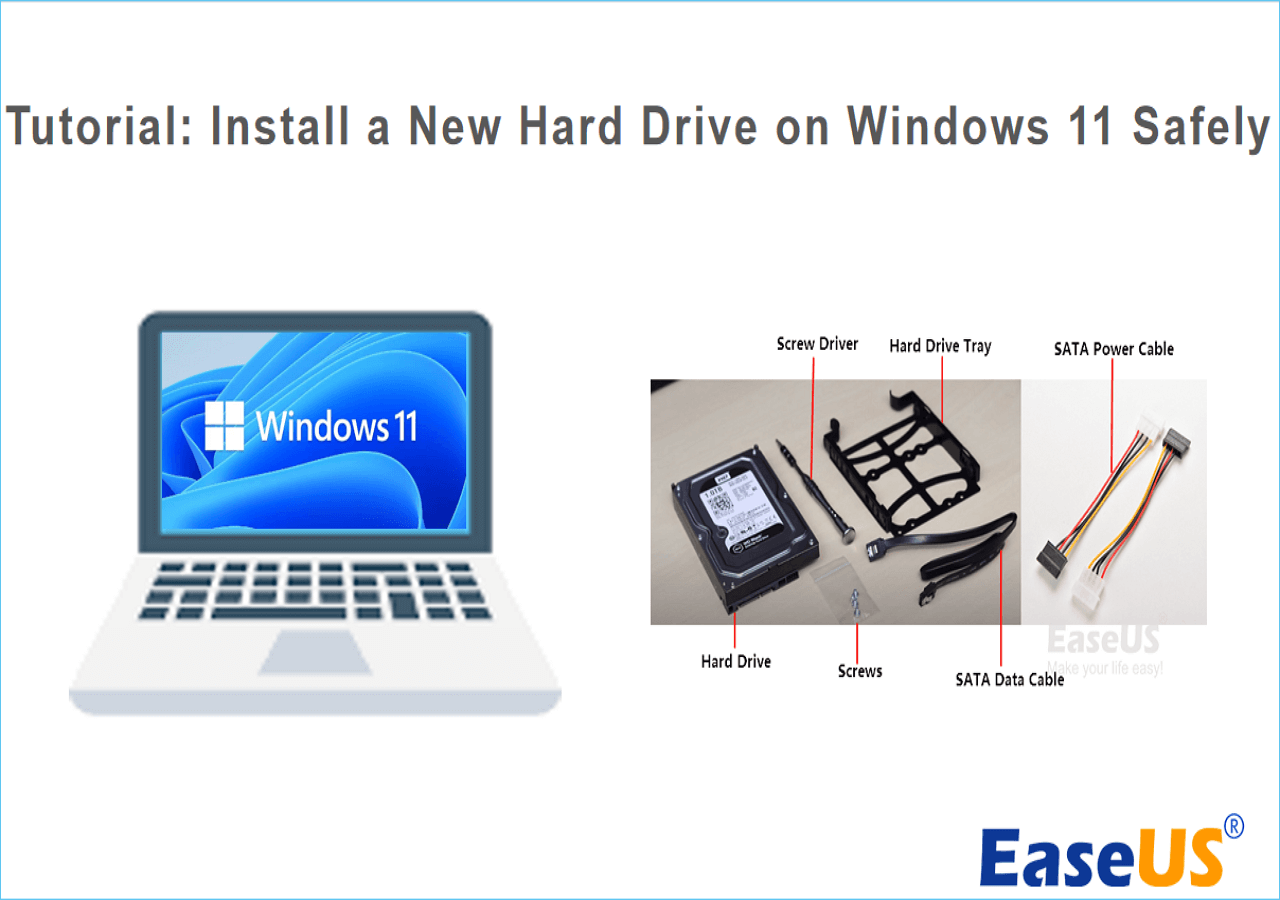
- Your New Hard Drive (HDD or SSD): Ensure it’s correctly installed inside your computer case and connected via SATA data and power cables (or NVMe slot for M.2 SSDs). While this guide focuses on the software installation, a proper physical connection is non-negotiable. If you’re unsure about hardware installation, consult your drive’s manual or a specific hardware installation guide.
- A Computer with Internet Access: You’ll need this to download the Windows installation media. This can be the same computer you’re upgrading (if it’s still functional) or another PC.
- A USB Flash Drive (at least 8GB): This will be used to create your bootable Windows installation media. Make sure it’s empty or that you’ve backed up any data on it, as the process will format the drive.
- Your Windows Product Key: If you have a retail copy, this will be on a sticker or card. If you’re reinstalling Windows 10/11 on a machine that previously had a digital license linked to your Microsoft account, you might not need to enter it during installation; it will automatically activate once connected to the internet. However, it’s always good to have it handy.
- Backup of Important Data (if applicable): While you’re installing on a new hard drive, if this new drive is replacing an existing one with valuable data, ensure you’ve backed up all critical files to an external drive or cloud service. This is a fundamental digital security and productivity practice.
- Basic PC Peripherals: A monitor, keyboard, and mouse are essential for navigating the installation process.
Choosing Your Windows Version and Media
Deciding which version of Windows to install is a crucial first step. Currently, Windows 10 and Windows 11 are the primary options. Windows 11 offers a refreshed user interface, enhanced security features, and better integration with Microsoft Teams, along with performance improvements, especially for modern hardware. Windows 10 remains a robust and widely supported operating system. Your choice might depend on your hardware compatibility (Windows 11 has stricter requirements like TPM 2.0), software compatibility, or personal preference.
Once you’ve decided, the most common and recommended method to obtain the installation media is using Microsoft’s official Media Creation Tool. This tool simplifies the process of downloading the correct Windows ISO file and turning your USB flash drive into a bootable installer. Avoid unofficial sources, as they can pose significant digital security risks.
Creating Your Windows Installation Media
The USB flash drive you prepared earlier will become the bootable drive that initiates the Windows installation process. This is where the Media Creation Tool comes into play, making the process straightforward and reliable.
Using the Media Creation Tool
- Download the Tool: Go to Microsoft’s official website (search “Windows 10 Media Creation Tool” or “Windows 11 Media Creation Tool”) and download the tool.
- Run the Tool: Execute the downloaded file. Accept the license terms.
- Select “Create installation media (USB flash drive, DVD, or ISO file) for another PC”: This option allows you to prepare your USB drive.
- Choose Language, Edition, and Architecture: The tool will usually recommend options based on your current PC. Unless you have a specific reason, stick with the recommended options. For example, choose “Windows 10” or “Windows 11,” “English (United States),” and “64-bit (x64)” architecture.
- Select USB Flash Drive: When prompted to choose which media to use, select “USB flash drive” and then select your prepared USB drive from the list.
- Start the Process: The tool will download the necessary Windows files and write them to your USB drive, making it bootable. This can take some time depending on your internet speed. Do not unplug the USB drive or shut down your computer during this process.
Once complete, your USB flash drive is ready to install Windows! Eject it safely from your current computer.
Other Methods (ISO, Third-Party Tools)
While the Media Creation Tool is the simplest for most users, advanced users might prefer to download the ISO file directly from Microsoft and then use a third-party tool like Rufus to create a custom bootable USB drive. Rufus offers more granular control over partitioning schemes (MBR vs. GPT) and boot modes (BIOS vs. UEFI), which can be useful for specific system configurations or older hardware. However, for a standard modern PC, the Media Creation Tool generally suffices. Regardless of the method, always download the ISO files from official Microsoft sources to ensure authenticity and avoid security vulnerabilities.
The Installation Process: A Step-by-Step Guide
With your bootable USB drive ready, it’s time to connect it to your computer with the new hard drive and begin the installation. This phase involves interacting directly with the Windows setup wizard.
Booting from the Installation Media
- Insert the USB Drive: Plug the bootable USB flash drive into an available USB port on the computer where you want to install Windows.
- Access BIOS/UEFI: Turn on your computer and immediately press the designated key to enter your BIOS or UEFI firmware settings. Common keys include
Delete,F2,F10,F12, orEsc. This key varies by motherboard manufacturer (e.g., ASUS, Gigabyte, MSI, Dell, HP, Lenovo). If you miss it, restart and try again. - Set Boot Order: Inside the BIOS/UEFI, navigate to the “Boot” or “Boot Options” section. You need to change the boot order to prioritize your USB drive. Move your USB drive (it might be listed by its brand or as “USB HDD”) to the top of the boot priority list. For UEFI systems, ensure you select the “UEFI” version of your USB drive if available, as this often leads to a more modern and secure boot.
- Save and Exit: Save your changes (often
F10) and exit the BIOS/UEFI. Your computer will restart and should now boot from the USB drive, launching the Windows setup wizard.
Initial Setup and Language Selection
Once the Windows logo appears, followed by the setup screen, you’re on your way:
- Language, Time, and Keyboard Input: The first screen will ask you to select your language, time and currency format, and keyboard or input method. Choose your preferences and click “Next.”
- Install Now: Click the “Install now” button to proceed.
Entering Your Product Key
You’ll be prompted to enter your Windows product key.
- Enter Key: Type your 25-character product key into the field provided and click “Next.”
- Skip (if applicable): If you are reinstalling Windows on a computer that previously had a digital license, or if you plan to activate it later, you can click “I don’t have a product key.” Windows will usually activate automatically once you connect to the internet and sign in with your Microsoft account (if the digital license is linked to it).
Choosing Installation Type (Custom vs. Upgrade)
- Accept License Terms: Read and accept the Microsoft Software License Terms.
- Which type of installation do you want?
- Upgrade: This option is for upgrading an existing Windows installation while keeping your files, settings, and applications. Since you’re installing on a new hard drive, this option is generally greyed out or not applicable.
- Custom: Install Windows only (advanced): This is the option you want for a clean installation on a new hard drive. Select this.
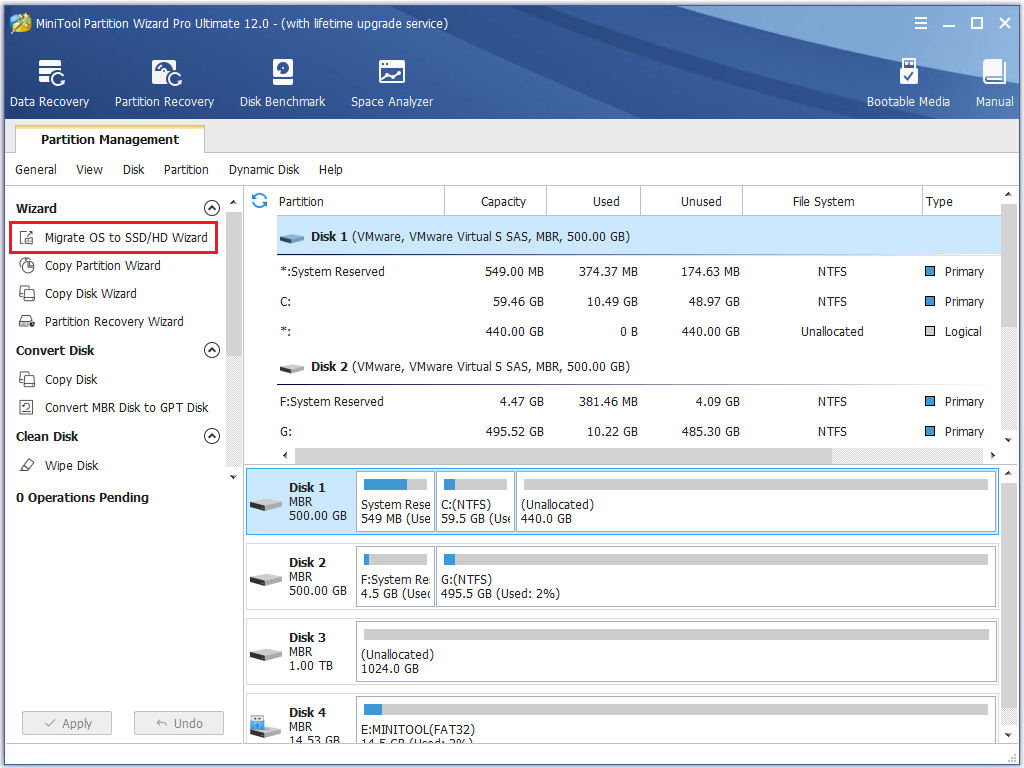
Partitioning Your New Hard Drive
This is a critical step, especially for a new drive.
- Drive Selection: You’ll see a list of available drives. Your new hard drive will likely appear as “Drive 0 Unallocated Space” or similar.
- Create Partitions:
- Select the “Drive 0 Unallocated Space.”
- Click “New.” You can choose to use the entire drive for Windows by simply clicking “Apply” after clicking “New.” Windows will automatically create the necessary system partitions (Recovery, EFI, MSR, and the primary Windows partition).
- Alternatively, you can specify a smaller size for the primary Windows partition and leave some space unallocated to create additional data partitions later. However, for most users, letting Windows manage the default partitions is recommended.
- Format: Once partitions are created, select the largest partition (usually labelled “Primary” or the one with the most free space) where you want to install Windows. Click “Format” to ensure it’s clean.
- Proceed: With the primary partition selected and formatted, click “Next.”
Copying Windows Files
Windows will now begin copying files and installing features. This process involves several stages, including:
- Copying Windows files
- Getting files ready for installation
- Installing features
- Installing updates (if any are integrated into the media)
- Finishing up
Your computer will restart multiple times during this phase. Do not remove the USB drive until after the first restart or when prompted. The system needs to boot from the newly installed Windows on your hard drive, not from the USB installer, for subsequent stages.
Initial Configuration (Account, Privacy, Updates)
After the final restart, you’ll be greeted by the Out-of-Box Experience (OOBE), where you’ll configure your personal settings:
- Region and Keyboard Layout: Confirm your region and keyboard layout.
- Connect to a Network: Connect to your Wi-Fi or Ethernet network. This is important for updates and signing in with a Microsoft account.
- Sign in with Microsoft Account or Create Local Account:
- Microsoft Account: Recommended for seamless integration with OneDrive, Microsoft Store, and syncing settings across devices.
- Local Account: If you prefer not to use a Microsoft account. On Windows 11 Home, you might need to disconnect from the internet during setup to create a local account.
- Create PIN: Set up a PIN for faster sign-in.
- Privacy Settings: Review and choose your privacy settings. Microsoft offers various telemetry and advertising options; configure these to your comfort level for digital security and data privacy.
- Cortana, OneDrive, Gaming (Windows 11): Set up or skip these optional features.
- Final Checks: Windows will perform final checks and prepare your desktop. This might take a few minutes.
Congratulations! You’ve successfully installed Windows on your new hard drive.
Post-Installation Essentials
Installing Windows is just the first step. To ensure optimal performance, security, and productivity, there are several crucial post-installation tasks.
Installing Drivers
Drivers are software components that allow your operating system to communicate with your hardware (graphics card, motherboard chipset, network adapter, audio card, etc.). Without them, your system might not perform optimally, or some hardware might not function at all.
- Check Device Manager: Right-click the Start button and select “Device Manager.” Look for any devices with a yellow exclamation mark, indicating missing or problematic drivers.
- Motherboard Drivers: Start by installing your motherboard’s chipset drivers from the manufacturer’s website (e.g., ASUS, Gigabyte, MSI, ASRock). These are fundamental.
- Graphics Card Drivers: Download and install the latest drivers for your graphics card (NVIDIA, AMD, Intel) directly from the manufacturer’s website. This is crucial for display performance, gaming, and video editing.
- Other Drivers: Install drivers for Wi-Fi, Ethernet, audio, and any other specific peripherals you have.
- Windows Update: Often, Windows Update will automatically find and install many basic drivers, but always check the manufacturer’s website for the very latest versions, especially for graphics.
Windows Updates
Keeping your operating system updated is paramount for digital security and accessing new features.
- Check for Updates: Go to
Settings > Update & Security(Windows 10) orSettings > Windows Update(Windows 11) and click “Check for updates.” - Install All Pending Updates: Allow Windows to download and install all available updates. This might involve several restarts. Regularly checking for updates is a good habit.
Software Installation
Now that your system is stable and secure, it’s time to install your essential applications.
- Web Browser: Install your preferred web browser (Chrome, Firefox, Edge, Brave, etc.).
- Productivity Suite: Install office software like Microsoft Office, LibreOffice, or Google Workspace desktop apps.
- Antivirus/Security Software: While Windows Defender provides good baseline protection, you might opt for a third-party antivirus solution if you prefer.
- Communication Tools: Install Zoom, Microsoft Teams, Slack, Discord, etc.
- Creative Software: Photoshop, Illustrator, DaVinci Resolve, Audacity, etc., if applicable to your work.
- Gaming Platforms: Steam, Epic Games Launcher, GOG Galaxy, if you’re a gamer.
Optimizing Your System
A few simple steps can help optimize your new Windows installation for better performance and longevity:
- Uninstall Bloatware: Check
Settings > Apps > Apps & featuresand uninstall any pre-installed software you don’t need, especially if your PC came from an OEM. - Configure Storage Sense (Windows 10/11): This feature automatically frees up space by deleting temporary files and managing your Recycle Bin. Find it in
Settings > System > Storage. - Manage Startup Programs: Use Task Manager (
Ctrl+Shift+Escthen “Startup” tab) to disable unnecessary programs from launching with Windows, improving boot times and overall responsiveness. - Create a Restore Point: Once your system is fully set up and stable, create a system restore point. This provides a snapshot you can revert to if future installations or updates cause issues. Search “Create a restore point” in the Start menu.
Digital Security Measures
Your fresh install is an ideal time to implement robust security practices.
- Strong Passwords: Use unique, strong passwords for your Microsoft account and any other online services. Consider a password manager.
- Two-Factor Authentication (2FA): Enable 2FA for your Microsoft account and other critical services for an extra layer of security.
- Firewall: Ensure Windows Firewall is active and properly configured.
- User Account Control (UAC): Keep UAC enabled to prevent unauthorized changes to your system.
- Regular Backups: Even with a new drive, establish a routine for backing up your important data to an external drive or cloud service. This is the ultimate safety net.
Troubleshooting Common Issues
Even with careful preparation, you might encounter issues. Here are solutions to some common problems:
Boot Order Problems
If your computer keeps booting into your old operating system (if it still exists) or directly into BIOS/UEFI after removing the USB drive:
- Check BIOS/UEFI Boot Order: Re-enter BIOS/UEFI and ensure your new hard drive is set as the primary boot device.
- UEFI vs. Legacy Boot: Sometimes, issues arise from a mismatch between how Windows was installed (UEFI) and how your BIOS is configured (Legacy/CSM). Try switching the boot mode in your BIOS settings.
Drive Not Recognized During Installation
If your new hard drive isn’t appearing when you’re selecting where to install Windows:
- Check Physical Connections: Power off your PC and double-check that the SATA data and power cables (or NVMe drive) are securely connected.
- BIOS/UEFI Detection: Enter BIOS/UEFI to see if the drive is detected there. If not, it could be a faulty drive or connection.
- Load Drivers: In the Windows setup, there’s an option “Load driver” if your drive requires specific drivers (e.g., RAID controllers, some NVMe drives on older motherboards). You’d need these drivers on another USB drive.
Activation Errors
If Windows doesn’t activate automatically after connecting to the internet:
- Check Product Key: Double-check you entered the correct product key.
- Digital License: If you have a digital license linked to your Microsoft account, ensure you’re signed in with that account. Go to
Settings > Update & Security > Activation(Windows 10) orSettings > System > Activation(Windows 11) and click “Troubleshoot” or “Add an account.” - Internet Connection: Ensure you have a stable internet connection.
Performance Lags
If your new installation feels sluggish:
- Update Drivers: Ensure all drivers, especially chipset and graphics, are up to date from the manufacturer’s website.
- Windows Updates: Install all pending Windows updates.
- Check Disk Usage: Open Task Manager (
Ctrl+Shift+Esc) and check the “Performance” tab, particularly disk usage. High disk usage might indicate a background process or a problem with your drive. - System Specifications: Ensure your hardware meets the recommended specifications for your chosen Windows version.
Installing Windows on a new hard drive is a rewarding process that gives you a clean, optimized foundation for your computing needs. By following these steps diligently, you’ll not only achieve a successful installation but also gain valuable insights into managing your PC’s operating system. Enjoy your fresh start!
aViewFromTheCave is a participant in the Amazon Services LLC Associates Program, an affiliate advertising program designed to provide a means for sites to earn advertising fees by advertising and linking to Amazon.com. Amazon, the Amazon logo, AmazonSupply, and the AmazonSupply logo are trademarks of Amazon.com, Inc. or its affiliates. As an Amazon Associate we earn affiliate commissions from qualifying purchases.