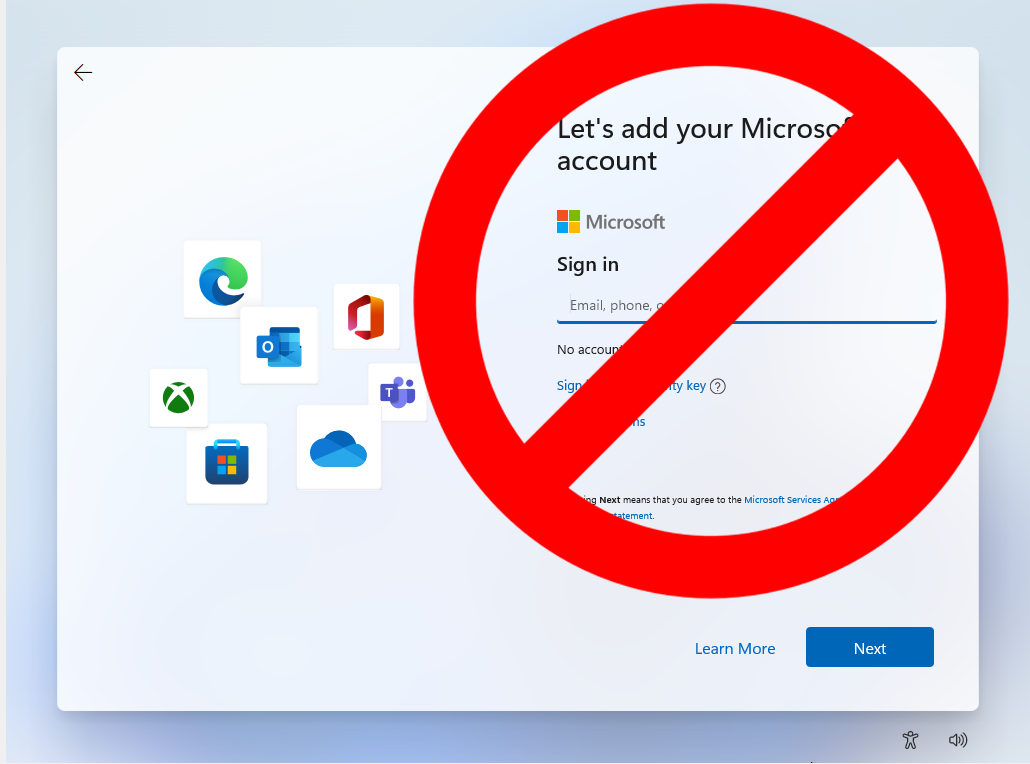
The allure of a fresh operating system, sleek interface, and enhanced features is undeniable. Windows 11, with its modern design and improved performance, promises just that. However, for many users, the mandatory requirement to sign in with a Microsoft account during the installation process presents a significant hurdle. Whether it’s a preference for local accounts for privacy, a desire to avoid cloud integration, or simply the need for a quick setup without the overhead of creating and managing an online profile, bypassing this requirement is a common goal. Fortunately, with a few clever workarounds, it’s entirely possible to install Windows 11 and enjoy its benefits without tying it to a Microsoft account.
This guide will walk you through the essential steps and techniques to achieve a Windows 11 installation using a local account. We’ll explore the rationale behind Microsoft’s push for account integration and then dive into the practical methods that empower you to maintain your digital independence.
Understanding Microsoft’s Shift Towards Account Integration
Microsoft’s strategy with Windows 10 and, even more emphatically, Windows 11, has been to weave its ecosystem more tightly into the user experience. The Microsoft account serves as a central hub for various services, including OneDrive cloud storage, Microsoft 365 subscriptions, personalized settings synchronization across devices, and access to the Microsoft Store. From Microsoft’s perspective, this integration offers several advantages:
- Enhanced Personalization: When logged in with a Microsoft account, Windows 11 can sync your settings, themes, passwords, and preferences across multiple devices. This means a consistent experience whether you’re on your desktop, laptop, or tablet.
- Cloud Services Integration: Services like OneDrive, Office 365, and Xbox Game Pass are seamlessly integrated, making it easier for users to access their files, documents, and entertainment across their devices.
- Simplified Software Management: The Microsoft Store provides a centralized platform for downloading and managing applications, games, and even operating system features. A Microsoft account streamlines this process.
- Security Features: Features like Windows Hello (facial recognition, fingerprint login) and Find My Device often rely on a linked Microsoft account for enhanced security and device management.
- Telemetry and Improvement: By analyzing user data (with consent), Microsoft can identify bugs, improve performance, and tailor future updates and features based on real-world usage patterns.
While these benefits are compelling for many, they come at the cost of data privacy and a potential reduction in user autonomy. For individuals and organizations prioritizing data control, avoiding external account dependencies, or simply preferring a more traditional, isolated system, a local account remains a crucial option. This is where the necessity for workarounds arises.
Method 1: The “No Internet Connection” Bypass During Setup
One of the most straightforward and widely adopted methods to avoid signing in with a Microsoft account during Windows 11 installation is to simply disconnect from the internet when the setup prompts you to sign in. Microsoft has increasingly made this option less obvious, but it remains a viable path.
Pre-Installation Preparations
Before you even begin the installation process, ensure you have your Windows 11 installation media ready. This is typically a bootable USB drive or DVD created using the Media Creation Tool from Microsoft’s official website. During the setup, you will be guided through language selection, keyboard layout, and product key entry. It’s crucial to have these details at hand.
The Key Step: Disconnecting Your Network
- Boot from Installation Media: Insert your bootable USB drive or DVD and boot your computer from it. You might need to adjust your BIOS/UEFI settings to prioritize booting from the USB/DVD.
- Proceed Through Initial Setup: Follow the on-screen prompts for language, time, and keyboard input. When prompted to enter a product key, you can skip this for now by clicking “I don’t have a product key.”
- Select Windows Edition: Choose the edition of Windows 11 you wish to install (Home, Pro, etc.).
- Accept License Terms: Agree to the license terms.
- Choose Installation Type: Select “Custom: Install Windows only (advanced).” This will present you with options to partition your hard drive.
- The Crucial Moment – Network Connection Prompt: When the installation reaches the point where it asks you to “Let’s connect you to a network,” this is where the bypass is initiated.
- If you are using a wired Ethernet connection: Simply unplug the Ethernet cable from your computer before you reach this screen.
- If you are using Wi-Fi: Do not select any available Wi-Fi networks. Look for an option that says something like “I don’t have internet” or “Continue with limited setup.” This option might be subtle or sometimes hidden behind a small text link. Click on it.
Completing the Setup with a Local Account
Once you click “I don’t have internet” or “Continue with limited setup,” Windows 11 will acknowledge your decision.
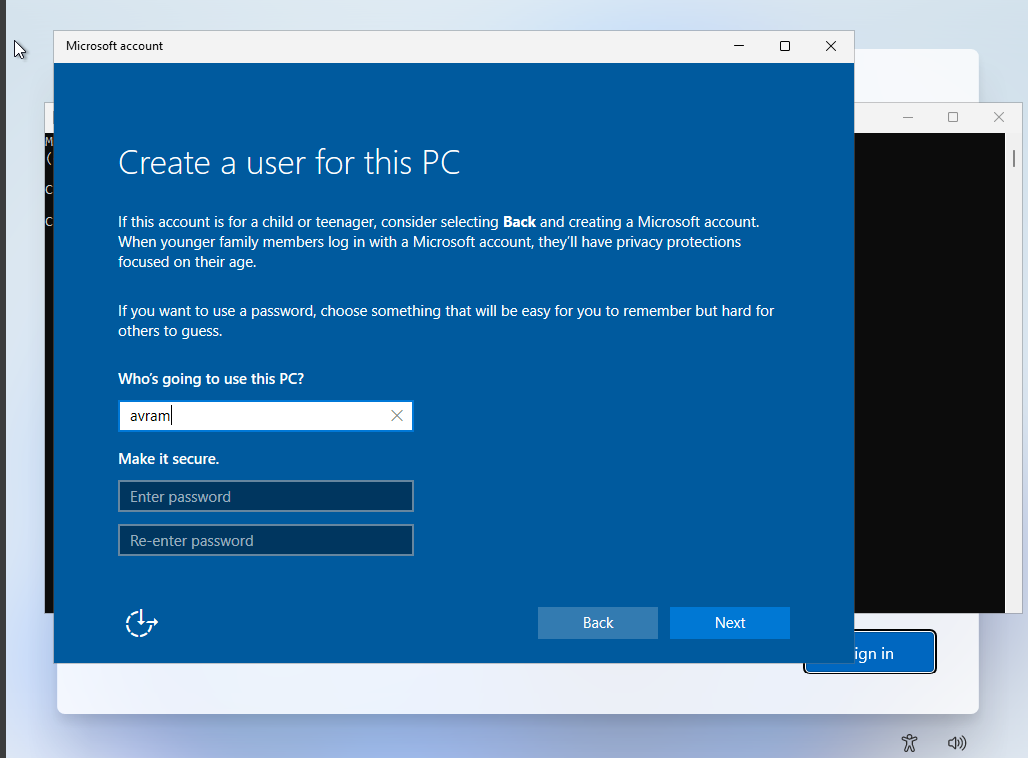
- Limited Setup: You will then be presented with the “limited setup” screen. This is where you’ll create your local user account.
- Enter Your Username: You’ll be prompted to enter a username for your local account. This is the name that will appear on your login screen.
- Set a Password (Recommended): You will be asked to set a password for your local account. It’s highly recommended to set a strong password for security. You can choose to leave it blank, but this is generally not advisable.
- Security Questions: You will likely need to set up security questions to help you recover your password if you forget it.
- Privacy Settings: You will then proceed through the remaining privacy settings for your Windows installation.
- Complete Installation: Once these steps are complete, Windows 11 will finish its setup and boot into the desktop, using your newly created local account.
Post-Installation Note: After Windows 11 has fully installed and you are logged into your local account, you can then choose to connect to the internet. You will likely be prompted to sign in with a Microsoft account again, but you can usually dismiss these prompts or choose to create one later if you wish.
Method 2: The Command Prompt and OOBEBYPASSNRO Tactic
If the “I don’t have internet” option is proving elusive or has been removed by a recent Windows 11 update, there’s a more technical but equally effective method using the Command Prompt. This involves interrupting the Out-of-Box Experience (OOBE) and instructing Windows to bypass the network requirement.
When to Use This Method
This method is particularly useful if you’ve reached the network connection screen and cannot find the “I don’t have internet” option, or if you’re performing a clean install on a device that’s always connected to the internet and you want to avoid a prolonged disconnection.
Executing the Command Prompt Bypass
-
Reach the Network Screen: Follow the initial installation steps as outlined in Method 1 until you reach the screen that says “Let’s connect you to a network.”
-
Open Command Prompt: Instead of trying to disconnect, press Shift + F10 on your keyboard. This keyboard shortcut will open a Command Prompt window directly within the Windows setup environment.
-
Enter the Command: In the Command Prompt window, type the following command exactly as it appears and press Enter:
OOBEBYPASSNRO- OOBE refers to the Out-of-Box Experience, the initial setup process for Windows.
- BYPASSNRO is the command to bypass the Network Requirement Option.
-
System Reboot: After executing the command, your computer will automatically restart. This is a normal part of the process.
-
Resume Setup: Once your computer reboots, it will bring you back to the initial setup screens. Proceed through the language, time, and keyboard selections again.
-
The “I Don’t Have Internet” Option Appears: This time, when you reach the “Let’s connect you to a network” screen, you should now see the “I don’t have internet” option clearly visible. Select it.
-
Continue with Limited Setup: From here, you will be directed to the “limited setup” screen, where you can create your local user account and password, just as described in Method 1.
This command effectively tells the Windows setup process to skip the mandatory network connection, allowing you to proceed with a local account setup.
Method 3: Modifying the Registry During Installation (Advanced)
For users who are comfortable with more advanced system modifications, altering the Windows Registry during the installation process can also be used to bypass the Microsoft account requirement. This method is generally more involved and carries a slightly higher risk if not performed correctly, but it offers another robust solution.
Prerequisites and Warnings
This method requires you to have reached the network connection screen and successfully opened the Command Prompt (Shift + F10). It involves navigating and modifying registry keys, which can impact system stability if done incorrectly. Proceed with caution.
Steps for Registry Modification
- Reach the Network Screen and Open Command Prompt: Follow the initial setup steps until you are on the “Let’s connect you to a network” screen. Press Shift + F10 to open the Command Prompt.
- Open Registry Editor: In the Command Prompt, type
regeditand press Enter to launch the Registry Editor. - Navigate to the Correct Key: In the Registry Editor, navigate to the following path:
HKEY_LOCAL_MACHINESOFTWAREMicrosoftWindows SetupOOBE- If the
OOBEkey does not exist, you may need to create it. Right-click onWindows Setup, selectNew > Key, and name itOOBE.
- If the
- Create a New DWORD Value:
- With the
OOBEkey selected, right-click in the right-hand pane. - Select
New > DWORD (32-bit) Value. - Name this new value
BypassNRO.
- With the
- Modify the Value Data:
- Double-click on the newly created
BypassNROvalue. - In the “Value data” field, change the existing
0to1. - Click
OK.
- Double-click on the newly created
- Close Registry Editor and Command Prompt: Close both the Registry Editor and the Command Prompt windows.
- Restart the Computer: Your computer will likely need to restart for these registry changes to take effect. You can usually do this by typing
wpeutilin the command prompt and pressing Enter, or by simply shutting down and restarting from the command prompt itself. - Continue Setup: After the restart, you will be presented with the setup screens again. When you reach the network connection screen, the “I don’t have internet” option should now be available. Proceed with the limited setup to create your local account.
This registry modification essentially flags the network bypass option as available for the OOBE process, achieving the same result as the OOBEBYPASSNRO command but through a more direct registry edit.

Maintaining Your Digital Independence: Post-Installation Best Practices
Successfully installing Windows 11 with a local account is a significant step towards greater control over your digital environment. However, to truly maintain your digital independence and ensure your system remains secure and functional, consider these post-installation best practices:
- Regularly Update Windows: Even with a local account, it’s crucial to keep your operating system updated. Windows updates often include critical security patches, performance improvements, and bug fixes. You can configure Windows Update to download and install updates automatically, or you can manually check for them.
- Install Essential Software: Since you’re not using a Microsoft account, you’ll need to download and install your preferred applications directly from their official websites or trusted third-party sources. This includes web browsers, productivity suites, media players, and any other software you rely on.
- Secure Your Local Account: A strong, unique password is your first line of defense. Consider using a password manager to generate and store complex passwords. Additionally, enable features like BitLocker drive encryption (available in Windows 11 Pro and Enterprise) to protect your data if your device is lost or stolen.
- Backup Your Data: Local accounts mean your data is primarily stored on your local machine. Implement a robust backup strategy. This could involve external hard drives, network-attached storage (NAS) devices, or reputable cloud backup services (without necessarily tying them to a Microsoft account).
- Consider Local Account Limitations: Be aware that certain features might require a Microsoft account. For instance, some integrated apps or services within Windows might prompt you to sign in. You may also miss out on seamless cross-device settings synchronization. Evaluate if these are deal-breakers for your usage.
- Be Wary of Future Updates: Microsoft’s strategies can evolve. While these bypass methods are currently effective, future Windows 11 updates might introduce stricter enforcement of Microsoft account requirements. Stay informed about changes to Windows installation processes.
By following these steps, you can enjoy a personalized and secure Windows 11 experience, tailored to your preferences and without the obligatory tether to a Microsoft account. This approach empowers users who value privacy, control, and a more direct relationship with their operating system.
aViewFromTheCave is a participant in the Amazon Services LLC Associates Program, an affiliate advertising program designed to provide a means for sites to earn advertising fees by advertising and linking to Amazon.com. Amazon, the Amazon logo, AmazonSupply, and the AmazonSupply logo are trademarks of Amazon.com, Inc. or its affiliates. As an Amazon Associate we earn affiliate commissions from qualifying purchases.