Installing a new operating system on your computer can feel like a significant undertaking, but with the right guidance, it’s a process that even novice users can master. One of the most common and versatile methods for deploying Windows 11 is by using a bootable USB drive. This approach offers flexibility, allowing you to install Windows 11 on multiple machines without needing a physical disc, and it’s often the quickest way to get a fresh installation up and running. Whether you’re upgrading an older PC, building a new system, or troubleshooting an existing installation, this comprehensive guide will walk you through every step of installing Windows 11 from a USB drive.
This article is primarily housed within the “Tech” section of our website, focusing on practical tutorials and digital security aspects of managing your operating system. While the process itself is purely technical, understanding the “why” and the potential benefits can also touch upon productivity gains (a faster, cleaner OS) and even financial considerations (avoiding costly professional installation fees).
Preparing for the Windows 11 Installation
Before you can begin the installation, a few crucial preparation steps are necessary. These ensure a smooth and error-free process, saving you potential headaches down the line.
1. System Requirements Check and Backup
The first and most critical step is to ensure your computer meets the minimum system requirements for Windows 11. Microsoft has specific hardware prerequisites, including a compatible processor, 4GB of RAM, 64GB of storage, UEFI firmware with Secure Boot enabled, and a TPM 2.0 module. You can find a detailed list of these requirements on Microsoft’s official website. Running Windows 11 on unsupported hardware might lead to instability, performance issues, or a complete inability to install.
Why is this important? Ignoring system requirements is a common pitfall that leads to installation failures or a poorly performing system.
Next, and equally vital, is to back up your important data. Installing Windows 11, especially a clean install, will format your primary drive, erasing everything on it. This includes your documents, photos, videos, applications, and any custom settings. Never skip this step. Consider using external hard drives, cloud storage services, or dedicated backup software. A comprehensive backup ensures that if anything goes wrong, or if you simply change your mind, your valuable data is safe.
What to back up:
- Personal Files: Documents, photos, videos, music, downloads.
- Application Data: Save files for games, project files, custom configurations.
- Browser Bookmarks and Passwords: Most browsers offer synchronization features.
- License Keys: For software you may need to reinstall.
2. Acquiring the Windows 11 Installation Media
To create a bootable USB drive, you’ll need the Windows 11 installation files. Microsoft provides a free tool called the Media Creation Tool that allows you to download the latest version of Windows 11 and prepare your USB drive.
Steps to download the Media Creation Tool:
- Navigate to the official Microsoft Windows 11 download page.
- Look for the “Create Windows 11 Installation Media” section.
- Click on “Download Now” under this section.
Once downloaded, run the Media Creation Tool. It will guide you through the process of creating installation media. You’ll have the option to download Windows 11 directly to a USB flash drive or to an ISO file, which you can then use with other tools if you prefer.
3. Preparing the USB Flash Drive
You will need a USB flash drive with at least 8GB of storage space. It’s highly recommended to use a USB 3.0 or higher drive for faster transfer speeds, which will significantly reduce the creation time.
Important Note: The process of creating a bootable USB drive will erase all existing data on the flash drive. Ensure you have backed up any important files from the USB drive before proceeding.
Using the Media Creation Tool for USB:
- Open the downloaded Media Creation Tool.
- Accept the license terms.
- On the “What do you want to do?” screen, select “Create installation media (USB flash drive, DVD, or ISO file) for another PC” and click “Next”.
- Ensure the correct language, edition, and architecture (usually 64-bit for Windows 11) are selected. If you want to use your PC’s current settings, leave “Use the recommended options for this PC” checked. Otherwise, uncheck it and make your selections manually. Click “Next”.
- On the “Choose which media to use” screen, select “USB flash drive” and click “Next”.
- The tool will prompt you to select the USB drive you want to use. Choose your connected USB drive from the list and click “Next”.
- The Media Creation Tool will then download the Windows 11 files and copy them to your USB drive, making it bootable. This process can take some time depending on your internet speed and the speed of your USB drive.
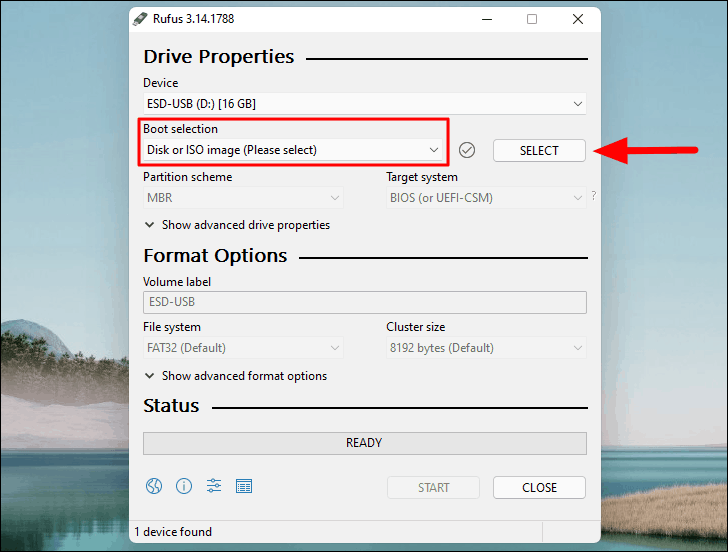
Alternatively, if you downloaded an ISO file earlier, you can use a third-party tool like Rufus or Ventoy to create a bootable USB drive from the ISO. These tools offer more advanced options and are often preferred by experienced users. For Rufus, you would select your USB drive, select the Windows 11 ISO file, and follow the on-screen prompts.
Booting from the USB Drive
With your bootable USB drive ready, the next crucial step is to configure your computer to boot from it. This involves accessing your system’s BIOS or UEFI settings.
Accessing BIOS/UEFI Settings
The BIOS (Basic Input/Output System) or its modern successor, UEFI (Unified Extensible Firmware Interface), is firmware that initializes your hardware when you start your computer and loads the operating system. You need to access these settings to change the boot order.
How to access BIOS/UEFI:
- Restart your computer.
- As soon as the computer starts to boot up (often when you see the manufacturer’s logo), repeatedly press a specific key to enter the BIOS/UEFI setup. The key varies depending on your motherboard manufacturer, but common keys include:
- Delete (Del)
- F2
- F10
- F12
- Esc
- Your computer screen might display a prompt like “Press [Key] to enter Setup” or “Press [Key] for Boot Menu.”
If you miss the window to press the key, you’ll have to restart your computer and try again.
Changing the Boot Order
Once you are in the BIOS/UEFI settings, you need to find the “Boot” or “Boot Order” section. The exact location and naming of this section can differ significantly between manufacturers and BIOS versions.
Steps to change the boot order:
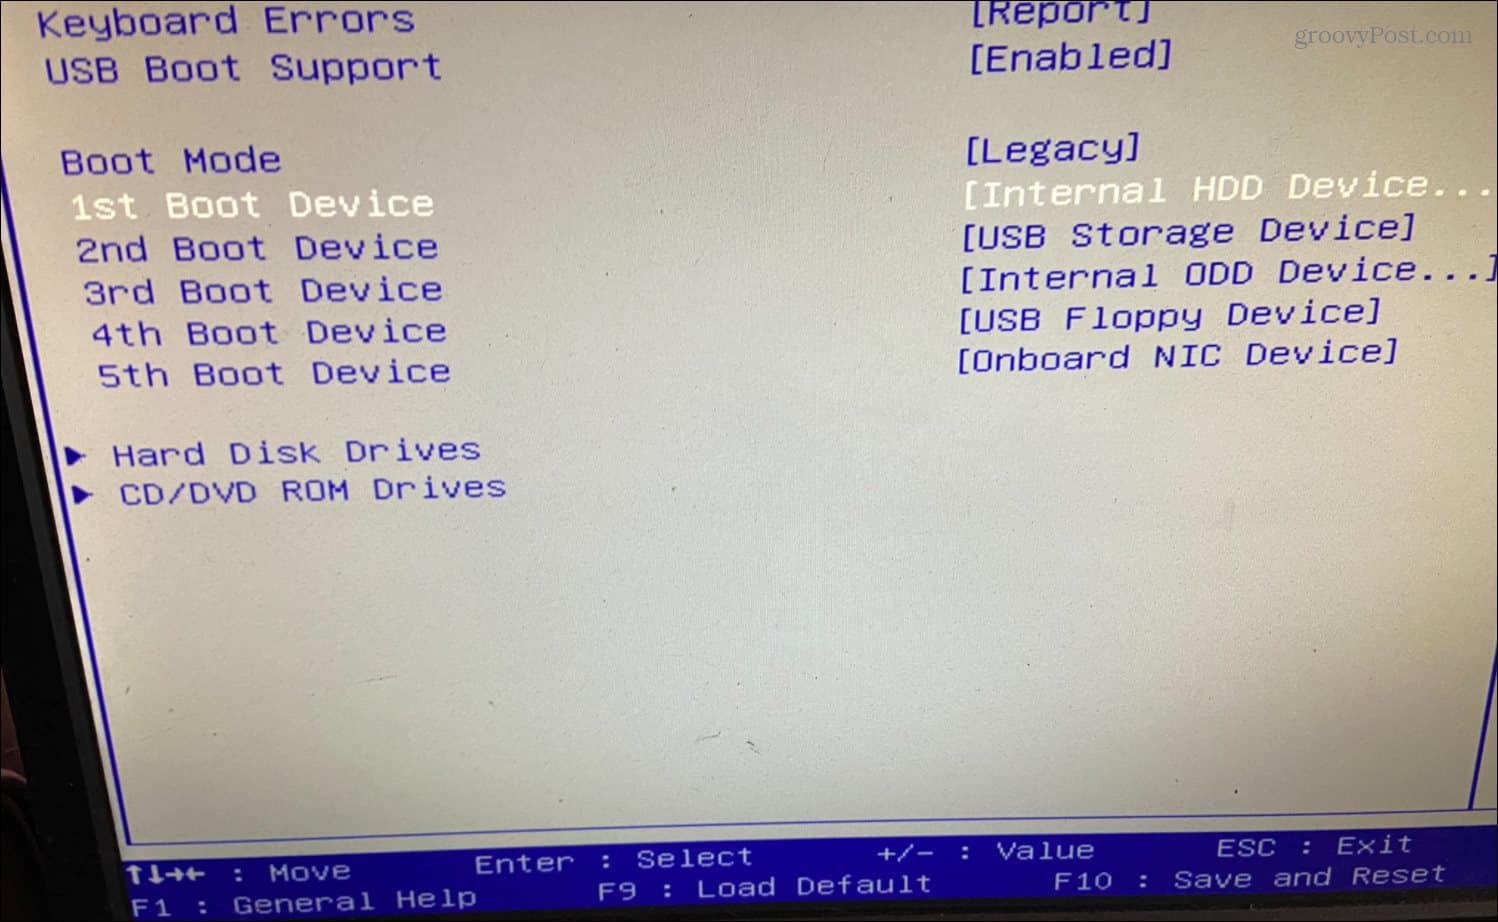
- Navigate to the “Boot” section.
- Look for an option that allows you to change the boot device priority.
- Your USB drive should be listed among the bootable devices. It might appear as “USB HDD,” “Removable Devices,” or by the specific brand name of your USB drive.
- Move your USB drive to the top of the boot order list. This tells your computer to try booting from the USB drive before attempting to boot from your hard drive or SSD.
- Save your changes and exit the BIOS/UEFI. This is usually done by pressing a specific key (often F10) and confirming your choice.
After saving and exiting, your computer will restart. If you’ve set the boot order correctly, it should now attempt to boot from the USB drive. You might see a message like “Press any key to boot from USB…” – if so, press any key on your keyboard immediately.
Installing Windows 11
Once your computer successfully boots from the USB drive, you will be greeted by the Windows 11 setup environment. This is where you’ll guide the installation process.
The Windows 11 Setup Wizard
The setup wizard is designed to be user-friendly. You’ll proceed through several screens, making choices about language, time, keyboard layout, and licensing.
- Language, Time, and Keyboard: Select your preferred language, time and currency format, and keyboard input method. Click “Next.”
- Install Now: Click the prominent “Install now” button.
- Product Key: If you have a Windows 11 product key, enter it here. If you are reinstalling Windows 11 on a computer that already had it activated, or if you plan to activate it later, you can click “I don’t have a product key.” The system will likely activate automatically once it connects to the internet.
- Edition Selection: If you clicked “I don’t have a product key,” you’ll be prompted to choose the edition of Windows 11 you want to install (e.g., Windows 11 Home, Windows 11 Pro). Make sure to select the edition you have a license for.
- License Terms: Accept the Microsoft license terms by checking the box and clicking “Next.”
- Installation Type: This is a critical choice:
- Upgrade: This option attempts to install Windows 11 while keeping your files, settings, and applications. It’s generally recommended for upgrades from compatible Windows versions. However, it’s less common when booting from USB for a fresh install.
- Custom: Install Windows only (advanced): This option is for a clean installation. It will format your drive and install a fresh copy of Windows 11. This is the recommended method for a clean start, troubleshooting, or installing on a new drive.
Partitioning and Formatting Your Drive
If you choose the “Custom” installation, you’ll be presented with a screen showing your hard drive partitions.
-
For a Clean Install on a New Drive or to Erase Everything:
- Select the drive or partition where you want to install Windows 11.
- If you want to start completely fresh, you can delete all existing partitions on that drive by selecting each one and clicking “Delete.” Be absolutely sure you have backed up all data before doing this, as it is irreversible.
- After deleting partitions, you will have “Unallocated Space.” Select this unallocated space.
- Click “New” to create a new partition. Windows will automatically create necessary system partitions (like the recovery partition and EFI system partition) and the main partition for Windows.
- Select the primary partition you just created (it will usually be the largest one) and click “Next.”
-
If You Want to Install Alongside Another OS or on a Specific Partition:
- Carefully select the existing partition where you want to install Windows 11.
- Click “Format” to erase the contents of that partition. Again, ensure you have backed up any necessary data from this partition.
- With the formatted partition selected, click “Next.”

Completing the Installation
After selecting your drive or partition, Windows 11 will begin installing. This involves copying files, installing features, and installing updates. Your computer will restart several times during this process. Do not remove the USB drive until prompted to do so.
Once the core installation is complete, you will be guided through the Out-of-Box Experience (OOBE) for Windows 11. This includes:
- Region and Keyboard Layout: Confirm your region and keyboard layout.
- Network Connection: Connect to your Wi-Fi or Ethernet.
- Account Setup: Sign in with your Microsoft account or create a local account (if available and desired).
- Privacy Settings: Configure your privacy preferences.
- Personalization: Set up Windows for personal use or work/school.
- OneDrive Setup: Choose your OneDrive backup preferences.
After completing the OOBE, you will land on the Windows 11 desktop, ready to personalize your system, install your applications, and start using your new operating system. Remember to install all necessary drivers for your hardware (graphics card, network adapter, audio, etc.) if they weren’t automatically installed by Windows Update.
By following these steps carefully, you can successfully install Windows 11 from a USB drive, enjoying a fresh, efficient, and secure computing experience.
aViewFromTheCave is a participant in the Amazon Services LLC Associates Program, an affiliate advertising program designed to provide a means for sites to earn advertising fees by advertising and linking to Amazon.com. Amazon, the Amazon logo, AmazonSupply, and the AmazonSupply logo are trademarks of Amazon.com, Inc. or its affiliates. As an Amazon Associate we earn affiliate commissions from qualifying purchases.