
In the fast-evolving world of technology, keeping your computer running efficiently is paramount for productivity, gaming, and general computing tasks. One of the most impactful and often straightforward upgrades you can make to breathe new life into an aging system, or boost the performance of a new one, is installing or upgrading your Random Access Memory (RAM). RAM acts as your computer’s short-term memory, allowing it to quickly access data needed by active applications and the operating system. When your system lacks sufficient RAM, it can lead to frustrating slowdowns, stuttering, and an overall sluggish experience.
This comprehensive guide will walk you through everything you need to know about installing RAM, from understanding its importance and preparing for the upgrade, to a step-by-step installation process and post-installation checks. Whether you’re a seasoned tech enthusiast or a first-time upgrader, equipping yourself with the right knowledge will ensure a smooth and successful installation, maximizing your system’s potential and your digital productivity.
Understanding RAM and Why It Matters
Before you even think about opening your computer case, it’s crucial to grasp what RAM is, why it’s so vital, and how to identify if an upgrade is truly what your system needs. This foundational knowledge will not only guide your installation but also help you make informed decisions about future hardware choices, aligning with the core “Tech” focus of optimal system performance.
What is RAM? The Computer’s Short-Term Memory
RAM, or Random Access Memory, is a type of volatile computer memory that can be accessed randomly. Unlike your hard drive or Solid State Drive (SSD), which stores data permanently, RAM holds data that your computer’s Central Processing Unit (CPU) needs to access quickly and frequently. Think of it as your computer’s workspace – the larger the workspace, the more tasks and applications it can keep open and readily accessible without having to constantly fetch information from slower storage devices. When you open a program, edit a document, or browse the web, all the data associated with those actions is temporarily loaded into RAM for rapid processing. The more RAM you have, the smoother your multitasking, the faster applications launch, and the more responsive your overall system feels.
Signs You Need a RAM Upgrade
Identifying the symptoms of insufficient RAM is the first step towards a targeted and effective upgrade. While a RAM upgrade is a relatively inexpensive way to boost performance, it’s not a magic bullet for all computer woes. However, several common signs strongly indicate that your system is crying out for more memory:
- Frequent Slowdowns and Freezing: Your computer becomes noticeably sluggish when running multiple applications or even a single demanding program.
- Excessive Disk Activity: If you hear your hard drive constantly churning or see your SSD’s activity light flickering excessively even when performing light tasks, it often means your system is “paging” or using virtual memory on your slower storage drive because it has run out of physical RAM.
- Browser Tabs Crashing or Reloading: Modern web browsers are notorious RAM hogs. If tabs frequently crash or reload when switching between them, more RAM could solve the issue.
- Difficulty with Demanding Applications: Video editing, graphic design software, CAD programs, and modern games are all incredibly memory-intensive. If these applications run poorly, experience crashes, or take a long time to load, a RAM upgrade is likely beneficial.
- “Out of Memory” Errors: This is the most direct indicator that your system has exhausted its available RAM.
Addressing these issues with a RAM upgrade often presents a cost-effective solution compared to purchasing an entirely new system, aligning with smart “Money” management in technology.
Key RAM Specifications for Compatibility
Before purchasing new RAM, understanding its specifications is critical to ensure compatibility with your existing system. Buying the wrong type of RAM is a common mistake that can lead to frustration and wasted funds.
- DDR Type (DDR3, DDR4, DDR5): This is perhaps the most important specification. Your motherboard supports a specific generation of DDR (Double Data Rate) memory. For example, a motherboard designed for DDR4 will not accept DDR3 or DDR5 RAM. Check your motherboard’s manual or use system information tools (like CPU-Z) to determine the correct DDR generation.
- Speed (MHz): RAM speed is measured in megahertz (MHz) and indicates how quickly the RAM can process data. Common speeds include 2133 MHz, 2400 MHz, 3200 MHz, etc. While faster RAM generally offers better performance, your motherboard and CPU have limits on the maximum supported speed. If you install RAM faster than your system supports, it will simply run at the maximum supported speed or its default JEDEC profile.
- Capacity (GB): This refers to the total amount of memory available (e.g., 4GB, 8GB, 16GB, 32GB). Your motherboard also has a maximum RAM capacity it can support. It’s often beneficial to use multiple smaller modules (e.g., two 8GB sticks) rather than one large one (e.g., one 16GB stick) to take advantage of dual-channel memory configurations, which can significantly boost performance.
- Form Factor (DIMM vs. SO-DIMM):
- DIMM (Dual In-line Memory Module): These are the longer sticks typically found in desktop computers.
- SO-DIMM (Small Outline Dual In-line Memory Module): These are shorter modules designed for laptops and small form-factor PCs.
You must choose the correct form factor for your device.
By carefully matching these specifications, you guarantee that your new RAM will seamlessly integrate with your current hardware, maximizing its “Tech” potential and preventing costly errors.
Preparation: Before You Begin
Proper preparation is key to a smooth and successful RAM installation. Neglecting any of these steps can lead to compatibility issues, damage to components, or even personal injury. Taking the time to prepare correctly aligns with safe “Tech” practices and protects your “Money” investment.
Checking Compatibility: The Ultimate Pre-Installation Step
This is the most critical step. Before buying any new RAM, you must verify its compatibility with your specific computer.
- Identify Your Motherboard Model: For desktops, you can usually find this printed on the motherboard itself, in your system’s documentation, or by using software like CPU-Z, Speccy, or by checking your system information in Windows (search “System Information”). For laptops, you’ll need your laptop’s specific model number.
- Consult Your Motherboard/Laptop Manual: Once you have your model number, search online for its official specifications or manual. This document will detail:
- The supported DDR generation (DDR3, DDR4, DDR5).
- The maximum supported RAM capacity.
- The number of RAM slots available.
- The maximum supported RAM speed.
- Whether it supports dual-channel, quad-channel, or single-channel configurations.
- Check Existing RAM: If you’re upgrading, note the specifications of your current RAM modules. Ideally, new RAM should match the speed, CAS Latency (CL), and voltage of existing modules for optimal performance, especially if you plan to mix them. For best results, it’s often recommended to purchase RAM kits that are sold together as a matched pair or set.
- Use Online Tools: Websites like Crucial.com offer “System Scanners” that can automatically detect your system’s specifications and recommend compatible RAM modules. This can be a very helpful starting point, though cross-referencing with your motherboard manual is always a good idea.
Gathering Your Tools
Having the right tools on hand streamlines the process and minimizes the risk of damage.
- Phillips Head Screwdriver: The most common tool for opening computer cases and removing components.
- Anti-Static Wrist Strap (Recommended): This is highly recommended to prevent electrostatic discharge (ESD) from damaging sensitive electronic components. ESD can be invisible but incredibly destructive.
- Non-Conductive Surface: A clean, flat, and non-carpeted surface to work on. Avoid working on carpet, especially in dry environments.
- Flashlight (Optional but Helpful): For illuminating tight spaces inside the computer case.
- Compressed Air (Optional): To clean out dust from inside the case and RAM slots, improving airflow and component longevity.
Safety Precautions: Protecting Yourself and Your Hardware
Safety should be your top priority during any computer hardware installation.
- Power Off and Unplug: Completely shut down your computer. Do not just put it to sleep. Once shut down, unplug the power cable from the wall outlet and the back of the computer.
- Discharge Residual Power: After unplugging, press and hold the power button on your computer for 10-15 seconds. This helps drain any residual power stored in the capacitors.
- Ground Yourself (ESD Protection):
- Anti-Static Wrist Strap: If you have one, connect it to your wrist and clip the other end to a bare, unpainted metal surface on your computer case (like the PSU casing) or another grounded object.
- Alternate Grounding: If you don’t have a strap, frequently touch a bare, unpainted metal part of your computer case before and during handling components. This equalizes your static charge with the computer’s, minimizing the risk of ESD.
- Avoid Static-Generating Environments: Do not work on carpet. Remove any synthetic clothing that can generate static.
By adhering to these preparatory steps, you establish a secure and efficient environment for your RAM installation, ensuring the longevity of your hardware and the success of your upgrade.
Step-by-Step RAM Installation Guide
With your preparations complete, you’re now ready to physically install the RAM. This section provides a detailed, “Tech”-focused tutorial for both desktop and laptop installations.
Opening Your Computer Case
The first step is gaining access to your motherboard’s RAM slots.
- For Desktops:
- Place your computer tower on your clean, non-conductive workspace.
- Locate the thumbscrews or regular screws on the back of the case that secure the side panel. These are usually on the left side when viewed from the front (this is typically the side that reveals the motherboard).
- Unscrew them and carefully slide the side panel backward, then lift it off. Set it aside in a safe place.
- For Laptops:
- Turn the laptop upside down.
- Identify the access panel for the RAM (often a smaller panel secured by a few screws, sometimes labeled with a memory module icon). Some laptops may require removing the entire bottom case.
- Unscrew the necessary screws and carefully pry open the panel or lift off the entire bottom case. Be gentle and watch for any ribbon cables connected to the panel.
Locating RAM Slots
Once the case is open, you need to find the RAM slots.
- For Desktops: RAM slots are long, narrow slots usually located next to the CPU socket on the motherboard. They often come in pairs or quads and typically have small plastic clips on either end. The number of slots can vary (2, 4, or 8).
- For Laptops: RAM slots are typically stacked one on top of the other, or side-by-side, usually protected by a metal bracket or film. They are generally smaller than desktop DIMM slots.
Removing Old RAM (If Upgrading)
If you’re replacing existing RAM modules, you’ll need to remove them first.
- Release the Clips: Gently push down on the small plastic clips at both ends of the RAM slot. The clips should spring outwards, causing the RAM module to slightly pop up.
- Pull Out the Module: Once the clips are disengaged, carefully pull the RAM module straight out of the slot. Hold it by its edges to avoid touching the gold connectors or the chips themselves.
- Store Safely: Place the removed RAM in an anti-static bag or a safe, non-conductive place.

Inserting New RAM Modules
This is the core of the installation. Handle the new RAM modules by their edges only.
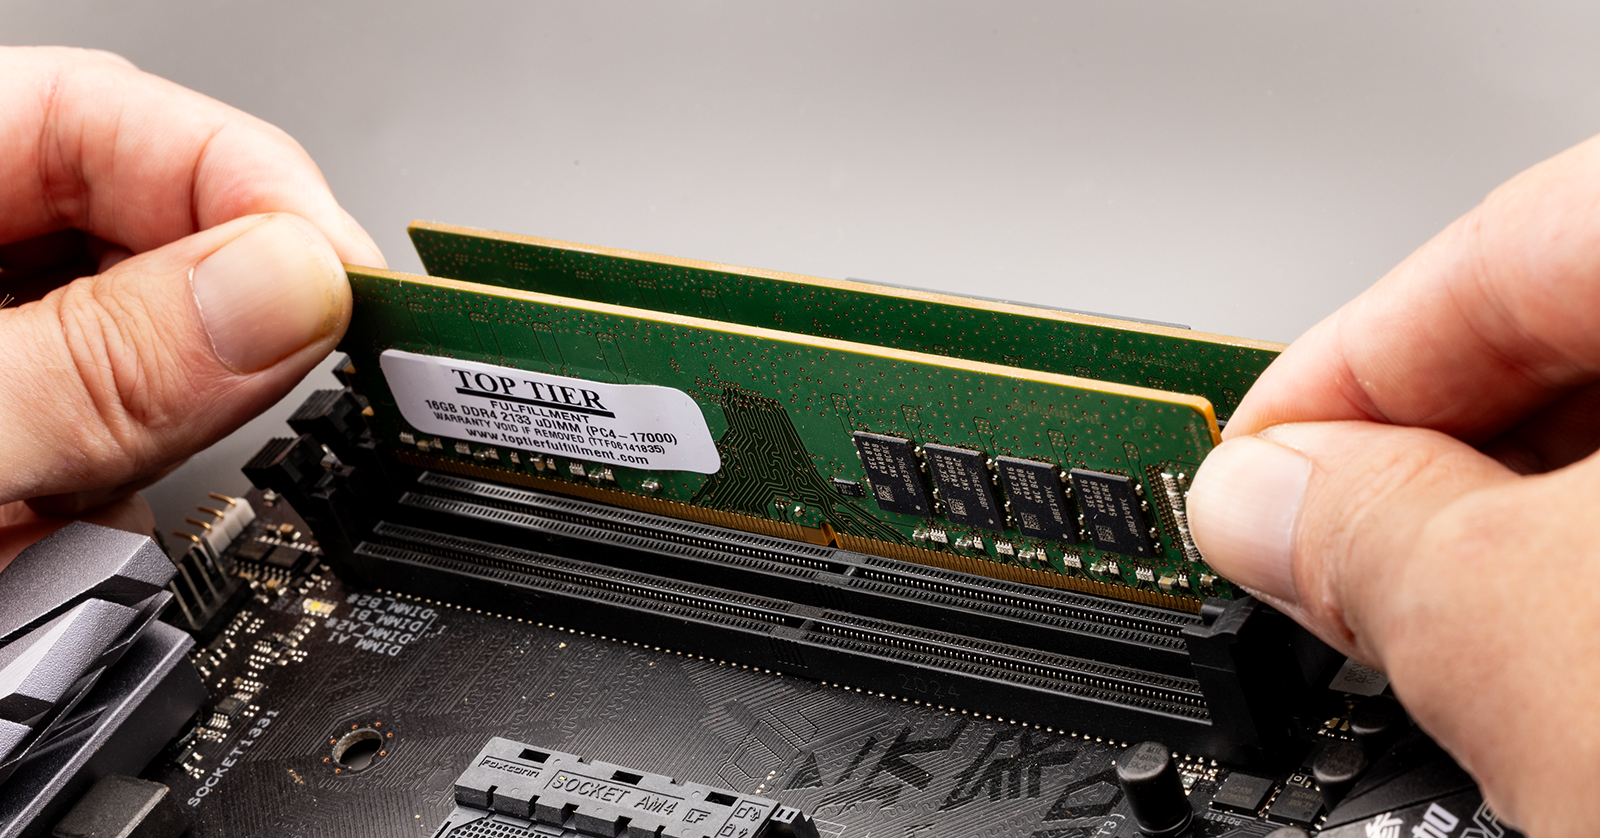
- Align the Notch: Look at the golden connectors on the bottom of the RAM module. You’ll notice a small notch in the middle. This notch must align with the corresponding key in the RAM slot on the motherboard. This ensures the RAM is inserted in the correct orientation. Never force a RAM module into a slot if it doesn’t align – you likely have it backward or it’s the wrong DDR type.
- Insert and Press Firmly:
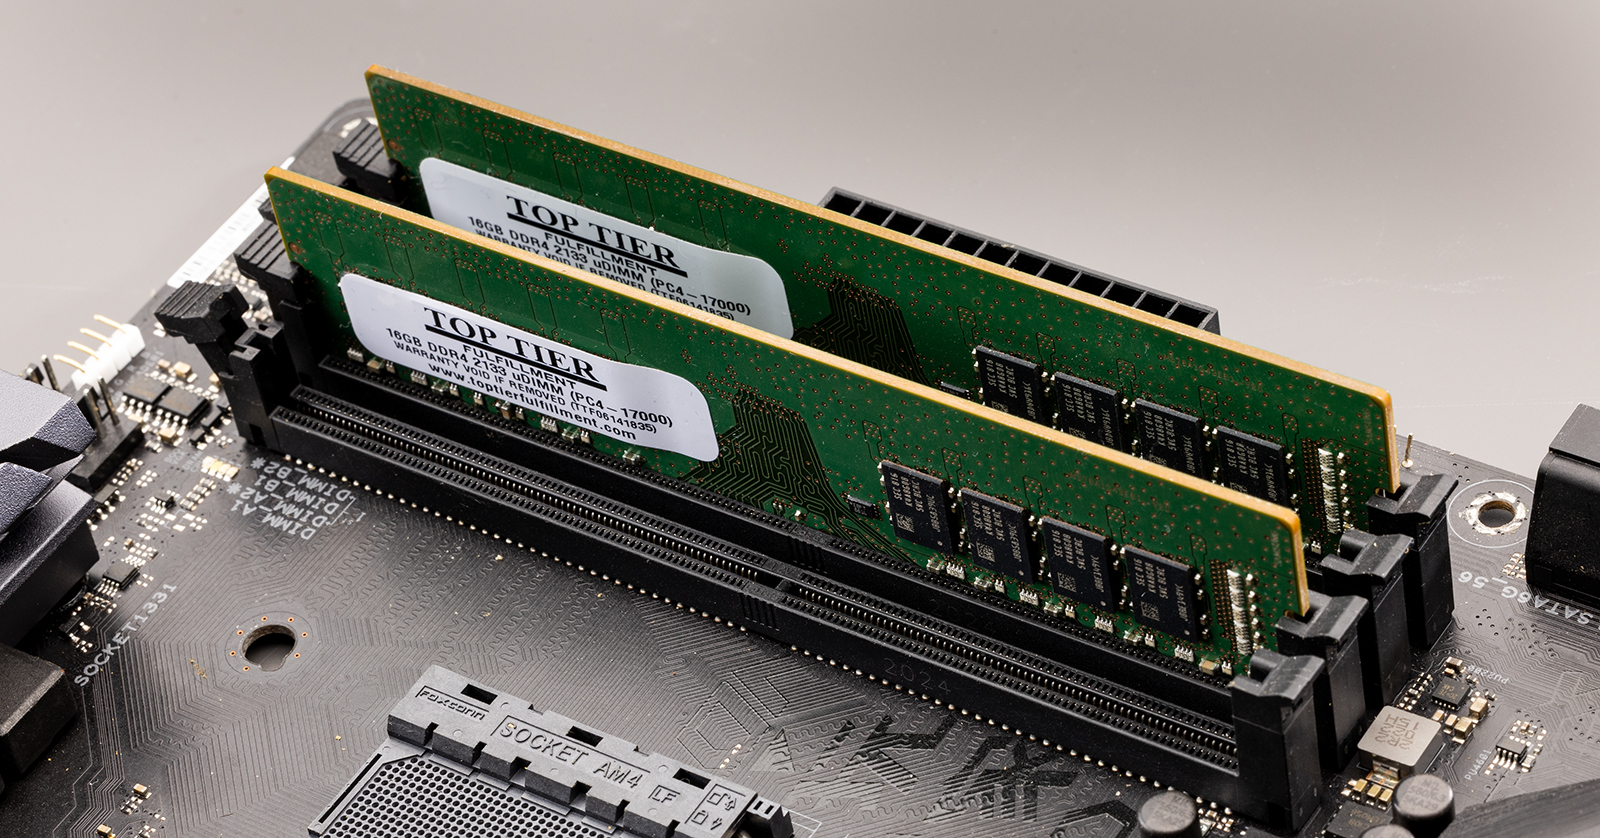
- For Desktops (DIMM): Place the module into the slot, aligning the notch. Apply even, firm pressure to both ends of the module simultaneously. You should hear and feel the plastic clips on either side snap into place, securing the RAM.
- For Laptops (SO-DIMM): Insert the module into the slot at roughly a 30-45 degree angle, pushing firmly until the golden contacts are mostly hidden. Then, push the module down until it lies flat and the small metal clips on the sides engage and hold it in place.
- Verify Seating: Double-check that the clips on both ends are fully engaged and that the RAM module is seated securely and evenly in the slot. There should be no gap between the module and the slot.
If installing multiple modules, repeat the process. Refer to your motherboard manual for the recommended slot configuration for dual-channel or quad-channel memory to optimize performance. Typically, these are labeled (e.g., A1, B1 for the first pair).
Closing Your Computer Case
Once all new RAM modules are securely installed:
- For Desktops: Carefully slide the side panel back onto the case, ensuring all tabs align, and secure it with the screws you removed earlier.
- For Laptops: Reattach the access panel or bottom case, ensuring all clips and screws are replaced.
Reconnect all peripherals (monitor, keyboard, mouse, power cable, etc.). You are now ready for the post-installation checks.
Post-Installation Checks and Troubleshooting
After physically installing the RAM, the next crucial step is to verify that your system recognizes it and that everything is functioning correctly. This “Tech” verification stage ensures your upgrade delivers the expected performance and helps resolve any immediate issues.
Verifying RAM Recognition
Once your computer boots up, you’ll want to confirm that the new RAM is detected and being used by your system.
- BIOS/UEFI Check (Before OS Load):
- Restart your computer. As it starts up, repeatedly press the designated key to enter your BIOS/UEFI settings (common keys are DEL, F2, F10, F12).
- Navigate to a section usually labeled “System Information,” “Main,” or “Memory.” Here, you should see the total amount of RAM installed and sometimes its speed. Confirm this matches your new installation.
- Optional: Enable XMP/DOCP profiles. If you purchased high-speed RAM (e.g., 3200MHz or higher), it might initially run at a lower default speed (e.g., 2133MHz). Look for an “Extreme Memory Profile” (XMP) or “D.O.C.P.” setting in your BIOS/UEFI, enable it, and select the profile that matches your RAM’s advertised speed. Save and exit.
- Operating System Check (After OS Load):
- Windows:
- Right-click on the Start button and select “System.” Under “Installed RAM,” you should see the total amount of memory.
- Alternatively, open Task Manager (Ctrl+Shift+Esc), go to the “Performance” tab, and click on “Memory.” You’ll see the total RAM, its speed, and usage details.
- macOS:
- Click the Apple menu in the top-left corner and select “About This Mac.” The overview tab will show the total installed memory.
- Linux:
- Open a terminal and type
free -horhtop. These commands will display the total and available system memory.
- Open a terminal and type
- Windows:
If the reported RAM matches your expectations, congratulations! Your installation was successful.
Common Issues and Solutions
Sometimes, things don’t go perfectly the first time. Here are common issues and how to troubleshoot them:
- Computer Doesn’t Boot / No Display:
- Solution: This is often due to RAM not being seated properly. Power down, unplug, and reopen the case. Carefully remove and re-seat all RAM modules, ensuring the clips snap firmly into place. Try one stick at a time in different slots if you have multiple.
- Computer Boots, but Not All RAM is Recognized:
- Solution: One or more sticks might not be seated correctly or could be faulty. Re-seat all modules. Check your motherboard manual for the correct slot configuration (e.g., often skipping a slot for dual-channel). Try booting with only one stick at a time to identify a potentially bad module.
- System Instability / Crashes After Boot:
- Solution: This can be a sign of incompatible RAM, faulty RAM, or incorrect BIOS settings (like XMP). If you enabled XMP, try disabling it in the BIOS to see if stability returns. If instability persists, try running a memory diagnostic tool (like Windows Memory Diagnostic or MemTest86+) to check for errors.
- RAM Shows Wrong Speed in OS/BIOS:
- Solution: This is usually because XMP/DOCP is not enabled in the BIOS/UEFI. Go back into your BIOS settings and activate the appropriate XMP profile for your RAM.
Testing Performance
Once your RAM is recognized and stable, it’s a good idea to test its impact on your system’s performance.
- Run Demanding Applications: Open the applications that previously struggled (games, video editors, multiple browser tabs) and observe the difference in responsiveness and load times.
- Monitor Resource Usage: Use Task Manager (Windows) or Activity Monitor (macOS) to observe RAM usage. You should see less “paging” or “disk activity” compared to before the upgrade, indicating your system is relying more on its faster RAM.
- Benchmarking (Optional): For those who enjoy specific metrics, you can use benchmarking software (e.g., PassMark PerformanceTest, AIDA64) to measure the raw performance gains of your new RAM.
By thoroughly checking and troubleshooting, you ensure that your RAM upgrade delivers the full “Tech” benefits it promises, translating into a more productive and enjoyable computing experience.
Maximizing Your Investment: Beyond the Install
Installing RAM is just one part of optimizing your system. To truly maximize the return on your “Money” investment and ensure peak “Tech” performance and “Productivity,” consider these additional factors. This also subtly ties into “Brand” by emphasizing the value of quality components and informed choices.
Dual-Channel vs. Single-Channel RAM: Unlocking Performance
One of the easiest ways to boost RAM performance (and it’s often overlooked) is by utilizing dual-channel memory configuration.
- How it Works: Most modern motherboards support dual-channel architecture, meaning the memory controller can access two RAM modules simultaneously, effectively doubling the memory bandwidth.
- Benefits: This leads to noticeable performance improvements, especially in scenarios involving integrated graphics, gaming, and data-intensive applications.
- Configuration: To enable dual-channel, you typically need to install RAM modules in specific, color-coded slots on your motherboard (e.g., slots 1 & 3, or 2 & 4). Always consult your motherboard manual for the correct configuration. It’s usually best to use two identical RAM sticks (same capacity, speed, and ideally “Brand” and model) to ensure optimal dual-channel operation.
Investing in a matched pair of RAM sticks, even if it means slightly less total capacity than a single, larger stick for the same price, can yield better real-world performance.
When to Upgrade vs. Buy New: A “Money” Perspective
A RAM upgrade is often a very cost-effective way to extend the lifespan and improve the performance of an existing computer. However, there comes a point where an upgrade, even with new RAM, won’t address fundamental bottlenecks.
- Upgrade RAM if: Your current system is generally performing well but struggles with multitasking, specific memory-intensive applications, or browser performance. This is typically the cheapest and easiest performance boost.
- Consider a New PC if: Your CPU is significantly old (e.g., 7+ years), your graphics card is outdated for your needs, or your storage is still a slow HDD. In such cases, upgrading only RAM might provide limited benefits, as other components will remain bottlenecks. A new PC might be a better long-term “Money” investment, offering a complete overhaul of performance and features.
The decision often boils down to a cost-benefit analysis. A RAM upgrade is a good first step, but if your system has multiple antique components, a new purchase may offer a better return on investment.
Choosing Reputable Brands: Reliability and Warranty
The “Brand” of your RAM might seem secondary to its specifications, but it plays a crucial role in reliability, compatibility, and customer support.
- Reliability: Reputable memory brands like Corsair, Kingston, Crucial, G.Skill, and Patriot have established track records for quality manufacturing and rigorous testing. This reduces the likelihood of receiving faulty modules.
- Compatibility: Major brands often work closely with motherboard manufacturers to ensure broad compatibility with various chipsets and systems. They also provide excellent online compatibility checkers.
- Warranty and Support: Leading brands typically offer robust warranties (often lifetime limited warranties) and responsive customer support, which can be invaluable if you encounter any issues. While generic or lesser-known brands might be slightly cheaper, the peace of mind and long-term reliability offered by established brands often justify the marginal price difference.
Making an informed choice about the “Brand” of RAM you purchase is part of a smart “Tech” strategy that pays off in system stability and longevity.
Maintaining Your System: Sustained Performance
Installing new RAM is a significant step, but maintaining your overall system ensures that you continue to reap the benefits of your upgrade.
- Regular Cleaning: Dust buildup inside your computer can hinder airflow, lead to overheating, and reduce component lifespan. Periodically clean out your case with compressed air.
- Software Optimization: Keep your operating system and drivers updated. Regularly uninstall unnecessary programs, manage startup applications, and perform disk cleanup to free up storage space. While RAM is fast, a cluttered system can still feel sluggish.
- Monitoring: Use system monitoring tools to keep an eye on your RAM usage, CPU temperature, and other vital statistics. This proactive approach helps identify potential issues before they become major problems, ensuring your improved “Productivity” continues uninterrupted.
By following this comprehensive guide, from understanding the technicalities of RAM to making smart purchasing decisions and ensuring a flawless installation, you’re not just installing a piece of hardware; you’re investing in a faster, more responsive, and more productive computing experience.
aViewFromTheCave is a participant in the Amazon Services LLC Associates Program, an affiliate advertising program designed to provide a means for sites to earn advertising fees by advertising and linking to Amazon.com. Amazon, the Amazon logo, AmazonSupply, and the AmazonSupply logo are trademarks of Amazon.com, Inc. or its affiliates. As an Amazon Associate we earn affiliate commissions from qualifying purchases.