In the ever-evolving landscape of technology, Java stands as a towering pillar, powering everything from enterprise-level applications and mobile development to big data processing and the underlying infrastructure of many AI tools. At the heart of developing with Java lies the Java Development Kit, or JDK. For aspiring developers, seasoned programmers adopting a new system, or even IT professionals maintaining critical infrastructure, understanding how to properly install and configure the JDK is a foundational skill.
This comprehensive guide will walk you through the process of installing the JDK on various operating systems, ensuring you have a robust and ready environment for all your Java development endeavors. We’ll delve into what the JDK is, how to choose the right version, detailed installation steps for Windows, macOS, and Linux, and essential post-installation verification and troubleshooting tips. By the end of this article, you’ll not only have a functioning JDK installation but also a deeper understanding of its importance in the broader tech ecosystem.

Understanding the Java Development Kit (JDK)
Before we dive into the installation process, it’s crucial to understand what the JDK is and its role in Java development. Often, terms like JDK, JRE (Java Runtime Environment), and JVM (Java Virtual Machine) are used interchangeably, but they represent distinct components of the Java platform.
What is JDK and Why Do You Need It?
The Java Development Kit (JDK) is a software development environment used for developing Java applications and applets. It includes the Java Runtime Environment (JRE), an interpreter/loader (java), a compiler (javac), an archiver (jar), a documentation generator (javadoc), and other tools needed for Java development. Essentially, if you want to write, compile, and debug Java code, you need the JDK. It’s your complete toolkit for creating Java-based software.
The Java Runtime Environment (JRE), on the other hand, is a subset of the JDK. It provides the minimum requirements for executing a Java application. It contains the JVM, class libraries, and other supporting files. If you only need to run Java applications (like many desktop apps or web applets), the JRE is sufficient. It does not include development tools like the compiler.
The Java Virtual Machine (JVM) is an abstract machine that provides a runtime environment in which Java bytecode can be executed. The JVM enables Java to be platform-independent, meaning compiled Java code can run on any device that has a JVM. Both the JDK and JRE include a JVM.
In summary:
- JVM: Executes Java bytecode.
- JRE: Contains JVM + libraries to run Java applications.
- JDK: Contains JRE + development tools to develop Java applications.
For anyone looking to code in Java, the JDK is indispensable. It’s the starting point for developing anything from simple command-line tools to complex enterprise systems, influencing modern software trends and underpinning many AI and big data solutions built on Java.
Choosing the Right JDK Version
Over the years, numerous versions of Java and the JDK have been released. Deciding which version to install can sometimes be perplexing, especially with the shift from Oracle’s commercial JDK to more open-source alternatives and a faster release cycle.
Historically, Oracle provided the primary JDK distribution. However, since Java 11, Oracle has changed its licensing model. While Oracle still offers a commercial JDK, the open-source OpenJDK project has become the de facto standard for many developers and organizations. OpenJDK is free, open-source, and maintained by a community of developers including Oracle, Red Hat, IBM, SAP, and others. Most major Linux distributions, for example, package OpenJDK by default. For the vast majority of use cases, OpenJDK is an excellent choice and functionally equivalent to Oracle JDK for development purposes.
When selecting a version, consider the following:
- Long-Term Support (LTS) Versions: Java releases often follow a pattern of non-LTS releases every six months and LTS releases every few years. LTS versions (like Java 8, Java 11, Java 17, Java 21) are recommended for production environments due to their extended support and stability.
- Project Requirements: If you’re working on an existing project, it’s crucial to install the JDK version that the project is built upon. Version mismatches can lead to compilation errors or runtime issues.
- New Features: If you’re starting a new project and want to leverage the latest language features and performance improvements, you might opt for the most recent LTS version.
- Specific Vendors: While OpenJDK is a community effort, various vendors provide their own builds, often with additional support or specific optimizations (e.g., Adoptium (formerly AdoptOpenJDK), Amazon Corretto, Azul Zulu, SapMachine). For most purposes, Adoptium’s Temurin builds are a popular and reliable choice for OpenJDK.
For this guide, we’ll generally refer to the process of installing an OpenJDK distribution (like Adoptium Temurin or direct OpenJDK from a package manager) or the Oracle JDK, as the installation steps are largely similar. We recommend starting with a recent LTS version, such as Java 17 or Java 21, for new development.
Step-by-Step JDK Installation Guide
The installation process varies slightly depending on your operating system. Below, we provide detailed instructions for Windows, macOS, and Linux.
Preparing for Installation
Before you begin, ensure your system meets the basic requirements (minimal disk space, RAM, etc., which are usually very low for JDK). It’s also a good practice to uninstall any older, potentially conflicting JDK versions if you encounter issues, though modern installers usually handle upgrades well.
Installation on Windows
Installing the JDK on Windows is typically straightforward using an installer.
-
Download the JDK Installer:
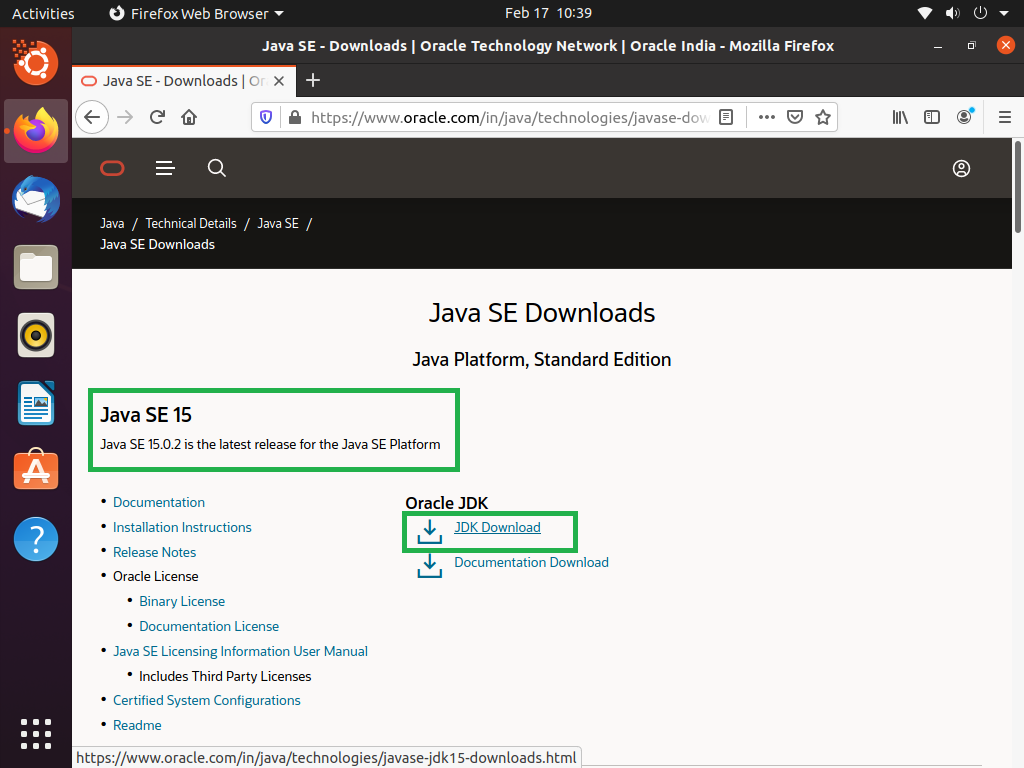
- Navigate to your preferred JDK provider’s website. For OpenJDK, a popular choice is Adoptium (Temurin). For Oracle JDK, visit Oracle’s Java Downloads page.
- Select the appropriate JDK version (e.g., Java 17 LTS or Java 21 LTS) and choose the Windows x64 installer (
.msifile). - Download the file to a convenient location on your computer.
-
Run the Installer:
- Locate the downloaded
.msifile (e.g.,jdk-17.0.x_windows-x64_bin.msi) and double-click it to start the installation wizard. - You might be prompted by User Account Control (UAC) to allow the app to make changes to your device; click Yes.
- Follow the on-screen instructions:
- Click Next on the welcome screen.
- Choose your installation directory. The default location (e.g.,
C:Program FilesJavajdk-17.0.x) is usually fine. Note this path, as you might need it later. Click Next. - The installation will proceed. Once finished, click Close.
- Locate the downloaded
-
Set Environment Variables (Crucial for Development):
For your system to recognize Java commands from any directory in the command prompt, you need to set up environment variables.- Open System Properties: Search for “Environment Variables” in the Windows search bar or right-click “This PC” (or “My Computer”), select “Properties,” then “Advanced system settings,” and finally click the “Environment Variables…” button.
- Create
JAVA_HOME(User or System Variable):- In the “System Variables” section (recommended for all users) or “User variables” section (for your user only), click New….
- For “Variable name,” enter
JAVA_HOME. - For “Variable value,” enter the path to your JDK installation directory (e.g.,
C:Program FilesJavajdk-17.0.x). Click OK.
- Update the
PathVariable:- In the “System Variables” section, find the
Pathvariable and select it. Click Edit…. - In the “Edit environment variable” window, click New.
- Add
%JAVA_HOME%bin(this tells your system where to find thejavaandjavacexecutables). - Alternatively, you can add the direct path:
C:Program FilesJavajdk-17.0.xbin. - Ensure this entry is high in the list to avoid conflicts with other Java versions, then click OK on all open windows to save the changes.
- In the “System Variables” section, find the
Installation on macOS
macOS users also have a couple of options: using a downloadable installer or a package manager like Homebrew.
Method 1: Using the Installer
-
Download the JDK Installer:
- Go to Adoptium (Temurin) or Oracle’s Java Downloads page.
- Select the appropriate JDK version and choose the macOS Arm 64 DMG (for Apple Silicon Macs) or macOS x64 DMG (for Intel Macs).
- Download the
.dmgfile.
-
Run the Installer:
- Double-click the downloaded
.dmgfile to mount it. - In the mounted disk image, double-click the
.pkgfile (e.g.,jdk-17.0.x_macos-x64_bin.pkg) to start the installer. - Follow the on-screen instructions:
- Click Continue on the welcome screen.
- Click Install.
- You’ll be prompted for your macOS user password. Enter it and click Install Software.
- Once the installation is complete, click Close. The JDK is usually installed in
/Library/Java/JavaVirtualMachines/jdk-17.0.x.jdk/Contents/Home.
- Double-click the downloaded
-
Set
JAVA_HOME(Optional but Recommended):
macOS often manages Java versions automatically, but settingJAVA_HOMEexplicitly is good practice, especially when dealing with multiple JDKs or certain development tools.- Open your terminal (Applications > Utilities > Terminal).
- Determine your shell:
echo $SHELL. If it’sbash, you’ll edit.bash_profileor.bashrc. If it’szsh, you’ll edit.zshrc. - Open the appropriate configuration file with a text editor (e.g.,
nano ~/.zshrcorvi ~/.bash_profile). - Add the following lines to the end of the file, replacing
jdk-17.0.x.jdkwith your actual JDK version:
bash

export JAVA_HOME=/Library/Java/JavaVirtualMachines/jdk-17.0.x.jdk/Contents/Home

export PATH=$JAVA_HOME/bin:$PATH
- Save the file and exit the editor.
- Apply the changes by sourcing the file:
source ~/.zshrc(orsource ~/.bash_profile).
Method 2: Using Homebrew (Recommended for Developers)
Homebrew simplifies software management on macOS.
-
Install Homebrew (if you haven’t already):
- Open Terminal.
- Run the command:
bash

/bin/bash -c "$(curl -fsSL https://raw.githubusercontent.com/Homebrew/install/HEAD/install.sh)"
- Follow any on-screen instructions.
-
Install JDK using Homebrew:
- Once Homebrew is installed, you can install the JDK with a single command. To install the latest LTS version (e.g., OpenJDK 17):
bash

brew install openjdk@17
- Homebrew will download and install the JDK, and often provide instructions for linking it and setting
JAVA_HOME. Pay attention to these post-installation messages. - Typically, you’ll need to run:
bash

sudo ln -sfn /usr/local/opt/openjdk@17/libexec/openjdk.jdk /Library/Java/JavaVirtualMachines/openjdk-17.jdk
(Adjust the version numberopenjdk@17as needed). - Then, set
JAVA_HOMEin your shell configuration file (e.g.,.zshrcor.bash_profile):
bash

export JAVA_HOME=$(/usr/libexec/java_home -v 17)

export PATH=$JAVA_HOME/bin:$PATH
(Or simply use thejava_homeutility provided by macOS). - Source your shell config:
source ~/.zshrc.
- Once Homebrew is installed, you can install the JDK with a single command. To install the latest LTS version (e.g., OpenJDK 17):
Installation on Linux
Linux offers the most flexibility, with options ranging from package managers to manual tarball installations. Using a package manager is generally recommended.
Method 1: Using Package Managers (Recommended)
This is the easiest and most common method. The commands vary based on your Linux distribution.
-
Debian/Ubuntu (apt-get/apt):
- Update your package lists:
bash

sudo apt update
- Install a specific OpenJDK version (e.g., OpenJDK 17):
bash

sudo apt install openjdk-17-jdk
- If you need to install the default JDK (often the latest LTS available in the repos):
bash

sudo apt install default-jdk
- Update your package lists:
-
Red Hat/CentOS/Fedora (yum/dnf):
- Update your packages:
bash

sudo dnf update # or sudo yum update
- Install a specific OpenJDK version (e.g., OpenJDK 17):
bash

sudo dnf install java-17-openjdk-devel # or sudo yum install java-17-openjdk-devel
- The
develpackage includes development tools.
- Update your packages:
-
Arch Linux (pacman):
- Update your packages:
bash

sudo pacman -Syu
- Install OpenJDK 17:
bash

sudo pacman -S jdk17-openjdk
- Update your packages:
Setting JAVA_HOME on Linux (if not automatically configured):
After installing via a package manager, java and javac commands are often directly available. However, JAVA_HOME might not be set, which is crucial for many build tools and IDEs.
-
Find your JDK installation path:
- For
apt-based systems, it’s usually in/usr/lib/jvm/java-X-openjdk-amd64(replaceXwith your version, e.g.,17). - For
dnf/yum-based systems, it’s often in/usr/lib/jvm/java-X-openjdk(replaceXwith your version, e.g.,17). - You can often use
readlink -f /usr/bin/javato find the path to thejavaexecutable, then trace back to theHomedirectory. - Example:
readlink -f $(which java)might give/usr/lib/jvm/java-17-openjdk-amd64/bin/java, meaningJAVA_HOMEis/usr/lib/jvm/java-17-openjdk-amd64.
- For
-
Edit your shell configuration file:
- Open
~/.bashrc,~/.zshrc, or~/.profilewith a text editor. - Add the following lines, replacing the path with your actual JDK path:
bash

export JAVA_HOME=/usr/lib/jvm/java-17-openjdk-amd64

export PATH=$JAVA_HOME/bin:$PATH
- Save the file and exit.
- Apply changes:
source ~/.bashrc(or~/.zshrc,~/.profile).
- Open
Method 2: Manual Installation from Tarball (Universal Linux)
This method is useful if your desired JDK version isn’t available in your package manager or for specific custom setups.
-
Download the JDK Tarball:
- Go to Adoptium (Temurin) or Oracle’s Java Downloads page.
- Select the Linux x64 Compressed Archive (
.tar.gz). Download it.
-
Extract the Tarball:
- Create a directory where you want to install Java (e.g.,
/opt/javaor~/java).
bash

sudo mkdir -p /opt/java
- Move the downloaded tarball to this directory and extract it:
bash
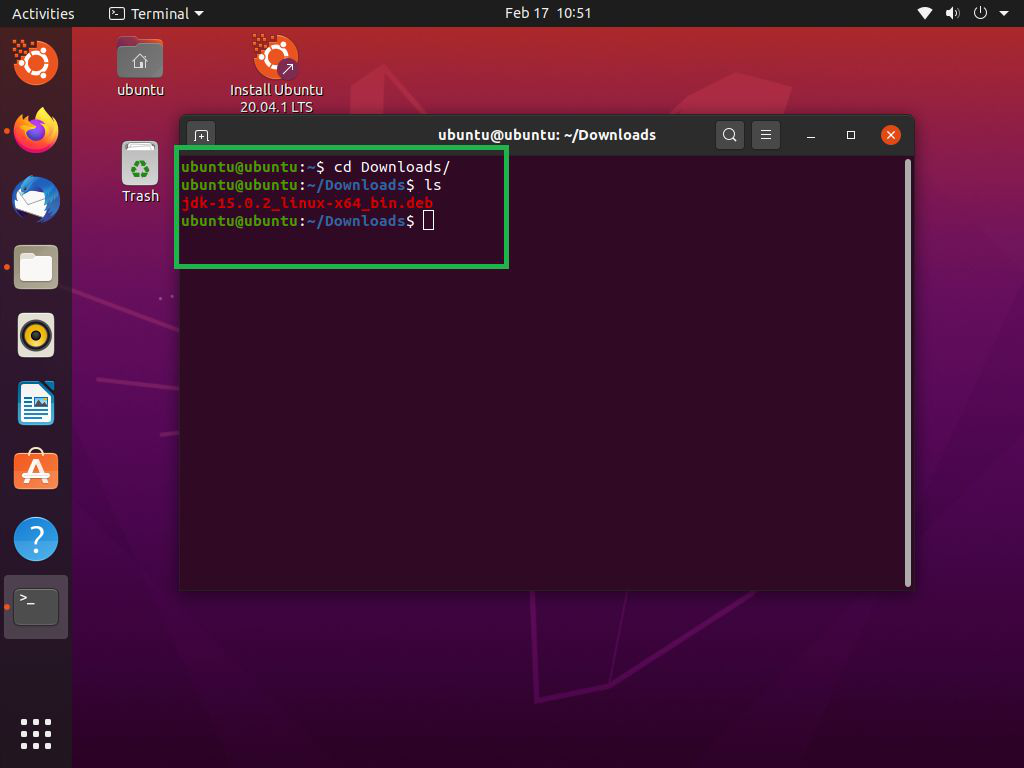
sudo mv ~/Downloads/jdk-17.0.x_linux-x64_bin.tar.gz /opt/java
cd /opt/java
sudo tar -xvzf jdk-17.0.x_linux-x64_bin.tar.gz
- This will create a directory like
jdk-17.0.xinside/opt/java.
- Create a directory where you want to install Java (e.g.,
-
Set Environment Variables:
- Open your shell configuration file (e.g.,
~/.bashrc,~/.zshrc, or~/.profile). - Add the following lines, replacing the path with your actual JDK path:
bash

export JAVA_HOME=/opt/java/jdk-17.0.x

export PATH=$JAVA_HOME/bin:$PATH
- Save and exit the editor.
- Apply changes:
source ~/.bashrc(or~/.zshrc,~/.profile).
- Open your shell configuration file (e.g.,
Verifying Your JDK Installation
After installing the JDK, it’s essential to verify that it’s correctly set up and accessible from your command line. This confirms that the environment variables are properly configured.
Running the java and javac Commands
Open a new terminal or command prompt window (important: existing windows might not have the updated environment variables).
-
Check Java Runtime Version:
Type the following command and press Enter:java -versionYou should see output similar to this, indicating the installed Java version and runtime environment:
openjdk version "17.0.x" 2023-01-17 LTS
OpenJDK Runtime Environment (build 17.0.x+y-LTS)
OpenJDK 64-Bit Server VM (build 17.0.x+y-LTS, mixed mode, sharing)
If you see “java: command not found” or an older version than expected, your
PATHvariable might not be correctly configured. -
Check Java Compiler Version:
Type the following command and press Enter:javac -versionThis should display the compiler version, which should match your Java runtime version:
javac 17.0.xIf
javacis not found, it indicates that the JDK (which includes the compiler) is either not installed or itsbindirectory is not correctly added to your system’sPATH. -
Check
JAVA_HOME(if applicable):
For many tools, theJAVA_HOMEenvironment variable is critical. You can verify its value:- Windows:
echo %JAVA_HOME% - macOS/Linux:
echo $JAVA_HOME
The output should be the path to your JDK installation directory (e.g.,C:Program FilesJavajdk-17.0.xor/usr/lib/jvm/java-17-openjdk-amd64).
- Windows:
If all these commands return the expected output, congratulations! Your JDK installation is successful and ready for use.
Common Issues and Troubleshooting
Even with careful following of instructions, issues can arise. Here are some common problems and their solutions.
Path Not Found Errors
- Problem:
javaorjavaccommand not found (e.g., “command not found,” “is not recognized as an internal or external command”). - Cause: The
bindirectory of your JDK installation is not correctly added to your system’sPATHenvironment variable. - Solution:
- Recheck
PATH: Go back to the environment variable settings for your OS (System Properties on Windows, shell config file on macOS/Linux). Ensure that an entry pointing to%JAVA_HOME%bin(Windows) or$JAVA_HOME/bin(macOS/Linux) or the direct path to the JDK’sbindirectory exists and is correct. - Order of
PATHentries: On some systems, the order of entries inPATHmatters. Ensure your JDK’sbindirectory comes before any other Java-related entries to prioritize your desired version. - New Terminal: Always open a new terminal or command prompt window after making changes to environment variables. Old windows often retain the old settings.
- Typos: Double-check for any spelling errors in variable names or paths.
- Recheck
Version Conflicts
- Problem:
java -versionshows an older or unexpected Java version, even after installing a new JDK. - Cause: Multiple JDKs/JREs are installed, and the
PATHvariable points to an older version first, orJAVA_HOMEis pointing to an incorrect version. - Solution:
- Check
PATHorder: Verify thePATHvariable. The firstjavaexecutable found in thePATHtakes precedence. Adjust the order to prioritize your desired JDK. - Update
JAVA_HOME: EnsureJAVA_HOMEpoints to the new JDK installation. - Remove old versions: If you no longer need older Java installations, consider uninstalling them to prevent conflicts.
update-alternatives(Linux): On Debian/Ubuntu systems, you can usesudo update-alternatives --config javaandsudo update-alternatives --config javacto explicitly choose the default Java version.
- Check
Permissions Issues
- Problem: Installation fails or Java commands give “Permission denied” errors.
- Cause: You don’t have the necessary administrative privileges to install software or modify system files.
- Solution:
- Run as Administrator/Sudo: On Windows, right-click the installer and choose “Run as administrator.” On macOS/Linux, use
sudofor installation commands or when moving/extracting files to system directories like/opt. - Check directory permissions: If manually installing, ensure the user account has read/execute permissions for the JDK directory.
- Run as Administrator/Sudo: On Windows, right-click the installer and choose “Run as administrator.” On macOS/Linux, use
Incomplete Installation
- Problem: Installation wizard finishes without errors, but
javaorjavaccommands don’t work. - Cause: The installation didn’t complete properly, or an essential component was missed.
- Solution:
- Re-download and Reinstall: The downloaded installer file might be corrupted. Try downloading it again and re-running the installation.
- Check Disk Space: Ensure you have enough free disk space for the installation.
- Antivirus/Firewall: Temporarily disable aggressive antivirus software or firewalls that might interfere with installation (remember to re-enable them afterward).
What’s Next After Installation?
With your JDK successfully installed, the real fun begins! You now have the foundational tools to embark on your Java development journey.
Your First Java Program (Hello World)
To truly confirm your setup and get a taste of Java, let’s write and run a simple “Hello, World!” program.
-
Create a Java file:
Open a text editor (like VS Code, Notepad++, Sublime Text, or even Notepad) and type the following code:public class HelloWorld { public static void main(String[] args) { System.out.println("Hello, JDK! Java is ready!"); } }Save the file as
HelloWorld.javain a directory of your choice (e.g.,C:devjavaon Windows,~/dev/javaon macOS/Linux). -
Compile the program:
Open your terminal or command prompt, navigate to the directory where you savedHelloWorld.java, and run the Java compiler:javac HelloWorld.javaIf successful, this command will create a
HelloWorld.classfile in the same directory. This is your compiled Java bytecode. -
Run the program:
Execute the compiled bytecode using the Java Virtual Machine:
bash

java HelloWorld
You should see the output:
Hello, JDK! Java is ready!
If this works, you’ve successfully compiled and run your first Java program!
Integrating with an IDE
While a text editor and command line are great for basics, serious Java development heavily relies on Integrated Development Environments (IDEs). IDEs offer features like code completion, debugging, refactoring, and project management that significantly boost productivity.
Popular Java IDEs include:
- IntelliJ IDEA (Community Edition): Highly recommended for its intelligent features and robust support for various Java frameworks.
- Eclipse IDE: A long-standing, open-source IDE widely used in enterprise environments.
- VS Code (with Java extensions): A lightweight but powerful editor that can be transformed into a capable Java IDE with extensions from the Extension Marketplace (e.g., Extension Pack for Java).
After installing your chosen IDE, you’ll typically configure it to use your newly installed JDK. Most modern IDEs can auto-detect JDKs, or you can point them to your JAVA_HOME directory.
Exploring Java Frameworks and Libraries
Once you’re comfortable with the basics, Java’s rich ecosystem of frameworks and libraries awaits:
- Spring Boot: The dominant framework for building enterprise-grade web applications and microservices.
- Maven/Gradle: Build automation tools essential for managing project dependencies and build processes.
- Hibernate: An Object-Relational Mapping (ORM) framework for database interaction.
- Apache Kafka: A distributed streaming platform often used with Java for real-time data processing.
- Various AI/Machine Learning Libraries: While Python dominates in some AI niches, Java also has powerful libraries like Deeplearning4j, Weka, and integrations with TensorFlow/ONNX Runtime for robust, scalable AI solutions.
Installing the JDK is just the beginning. It unlocks a world of possibilities for building powerful, scalable, and reliable software that underpins many aspects of modern technology, from mobile apps to sophisticated AI infrastructure.
Conclusion
The Java Development Kit is a fundamental tool for anyone looking to build applications in Java. While the installation process can seem daunting initially, especially with the nuances across different operating systems and environment variable configurations, a systematic approach ensures a smooth setup. By understanding the distinction between JDK, JRE, and JVM, choosing the right Java version, and meticulously following the installation steps outlined for Windows, macOS, or Linux, you can confidently prepare your development environment.
We’ve covered everything from downloading the correct installer or leveraging package managers like Homebrew and apt, to the critical step of setting your JAVA_HOME and PATH environment variables. Verification through java -version and javac -version commands is your final confirmation of a successful installation. Should you encounter any hurdles, our troubleshooting guide provides practical solutions for common issues, ensuring you spend less time fixing and more time coding.
With the JDK now at your fingertips, you’re ready to write your first Java program, integrate with powerful IDEs, and dive into the vast ecosystem of Java frameworks and libraries that drive innovation across various tech domains. Keep your JDK updated to benefit from the latest security patches, performance enhancements, and language features. Welcome to the world of Java development!
aViewFromTheCave is a participant in the Amazon Services LLC Associates Program, an affiliate advertising program designed to provide a means for sites to earn advertising fees by advertising and linking to Amazon.com. Amazon, the Amazon logo, AmazonSupply, and the AmazonSupply logo are trademarks of Amazon.com, Inc. or its affiliates. As an Amazon Associate we earn affiliate commissions from qualifying purchases.