Team Fortress 2 (TF2) stands as a monumental achievement in the world of online multiplayer gaming, celebrated for its vibrant art style, engaging class-based combat, and enduring community. Beyond its core gameplay, TF2 offers a remarkable degree of customization, allowing players to tailor their experience in numerous ways. One of the most impactful forms of personalization, particularly for those looking to gain a competitive edge or simply enhance their aesthetic enjoyment, is the installation of a custom Head-Up Display, or HUD.
This comprehensive guide will walk you through every step of installing a custom HUD in TF2, transforming your game interface to better suit your playstyle and preferences. We’ll delve into not just the “how-to,” but also the “why,” exploring the technical advantages, aesthetic appeal, and the sense of personal brand that a well-chosen HUD can bring to your gaming experience. Whether you’re a seasoned player seeking optimal information clarity or a newcomer curious about the extensive modding scene, understanding how to customize your TF2 HUD is a valuable digital skill that empowers you to take control of your virtual environment.
Understanding Custom HUDs: A Technical and Aesthetic Edge
In the fast-paced world of Team Fortress 2, every millisecond and every piece of on-screen information can make a difference. The default TF2 HUD is functional, but the community-driven custom HUD scene offers a universe of alternatives designed for specific purposes, from competitive play to pure visual delight.
What Exactly is a TF2 HUD?
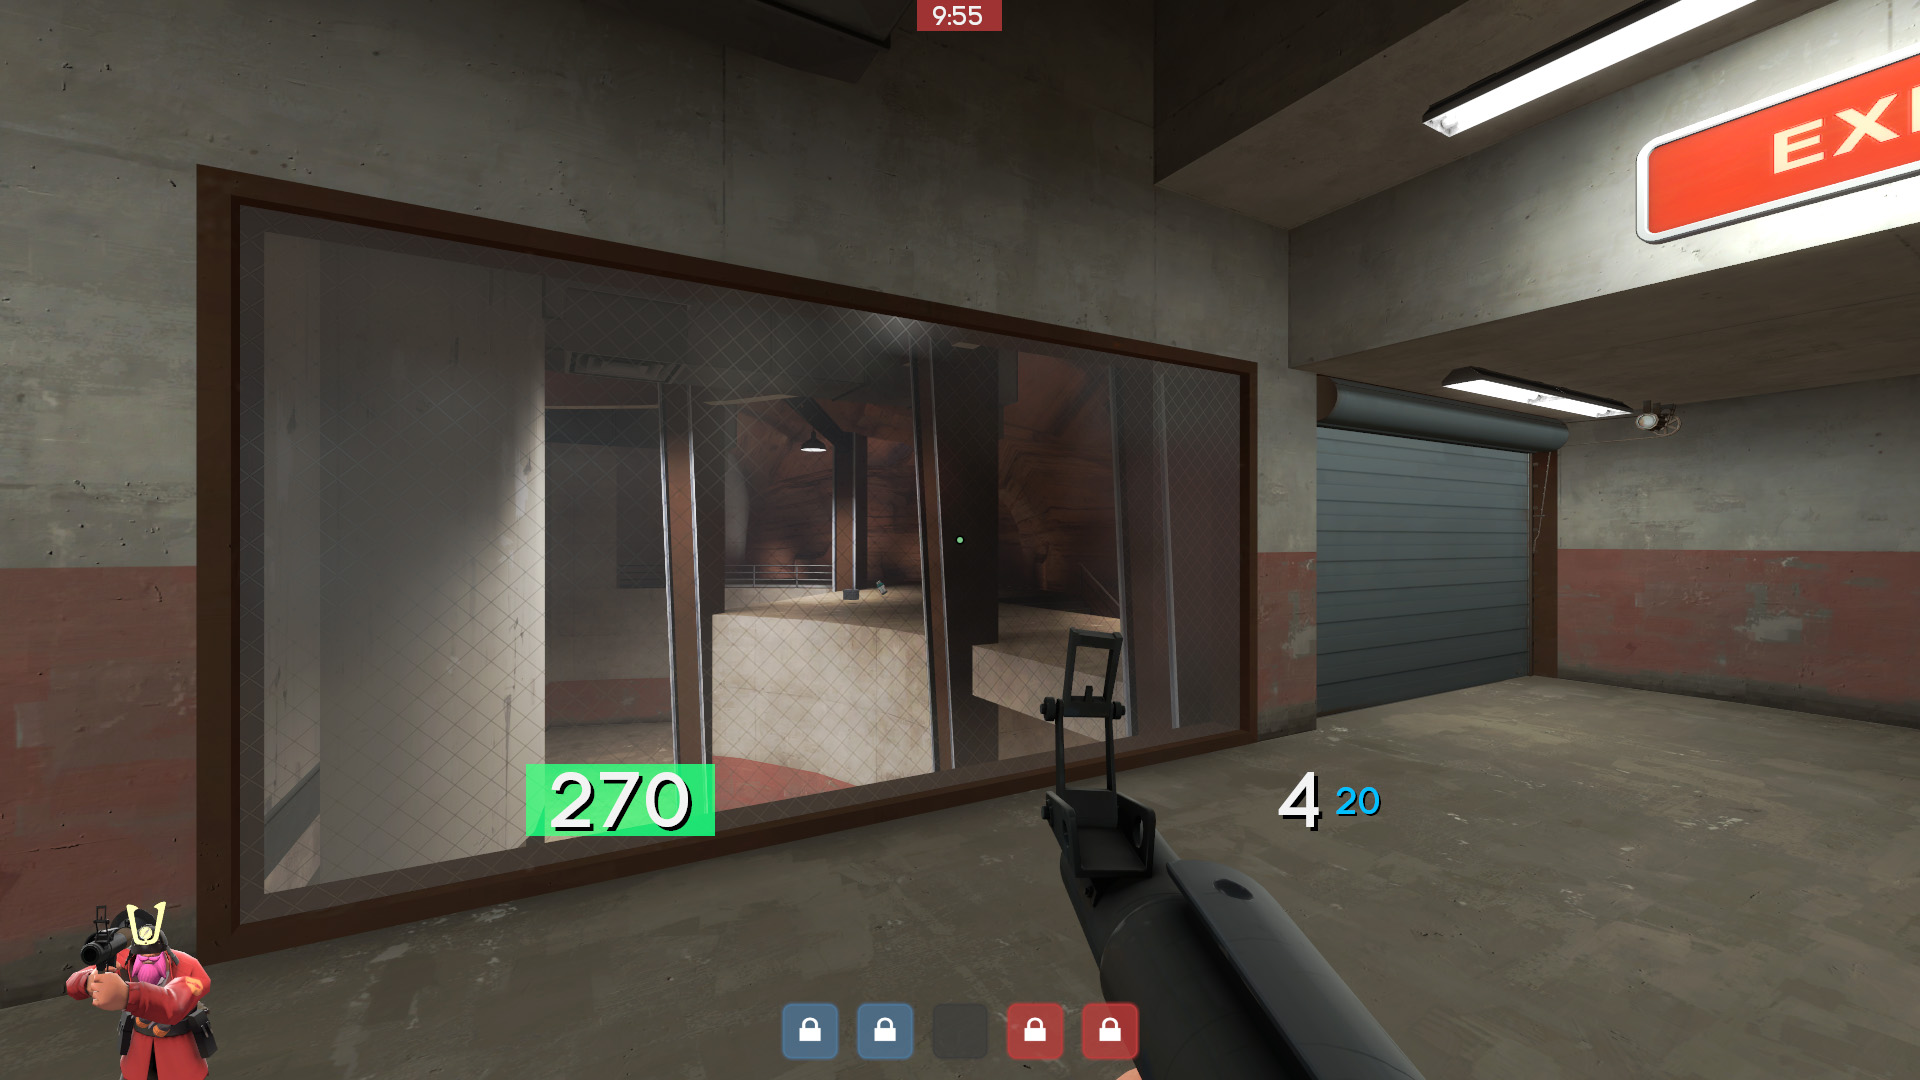
At its core, a HUD (Heads-Up Display) is the graphical interface layer overlaid onto the game world, providing players with crucial real-time information without obstructing their view. In TF2, this includes elements like your health, ammunition count, active weapon, charge meters, scoreboards, objective trackers, and communication alerts. The default TF2 HUD is instantly recognizable and designed to be universally accessible, but its design choices, such as font sizes, element placement, and visual flair, may not be optimal for every player or every situation.
Custom HUDs are player-made modifications that replace the default interface with entirely new layouts, aesthetics, and functionalities. These are typically developed using a combination of Valve’s proprietary scripting languages (like VGUI) and traditional image and font files. They are essentially carefully crafted sets of files that tell the game engine how to display vital information on your screen, often streamlining it for competitive play or enhancing its visual appeal. The beauty of custom HUDs lies in their diversity; there’s a HUD for almost every preference, from minimalist designs that declutter the screen to feature-rich interfaces that provide an abundance of data points.
The Benefits of Customization: Beyond Default Aesthetics
Why go through the effort of installing a custom HUD? The reasons are multifaceted, touching upon technical optimization, personal expression, and even a subtle form of digital branding within the gaming community.
Firstly, competitive advantage is a primary driver. Many custom HUDs are designed with competitive play in mind, prioritizing clarity, conciseness, and immediate access to critical information. This often means larger health and ammo displays, clearer crosshairs, more intuitive killfeeds, and easily readable charge meters for classes like Medic or Sniper. By reducing visual clutter and optimizing information delivery, players can make quicker, more informed decisions, potentially enhancing their in-game performance. This is a direct application of good UI/UX (User Interface/User Experience) design principles in a high-stakes environment.
Secondly, personal expression and aesthetics play a significant role. Just as one might customize a desktop wallpaper or smartphone theme, a custom HUD allows players to infuse their personality into their gaming setup. Some players prefer vibrant, colorful HUDs, while others lean towards sleek, monochromatic designs. This visual personalization contributes to a player’s unique identity within the game, subtly reinforcing their “brand” as a player. It’s a way to make the game truly feel like yours, a digital canvas reflecting your style.
Thirdly, accessibility and readability can be vastly improved. Players with specific visual preferences or even minor impairments might find certain default elements difficult to read. Custom HUDs can offer larger fonts, high-contrast colors, or repositioned elements to make the game more comfortable and enjoyable for a wider audience. This aspect highlights the community’s commitment to inclusive design.
Finally, installing a custom HUD is an excellent entry point into understanding game modification and file management. It’s a practical exercise in navigating game directories, understanding file structures, and safely implementing third-party modifications – valuable technical skills that extend beyond TF2 into general computer literacy and even potential career paths in game development or software modding. The custom HUD community itself is a testament to shared knowledge and collaborative development, a hallmark of open-source spirit within the gaming world.
Preparing for Your HUD Installation: The Tech Toolkit
Before diving into the actual installation process, a bit of preparation can save you headaches down the line. This involves knowing where to find reputable custom HUDs and understanding the basic prerequisites. Think of this as gathering your tools and blueprints before starting a construction project.
Finding Your Perfect HUD: Navigating the Community Landscape
The first step is arguably the most fun: browsing and selecting a HUD. The TF2 community has produced an astonishing variety of custom HUDs over the years, each with its unique philosophy and design.
The primary hub for finding TF2 HUDs is HUDs.tf. This website serves as a comprehensive directory, showcasing a vast array of actively maintained and frequently updated HUDs. Each listing typically includes screenshots, a description of features, a link to the creator’s page (often GitHub or a personal website), and most importantly, download links. When browsing, consider the following:
- Visual Style: Do you prefer minimalist, clean designs, or something more elaborate and stylized? Look at screenshots carefully.
- Information Clarity: Are health, ammo, and other critical elements easy to spot at a glance? Is there too much or too little information for your liking?
- Updates and Maintenance: A well-maintained HUD is crucial. TF2 receives updates periodically, which can sometimes break custom HUDs. Look for HUDs that have been recently updated or have an active development community behind them to ensure compatibility. The “brand” of a reputable HUD creator often comes with a promise of ongoing support.
- Features: Some HUDs offer unique features like custom class selection screens, advanced spectator modes, or highly configurable settings. Read the descriptions to see if any specific features appeal to you.
- Reviews and Community Feedback: Check comments or community forums for opinions on a particular HUD. Other players’ experiences can provide valuable insights into a HUD’s stability and usability.
Other platforms like GameBanana also host TF2 HUDs, though HUDs.tf is generally considered the most focused resource. YouTube is also an excellent place to see HUDs in action, as many creators and reviewers upload videos demonstrating their functionality during gameplay. Take your time with this step; selecting the right HUD can significantly enhance your long-term TF2 experience, making it an investment of your browsing time that pays dividends in enjoyment.
Essential Prerequisites: Setting the Stage
Before you download anything, ensure your system is ready. The requirements are minimal, but crucial for a smooth installation.
- Team Fortress 2 Installed: This might sound obvious, but ensure TF2 is fully installed and updated through Steam. You should be able to launch and play the game without any issues.
- Basic File Management Skills: You’ll need to know how to navigate your computer’s file system, locate folders, create new ones, and extract compressed files (like
.zipor.rararchives). If you’re unfamiliar with these tasks, take a moment to practice creating folders and moving files on your desktop. This fundamental tech skill is invaluable for any form of digital customization or software management. - An Archiving Tool: You’ll need software to uncompress the downloaded HUD files. Most operating systems have built-in
.zipfile support, but for.rarfiles or more robust options, free tools like 7-Zip (Windows) or Keka (macOS) are highly recommended.
Understanding your Steam directory structure is also key. Steam typically installs games in a predictable location. For Windows users, this is often C:Program Files (x86)Steamsteamappscommon. Within that, you’ll find the Team Fortress 2 folder, which is your gateway to customization. Knowing this common path is a cornerstone for almost any game modding endeavor, a practical example of understanding software installation architecture.
Step-by-Step Guide: Seamless HUD Integration
With your chosen HUD downloaded and your system ready, it’s time for the actual installation. Follow these steps carefully to ensure a smooth transition to your new custom interface. This is where your basic tech skills in file management truly come into play.
Step 1: Downloading Your Chosen HUD
Navigate to the download page for your selected HUD (usually found on HUDs.tf or the creator’s GitHub). Click the download link, which will typically provide a compressed archive file (e.g., myhud.zip or myhud.rar). Save this file to an easily accessible location, such as your Downloads folder or a dedicated “TF2 HUDs” folder you’ve created. Always download from reputable sources linked directly from HUDs.tf or the official creator to avoid malware or outdated versions. This is a crucial digital security practice.
Step 2: Locating the TF2 Custom Directory
This is perhaps the most critical step, as placing the HUD files in the correct location is essential for TF2 to recognize them.
- Open Steam: Launch your Steam client.
- Navigate to Library: Go to your game library.
- Find Team Fortress 2: Right-click on “Team Fortress 2” in your game list.
- Manage > Browse local files: From the context menu, select “Manage,” then “Browse local files.” This action will automatically open the main Team Fortress 2 installation directory in your file explorer.
- Locate the
tffolder: Inside theTeam Fortress 2folder, you will see a folder namedtf. Double-click to enter it. - Locate or Create the
customfolder: Within thetffolder, look for a folder namedcustom. If it already exists (which it should for most TF2 installations), double-click to enter it. If, for some rare reason, it does not exist, right-click in an empty space within thetffolder, select “New” > “Folder,” and name it exactlycustom(all lowercase). Thiscustomfolder is Valve’s designated location for user-made modifications, ensuring that your core game files remain untouched and easily revertible.
The full path will typically look something like this:
C:Program Files (x86)SteamsteamappscommonTeam Fortress 2tfcustom
Step 3: Extracting and Organizing Your HUD Files
Now that you’re in the custom folder, it’s time to place your downloaded HUD.
- Open the downloaded archive: Locate the
myhud.zip(or.rar) file you downloaded earlier. Right-click on it and choose “Extract All” (for.zipfiles on Windows) or use your preferred archiving tool (like 7-Zip) to extract its contents. - Understand the extracted structure: After extraction, you’ll typically find a folder inside the archive that contains all the HUD’s actual files and subfolders (e.g.,
scripts,resource,materials,info.vdf). It is crucial to note that you usually need to place this inner folder directly into yourtf/customdirectory, not the raw contents themselves.- Example: If your downloaded
.zipextracts tomyhud_v1.2/, and insidemyhud_v1.2/are thescripts,resourcefolders, etc., then you should copy themyhud_v1.2folder itself.
- Example: If your downloaded
- Move the HUD folder: Drag and drop (or copy and paste) the entire extracted HUD folder (e.g.,
myhud_v1.2) into yourtf/customdirectory.
So, the final structure should look like this:
...Team Fortress 2tfcustommyhud_v1.2
Inside myhud_v1.2, you’ll find the resource, scripts, materials folders, etc. This method ensures that your HUD is properly compartmentalized, making it easier to manage multiple HUDs or remove one later. This is an important organizational principle for managing software assets.
Step 4: Launching TF2 and Verifying Installation
With the files in place, it’s time to see your new HUD in action!
- Launch Team Fortress 2: Start the game through Steam as you normally would.
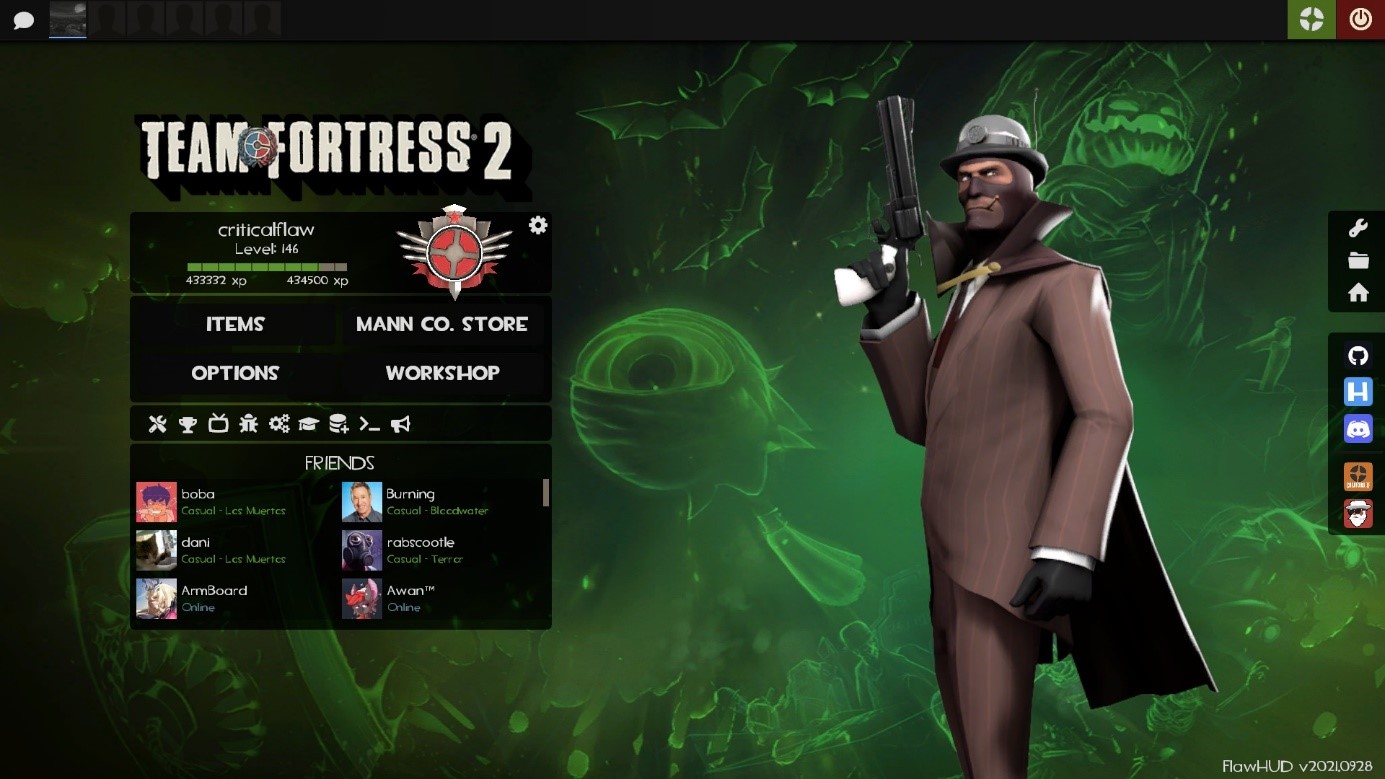
- Observe the changes: As the game loads, you should immediately notice differences in the main menu, class selection screen, and subsequently, in-game. If you see your new HUD elements, congratulations – the installation was successful!
- Troubleshooting (if needed): If the HUD hasn’t changed or looks broken, don’t panic. Proceed to the troubleshooting section below.
Step 5: Post-Installation Tweaks and Configuration
Some custom HUDs offer additional configuration options, either through in-game menus, external .cfg files, or even dedicated HUD switchers.
- In-Game Options: Check the game’s advanced options menu (
Options > Advanced Options) as some HUDs might integrate custom settings there. - HUD Configuration Files: Many HUDs include
.cfgfiles (e.g.,hudlayout.res,clientscheme.res) that can be edited with a basic text editor (like Notepad or Notepad++). These files allow you to fine-tune aspects like font sizes, color schemes, or element visibility. Always back up any files before editing them! - Developer Console: Certain HUDs might suggest console commands (
~key to open) for specific settings. Read your HUD’s documentation carefully for these advanced customizations.
Experimenting with these options allows you to truly personalize your interface, aligning it perfectly with your “brand” as a player and maximizing your visual comfort and competitive effectiveness.
Troubleshooting and Maintenance: Keeping Your HUD Optimized
Even with careful installation, issues can sometimes arise. Knowing how to troubleshoot common problems and maintain your HUD is an essential part of being a savvy digital user.
Common Issues and Solutions
-
HUD Not Showing Up / Default HUD Persists:
- Incorrect Folder Structure: This is the most common issue. Double-check that you placed the inner HUD folder (the one containing
resource,scripts, etc.) directly intotf/custom. The path should betf/custom/YOUR_HUD_NAME/resource, nottf/custom/resource. - Misnamed
customfolder: Ensure the folder is named exactlycustom(all lowercase). - Corrupted Download: Re-download the HUD file to ensure it wasn’t corrupted during the initial download.
- Conflicting HUDs: If you have multiple folders in your
tf/customdirectory, they might conflict. For troubleshooting, temporarily move all other folders out ofcustomexcept for the one you’re trying to install. - Game is Running: Ensure TF2 is completely closed before installing or modifying HUD files.
- Incorrect Folder Structure: This is the most common issue. Double-check that you placed the inner HUD folder (the one containing
-
HUD Looks Broken / Elements Missing or Misplaced:
- Outdated HUD: TF2 frequently receives updates, and sometimes these updates change underlying game files that custom HUDs rely on. If your HUD hasn’t been updated recently by its creator, it might be partially or fully broken. Check the HUD’s page for recent updates or known compatibility issues.
- Resolution Issues: Some older HUDs might not scale properly with modern high resolutions or ultrawide monitors. Check if the HUD has specific instructions for different resolutions.
- Missing Game Fonts: In rare cases, some custom fonts used by a HUD might not be present on your system.
- Reinstall: A fresh reinstallation of the HUD, ensuring all steps are followed precisely, can often resolve these issues.
-
Game Crashing on Launch:
- This is a severe but less common issue. It almost always points to a critically malformed HUD installation or a severely outdated/corrupted HUD. Remove the newly installed HUD folder from
tf/custom. If the game launches normally afterward, the HUD was the culprit. Seek an alternative or report the issue to the HUD creator.
- This is a severe but less common issue. It almost always points to a critically malformed HUD installation or a severely outdated/corrupted HUD. Remove the newly installed HUD folder from
When troubleshooting, adopt a systematic approach: isolate the problem, test one solution at a time, and always back up your files before making significant changes. These are foundational skills in digital diagnostics.
Updating and Reverting Your HUD
Updating a HUD:
When a HUD creator releases an update, the process is generally straightforward:
- Delete the old HUD folder: Go to
tf/customand delete the folder containing your current, outdated HUD. - Download the new version: Download the latest version of the HUD.
- Install the new version: Follow the installation steps (Steps 1-3) exactly as you did for the initial installation.
This ensures you have a clean, up-to-date installation without residual files from the old version causing conflicts.
Reverting to the Default HUD:
If you ever want to go back to TF2’s original interface, simply:
- Close TF2.
- Navigate to
tf/custom: Go to yourtf/customfolder using the method described in Step 2. - Remove or move the HUD folder: Delete the folder(s) containing your custom HUDs, or, if you want to keep them for later, move them out of the
customfolder (e.g., to atf/disabled_hudsfolder). - Launch TF2: The game will automatically revert to its default HUD. This simplicity is a major benefit of Valve’s
customfolder system.
These maintenance practices underscore the importance of responsible software management, ensuring both functionality and the flexibility to adapt your setup as your preferences or game updates dictate.
Conclusion
Installing a custom HUD in Team Fortress 2 is more than just a technical tweak; it’s an act of empowerment that allows you to sculpt your digital environment, enhance your gameplay, and express your individual style. From optimizing competitive performance through superior UI/UX design to simply making the game feel more “yours,” the benefits are clear and significant.
By following this guide, you’ve not only learned the practical steps of file management and game modification but also touched upon broader themes that resonate with our core website topics. You’ve applied tech skills in software customization and troubleshooting, engaged in a form of personal branding by tailoring your game’s aesthetic, and potentially even leveraged your time investment in gaming by creating a more efficient and enjoyable experience.
The world of custom TF2 HUDs is a testament to the creativity and collaborative spirit of the gaming community. We encourage you to explore the vast array of available HUDs, experiment with different styles, and find the perfect interface that elevates your Team Fortress 2 experience to new heights. Happy fragging!
aViewFromTheCave is a participant in the Amazon Services LLC Associates Program, an affiliate advertising program designed to provide a means for sites to earn advertising fees by advertising and linking to Amazon.com. Amazon, the Amazon logo, AmazonSupply, and the AmazonSupply logo are trademarks of Amazon.com, Inc. or its affiliates. As an Amazon Associate we earn affiliate commissions from qualifying purchases.