
In the realm of personal computing, few upgrades offer as dramatic and immediate an improvement to overall system performance as the transition to a Solid State Drive (SSD). While the dream scenario for many is a lightning-fast SSD for their operating system and frequently used applications, the practical reality often dictates a need for vast storage space, which Hard Disk Drives (HDDs) still provide more affordably. The good news is that you don’t have to choose between speed and capacity; you can have both. This comprehensive guide will walk you through the process of installing an SSD alongside your existing HDD, transforming your PC into a powerhouse of efficiency and ample storage.
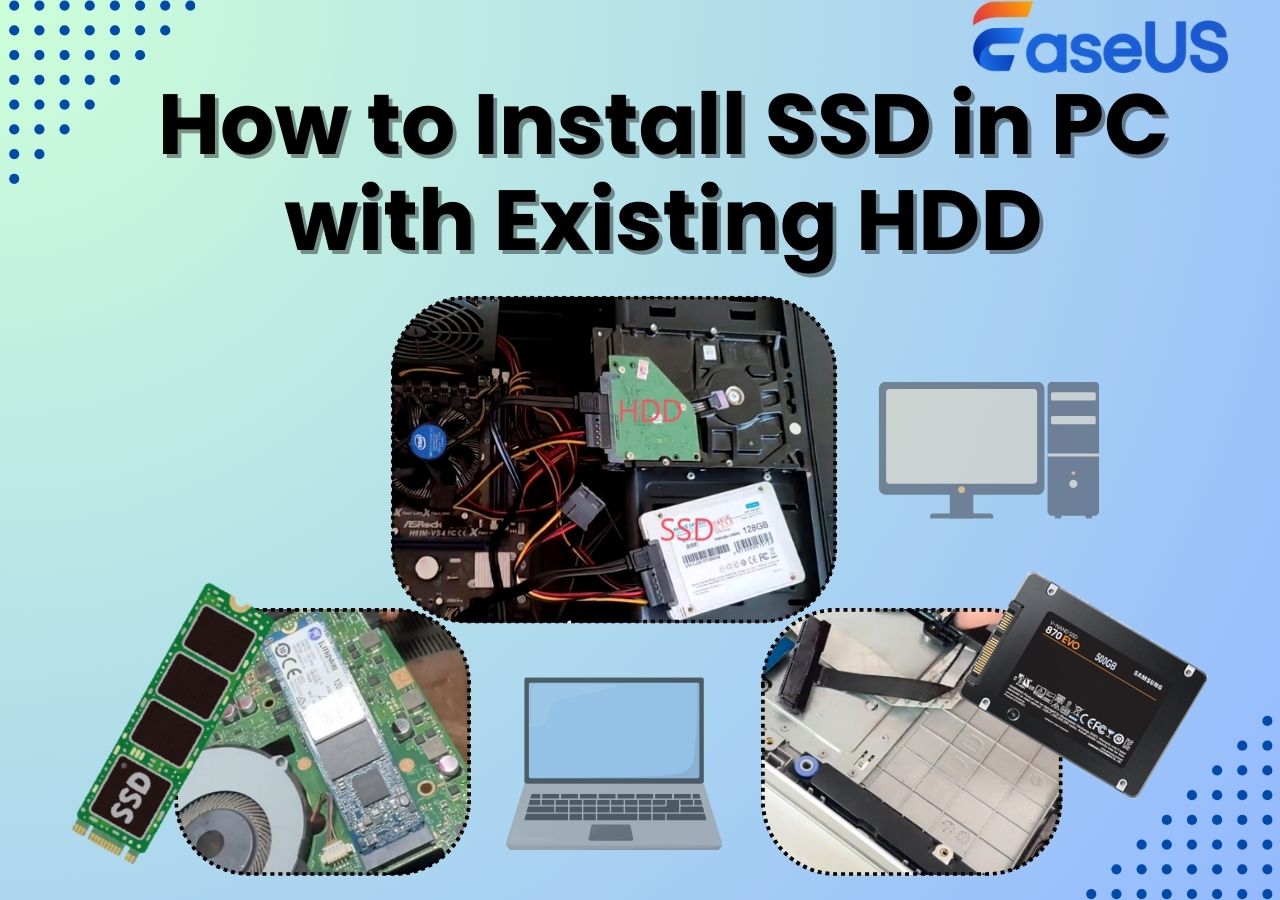
Why Upgrade to an SSD and Keep Your HDD?
The decision to integrate an SSD into a system already utilizing an HDD isn’t merely about adding another component; it’s about strategically optimizing your entire computing experience. This dual-drive setup leverages the unique strengths of each storage medium, creating a synergy that standalone drives cannot match.
The Synergistic Advantage: Speed and Storage
At its core, the appeal of a dual-drive system lies in its ability to offer the best of both worlds. SSDs are renowned for their incredible speed, thanks to their flash-based memory, which allows for near-instantaneous data access, boot times, and application loading. HDDs, conversely, rely on spinning platters and read/write heads, making them significantly slower, yet their mature technology allows for much larger storage capacities at a fraction of the cost per gigabyte. By combining them, you dedicate the SSD to tasks that demand speed and responsiveness, such as the operating system, critical applications, and frequently played games, while relegating the HDD to mass storage for documents, photos, videos, and less frequently accessed software. This division of labor ensures that your primary user experience is fluid and rapid, without sacrificing the vast storage potential needed for modern digital lives.
Performance Boost for Your OS and Applications
Imagine booting your computer in mere seconds, or launching complex software like video editors or graphic design suites almost instantly. This is the tangible benefit of installing your operating system and primary applications on an SSD. The difference in responsiveness compared to an HDD is night and day. Files open quicker, multitasking becomes smoother, and overall system snappiness improves dramatically. Even tasks like web browsing can feel faster as your browser caches and temporary files are read and written at superior speeds. For gamers, this translates into reduced loading screens and smoother in-game asset streaming, enhancing the immersive experience. The performance uplift isn’t just a luxury; for many professional users, it directly translates into increased productivity and reduced frustration from waiting for processes to complete.
Cost-Effectiveness and Data Management
From a financial perspective, a hybrid setup is often the most sensible approach. Large-capacity SSDs can still be quite expensive. By opting for a smaller, more affordable SSD (e.g., 256GB or 512GB) for your OS and core programs, and retaining your high-capacity HDD (e.g., 1TB, 2TB, or more) for bulk storage, you achieve an optimal balance between performance and cost. This strategy allows you to invest in the speed where it matters most, without breaking the bank on an exorbitantly priced large SSD. Furthermore, this configuration also simplifies data management. Your critical system files and most-used programs are isolated on the SSD, potentially making backups or system restorations more streamlined, while your personal data resides safely and expansively on the HDD. It’s an intelligent way to future-proof your system, providing ample room for growth in your digital archives without compromising on daily operational speed.
Essential Preparations Before Installation
Before you even think about opening your PC case, a thorough preparation phase is crucial. This not only ensures a smooth installation process but also safeguards your valuable data and helps you avoid common pitfalls. Skipping these steps can lead to frustration, data loss, or incompatible hardware.
Back Up Your Data: A Non-Negotiable Step
This cannot be stressed enough: back up your data. While the installation process is generally straightforward, hardware installations always carry a minimal risk. A power surge, an accidental cable disconnect, or an unforeseen software glitch during migration could potentially compromise your existing data. Use an external hard drive, cloud storage, or a network-attached storage (NAS) device to create a full backup of all important documents, photos, videos, and any other files you cannot afford to lose. This safety net provides peace of mind and allows you to proceed with confidence. Verify your backup to ensure its integrity before proceeding.
Gather Your Tools and Components
Having all necessary items on hand before starting will save you time and prevent interruptions. You’ll need:
-
The SSD itself: Ensure you’ve purchased the correct type (2.5-inch SATA, M.2 SATA, or M.2 NVMe) for your needs and system.
-
SATA data cable (for 2.5-inch SATA SSDs): Most motherboards come with a few spare cables, but it’s good to have an extra.
-
SATA power cable: Usually supplied by your PC’s power supply unit (PSU).
-
Screwdriver set: Typically a Phillips head screwdriver will suffice for opening the case and mounting the drive.
-
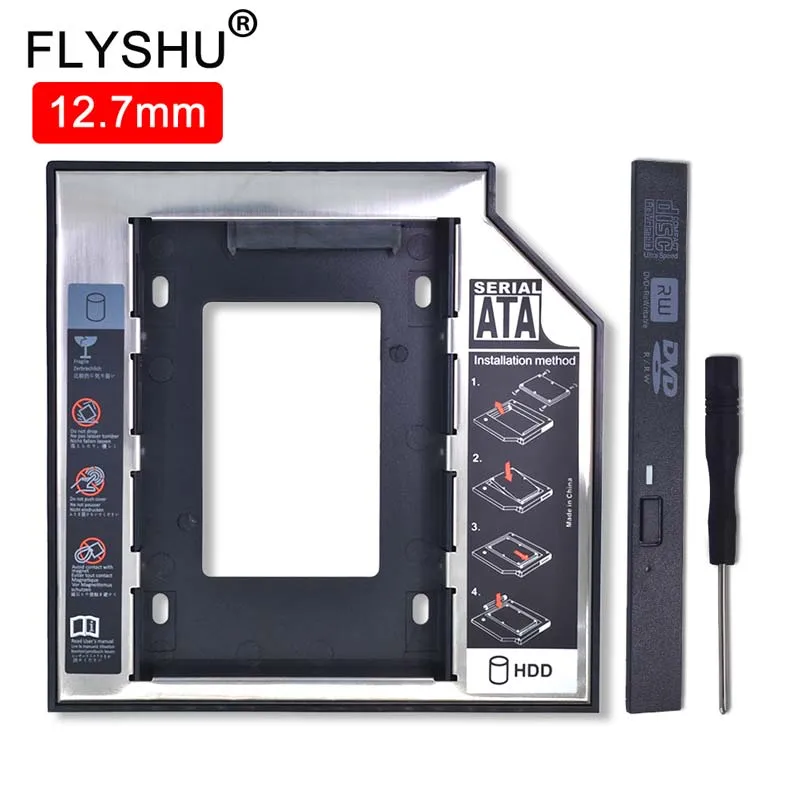
SSD mounting bracket/adapter (if installing a 2.5-inch SSD in a 3.5-inch bay): Many PC cases have dedicated 2.5-inch bays, but older cases might require an adapter.
-
Anti-static wrist strap (recommended): To prevent electrostatic discharge from damaging components.
-
Cloning software (if migrating your OS): Brands like Samsung, Crucial, and Western Digital often provide their own cloning tools. Third-party options like Macrium Reflect Free are also excellent.
-
USB installer for your operating system (if performing a clean install): Create one using Microsoft’s Media Creation Tool for Windows.
Understanding SSD Types and Compatibility
SSDs come in several form factors and interfaces, and understanding these is key to selecting the right one for your PC.
-
2.5-inch SATA SSDs: These are the most common type, resembling traditional laptop HDDs. They connect via a SATA data cable and a SATA power cable. They are compatible with virtually any modern desktop PC.
-
M.2 SATA SSDs: These are small, rectangular sticks that plug directly into an M.2 slot on your motherboard. They use the SATA protocol and offer similar performance to 2.5-inch SATA drives, but in a much smaller form factor, eliminating the need for cables.
-
M.2 NVMe SSDs: Also small sticks, these use the NVMe (Non-Volatile Memory Express) protocol over the PCIe interface. NVMe drives are significantly faster than SATA drives (both 2.5-inch and M.2 SATA) due to their direct connection to the CPU’s PCIe lanes.
Ensure your motherboard has the correct M.2 slot (Key M for NVMe, Key B or B+M for SATA) if you’re opting for an M.2 drive. Consult your motherboard manual for details on slot types and PCIe lane allocation.
Checking Your PC’s Motherboard and Case Compatibility
Before purchasing an SSD, inspect your PC’s internal layout.
-
Motherboard: Does it have available SATA ports if you’re installing a 2.5-inch SATA SSD? Are there any free M.2 slots, and if so, are they M-keyed (for NVMe) or B/B+M-keyed (for SATA)? Check if the M.2 slots support PCIe Gen3 or Gen4, which impacts NVMe SSD speeds.
-
PC Case: Does your case have a dedicated 2.5-inch drive bay, or will you need a 3.5-inch adapter? Is there enough physical space for the SSD and its cables without obstructing airflow or other components? Ensure your power supply has a spare SATA power connector available. Familiarize yourself with how to open your case and access the drive bays and motherboard.
The Physical Installation Process
With preparations complete and tools at hand, you’re ready to dive into the physical installation. This stage involves carefully opening your PC, mounting the SSD, and connecting it to the motherboard and power supply. Always exercise caution and work methodically to avoid damage.
Opening Your PC Case Safely
First, power down your PC completely and unplug it from the wall socket. Press the power button a few times to discharge any residual electricity. Move your PC to a clean, well-lit, and stable workspace. If you have an anti-static wrist strap, now is the time to put it on and clip it to an unpainted metal part of your PC case. Locate the screws holding the side panel(s) in place, usually at the rear of the case, and carefully remove them. Slide or swing the side panel open and set it aside. Take a moment to observe the internal layout, identifying potential drive bays and available SATA ports on your motherboard.
Mounting the SSD
-
For 2.5-inch SATA SSDs: Locate an available 2.5-inch drive bay or an empty 3.5-inch bay if you’re using an adapter. Slide the SSD into the bay and secure it with screws (usually four, from the sides or bottom). If using an adapter, first attach the SSD to the adapter, then mount the adapter into the 3.5-inch bay. Many modern cases have tool-less drive cages, simplifying this step.
-
For M.2 SSDs (SATA or NVMe): Locate an empty M.2 slot on your motherboard. These are typically small horizontal slots, often near the CPU or graphics card, sometimes hidden under a heatsink. Gently insert the M.2 SSD into the slot at a slight angle (around 30 degrees). Once fully seated, push the drive down horizontally until it’s parallel with the motherboard. Secure it with the small screw provided with your motherboard or SSD (it’s often a tiny M.2 screw, so be careful not to lose it). If your M.2 slot came with a heatsink, apply any thermal pads as instructed and reattach the heatsink over the SSD.
Connecting Data and Power Cables
-
For 2.5-inch SATA SSDs:
-
Data Cable: Connect one end of the SATA data cable (which looks like a flat L-shaped connector) to the SSD. Connect the other end to an available SATA port on your motherboard. Motherboard SATA ports are often numbered; it’s generally good practice to use the lowest numbered available port for your primary OS drive.
-
Power Cable: Connect a SATA power cable (a wider, flat L-shaped connector) from your power supply unit (PSU) to the SSD. Ensure both data and power cables are firmly seated.
-
-
For M.2 SSDs: No separate data or power cables are needed as M.2 drives draw power and communicate data directly through the motherboard slot. This simplifies cable management significantly.
Securing and Closing the Case
Once the SSD is physically installed and connected, double-check all connections to ensure they are snug. Make sure no cables are obstructing fan blades or airflow paths. Carefully reattach the side panel(s) of your PC case and secure them with the screws. Reconnect your PC’s power cable, monitor, and peripherals. You are now ready for the software configuration.
Software Configuration and Data Migration
With your SSD physically installed, the next crucial step is to configure it for use. This typically involves initializing and formatting the drive, followed by either a clean installation of your operating system or cloning your existing HDD.
Initializing and Formatting the SSD
After booting your PC for the first time with the new SSD, your operating system might not immediately recognize it as usable storage. You’ll need to initialize and format it.
-
Windows: Right-click the Start button and select “Disk Management.” You should see your new SSD listed as “Disk 1” or similar, usually showing as “Unallocated Space.” If a prompt appears asking to initialize the disk, choose “GPT (GUID Partition Table)” for modern systems. Then, right-click on the “Unallocated Space” of the SSD, select “New Simple Volume,” and follow the wizard to assign a drive letter and format it (NTFS file system, default allocation size). You can label it “SSD” or “OS Drive” for clarity.
-
macOS: Open “Disk Utility.” Select the new SSD, choose “Erase,” and format it as APFS (Apple File System) for modern macOS versions, or HFS+ (Mac OS Extended, Journaled) for older versions.
Option 1: Clean Installation of Operating System on SSD
A clean installation is often the preferred method for optimal performance. It means starting fresh with your operating system on the SSD, free from any old software remnants or registry clutter.
-
Prepare a Bootable USB: Create a bootable USB drive for your OS (e.g., Windows Media Creation Tool).
-
Disconnect HDD: To prevent accidental installation on the wrong drive and ensure the system definitively boots from the SSD, temporarily disconnect your HDD’s SATA data cable.
-
Boot from USB: Enter your PC’s BIOS/UEFI settings (usually by pressing Del, F2, F10, or F12 during startup) and set your USB drive as the primary boot device.
-
Install OS: Follow the on-screen prompts to install your OS onto the new SSD. When prompted to choose an installation location, ensure you select your new SSD. Delete any existing partitions on the SSD if it’s not brand new and you initialized it already.
-
Reconnect HDD: Once the OS is successfully installed and you’ve booted into it from the SSD, power down, and reconnect your HDD’s SATA data cable.
-
Adjust Boot Order: Re-enter BIOS/UEFI and set your SSD as the primary boot drive.
-
Format HDD (Optional): If your HDD contains the old OS and you want to reclaim its space for data, you can now format the HDD from within your new OS installation. Be absolutely sure you are formatting the correct drive and that you have backed up all important data.
Option 2: Cloning Your Existing HDD to the SSD
Cloning copies your entire operating system, programs, settings, and files from your old HDD directly to the new SSD, allowing you to seamlessly pick up exactly where you left off.
-
Install Cloning Software: Install a reliable cloning tool (e.g., Macrium Reflect Free, Samsung Data Migration, Crucial Storage Executive) on your existing OS.
-
Connect Both Drives: Ensure both your old HDD and the new SSD are connected and recognized by the system.
-
Initiate Cloning: Open the cloning software and follow its instructions. You will select your HDD as the “source disk” and your new SSD as the “destination disk.” The software will guide you through partitioning and scaling the partitions to fit the SSD (if it’s a different size).
-
Start Cloning: Begin the cloning process. This can take anywhere from 30 minutes to several hours depending on the amount of data and drive speeds.
-
Adjust Boot Order: Once cloning is complete, power down your PC. It’s often recommended to temporarily disconnect the old HDD to ensure the system boots from the SSD. Enter BIOS/UEFI and set your new SSD as the primary boot device.
-
Boot from SSD: Boot into your OS from the SSD. Once confirmed working, you can reconnect the HDD. You might then need to format the old OS partition on the HDD to free up space, using Disk Management as described above.
Optimizing Your System for Dual Drives
After installation, fine-tune your setup:
-
Move User Folders: Redirect “Documents,” “Downloads,” “Pictures,” “Videos,” and “Music” folders from your SSD to your HDD. Right-click on each folder (within your user profile), go to “Properties,” then the “Location” tab, and click “Move” to select a new path on your HDD.
-
Install Programs on HDD: For large programs or games that don’t benefit as much from SSD speeds (or if your SSD is small), install them directly to your HDD.
-
Manage Game Libraries: Steam, Epic Games, and other launchers allow you to create multiple game libraries across different drives, letting you keep performance-critical games on the SSD and others on the HDD.
Post-Installation Optimization and Maintenance
The installation is complete, but a few final steps can ensure your dual-drive system operates at peak efficiency and remains trouble-free for years to come. These optimizations help maximize both performance and longevity.
Verifying Boot Order and Performance
After successfully booting from your SSD, take a moment to confirm that your system is indeed utilizing it as the primary drive.
-
Check Boot Order: Enter your BIOS/UEFI settings again and verify that your SSD is listed as the first boot option. This prevents your PC from accidentally trying to boot from the old HDD or other devices, ensuring consistently fast startup times.
-
Confirm Drive Letters: In Windows Disk Management (or macOS Disk Utility), ensure your SSD is assigned a clear drive letter (often C: for the OS) and your HDD is accessible with its own letter.
-
Benchmark (Optional): Use a benchmarking tool like CrystalDiskMark (Windows) or Blackmagic Disk Speed Test (macOS) to confirm that your SSD is delivering the expected read and write speeds. This helps verify proper installation and driver functionality.
SSD-Specific Optimizations (TRIM, Defragmentation Awareness)
Unlike HDDs, SSDs require different management strategies.
-
TRIM: Ensure TRIM is enabled. TRIM is a command that helps your operating system tell the SSD which data blocks are no longer in use and can be wiped. This maintains the SSD’s performance over time. Windows enables TRIM by default for SSDs, but you can verify it by opening Command Prompt as administrator and typing
fsutil behavior query DisableDeleteNotify. A value of0means TRIM is enabled. -
Defragmentation: Never defragment an SSD. Defragmentation is designed for HDDs to consolidate fragmented files and improve read speeds by reducing head movement. For SSDs, defragmentation is unnecessary, offers no performance benefit, and actually reduces the lifespan of the drive by increasing write cycles. Modern operating systems are smart enough to recognize SSDs and disable defragmentation automatically, but it’s good to be aware.
-
Superfetch/Prefetch/ReadyBoost: For Windows, these features (designed to speed up HDDs) can sometimes be disabled for SSDs as they can cause unnecessary writes. However, modern Windows versions manage these intelligently, so manual intervention is rarely required.
-
AHCI Mode: Ensure your SATA controller is set to AHCI (Advanced Host Controller Interface) mode in your BIOS/UEFI. This provides optimal performance for SSDs, enabling features like Native Command Queuing (NCQ). Most modern systems already default to AHCI.
Managing Data Between Drives
With two drives, effective data management becomes key to a clutter-free and efficient system.
-
OS and Core Apps on SSD: Keep your operating system, frequently used applications, and critical games on the SSD for maximum speed.
-
Mass Storage on HDD: Store large files, documents, photos, videos, and less-critical games/applications on your HDD.
-
Downloads and Temporary Files: Consider directing your browser’s download folder and temporary system files to your HDD if your SSD is small, to reduce unnecessary writes and preserve SSD space.
-
Regular Cleanup: Periodically review your drives. Uninstall unused programs from your SSD, move old projects or large files to your HDD, and empty your recycle bin. Tools like WinDirStat (Windows) or OmniDiskSweeper (macOS) can help visualize disk usage.
Troubleshooting Common Issues
While the process is generally smooth, issues can arise.
-
SSD Not Detected: Double-check all power and data cable connections. If an M.2, ensure it’s fully seated. Verify in BIOS/UEFI that the SATA port is enabled (if using SATA SSD) or that the M.2 slot is recognized. Some M.2 slots share PCIe lanes with SATA ports, disabling them when an M.2 drive is in use – check your motherboard manual.
-
Boot Issues: If your PC doesn’t boot from the SSD, re-enter BIOS/UEFI and ensure the SSD is set as the primary boot device. If cloning, ensure the cloning process completed successfully and the partitions are marked as bootable.
-
Performance Not as Expected: Check if AHCI mode is enabled. Ensure you’re not running a very old operating system that doesn’t fully support SSDs. Update SSD firmware using the manufacturer’s utility if available.

Conclusion
Installing an SSD alongside your existing HDD is one of the most impactful upgrades you can perform on your PC. It’s a strategic move that provides the best of both worlds: the blistering speed of an SSD for your operating system and most-used applications, combined with the vast, cost-effective storage of an HDD for everything else. By meticulously following the preparation, physical installation, and software configuration steps outlined in this guide, you can confidently transform your computing experience. Embrace the enhanced responsiveness, faster loading times, and improved productivity that this dual-drive setup offers, securing a powerful and efficient system that is ready to tackle any digital challenge.
aViewFromTheCave is a participant in the Amazon Services LLC Associates Program, an affiliate advertising program designed to provide a means for sites to earn advertising fees by advertising and linking to Amazon.com. Amazon, the Amazon logo, AmazonSupply, and the AmazonSupply logo are trademarks of Amazon.com, Inc. or its affiliates. As an Amazon Associate we earn affiliate commissions from qualifying purchases.