
In the rapidly evolving landscape of personal computing, the Solid State Drive (SSD) stands as a beacon of performance, offering a dramatic leap over traditional Hard Disk Drives (HDDs). For laptop users, an SSD upgrade is arguably the single most impactful improvement one can make to breathe new life into an aging machine or supercharge a newer one. This guide will walk you through the process of installing an SSD in your laptop, transforming its speed, responsiveness, and overall user experience.
Why Upgrade to an SSD? Understanding the Benefits
Before diving into the mechanics of installation, it’s crucial to understand why an SSD upgrade is so beneficial. The advantages extend far beyond mere speed, touching upon several critical aspects of laptop performance and longevity.
Speed and Responsiveness
The most immediate and noticeable benefit of an SSD is its unparalleled speed. Unlike HDDs, which rely on spinning platters and read/write heads, SSDs use flash memory to store data. This absence of moving parts eliminates mechanical delays, resulting in significantly faster boot times, application loading, file transfers, and overall system responsiveness. Tasks that once felt sluggish, such as opening large applications or multitasking, become smooth and instantaneous. For users accustomed to waiting minutes for their operating system to load, an SSD can reduce that time to mere seconds. This translates directly into increased productivity and a more enjoyable computing experience.
Durability and Reliability
The mechanical nature of HDDs makes them susceptible to damage from drops, bumps, or even prolonged vibrations. A sudden jolt can cause the read/write heads to crash into the platters, leading to data loss or complete drive failure. SSDs, being solid-state devices, are inherently more durable. They are far more resistant to physical shock and vibration, making them ideal for mobile devices like laptops that are frequently carried and exposed to movement. This enhanced durability translates to greater data security and a more reliable system, reducing the risk of unexpected hardware failures.
Energy Efficiency and Battery Life
The moving parts in an HDD consume considerable power. SSDs, conversely, operate with much lower power requirements. This reduced power consumption has two significant advantages for laptop users: extended battery life and less heat generation. A more energy-efficient storage drive means your laptop can run longer on a single charge, which is invaluable for users on the go. Additionally, lower heat output contributes to a cooler-running laptop, potentially prolonging the lifespan of other internal components and reducing the need for noisy cooling fans to spin up frequently.
Noise Reduction
One of the subtle yet significant improvements an SSD brings is the elimination of operational noise. HDDs produce audible whirring sounds from their spinning platters and clicking noises from their read/write heads. This constant mechanical noise can be a minor annoyance in quiet environments. SSDs, having no moving parts, operate in complete silence. This contributes to a quieter computing environment, allowing for more focused work or uninterrupted media consumption.
Essential Preparations Before You Begin
Installing an SSD is a relatively straightforward process, but meticulous preparation is key to a smooth and successful upgrade. Skipping any of these preliminary steps can lead to complications, including data loss or an unbootable system.
Choosing the Right SSD
The first critical step is selecting the correct SSD for your laptop. There are primarily two form factors and interfaces to consider:
-
2.5-inch SATA SSDs: These are the most common and universally compatible SSDs, designed to replace traditional 2.5-inch HDDs. They connect via a SATA data and power interface, which is found in virtually all modern laptops. Their performance is excellent for general use, significantly outperforming HDDs.
-
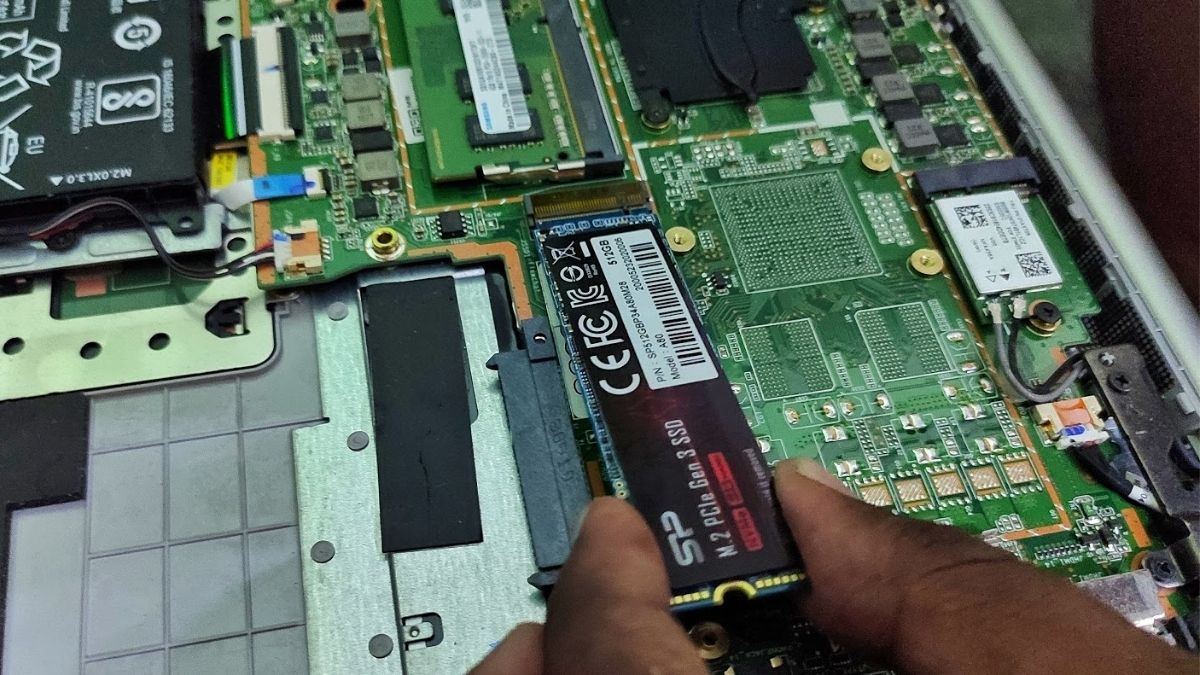
M.2 SSDs (SATA or NVMe): M.2 is a newer, smaller form factor that resembles a stick of RAM. M.2 SSDs can utilize either the SATA interface (offering similar performance to 2.5-inch SATA SSDs) or the much faster NVMe (Non-Volatile Memory Express) interface. NVMe SSDs leverage the PCIe bus, offering speeds several times greater than SATA SSDs, making them ideal for demanding applications, gaming, and professional workloads. Crucially, you must check your laptop’s specifications or open it up to confirm if it has an M.2 slot and, if so, whether it supports SATA or NVMe (or both). Laptops can often have both a 2.5-inch bay and an M.2 slot, allowing for dual-drive configurations.
Consider your budget, performance needs, and laptop compatibility. For most users, a SATA SSD offers an incredible performance boost for an affordable price. If your laptop supports NVMe and you crave top-tier speed, an NVMe drive is the way to go.
Gathering Your Tools
Having the right tools at hand will make the installation process much smoother:
-
Precision Screwdriver Set: You’ll typically need a small Philips head screwdriver. Some laptops might use Torx screws.
-
Plastic Spudger or Pry Tool: Useful for carefully prying open laptop casings without scratching them. Guitar picks can also work.
-
Anti-static Wrist Strap: Essential for preventing electrostatic discharge (ESD) which can damage sensitive electronic components. If you don’t have one, regularly touch a grounded metal object (like a metal tap) to discharge static electricity.
-
External Enclosure or USB-to-SATA/M.2 Adapter (for data migration): If you plan to clone your existing drive, you’ll need a way to connect the new SSD to your laptop externally before installation.
-
Small Container: To keep track of tiny screws.
Backing Up Your Data
This is the most critical preparatory step. Before you even touch a screwdriver, ensure all your important data (documents, photos, videos, applications, settings) is backed up. You can use an external hard drive, cloud storage, or a network-attached storage (NAS) device. While cloning software aims to replicate your drive perfectly, unforeseen issues can occur, and having a complete backup is your ultimate safeguard against data loss.
Cloning Your Existing Drive vs. Fresh Installation
You have two primary options for getting your operating system onto the new SSD:
-
Cloning (Data Migration): This involves creating an exact copy of your old drive, including the operating system, applications, and all your files, onto the new SSD. This is ideal if you want to retain your current setup without reinstalling everything. You’ll need cloning software (many SSD manufacturers provide this for free) and an external connection for the new SSD.
-
Fresh Installation: This involves installing a fresh copy of your operating system (e.g., Windows, macOS, Linux) directly onto the new SSD. This is often recommended for resolving long-standing software issues, eliminating bloatware, and ensuring a pristine system. You’ll need a bootable USB drive containing your OS installer. If choosing this, remember to back up your data even more diligently, as your old drive’s contents won’t be transferred.
The Step-by-Step Installation Process
With preparations complete, you’re ready for the physical installation. Always proceed with care and patience.
Disassembling Your Laptop
-
Power Down and Disconnect: Completely shut down your laptop. Unplug it from the power adapter and remove the battery if it’s externally accessible. For laptops with internal batteries, you might need to disconnect the battery connector inside the chassis, but only after opening it and locating it.
-
Discharge Static Electricity: Wear your anti-static wrist strap or touch a grounded metal object.
-
Open the Chassis: Most laptops have access panels or require the entire bottom case to be removed. Carefully unscrew all visible screws on the bottom. Use your plastic spudger to gently pry open the case, working your way around the edges. Be mindful of any clips or ribbon cables. Place removed screws in your container, perhaps noting their original positions if they vary in size.
Locating the Storage Drive Bay
Once the laptop is open, identify where your current storage drive is located.
-
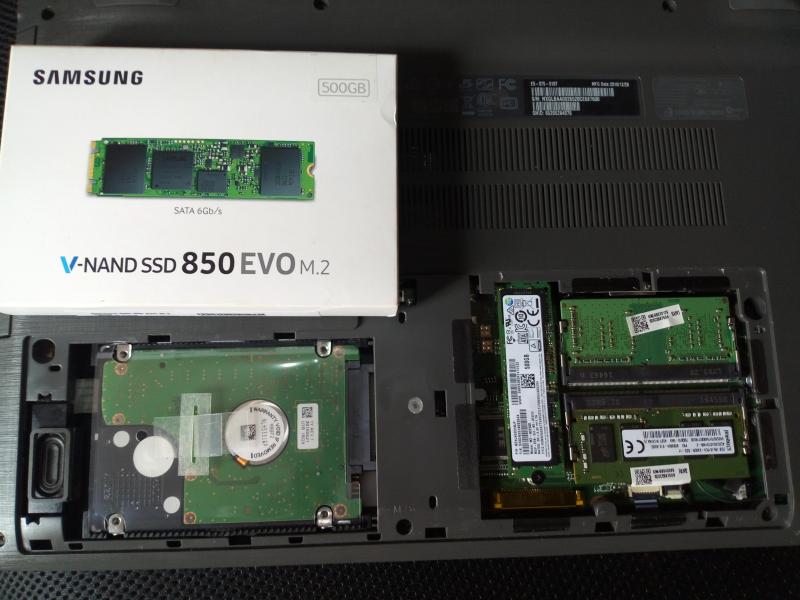
2.5-inch Bay: This is typically a rectangular slot where an HDD is secured with a caddy and a few screws.
-
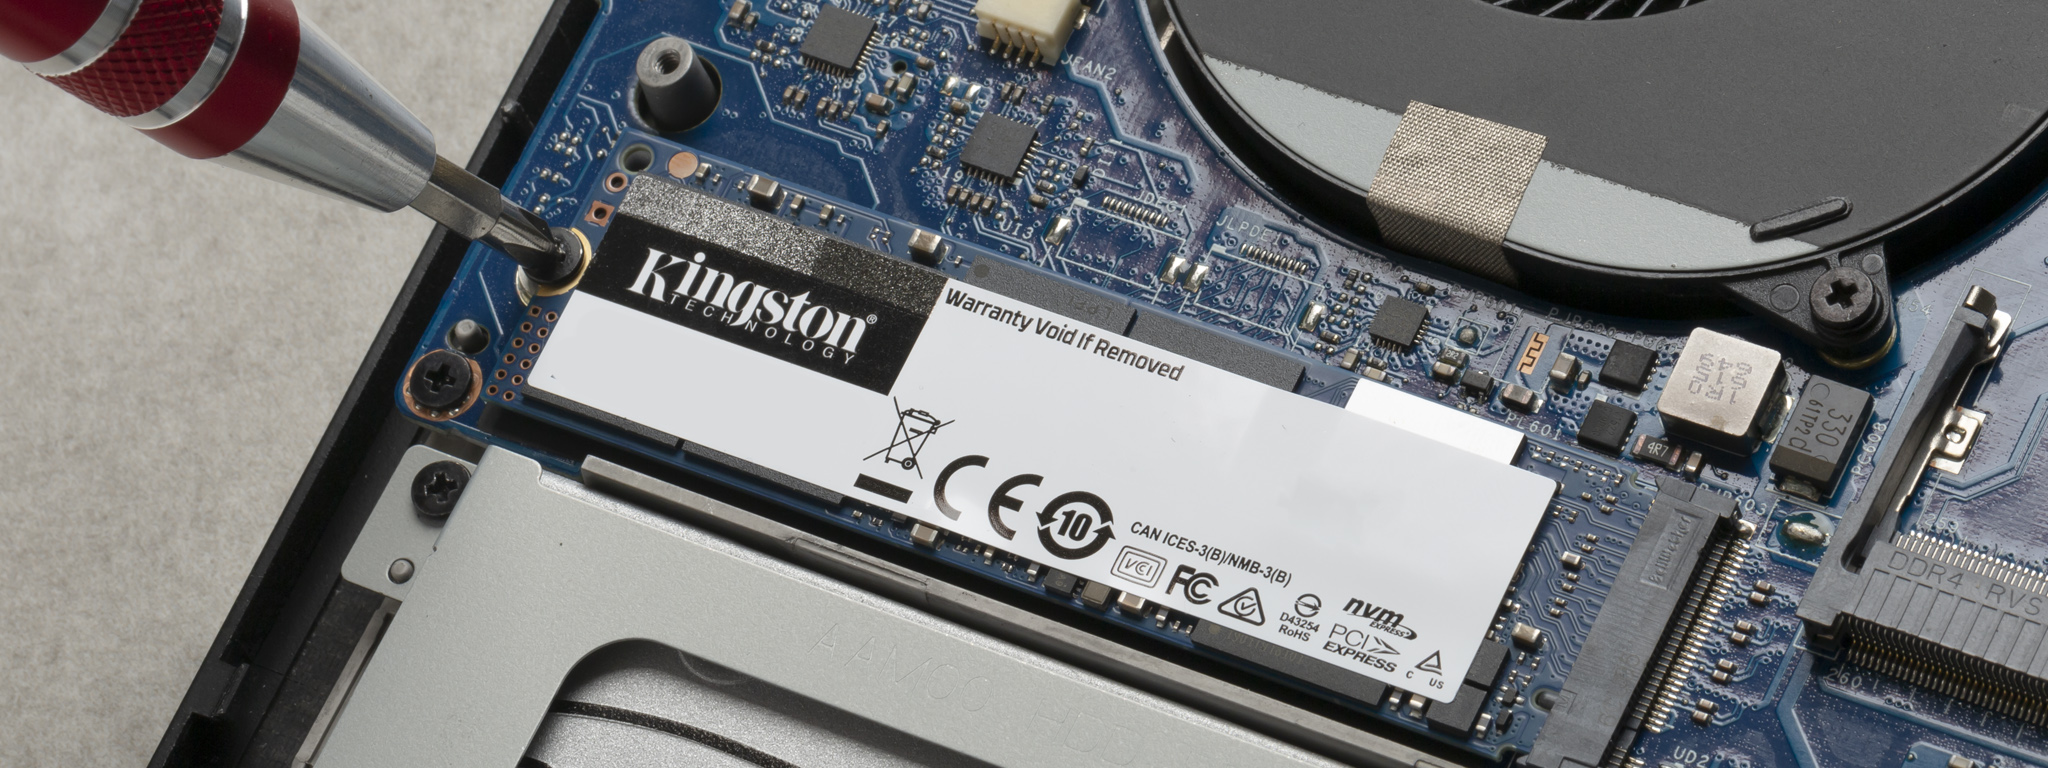
M.2 Slot: This is a smaller, often labeled slot on the motherboard, resembling a PCIe slot, where the M.2 SSD is inserted at an angle and secured with a single screw.
Removing the Old Drive (If Applicable)
-
2.5-inch HDD: Unscrew the mounting screws that secure the drive caddy or the drive itself. Carefully slide the drive out of its SATA connector. You may need to remove the caddy from the old drive and attach it to the new SSD.
-
M.2 SSD (if replacing): Unscrew the small screw at the end of the M.2 slot. The drive will pop up slightly. Gently pull it straight out of the slot.
Installing the New SSD
-
2.5-inch SSD: If using a caddy, attach it to the new SSD. Slide the new SSD into the SATA connector, ensuring it’s firmly seated. Secure it with the mounting screws.
-
M.2 SSD: Gently insert the M.2 SSD into its slot at an angle (usually around 30 degrees). Once fully inserted, push down the end of the SSD until it’s flat against the motherboard, and secure it with the small screw you removed earlier. Do not force it.
Reassembling Your Laptop
Carefully reverse the disassembly steps:
-
Ensure all internal connectors (especially the battery, if disconnected) are reattached.
-
Replace the bottom cover, ensuring all clips engage properly.
-
Screw back all the screws you removed. Do not overtighten.
-
Reconnect the power adapter and, if applicable, reinsert the external battery.
Post-Installation Procedures and Optimization
Once the physical installation is complete, there are a few crucial software steps to ensure your new SSD is fully operational and optimized for performance.
Initial Boot and BIOS/UEFI Settings
Power on your laptop. If you cloned your drive, it should boot directly into your operating system. If you’re doing a fresh installation, you’ll need to boot from your OS installation media (e.g., a USB drive).
-
Access BIOS/UEFI: During startup, repeatedly press the designated key (often F2, F10, F12, DEL, or ESC) to enter your laptop’s BIOS/UEFI settings.
-
Check Boot Order: Ensure your new SSD is recognized and set as the primary boot device. If performing a fresh install, set your USB installation media as the first boot device.
-
AHCI Mode: Verify that the SATA controller mode is set to AHCI (Advanced Host Controller Interface). This mode is crucial for SSD performance and features like TRIM. Most modern laptops default to AHCI, but it’s worth confirming. Changing this after Windows is installed can cause boot issues, so it’s best checked beforehand. Save and exit the BIOS/UEFI settings.
Data Migration or Fresh OS Installation
-
If Cloning: Your system should boot up as usual, but now much faster. Verify all your files and applications are intact.
-
If Fresh Installation: Follow the on-screen prompts of your operating system installer. Choose your new SSD as the destination drive. Once the OS is installed, you can begin installing your necessary applications and restoring data from your backup.
Driver Installation and Updates
Even with a fresh OS install, ensure all necessary drivers for your laptop’s hardware are installed. Visit your laptop manufacturer’s website to download the latest drivers for chipset, graphics, audio, Wi-Fi, and any other components. For the SSD, generally, the OS will automatically recognize and use the correct drivers, but some NVMe drives might benefit from specific manufacturer-provided drivers for optimal performance.
SSD Optimization Tips
To maximize the lifespan and performance of your SSD, consider these optimizations (many modern OS versions handle these automatically, but it’s good to be aware):
-
TRIM Enablement: TRIM is a command that helps an operating system tell an SSD which data blocks are no longer in use and can be wiped. This prevents performance degradation over time. Windows 7 and later, and recent versions of macOS and Linux, enable TRIM by default. You can verify it’s enabled via the command prompt (for Windows,
fsutil behavior query DisableDeleteNotification). -
Disable Defragmentation: Unlike HDDs, SSDs do not benefit from defragmentation; it actually shortens their lifespan due to unnecessary write cycles. Windows automatically disables defragmentation for SSDs and enables “Optimize Drives,” which runs TRIM.
-
Over-provisioning: Some SSDs come with a small portion of their capacity reserved for over-provisioning, which improves performance and longevity. You can manually allocate more if desired, though for most users, this isn’t necessary.
-
Disable Superfetch/Prefetch & Windows Search Indexing (optional): For older systems or specific use cases, disabling these features (which pre-load data from disk into RAM) can sometimes offer marginal improvements as SSDs are fast enough not to need them. However, for most users on modern OSes, the benefits are negligible, and disabling them might hinder other system functions.
Troubleshooting Common Issues
Even with careful preparation, issues can arise. Here are solutions to common problems:
SSD Not Detected
-
Check Connections: Ensure the SSD is firmly seated in its SATA or M.2 slot and that all power and data cables (for 2.5-inch drives) are securely connected.
-
BIOS/UEFI: Re-enter BIOS/UEFI to verify the SSD is listed in the storage devices or boot order.
-
Driver Issues (NVMe): For NVMe drives, ensure your OS installation media includes NVMe drivers. Sometimes, older Windows installers might not recognize newer NVMe drives without loading additional drivers.
-
Faulty Drive/Cable: If all else fails, the drive or connector cable might be faulty. Test the SSD in another computer or with a different cable/enclosure if possible.
Boot Issues After Installation
-
Incorrect Boot Order: Confirm in BIOS/UEFI that the SSD (or your installation media) is the first boot device.
-
Corrupted Clone/Installation: If you cloned, the cloning process might have failed or been corrupted. Try a fresh OS installation. If doing a fresh install, ensure the USB media is bootable and not corrupted.
-
Partition Style: Ensure the partition style (GPT for UEFI, MBR for legacy BIOS) matches your laptop’s boot mode.
-
Secure Boot/CSM: In BIOS/UEFI, try toggling Secure Boot or Compatibility Support Module (CSM) settings. Some older OS installations or boot media might require CSM (legacy mode) to be enabled, while newer OSes with UEFI often require Secure Boot.
Performance Not as Expected
-
AHCI Mode: Double-check that AHCI mode is enabled in your BIOS/UEFI.
-
TRIM: Verify TRIM is enabled for your operating system.
-
Drivers: Ensure all chipset and SSD-specific drivers are up to date.
-
SSD Health: Use an SSD utility tool (often provided by the SSD manufacturer) to check the drive’s health and firmware version. Update firmware if available.
-
SATA Speed: Confirm that your laptop’s SATA port supports SATA III (6Gbps) for maximum performance. Some older laptops might be limited to SATA II (3Gbps). For M.2 NVMe drives, ensure your slot supports PCIe Gen3 or Gen4 for full speed.
Upgrading your laptop with an SSD is a transformative experience, offering a significant performance boost that breathes new life into your machine. By following this comprehensive guide, from careful preparation and correct component selection to meticulous installation and post-setup optimization, you can confidently undertake this upgrade and unlock the full potential of your laptop. The transition to solid-state storage is not just an upgrade; it’s an investment in a faster, more reliable, and more enjoyable computing future.
aViewFromTheCave is a participant in the Amazon Services LLC Associates Program, an affiliate advertising program designed to provide a means for sites to earn advertising fees by advertising and linking to Amazon.com. Amazon, the Amazon logo, AmazonSupply, and the AmazonSupply logo are trademarks of Amazon.com, Inc. or its affiliates. As an Amazon Associate we earn affiliate commissions from qualifying purchases.