In today’s fast-paced digital landscape, reliable and efficient data management is the backbone of virtually every successful application and service. Whether you’re building a dynamic website, managing complex business operations, or developing the next big AI tool, a robust database solution is indispensable. For those leveraging the power and flexibility of Amazon Web Services (AWS), running a SQL database on an Amazon Linux instance offers a compelling blend of performance, security, and cost-effectiveness. This comprehensive guide will walk you through the process of installing a SQL database, specifically MariaDB, on your Amazon Linux environment, ensuring you have a solid foundation for your data-driven projects.
Amazon Linux, specifically Amazon Linux 2 (AL2), is an optimized operating system provided by AWS. It’s designed to run efficiently on Amazon EC2 instances, offering a secure, stable, and high-performance execution environment for cloud applications. Choosing Amazon Linux for your SQL database offers several advantages: deep integration with AWS services, a consistent update cycle, and a security-hardened environment that aligns perfectly with modern digital security practices. This tutorial aims to demystify the installation process, making it accessible even if you’re relatively new to server administration, while also providing enough detail for seasoned professionals to ensure a secure and optimal setup.
Preparing Your Amazon Linux Instance for Database Installation
Before we dive into installing the SQL database itself, it’s crucial to prepare your Amazon Linux instance. This preparatory phase ensures that your system is up-to-date, has the necessary foundational packages, and is ready to host a robust database server. This step is a cornerstone of good tech practice, promoting stability and reducing potential conflicts later on.
Updating System Packages
The first and most critical step is to update all existing packages on your Amazon Linux instance. This ensures that you’re running the latest versions of all software, including critical security patches and bug fixes. Running an outdated system can lead to vulnerabilities and compatibility issues, undermining both your digital security and productivity.
To update your system, open your terminal and execute the following command:
sudo yum update -y
Explanation:
sudo: This command grants superuser privileges, allowing you to perform administrative tasks.yum: This is the package manager used by Amazon Linux (and other RHEL-based distributions). It’s responsible for installing, updating, and removing software packages.update: This command instructsyumto check for available updates for all installed packages.-y: This flag automatically answers “yes” to any prompts during the update process, allowing the operation to proceed without manual intervention.
Allow this process to complete. Depending on how recently your instance was launched or last updated, this could take a few minutes. It’s good practice to reboot your instance after a significant kernel or core system package update, though it’s often not strictly necessary for simple software installations. If you decide to reboot, use sudo reboot.
Installing Essential Utilities
While Amazon Linux comes with many pre-installed tools, ensuring you have common development utilities can be beneficial. These tools might be required by certain database components or simply make troubleshooting and future management tasks easier. Though not always strictly necessary for MariaDB installation, having them on hand is a good measure for general system administration.
Install the Development Tools group, which includes compilers and libraries often used for building software from source, using:
sudo yum groupinstall "Development Tools" -y
Additionally, some users might find wget or curl useful for downloading external files, although yum itself handles repository interactions. If they’re not already present (they usually are), you can install them individually:
sudo yum install wget curl -y
With these preparatory steps complete, your Amazon Linux instance is now fully prepared to proceed with the installation of the SQL database server. This methodical approach not only ensures a smoother installation but also contributes to the overall stability and security of your server environment, a key aspect of managing your tech infrastructure effectively.
Installing the MariaDB Database Server
With your Amazon Linux instance prepped, the next step is to install the SQL database server itself. While “SQL” refers to a query language, in practice, it often means installing a specific relational database management system (RDBMS) like MySQL, PostgreSQL, or MariaDB. For Amazon Linux 2, MariaDB is an excellent, open-source choice that is readily available in the default repositories and highly compatible. It offers robust performance, reliability, and a rich feature set, making it a popular option for developers and businesses.
Understanding MariaDB on Amazon Linux 2
Amazon Linux 2 typically includes MariaDB in its default yum repositories. This simplifies the installation process significantly, as you won’t need to add external repositories unless you specifically require a very recent or specific version of MariaDB not available in the standard channels. MariaDB is a community-developed fork of MySQL, guaranteeing strong compatibility and a familiar experience for those accustomed to MySQL.
Executing the Installation Command
To install the MariaDB server and its client utilities, use the yum package manager. This single command will fetch all necessary packages and their dependencies, installing them on your system.
sudo yum install mariadb-server -y
Explanation:
mariadb-server: This is the main package for the MariaDB database server. It includes the database daemon, server-side tools, and necessary libraries.- The
-yflag, as before, provides automatic confirmation for the installation.
Once the command is executed, yum will list the packages to be installed and their dependencies. Confirm the installation if prompted (though -y should handle this). The process should complete in a few minutes, depending on your internet connection and instance type.
Verifying the Installation
After the installation completes, it’s a good practice to verify that MariaDB has been installed correctly and is accessible. You can do this by checking the installed version of the MariaDB client:
mariadb --version
This command should output information about the MariaDB client version, confirming that the installation was successful. If you see version information, it means MariaDB has been correctly placed on your system. This immediate verification helps in early detection of any installation issues, maintaining your productivity.
With MariaDB installed, your Amazon Linux instance now hosts a powerful SQL database server. The next critical steps involve securing this server and configuring it for use, transforming it from a mere installation into a fully operational and protected data management system.
Securing and Configuring Your MariaDB Installation
Installing MariaDB is only the first part; securing and properly configuring it is paramount for any production or even development environment. Without proper security measures, your database could become a significant vulnerability, exposing sensitive data and compromising your entire system. This section focuses on essential post-installation steps, including starting the service, running the security script, and configuring firewall rules to protect your database. These steps are crucial for maintaining digital security and ensuring the long-term reliability of your data infrastructure.
Enabling and Starting the MariaDB Service
After installation, the MariaDB service needs to be started and configured to launch automatically upon system boot. This ensures that your database is always available when your server is running.
-
Start the MariaDB Service:
sudo systemctl start mariadbThis command initiates the MariaDB database daemon, making it active.
-
Enable MariaDB to Start on Boot:
sudo systemctl enable mariadbThis command creates a symbolic link that ensures the MariaDB service will automatically start whenever your Amazon Linux instance boots up. This is a critical step for maintaining continuous availability and productivity.
-
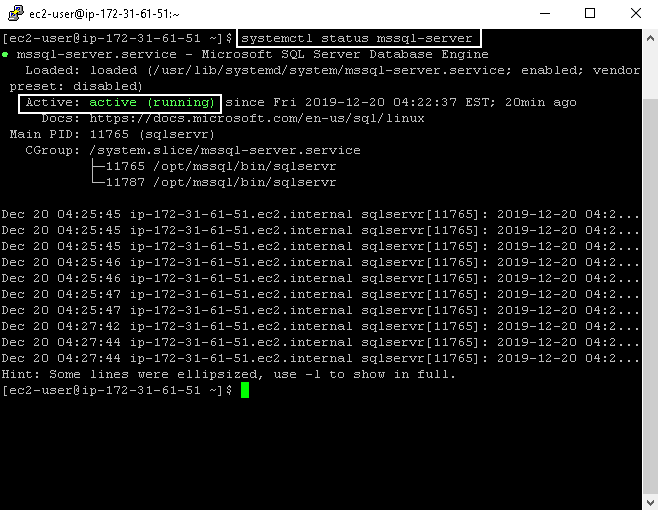
Check the Service Status:
bash

sudo systemctl status mariadb
You should see output indicating that the service is “active (running)”, confirming that MariaDB is now operational.
Running the MariaDB Security Script
MariaDB provides a dedicated security script that helps you implement essential security best practices immediately after installation. This script guides you through setting a root password, removing anonymous users, disabling remote root login, and removing the test database. These actions significantly enhance the security posture of your database, reducing the attack surface.
Execute the security script:
sudo mysql_secure_installation
You will be prompted to answer a series of questions:
- Enter current password for root (enter for none): Since this is a fresh installation, there’s no root password yet. Just press
Enter. - Set root password? [Y/n]: Type
Yand pressEnter. Choose a strong, unique password for your database root user. This is different from your system’s root user. - Remove anonymous users? [Y/n]: Type
Yand pressEnter. Anonymous users pose a security risk. - Disallow root login remotely? [Y/n]: Type
Yand pressEnter. This prevents the root user from logging in from external machines, forcing administrative tasks to be performed locally or via specific, more secure user accounts. - Remove test database and access to it? [Y/n]: Type
Yand pressEnter. The ‘test’ database is typically not needed and can be a security vulnerability. - Reload privilege tables now? [Y/n]: Type
Yand pressEnter. This ensures that all the changes you just made to user privileges are immediately applied.
After completing these steps, your MariaDB installation is significantly more secure.
Configuring Firewall Rules
Even with strong internal security, restricting network access to your database is crucial. The firewall acts as a gatekeeper, allowing only legitimate traffic to reach your MariaDB server. Amazon Linux 2 typically uses firewalld as its default firewall management service. By default, most cloud instances restrict incoming connections, so you’ll need to explicitly open the MariaDB port. The default port for MariaDB (and MySQL) is 3306.
-
Check Firewall Status (Optional):
sudo systemctl status firewalldIf
firewalldis not running, you might need to start and enable it:sudo systemctl start firewalld sudo systemctl enable firewalld -
Allow MariaDB Port (3306/tcp):
To allow external connections to your MariaDB server, you need to open port 3306 through the firewall. This command makes the change permanent:sudo firewall-cmd --permanent --add-port=3306/tcpImportant Note: This command opens the port to all IP addresses. For production environments, it is highly recommended to restrict access to specific IP addresses or IP ranges that need to connect to your database. For example:
sudo firewall-cmd --permanent --add-rich-rule='rule family="ipv4" source address="YOUR_APP_SERVER_IP" port protocol="tcp" port="3306" accept' -
Reload Firewall Rules:
After making changes, you must reload the firewall for them to take effect:sudo firewall-cmd --reload -
Verify Firewall Rule (Optional):
bash

sudo firewall-cmd --list-all
Look for port 3306/tcp in the services and ports list.
In addition to the instance’s internal firewall, if your Amazon Linux instance is an EC2 instance, you must also configure the AWS Security Group associated with it. Security Groups act as virtual firewalls at the instance level. You’ll need to add an inbound rule for TCP port 3306, again, ideally restricting the source to specific IP addresses or other Security Groups rather than 0.0.0.0/0 (anywhere). This layered security approach is a hallmark of robust digital security practices in the cloud.
With these security and configuration steps meticulously followed, your MariaDB server is now not only running but also well-protected, forming a secure foundation for your applications.
Testing and Verifying Your Database Functionality
After installing and securing MariaDB, the final crucial step is to test its functionality. This involves connecting to the database, creating a sample database, and a user, ensuring that all components are working as expected. This validation process confirms that your database is ready for your applications, supporting your productivity and data integrity.
Connecting to MariaDB as Root
First, connect to the MariaDB server using the root user and the password you set during the mysql_secure_installation step.
mysql -u root -p
You will be prompted to “Enter password:”. Type the strong root password you configured and press Enter.
If successful, you will see the MariaDB prompt, which looks like MariaDB [(none)]>. This indicates you are connected and can now execute SQL commands.
Creating a Sample Database and User
For security and best practices, applications should generally not connect to the database using the root user. Instead, you should create dedicated users with specific privileges for each application or service. Let’s create a new database and a user with access to it.
-
Create a New Database:
Let’s create a database namedmy_app_db.CREATE DATABASE my_app_db;You should see “Query OK, 1 row affected”.
-
Create a New User and Grant Privileges:
Now, create a user namedapp_userwith a strong password (replaceYourStrongPasswordwith your actual chosen password) and grant all privileges onmy_app_dbto this user. For this example, we’ll restrict the user to connect only fromlocalhost. If your application server is a different EC2 instance, you’d replace'localhost'with the application server’s private IP or hostname, or a wildcard'%'(use'%'with extreme caution and ensure your firewall rules are very strict).CREATE USER 'app_user'@'localhost' IDENTIFIED BY 'YourStrongPassword'; GRANT ALL PRIVILEGES ON my_app_db.* TO 'app_user'@'localhost';This command creates the user and gives them full control over
my_app_db. If you need to allow remote connections, adjust'localhost'to the appropriate IP address or'%‘ for any host (again, with careful security group configuration). -
Flush Privileges:
It’s good practice to flush the privilege tables after making changes to user permissions to ensure they are immediately reloaded by the server.FLUSH PRIVILEGES; -
Exit the MariaDB Prompt:
sql

EXIT;
Connecting with the New User
Finally, test connecting to my_app_db using your newly created app_user.
mysql -u app_user -p my_app_db
Enter the password for app_user when prompted. If successful, you will see MariaDB [my_app_db]>, indicating you’ve connected to the specific database with the designated user. This confirms that your user and database setup is correct.
You can now perform basic SQL operations:
- Create a table:
sql

CREATE TABLE users (id INT AUTO_INCREMENT PRIMARY KEY, name VARCHAR(255), email VARCHAR(255));
- Insert data:
sql

INSERT INTO users (name, email) VALUES ('John Doe', 'john.doe@example.com');
- Select data:
sql

SELECT * FROM users;
After confirming functionality, you can EXIT; the MariaDB prompt.
This thorough testing ensures that your MariaDB installation on Amazon Linux is not only operational but also configured securely for your applications. It’s a vital step in transforming your server into a reliable data management hub, ready to support your tech initiatives.
Conclusion: Your SQL Foundation on Amazon Linux
You have now successfully installed, secured, and tested a MariaDB server on your Amazon Linux instance. This accomplishment lays a critical foundation for any data-driven project, from web applications and content management systems to analytics platforms and AI tools. By choosing Amazon Linux, you’ve opted for a highly optimized, secure, and integrated environment within the AWS ecosystem, which aligns perfectly with modern technology trends and robust digital security practices.
The journey from a fresh Amazon Linux instance to a fully functional SQL database involves several key stages:
- Preparation: Ensuring your system is up-to-date and equipped with essential utilities, minimizing potential issues and enhancing system stability.
- Installation: Leveraging the
yumpackage manager to seamlessly deploy the MariaDB server, a powerful and reliable open-source relational database. - Security Configuration: Implementing crucial security measures, including setting a strong root password, removing unnecessary accounts, disabling remote root login, and configuring the instance’s firewall (
firewalld) and AWS Security Groups. These steps are not just technical requirements; they are fundamental to protecting your data and your brand’s reputation from potential threats. - Verification: Thoroughly testing the database by creating specific users and databases, ensuring that all components are operational and accessible as intended, thereby guaranteeing productivity and reliability.
Next Steps and Best Practices
With your SQL database up and running, consider these next steps and best practices to further optimize and maintain your setup:
- Application Integration: Connect your applications (e.g., Python, Node.js, PHP applications) to the MariaDB instance using the
app_usercredentials you created, rather than therootuser. Ensure your application code handles database connections securely and efficiently. - Regular Backups: Implement a robust backup strategy. Data is your most valuable asset, and regular backups are non-negotiable. Consider using
mysqldumpfor logical backups or AWS EBS snapshots for block-level backups. Automate these processes to ensure consistency and reliability. - Monitoring: Set up monitoring for your database performance and resource utilization. Tools like Amazon CloudWatch can track CPU usage, disk I/O, and network activity. For deeper insights into database performance, consider MariaDB’s own monitoring tools or third-party solutions. Early detection of performance bottlenecks or issues can save significant time and money.
- Further Security Enhancements:
- SSL/TLS for Connections: Encrypt communication between your applications and the database using SSL/TLS.
- Principle of Least Privilege: Continuously review and refine user permissions, ensuring each user or application only has the minimum necessary privileges to perform its tasks.
- Regular Patching: Keep your Amazon Linux instance and MariaDB server updated with the latest security patches.
- Scalability and High Availability: As your application grows, you might need to consider database replication (e.g., MariaDB Galera Cluster), read replicas, or migrating to a managed database service like Amazon RDS for MariaDB, which handles much of the operational overhead.
- Performance Tuning: Optimize your database configuration for your specific workload. This might involve adjusting memory settings, cache sizes, or query optimization.
By diligently following these steps and embracing best practices, you empower your organization with a dependable and high-performing data infrastructure. This not only enhances the technical capabilities of your applications but also contributes to your brand’s reputation for reliability and security. A well-managed database is a critical investment in your digital future, driving productivity and safeguarding your valuable data assets, ultimately contributing to your overall business success and financial stability by providing a solid, cost-effective, and scalable backend solution.
aViewFromTheCave is a participant in the Amazon Services LLC Associates Program, an affiliate advertising program designed to provide a means for sites to earn advertising fees by advertising and linking to Amazon.com. Amazon, the Amazon logo, AmazonSupply, and the AmazonSupply logo are trademarks of Amazon.com, Inc. or its affiliates. As an Amazon Associate we earn affiliate commissions from qualifying purchases.