The realm of virtual reality is constantly expanding, offering immersive experiences that transport us to new worlds. While official app stores for VR headsets like the Meta Quest provide a curated selection of games and applications, a vast universe of independent, experimental, and modded content lies just beyond their walled gardens. This is where SideQuest steps in – a powerful desktop application that serves as a gateway to unlocking the full potential of your VR device.
SideQuest is much more than just an alternative app store; it’s a community-driven platform that empowers users to sideload applications, customize their headset settings, and explore a vibrant ecosystem of content not officially available. For tech enthusiasts, gamers, and developers alike, installing SideQuest is a transformative step, opening doors to a deeper, more personalized VR journey. This comprehensive guide will walk you through every stage of the SideQuest installation process, from initial setup to connecting your headset and beyond, ensuring a smooth and secure experience as you delve into the exciting world of VR customization.
Understanding SideQuest: The Gateway to Enhanced VR Experiences
Before we dive into the nitty-gritty of installation, it’s crucial to understand what SideQuest is, why it’s become an essential tool for many VR users, and what you’ll need to get started. Embracing SideQuest means taking control of your VR environment, but it also means being aware of the responsibilities that come with sideloading.
What is SideQuest and Why Do You Need It?
At its core, SideQuest is a desktop client and a web platform that facilitates “sideloading” applications onto Android-based VR headsets, most notably the Meta Quest line (Quest 1, 2, 3, and Quest Pro). Sideloading is essentially installing apps onto your device that haven’t come through its official app store. Think of it as installing an app on your Android phone from an APK file rather than Google Play.
The reasons for SideQuest’s popularity are manifold:
- Access to a Wider Content Library: Many innovative, experimental, and indie games and applications simply don’t make it to the official Meta Quest Store, either because they’re still in development, don’t meet Meta’s strict publishing guidelines, or are niche projects. SideQuest provides a platform for these creators and a storefront for users to discover them.
- Modding Capabilities: SideQuest enables users to install mods for existing games, offering new levels, characters, features, or graphical enhancements that breathe new life into favorite titles.
- Enhanced Customization and Performance Tweaks: Beyond just apps, SideQuest allows users to tweak various headset settings that aren’t accessible through the standard Quest interface. This includes adjusting refresh rates (e.g., to 90Hz or 120Hz for compatible models), changing resolution, altering CPU/GPU clock speeds for better performance or battery life, and even managing Guardian boundaries.
- Early Access to Developer Content: Developers often use SideQuest to distribute beta versions of their games and apps, allowing enthusiasts to test new features and provide feedback before official releases.
- File Management: It offers a robust file manager for your headset, making it easy to transfer files, back up data, and organize your VR content.
In essence, SideQuest transforms your Meta Quest from a curated console into a more open, developer-friendly platform, empowering you to explore the full spectrum of VR content and fine-tune your experience.
Prerequisites for a Smooth Installation
Before you begin the SideQuest installation process, gather the following essential items and ensure your headset is configured correctly. Taking these preparatory steps will prevent common issues and streamline your setup.
- A Compatible VR Headset: This guide primarily focuses on Meta Quest headsets (Quest 1, Quest 2, Quest 3, or Quest Pro). SideQuest is specifically designed for these Android-based standalone devices.
- A Computer: You’ll need a desktop or laptop running Windows 10/11, macOS (Catalina or newer recommended), or a Linux distribution. The SideQuest application runs on your computer, not directly on the headset.
- A USB-C Data Cable: This is crucial. You’ll need a USB-C to USB-C or USB-A to USB-C cable capable of data transfer (not just charging). The cable that came with your Quest usually works, or a good quality third-party cable like the Meta Quest Link cable.
- Internet Connection: Required for downloading SideQuest and any apps.
- Developer Mode Enabled on Your Quest: This is the most critical prerequisite. Meta requires users to enable Developer Mode on their headset to allow sideloading and access advanced settings. We’ll detail how to do this in the next section.
- A Meta Account with an Organization: To enable Developer Mode, your Meta account needs to be associated with a “developer organization.” This is a quick and free process that doesn’t require any actual development work.
Step-by-Step Guide: Installing SideQuest on Your Computer
With your prerequisites in order, it’s time to embark on the installation journey. This section will guide you through preparing your headset, downloading the SideQuest application, and establishing the connection.
Preparing Your Meta Quest for Developer Mode
Enabling Developer Mode is a mandatory first step. It signals to your Quest headset that you intend to use it for development purposes, which includes allowing USB debugging and sideloading.
-
Create a Meta Developer Organization (If You Haven’t Already):
- Open a web browser on your computer and go to developer.oculus.com/organizations/create.
- Log in with the Meta account linked to your Quest headset.
- You’ll be prompted to create a new organization. Enter any name you like (e.g., “My VR Lab,” “Quest Sideloading,” or your own name). This step is purely for administrative purposes and doesn’t require any formal registration.
- Agree to the terms and conditions, then click “Submit.”
-
Enable Developer Mode via the Meta Quest Mobile App:
- Ensure your Meta Quest headset is powered on and connected to the same Wi-Fi network as your phone.
- Open the Meta Quest mobile app on your smartphone (available for iOS and Android).
- Tap on “Devices” at the bottom navigation bar.
- Select your connected headset from the list.
- Scroll down and tap on “Headset Settings.”
- Tap on “Developer Mode.”
- Toggle the “Developer Mode” switch to the “On” position.
-
Restart Your Headset (Optional but Recommended):
- After enabling Developer Mode, it’s a good practice to fully power off your Meta Quest headset and then power it back on. This ensures the new settings are properly applied.
Your Quest headset is now ready for SideQuest.
Downloading and Installing the SideQuest Application
The SideQuest application runs on your computer, acting as the bridge between your PC and your VR headset. It’s available for Windows, macOS, and Linux. For the most stable experience and to ensure all necessary drivers are installed, the “Advanced Installer” is generally recommended.
-
Visit the Official SideQuest Website:
- Open your web browser and navigate to sidequestvr.com. Be wary of unofficial sources to ensure you download legitimate software.
-
Download the Advanced Installer:
- On the SideQuest homepage, look for the download section. You’ll typically see options for “Advanced Installer” and “Easy Installer.”
- Click on “Advanced Installer.” This version includes the necessary ADB (Android Debug Bridge) drivers, which are crucial for your computer to communicate with your Quest headset.
- Select the correct operating system (Windows, macOS, or Linux) to download the appropriate file.
-
Install SideQuest on Your Computer:
-
For Windows:
- Locate the downloaded
.exefile (e.g.,SideQuest_Setup_X.X.X.exe). - Double-click the installer and follow the on-screen prompts. Accept the license agreement, choose an installation location, and let the installer complete the process. It will install SideQuest and any required ADB drivers.
- Once finished, SideQuest will usually launch automatically.
- Locate the downloaded
-
For macOS:
- Locate the downloaded
.dmgfile. - Double-click the
.dmgfile to open it. - Drag the SideQuest application icon into your “Applications” folder.
- Close the
.dmgwindow and eject the disk image. - You can launch SideQuest from your Applications folder or Launchpad. You might need to confirm that you want to open an app downloaded from the internet the first time.
- Locate the downloaded
-

*   **For Linux:**
    *   SideQuest often provides an AppImage, `.deb` package (for Debian/Ubuntu), or `.rpm` package (for Fedora/openSUSE).
    *   **AppImage:** Make the downloaded `.AppImage` file executable (right-click -> Properties -> Permissions -> "Allow executing file as program," or `chmod +x SideQuest-*.AppImage` in terminal), then double-click to run.
    *   **Deb/RPM:** Use your system's package installer (e.g., `sudo dpkg -i SideQuest_X.X.X_amd64.deb` for `.deb` files, or `sudo rpm -i SideQuest-X.X.X.x86_64.rpm` for `.rpm` files).
Connecting Your Headset to SideQuest
With SideQuest installed on your computer and Developer Mode active on your Quest, the final step is to establish a connection between the two.
- Launch SideQuest: Open the SideQuest application on your computer.
- Connect Your Quest Headset: Use your USB-C data cable to connect your Meta Quest headset directly to a USB port on your computer.
- Grant Permissions Inside VR:
- Put on your Quest headset.
- You should see a prompt that says “Allow USB debugging?” You must click “Allow” or “Always allow from this computer.” Choosing “Always allow” prevents you from having to approve this every time you connect.
- You might also see a prompt to “Allow access to data.” Click “Allow.”
- Verify Connection in SideQuest:
- Look at the top-left corner of the SideQuest desktop application.
- A green dot indicates a successful connection, and you’ll see your headset’s battery level and device name displayed.
- If it’s an orange dot, your headset is detected but not fully authorized. Re-check the prompts inside your headset.
- If it’s a red dot, the headset is not detected. This could indicate a problem with the cable, USB port, Developer Mode, or drivers.
Congratulations! Your SideQuest installation is complete, and your headset is connected. You are now ready to explore the expanded world of VR content.
Beyond Installation: Maximizing Your SideQuest Experience
Installing SideQuest is just the beginning. The platform offers a wealth of features that allow you to truly customize and enhance your virtual reality adventures. This section delves into navigating the SideQuest interface and understanding its capabilities.
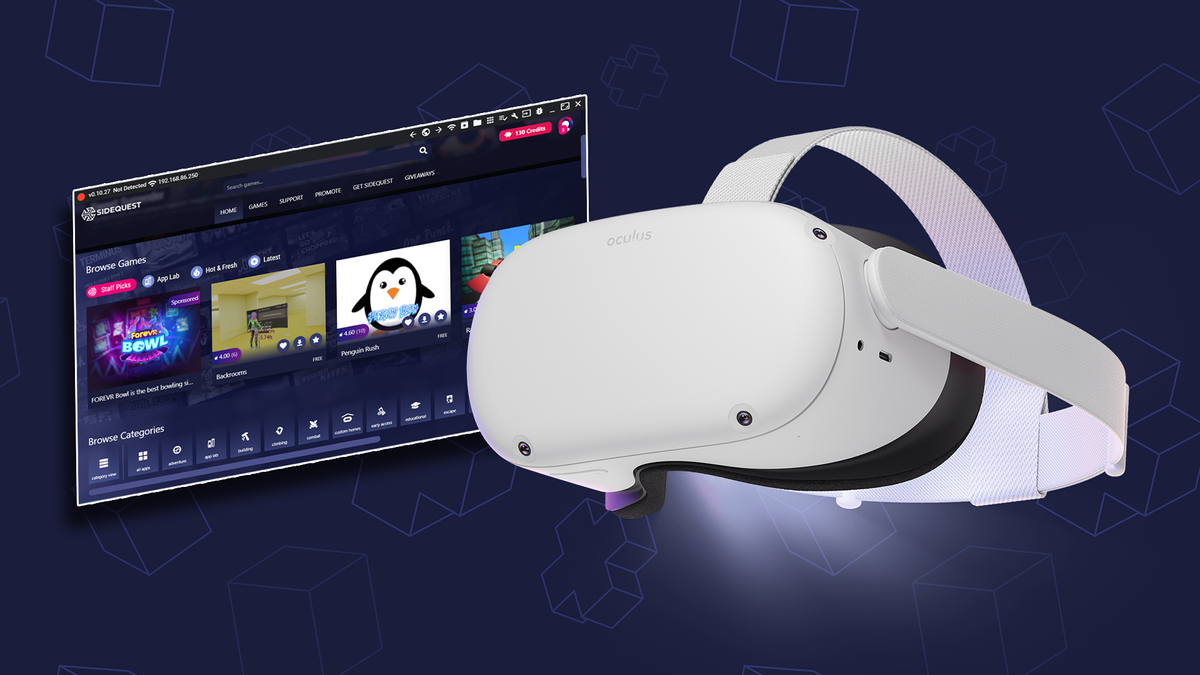
Navigating SideQuest and Sideloading Your First App
The SideQuest interface is designed for ease of use, making it straightforward to find, install, and manage applications.
-
Interface Overview:
- Home/Discover: This is where you’ll find featured games, new releases, and popular content.
- Categories: Browse apps by genre, type (games, tools, experiences), or status (early access, experimental).
- Search Bar: If you know what you’re looking for, use the search function.
- Installed Apps: A tab that lists all applications currently installed on your headset, including both official store apps and sideloaded ones.
- Top Bar Icons: Provide quick access to settings, file manager, ADB commands, and connection status.
-
Sideloading Your First App:
- Browse/Search: Find an app you’d like to install. Many free and experimental apps are excellent starting points.
- App Page: Click on an app to view its details, screenshots, reviews, and a description.
- Install Button: On the app’s page, you’ll typically find an “Install to Headset” button. Click it.
- Monitor Progress: A download and installation progress bar will appear in the bottom-right corner of the SideQuest application.
- Confirmation: Once complete, SideQuest will notify you.
- Accessing Sideloaded Apps in VR: Put on your Quest headset. From your app library, change the filter to “Unknown Sources.” All your sideloaded apps will appear here, ready to launch.
Advanced Features and Customization
SideQuest extends beyond simple app installation, offering powerful tools for deeper customization and control over your VR device.
- Performance Settings: Access the “Device Settings” icon (often a gear icon) to fine-tune your Quest. You can:
- Adjust Default Refresh Rate (e.g., from 72Hz to 90Hz or 120Hz, depending on your Quest model and the app’s support).
- Set Default CPU and GPU Level: Overclocking can improve performance in demanding games but will consume more battery and generate more heat.
- Change Default Texture Size/Resolution: Increasing this can improve visual clarity but might impact performance.
- File Manager: The integrated file manager allows you to browse the Quest’s internal storage, transfer files (APKs, videos, photos, game saves) between your computer and headset, and delete unnecessary data.
- Backup and Restore: Some tools within SideQuest allow you to back up app data, which can be invaluable when reinstalling apps or troubleshooting issues.
- ADB Commands: For advanced users, SideQuest provides a console to send direct Android Debug Bridge commands to your headset, opening up a myriad of possibilities for diagnostics and custom operations.
- Explore Mods and Patches: Dedicated sections or external communities linked through SideQuest host various mods for popular VR games, ranging from cosmetic changes to gameplay overhauls.
Digital Security and Best Practices with Sideloading
While SideQuest unlocks incredible possibilities, it’s essential to exercise caution and adhere to best practices to maintain the digital security of your device and personal data.
- Trust Your Sources: Only download apps and content from the official SideQuest platform or other reputable developer sources linked through it. Avoid installing APKs from random websites, as they could contain malware or compromise your headset’s security.
- Read Reviews and Descriptions: Before installing, always check app descriptions and user reviews on SideQuest. This can give you an idea of the app’s quality, potential bugs, and whether it’s suitable for your device.
- Understand Permissions: When prompted in your headset, be mindful of the permissions you grant to apps, especially those from “Unknown Sources.” If an app asks for excessive or unnecessary permissions, reconsider its installation.
- Keep Software Updated: Regularly update both your SideQuest application and your Meta Quest headset’s firmware. Updates often include security patches and performance improvements.
- Backup Important Data: Before making significant changes or installing experimental software, consider backing up any crucial game saves or data if the option is available.
- Report Issues: If you encounter a suspicious app or experience issues that might be security-related, report it to the SideQuest team and the community.
Troubleshooting Common SideQuest Installation Issues
Even with careful preparation, you might encounter minor hurdles during the installation or connection process. Here are solutions to some of the most common issues.
Connection Problems and Driver Issues
- Headset Not Detected (Red Dot):
- Check USB Cable: Ensure the cable is a data transfer cable and not just a charging cable. Try a different USB port on your computer, or a different cable.
- Developer Mode: Double-check that Developer Mode is indeed enabled on your Quest via the mobile app and that you’ve restarted the headset.
- USB Debugging Prompt: Put on your headset immediately after connecting it. You must accept the “Allow USB debugging?” prompt inside the VR environment. If you missed it, disconnect and reconnect the cable.
- ADB Drivers (Windows Specific): The SideQuest Advanced Installer should install these. If issues persist, you might need to manually update or reinstall ADB drivers. You can often find a “Install Drivers” option within SideQuest’s settings or by searching for “ADB drivers for Oculus Quest” online.
- Reboot Everything: Sometimes a simple restart of both your computer and your Quest headset can resolve connection glitches.
- Headset Detected but Unauthorized (Orange Dot):
- This almost always means you haven’t approved the “Allow USB debugging?” prompt inside the headset. Disconnect and reconnect, then immediately put on the headset to approve. Select “Always allow from this computer” to avoid future prompts.
Developer Mode Activation Failures
- Organization Not Created/Verified: Ensure you have successfully created an organization on developer.oculus.com. Log out and back in to your Meta account in the mobile app, or try creating the organization again if you’re unsure.
- Mobile App Sync Issues: If Developer Mode isn’t appearing or toggling correctly in the mobile app, try closing and reopening the app, or reinstalling it. Ensure your phone and headset are on the same Wi-Fi network and your headset is turned on.
- Headset Restart: Always restart your headset after enabling Developer Mode for the setting to fully take effect.
App Installation Errors
- “Installation Failed” or App Not Launching:
- Insufficient Storage: Check your Quest’s available storage space through the headset’s settings or SideQuest’s device info. Sideloaded apps, especially games, can be large.
- Corrupt APK: The downloaded app file (APK) might be corrupt. Try downloading it again, or if it’s from an external source, verify its integrity.
- Permissions Not Granted: Ensure you’ve granted any necessary permissions to the app once it’s launched in “Unknown Sources.”
- App Compatibility: Some older or experimental apps might not be fully compatible with the latest Quest firmware or hardware. Check the app’s information on SideQuest for any known issues.
- Restart SideQuest/Headset: Close SideQuest, restart your headset, and try the installation again.
By systematically going through these troubleshooting steps, you can resolve most common issues and get back to enjoying your enhanced VR experience.
The installation of SideQuest represents a significant step for any Meta Quest owner looking to expand their virtual horizons. It transforms a consumer-grade VR headset into a versatile development platform, offering unparalleled access to a diverse world of indie games, experimental applications, and powerful customization tools. From enhancing performance and visual fidelity to exploring unique content unavailable elsewhere, SideQuest empowers you to truly take control of your VR journey.
While the process involves a few technical steps, this guide has provided a clear, actionable roadmap to get you up and running. By understanding the prerequisites, following the installation instructions carefully, and practicing good digital security, you are now well-equipped to unlock the full potential of your VR headset. So go forth, explore the “Unknown Sources,” and redefine what’s possible in virtual reality. The future of VR customization is now at your fingertips!
aViewFromTheCave is a participant in the Amazon Services LLC Associates Program, an affiliate advertising program designed to provide a means for sites to earn advertising fees by advertising and linking to Amazon.com. Amazon, the Amazon logo, AmazonSupply, and the AmazonSupply logo are trademarks of Amazon.com, Inc. or its affiliates. As an Amazon Associate we earn affiliate commissions from qualifying purchases.