
Minecraft, a game celebrated for its blocky, pixellated charm, offers an unparalleled canvas for creativity and exploration. While its iconic aesthetic has captivated millions, a significant portion of its community continuously seeks ways to push the visual boundaries of the game. Enter shaders: powerful graphical enhancements that transform Minecraft’s appearance, introducing dynamic lighting, realistic shadows, reflective water, and lush foliage. For players on the Bedrock Edition, installing shaders opens up a whole new realm of immersive possibilities, elevating the familiar landscapes into breathtaking vistas. This comprehensive guide will walk you through the process, ensuring you can enhance your Minecraft Bedrock experience with stunning visual fidelity.

Understanding Shaders and Their Appeal in Minecraft Bedrock
Before diving into the technicalities, it’s crucial to grasp what shaders are, why they’ve become so popular, and what foundational knowledge you need to acquire them effectively for Minecraft Bedrock.
What are Shaders?
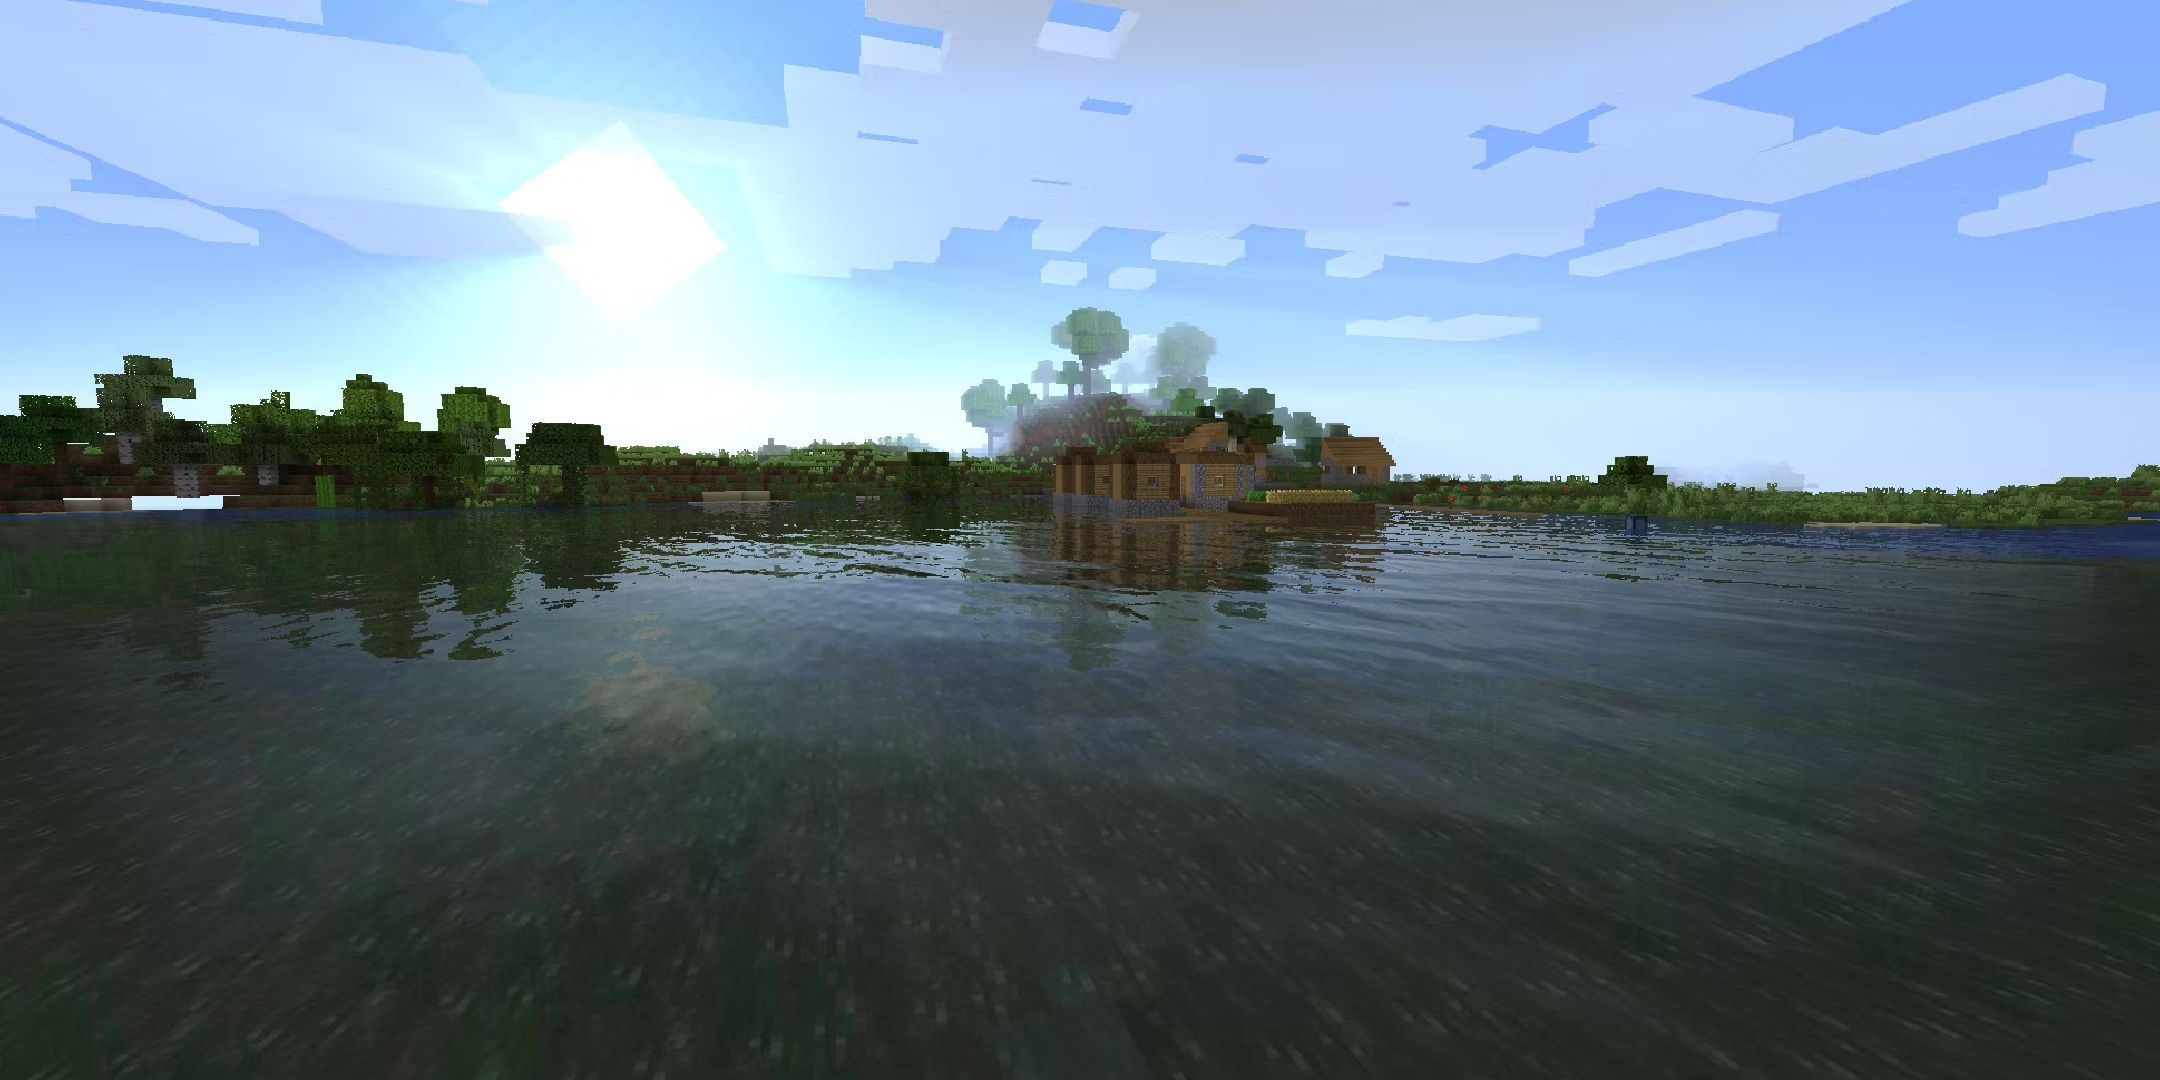
In the realm of computer graphics, a “shader” is a program that dictates how light interacts with surfaces, how shadows are cast, and how colors are rendered on-screen. For Minecraft, shaders are essentially graphical modifications that override the game’s default rendering engine. They introduce advanced visual effects such as per-pixel lighting, volumetric fog, realistic water reflections and refractions, swaying plants and leaves, and dynamic cloud formations. Unlike texture packs that merely change the appearance of blocks, shaders alter the very physics of light and shadow, fundamentally changing the game’s atmosphere and realism.
Why Enhance Your Minecraft Bedrock Experience with Shaders?
The appeal of shaders is multi-faceted. Firstly, they offer an unparalleled aesthetic upgrade. Imagine traversing a sun-drenched forest where rays of light pierce through the canopy, or watching a sunset paint the sky with vibrant hues, all reflected perfectly on the shimmering surface of a lake. Shaders bring a level of visual realism and beauty that the vanilla game, by design, cannot achieve. Secondly, they foster a deeper sense of immersion. Realistic shadows and dynamic weather effects make the world feel more alive and responsive. For content creators, shaders provide a professional sheen to videos and screenshots, attracting more viewers and showcasing the game in its best possible light. Ultimately, shaders allow players to customize their visual experience, making Minecraft truly their own.
Key Considerations Before Installation
While the allure of enhanced graphics is strong, there are several important considerations to bear in mind before embarking on the installation journey. The most significant factor is performance impact. Shaders are resource-intensive; they demand more from your device’s CPU, GPU, and RAM. This means that older or lower-spec devices might struggle to run shaders smoothly, potentially leading to frame rate drops, stuttering, or even crashes. It’s essential to assess your device’s capabilities and choose a shader pack that aligns with its hardware. Additionally, ensure your Minecraft Bedrock game is up-to-date, as shader compatibility often relies on the latest game version. Finally, be aware that not all shaders are compatible with every version of Minecraft Bedrock or every device, so research and user reviews are your best friends.
Preparing Your Device for Shader Installation
A smooth shader installation process begins with proper preparation. This involves checking your system’s specifications, ensuring your game is current, and gathering the necessary tools.
Checking System Requirements
Before downloading any shader pack, take a moment to understand your device’s hardware. While Minecraft Bedrock is available on a wide array of platforms (Windows 10/11, Xbox, PlayStation, Nintendo Switch, Android, iOS), the most significant impact from shaders will be felt on PC (Windows 10/11) and high-end mobile devices. For Windows users, navigate to “Settings” > “System” > “About” to view your processor (CPU) and installed RAM. For your graphics card (GPU), open the “Device Manager,” expand “Display adapters.” Generally, a dedicated GPU (NVIDIA GeForce, AMD Radeon) will handle shaders significantly better than integrated graphics. Most shader packs will specify recommended or minimum system requirements, so compare these against your hardware. If your system is borderline, opt for “lighter” or “performance-friendly” shader packs.
Ensuring Minecraft Bedrock is Up-to-Date
Game updates frequently include performance improvements, bug fixes, and crucially, support for new rendering features or compatibility adjustments that shader developers rely on. Running an outdated version of Minecraft Bedrock can lead to incompatibility issues, visual glitches, or shaders simply failing to load.
-
For Windows 10/11: Open the Microsoft Store, click on the three dots in the top right corner, then select “Downloads and updates” > “Get updates.”
-
For Consoles: Your console typically updates games automatically, but you can manually check for updates via the game’s options menu on the dashboard.
-
For Mobile: Visit your device’s app store (Google Play Store or Apple App Store) and check for updates for Minecraft.
Always ensure your game is running the latest stable release for the best shader experience.
Backing Up Your Worlds (Optional but Recommended)
While shader installation is generally safe, any modification to game files carries a minuscule risk. To safeguard your precious builds and progress, it’s always a good practice to back up your Minecraft worlds.
-
For Windows 10/11: Your worlds are typically located in
C:Users[Your Username]AppDataLocalPackagesMicrosoft.MinecraftUWP_8wekyb3d8bbweLocalStategamescom.mojangminecraftWorlds. Copy the entireminecraftWorldsfolder to a safe location, such as an external drive or cloud storage. -
For Mobile: You can usually find an export option within the game’s world settings, or manually access files via a file manager if your device allows.
This precaution ensures that even in the unlikely event of data corruption, your worlds remain intact.
Essential Tools: File Explorer and a Reliable Shader Pack
The primary tools you’ll need are a reliable file explorer and the shader pack itself.
-
File Explorer: For Windows, the built-in File Explorer is sufficient. For mobile devices, you might need a third-party file manager app (e.g., FX File Explorer for Android, Files app or iMazing for iOS).
-
Shader Pack: This is the core component. Shader packs for Minecraft Bedrock are typically distributed as
.mcpackfiles. These are custom file formats that Minecraft can recognize and import directly. Alternatively, some packs might come as.ziparchives containing the shader files that need manual placement. You’ll find these packs on dedicated Minecraft modding websites (e.g., MCPEDL, CurseForge, Planet Minecraft) or through community forums. When selecting a shader pack, pay attention to its compatibility (Bedrock Edition, specific game versions), user reviews, and performance recommendations.
Step-by-Step Guide to Installing Shaders on Minecraft Bedrock
With your preparations complete, you’re ready to proceed with the actual installation. This section details the process from downloading to in-game activation.
Locating and Downloading a Compatible Shader Pack
The first step is to find a shader pack that suits your taste and is compatible with your version of Minecraft Bedrock. Popular choices include ESBE Shaders, EVO Shaders, Defined PBR, and many more, each offering a unique visual style and performance profile.
-
Visit Reputable Websites: Navigate to well-known Minecraft Bedrock modding sites like MCPEDL.com. These sites host a vast collection of shaders, texture packs, and add-ons.
-
Filter for Bedrock Shaders: Use the site’s filters to specifically search for “shaders” or “render dragon shaders” (if your version of Bedrock uses the Render Dragon engine, which many newer versions do).
-
Check Compatibility: Carefully read the description of each shader pack. It will usually state which Minecraft Bedrock versions it supports and if it has any specific hardware requirements or known issues.
-
Download the Pack: Once you’ve chosen a shader pack, click the download link. Most Bedrock shader packs will download as a
.mcpackfile. If it’s a.zipfile, you’ll need to extract its contents later.

Importing the Shader Pack into Minecraft
There are two primary methods for importing shader packs: the direct .mcpack import and manual file placement.
Method 1: Direct .mcpack Import (Recommended)
This is the simplest and most common method for Bedrock Edition.
-
Locate the
.mcpackfile: After downloading, find the.mcpackfile in your “Downloads” folder or wherever you saved it. -
Double-click the file: Simply double-click the
.mcpackfile. This action should automatically launch Minecraft Bedrock. -
Wait for Import Confirmation: Minecraft will display an “Import Started” notification at the top of the screen, followed by “Successfully imported [Shader Pack Name]”. If it fails, check for compatibility issues or try downloading the pack again.
Method 2: Manual File Placement (for .zip files or troubleshooting)
If your shader pack downloads as a .zip file or if the .mcpack method fails, you might need to place the files manually.
-
Extract the
.zipfile: If you downloaded a.zipfile, right-click it and select “Extract All” to unpack its contents into a new folder. Inside, you should find a folder containing the shader’s files (manifest.json, textures, etc.). -
Navigate to the Minecraft Resource Packs Folder:
-
On Windows 10/11: Open File Explorer and paste the following path into the address bar:
%LOCALAPPDATA%PackagesMicrosoft.MinecraftUWP_8wekyb3d8bbweLocalStategamescom.mojangresource_packs. -
On Android/iOS: Use your file manager app to navigate to
Internal Storage > games > com.mojang > resource_packs. (Note: iOS users might need specific apps or a computer connection to access this folder directly.)
-
-
Copy the Shader Folder: Copy the extracted shader folder (the one containing the
manifest.jsonfile) and paste it directly into theresource_packsfolder. Do not paste the.zipfile itself.
Activating the Shader Pack within Minecraft Bedrock
Once imported, the shader pack needs to be activated in-game.
-
Launch Minecraft Bedrock: If it’s not already open, launch the game.
-
Access Global Resources: From the main menu, click on “Settings.” Scroll down the left sidebar and select “Global Resources” under the “Global Resources” section.
-
Activate the Shader Pack: In the “My Packs” tab on the right, locate your newly imported shader pack. Click on it, then click “Activate.” The shader pack will move from “My Packs” to “Active Packs.” Ensure it’s at the top of the “Active Packs” list for highest priority, especially if you have other resource packs.
-
Activate in World Settings (Optional but Recommended): For maximum control, you can also activate shaders on a per-world basis. When creating a new world or editing an existing one, navigate to the “Resource Packs” section in the world settings. Activate the shader pack there as well, ensuring it’s active for that specific game session.
Verifying Successful Installation
The moment of truth!
-
Launch a World: Start a new world or load an existing one.
-
Observe Visual Changes: As the world loads, you should immediately notice the visual enhancements. Look for dynamic lighting, swaying foliage, realistic water effects, and dramatic shadows.
-
Adjust Settings: If the shaders are too dark, too bright, or impacting performance, some shader packs offer in-game settings or a sub-pack selection within the “Active Packs” menu to customize their intensity or features.
Troubleshooting Common Issues and Optimizing Performance
Even with careful installation, you might encounter issues. Here’s how to address them and optimize your shader experience.
Shaders Not Appearing or Crashing the Game
-
Incorrect File Placement/Import: Double-check that the
.mcpackimported successfully, or that the shader folder was placed directly into theresource_packsdirectory, not within another subfolder. -
Incompatible Shader: The shader pack might not be compatible with your current Minecraft Bedrock version or your device’s hardware. Refer back to the shader pack’s description and try a different, known-compatible pack.
-
Outdated Game/Drivers: Ensure both Minecraft Bedrock and your graphics drivers (for PC) are fully up-to-date.
-
Render Dragon Engine: Newer versions of Minecraft Bedrock utilize the Render Dragon engine. Older shaders designed for previous rendering engines may not work. Look specifically for “Render Dragon compatible” shaders.
-
Conflicts with Other Packs: If you have multiple resource packs active, try deactivating all other packs and only activating the shader to rule out conflicts.
Performance Lag and Optimization Tips
Shaders are demanding, and performance issues are common.
-
Choose Lighter Shaders: Many shader creators offer “lite” or “performance” versions of their packs. These reduce some of the more intensive effects for smoother gameplay.
-
Adjust In-Game Settings:
-
Render Distance: Lowering your render distance (chunks) significantly reduces the number of blocks the game needs to render, improving FPS.
-
Simulation Distance: Similar to render distance, reducing this can help.
-
Fancy Graphics/Smooth Lighting: Experiment with these settings in Minecraft’s video options. Sometimes turning “Fancy Graphics” off (or on, depending on the shader) can improve performance.
-
Particles: Reduce particle effects.
-
-
Update Hardware (If Possible): For persistent performance issues, especially on PC, upgrading your GPU or increasing RAM can provide a substantial boost.
-
Close Background Applications: Ensure no other demanding programs are running in the background while you play Minecraft with shaders.
Managing Multiple Shader Packs
While you can have multiple shader packs downloaded, only one can be active globally at a time, and it needs to be at the top of the “Active Packs” list in Global Resources to take priority. If you want to switch between shaders, simply deactivate the current one and activate another. Some shaders might combine elements, but generally, it’s best to stick to one primary visual overhaul at a time to avoid conflicts or unexpected visual glitches.
Removing Shaders
If you wish to remove a shader pack:
-
Deactivate In-Game: Go to “Settings” > “Global Resources” > “Active Packs,” select the shader pack, and click “Deactivate.”
-
Delete Files (Optional): To free up storage space, you can navigate to the
resource_packsfolder (as described in the manual installation section) and delete the shader pack’s folder. For.mcpackimports, there’s often no visible file inresource_packsas the game manages it internally; simply deactivating is sufficient.
The Future of Graphics in Minecraft Bedrock
The visual landscape of Minecraft Bedrock is continuously evolving, with shaders playing a pivotal role in pushing its graphical potential. Understanding where the technology is headed can offer further insight into maximizing your visual experience.
Ray Tracing vs. Traditional Shaders
With the advent of the Render Dragon engine in Minecraft Bedrock, official support for ray tracing on compatible hardware (primarily NVIDIA RTX GPUs on Windows 10/11) has emerged. Ray tracing is a sophisticated rendering technique that simulates the physical behavior of light, producing hyper-realistic lighting, shadows, and reflections that surpass what traditional shaders can achieve. While traditional shaders approximate these effects, ray tracing calculates them with astonishing accuracy. For players with RTX-enabled graphics cards, Minecraft with RTX offers an official, highly optimized, and visually stunning experience that goes beyond community-made shaders. However, traditional shaders remain a fantastic, accessible option for a broader range of devices and for those seeking specific aesthetic styles not covered by ray tracing packs.
Community Innovation and Ongoing Development
The Minecraft modding community is a relentless engine of innovation. Shader developers constantly refine their creations, optimize performance, and adapt to new game versions and rendering technologies. This vibrant ecosystem means there’s always something new to explore, from hyper-realistic shaders striving for photorealism to stylized packs that transform Minecraft into a vibrant, painterly world. The continuous feedback loop between players and creators drives the evolution of these visual enhancements, ensuring that the visual possibilities for Minecraft Bedrock remain virtually limitless.
Maximizing Your Visuals Responsibly
As you delve into the world of shaders, it’s important to do so responsibly. Always download shader packs from reputable sources to avoid malware or corrupted files. Respect the work of shader creators by adhering to their terms of use and, where applicable, supporting them through donations or recognition. The pursuit of enhanced graphics should also be balanced with performance; a visually stunning game is only enjoyable if it runs smoothly. Experiment, explore, and find the perfect balance that transforms your Minecraft Bedrock experience into something truly spectacular, allowing you to build, explore, and survive in a world rendered with breathtaking new life.
aViewFromTheCave is a participant in the Amazon Services LLC Associates Program, an affiliate advertising program designed to provide a means for sites to earn advertising fees by advertising and linking to Amazon.com. Amazon, the Amazon logo, AmazonSupply, and the AmazonSupply logo are trademarks of Amazon.com, Inc. or its affiliates. As an Amazon Associate we earn affiliate commissions from qualifying purchases.