
In the ever-evolving landscape of technology, understanding how to manage software is a fundamental skill. For users of Linux distributions that utilize the Red Hat Package Manager (RPM) system, such as Fedora, CentOS, RHEL, and their derivatives, knowing how to install RPM packages is essential. This guide will demystify the process, offering clear instructions and practical advice, all while keeping in mind the broader context of technology and how software management impacts your digital life.
Whether you’re a seasoned system administrator or a curious tech enthusiast dipping your toes into the world of Linux, this tutorial aims to equip you with the knowledge to confidently install RPM packages. We’ll delve into the core commands, explore different installation scenarios, and touch upon best practices for maintaining a stable and secure system. This knowledge not only enhances your technical prowess but also contributes to better digital security and productivity, aligning with the core tenets of the technology we explore.
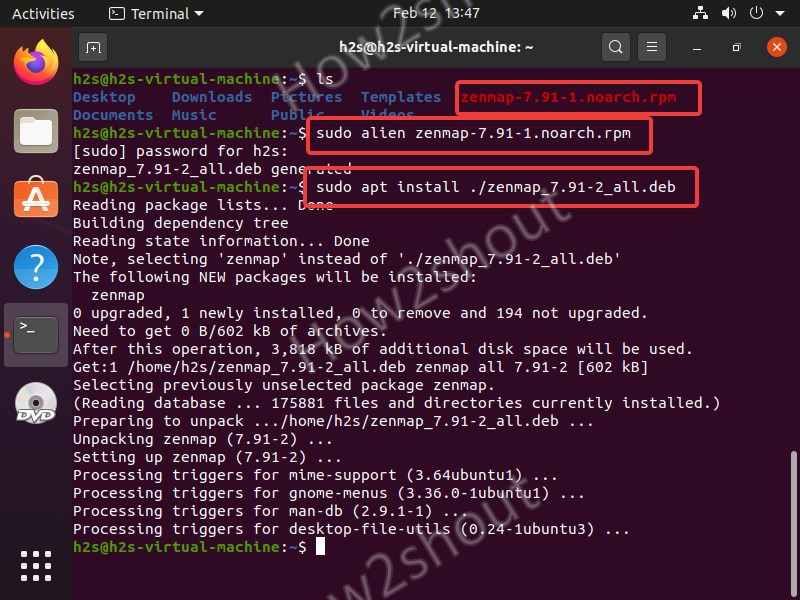
Understanding RPM Packages: The Building Blocks of Linux Software
Before we dive into the “how,” it’s crucial to understand “what” an RPM package is. RPM stands for Red Hat Package Manager. It’s a powerful and versatile package management system widely used in the Linux ecosystem. Think of an RPM package as a neatly wrapped bundle containing all the files needed to install, upgrade, or remove a piece of software. This includes executable binaries, configuration files, documentation, and metadata about the package itself.
The primary advantage of using RPM packages lies in their ability to streamline software installation and management. Instead of manually downloading, compiling, and configuring individual software components, RPM handles these tasks automatically. This standardization simplifies the process, reduces the chances of errors, and ensures that software is installed consistently across different systems.
The Anatomy of an RPM Package
An RPM package is more than just a collection of files; it’s a sophisticated archive that includes:
- Metadata: This is crucial information about the package, such as its name, version, architecture (e.g., x86_64 for 64-bit Intel/AMD processors), description, license, and dependencies. Dependencies are other packages that the software relies on to function correctly.
- Payload: This section contains the actual files that will be installed on your system. These could be executables, libraries, configuration files, man pages, and more.
- Scripts: RPM packages can also include pre-installation and post-installation scripts. These scripts can perform tasks before the package files are extracted (e.g., creating directories, setting permissions) and after the installation is complete (e.g., starting services, updating caches).
By encapsulating all these elements, RPM packages provide a robust mechanism for software distribution and management, making it easier for both developers to package their software and for users to install it. This efficiency directly translates to enhanced productivity and a smoother user experience in your tech endeavors.
Installing RPM Packages: The rpm Command and its Capabilities
The cornerstone of installing RPM packages is the rpm command-line utility. While more user-friendly tools like yum and dnf (which we’ll touch upon later) have become the default for most users, understanding the raw rpm command is fundamental. It gives you granular control and offers insights into the package management process.
Basic Installation with rpm -i or rpm -U
The most straightforward way to install an RPM package is using the rpm command with the -i (install) or -U (upgrade) option. The -U option is generally preferred as it can both install a new package and upgrade an existing one if a newer version is available.
Syntax:
sudo rpm -i /path/to/your/package.rpm
or, more commonly:
sudo rpm -Uvh /path/to/your/package.rpm
Let’s break down the options used above:
sudo: This command is necessary because installing software typically requires administrative privileges.-i: This flag tellsrpmto install the specified package.-U: This flag tellsrpmto upgrade the package if it’s already installed, or install it if it’s not. This is a safer and more versatile option than-ialone.-v: This stands for “verbose” and means thatrpmwill output detailed information about the installation process. You’ll see which files are being installed, which scripts are being run, and so on.-h: This flag tellsrpmto display a hash mark (#) for every 100 packages or 10 percent of the transfer, providing a visual progress indicator.
Example:
If you have an RPM file named my-application-1.0-1.x86_64.rpm in your current directory, you would install it using:
sudo rpm -Uvh my-application-1.0-1.x86_64.rpm
Important Note on Dependencies:
One of the key limitations of the rpm command when used directly for installation is its lack of automatic dependency resolution. If the package you’re trying to install requires other software components that are not already present on your system, the rpm command will likely fail with an error message indicating missing dependencies. This is where higher-level package managers like yum and dnf shine.
Handling Dependencies: The Role of yum and dnf
For everyday users, the preferred method for installing RPM packages is through package managers that handle dependencies automatically. These managers connect to online repositories (collections of software packages) and download not only the package you requested but also all the necessary dependencies.
yum(Yellowdog Updater, Modified): This has been the standard package manager for older Red Hat-based systems like CentOS 7 and RHEL 7.dnf(Dandified YUM): This is the successor toyumand is the default package manager for newer systems like Fedora, CentOS 8+, and RHEL 8+.dnfoffers improved performance, better dependency resolution, and a more modern architecture.
Installing with yum:
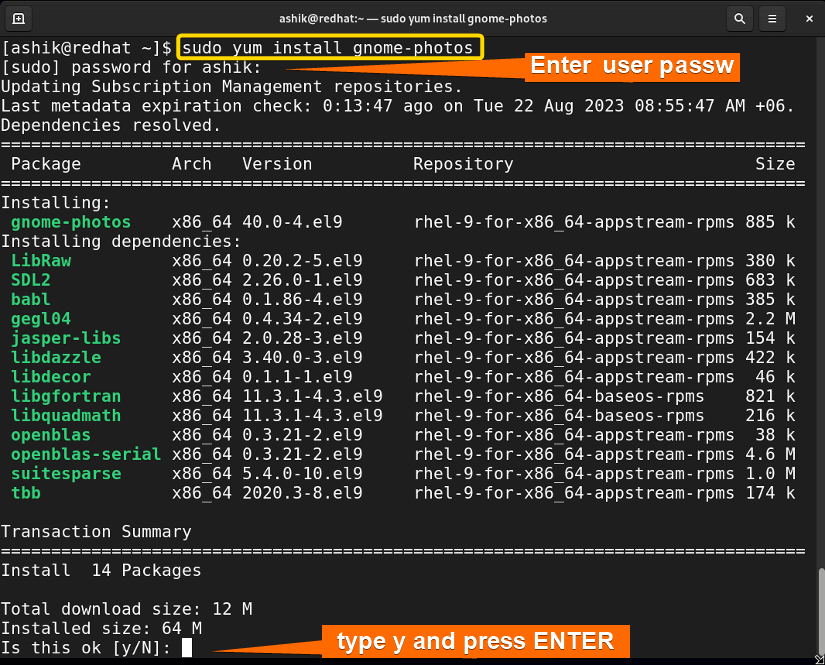
If your system uses yum, you can install an RPM package from a local file by simply providing the path to the .rpm file. yum will then attempt to resolve and install any dependencies from configured repositories.
sudo yum install /path/to/your/package.rpm
Installing with dnf:
Similarly, for systems using dnf:
sudo dnf install /path/to/your/package.rpm
These commands are significantly more convenient than using rpm -i directly because they abstract away the complex dependency management. When you use yum or dnf, you’re not just installing a single package; you’re ensuring that your entire software environment remains consistent and functional. This is a critical aspect of maintaining a secure and productive digital setup.
Verifying Installation and Querying Packages
Once a package is installed, it’s often useful to verify its installation or retrieve information about it. The rpm command also provides tools for this.
Querying Package Information:
To get information about an installed package, use the -q (query) option.
rpm -qi <package_name>
This will display detailed information about the package, including its name, version, release, architecture, installation date, and description.
Listing Files Installed by a Package:
You can also see which files were installed by a specific package using the -l (list) option in conjunction with -q.
rpm -ql <package_name>
Verifying Package Integrity:
To ensure that the files belonging to an installed package haven’t been tampered with or corrupted, you can use the -V (verify) option.
rpm -V <package_name>
This command checks the integrity of the files against the package’s metadata. If any discrepancies are found (e.g., file size changed, MD5 checksum mismatch, permissions altered), it will report them. This is a crucial step in maintaining digital security.
Advanced RPM Operations: Unpacking, Building, and Cleaning Up
Beyond basic installation, RPM offers advanced features that are valuable for developers, system administrators, and power users.
Unpacking an RPM Package
Sometimes, you might want to inspect the contents of an RPM package without actually installing it. You can “unpack” an RPM file to extract its payload.
Syntax:
rpm2cpio /path/to/your/package.rpm | cpio -idmv
Let’s break this down:
rpm2cpio: This utility converts an RPM package into a CPIO archive, which is a standard Unix archive format.|: This is the pipe symbol, which sends the output ofrpm2cpioas input to thecpiocommand.cpio -idmv:-i: Extract files from an archive.-d: Create directories as needed.-m: Preserve modification times.-v: Verbose output, showing the files being extracted.
This command will extract the entire payload of the RPM package into your current directory, allowing you to examine its files and structure. This can be incredibly useful for debugging or understanding how a particular application is packaged.
Building Your Own RPM Packages
For developers or those who need to distribute custom software, learning to build RPM packages is a significant skill. This involves creating an .spec file, which is a recipe for building the RPM. The .spec file contains metadata, instructions on how to compile and install the software, and scripts to run before and after installation.
The process of building an RPM typically involves using the rpmbuild command. It’s a more involved topic that goes beyond simple installation, but it’s the foundation for creating professional software distributions on RPM-based systems. This aspect connects directly to the “Brand” and “Tech” pillars of our website, as it allows for the creation and distribution of branded technological solutions.
Removing RPM Packages
Just as important as installing software is knowing how to remove it cleanly. You can uninstall packages using the rpm command with the -e (erase) option.
Syntax:
sudo rpm -e <package_name>
Example:
To remove the my-application package:
sudo rpm -e my-application
Note on yum and dnf for Removal:
Again, if you installed the package using yum or dnf, it’s generally recommended to use those tools for removal as well, as they can sometimes handle associated configuration files or dependencies more effectively.
sudo yum remove <package_name>
sudo dnf remove <package_name>
Cleaning Up Unused Dependencies (Using yum or dnf)
Over time, as you install and remove software, your system can accumulate orphaned dependencies – packages that were installed as dependencies for other software but are no longer needed. These can take up disk space and potentially create minor security vulnerabilities if not managed.
Both yum and dnf provide commands to clean up these unused packages:
For yum:
sudo yum autoremove
For dnf:
sudo dnf autoremove
These commands will identify and remove packages that are no longer required by any installed application. This is a crucial part of system maintenance, contributing to better overall system performance and security.

Conclusion: Mastering RPM for a Smarter Tech Experience
Understanding how to install and manage RPM packages is a vital skill for anyone working with Red Hat-based Linux distributions. From the fundamental rpm -Uvh command to the automated dependency management of yum and dnf, each method serves a purpose in building and maintaining your software environment.
By mastering these tools, you gain not only technical proficiency but also the ability to keep your systems secure, efficient, and up-to-date. This directly impacts your productivity, your ability to leverage new software, and the overall reliability of your digital tools. Whether you’re deploying complex server infrastructure, personalizing your desktop, or exploring the latest AI applications, a solid grasp of package management like RPM is a foundational step towards a smarter, more controlled technological experience. Remember, in the world of tech, knowledge is power, and understanding your software’s building blocks is a significant part of that power.
aViewFromTheCave is a participant in the Amazon Services LLC Associates Program, an affiliate advertising program designed to provide a means for sites to earn advertising fees by advertising and linking to Amazon.com. Amazon, the Amazon logo, AmazonSupply, and the AmazonSupply logo are trademarks of Amazon.com, Inc. or its affiliates. As an Amazon Associate we earn affiliate commissions from qualifying purchases.