
The quest for enhanced vehicle safety and reliable documentation on the road has propelled dash cams into a must-have accessory for many drivers. While front-facing dash cams have become commonplace, the inclusion of a rear dash cam offers a comprehensive surveillance solution, capturing incidents that occur behind your vehicle – from fender benders and tailgating to hit-and-run scenarios. This article will guide you through the process of installing a rear dash cam, ensuring you can benefit from its protective capabilities.
The decision to install a rear dash cam is a strategic one, aligning perfectly with the principles of Tech that drive innovation in automotive safety. It’s a practical application of digital technology designed to enhance everyday life. Furthermore, from a Brand perspective, a well-documented driving history, supported by dash cam footage, can be invaluable in protecting your personal brand as a responsible and safe driver, or for businesses, reinforcing their corporate identity as safety-conscious entities. Financially, as explored within the Money domain, a rear dash cam can potentially save you significant amounts in insurance premiums, legal fees, and repair costs by providing irrefutable evidence in the event of an accident.
This guide will cover the essential steps, from choosing the right dash cam to the physical installation and final checks, empowering you to take control of your vehicle’s security.
Understanding Your Rear Dash Cam Setup
Before diving into the installation process, it’s crucial to understand the components and options available for rear dash cam setups. Most rear dash cams operate in one of two primary configurations:
Standalone Rear Dash Cam
This is the simplest setup, where the rear dash cam is a self-contained unit that records independently. It typically attaches to your rear windshield and records video of what’s happening behind your car.
Pros:
- Simplicity: Easy to install and manage as a separate device.
- Cost-Effective: Generally less expensive than integrated systems.
- Flexibility: Can be moved between vehicles more easily if needed.
Cons:
- Limited Integration: Doesn’t seamlessly integrate with a front dash cam for a unified recording system.
- Separate Storage: Requires its own memory card and power source.
- Potential for Clutter: Adds another device and its associated wires to manage.
Dual-Channel Dash Cam System (Front and Rear)
This is a more integrated and often preferred solution. A dual-channel system features a main unit that records footage from both a front-facing camera and a rear-facing camera. The rear camera is connected to the main unit, usually via a long cable that runs through your car’s interior.
Pros:
- Comprehensive Coverage: Records both front and rear views simultaneously.
- Unified Storage: All footage is stored on a single memory card.
- Streamlined Operation: Managed by a single device and app.
- Enhanced Evidence: Provides a complete picture of an incident from both perspectives.
Cons:
- More Complex Installation: Requires running a cable from the front to the rear of the vehicle.
- Higher Initial Cost: Generally more expensive than a standalone rear camera.
- Dependency: If the main unit fails, both recordings are affected.
When purchasing a rear dash cam, consider the following technical specifications:
- Resolution: Aim for at least 1080p for clear, detailed footage. Higher resolutions like 1440p or 4K offer even better clarity, especially for license plate recognition.
- Field of View (FOV): A wider FOV (e.g., 150-170 degrees) captures more of the surroundings.
- Night Vision/Low-Light Performance: Crucial for effective recording in various lighting conditions. Look for cameras with good infrared (IR) capabilities or advanced sensors.
- Frame Rate: 30 frames per second (fps) is standard. Higher frame rates can result in smoother video but consume more storage.
- Mounting Options: Consider how the camera will be attached – suction cup, adhesive mount, or clip-on for the rearview mirror.
- Connectivity: Wi-Fi and Bluetooth for easy access to footage via smartphone apps are highly desirable.
The Installation Process: Step-by-Step Guidance
Installing a rear dash cam, especially as part of a dual-channel system, involves careful planning and execution to ensure a clean, secure, and functional setup.
H2: Preparing Your Workspace and Gathering Tools
Before you begin the physical installation, it’s essential to prepare your workspace and have the necessary tools at hand. This will make the process smoother and prevent interruptions.
Tools and Materials You’ll Need:
- Your Rear Dash Cam Kit: Ensure all components are present, including the camera, mounting hardware, power cable, and rear camera connection cable (if applicable).
- Trim Removal Tools: These plastic tools are invaluable for prying open interior panels without damaging them. You can find inexpensive sets online or at auto parts stores.
- Screwdriver Set: For any screws that might need to be removed.
- Wire Strippers and Crimp Connectors (Optional): If you plan to hardwire your dash cam to the fuse box for continuous power.
- Electrical Tape or Cable Ties: For securing wires neatly.
- Cleaning Supplies: Isopropyl alcohol and a microfiber cloth to clean the mounting surface.
- A Small Mirror (Optional): To help see the mounting area on the inside of the rear windshield.
- Gloves (Optional): To keep fingerprints off the lens and interior surfaces.
- Patience and Time: Allocate at least an hour for installation, more if you’re hardwiring.
Important Considerations Before Installation:
- Read Your Dash Cam Manual: Every dash cam model is slightly different. Always refer to the manufacturer’s instructions for specific details and recommendations.
- Plan Your Wire Routing: Before you start, think about how you’ll run the cables. The goal is to hide them as much as possible to maintain a clean interior and prevent them from obstructing your view or getting snagged.
- Power Source: Decide whether you’ll use the cigarette lighter adapter or hardwire the dash cam. Hardwiring provides a more discreet and professional installation but requires a bit more technical skill.
H2: Mounting the Rear Dash Cam
The physical placement and secure mounting of your rear dash cam are critical for optimal performance and a professional look.
H3: Positioning the Camera
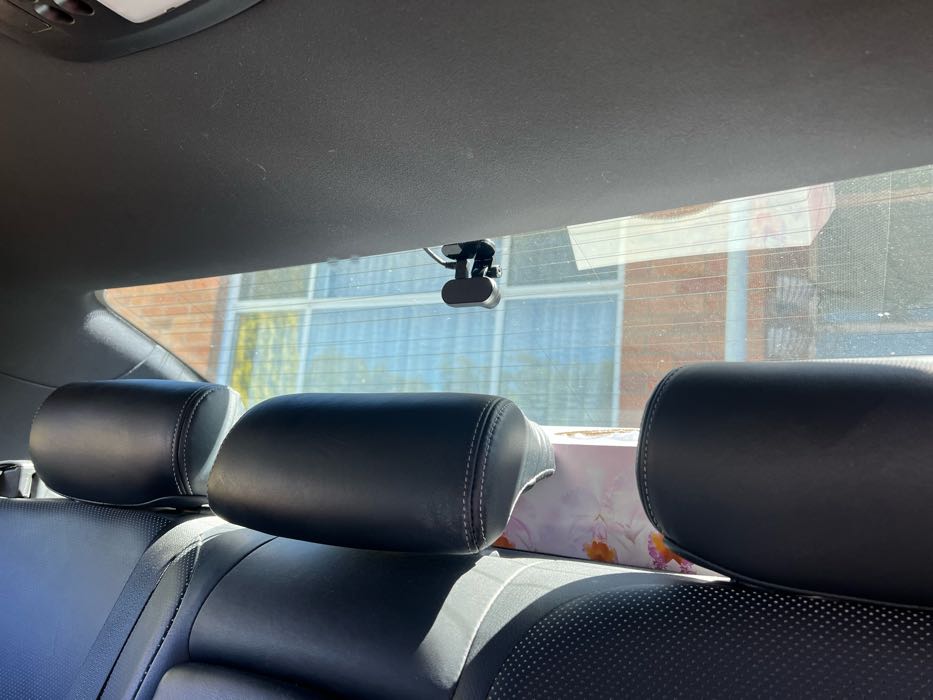
The ideal location for your rear dash cam is on the inside of the rear windshield.
- Central Placement: Aim for the center of the windshield. This provides the most balanced view of traffic behind you.
- Avoid Obstructions: Ensure the camera’s view is not blocked by the rearview mirror, headrests, or any stickers on the windshield.
- Respect Tinting: If your rear windshield has tinting, be aware that some tints can interfere with the camera’s ability to capture clear footage, especially at night. Test the view before permanently mounting.
- Consider the Connection Cable: For dual-channel systems, the location should also facilitate the routing of the rear camera connection cable.
H3: Attaching the Mount
- Clean the Surface: Thoroughly clean the chosen area on the inside of the rear windshield with isopropyl alcohol and a microfiber cloth. This ensures the adhesive or suction cup will form a strong bond. Allow it to dry completely.
- Apply the Mount:
- Suction Cup: Firmly press the suction cup onto the glass, ensuring there are no air bubbles. Some suction cups have a lever to create a vacuum seal.
- Adhesive Mount: Peel off the backing from the adhesive pad and firmly press the mount onto the glass. Hold it in place for the recommended time (often 30 seconds to a minute) to ensure proper adhesion.
- Attach the Camera: Once the mount is secure, attach the dash cam unit to the mount according to the manufacturer’s instructions. Ensure it’s firmly in place and can be adjusted to the desired angle.
H3: Connecting the Rear Camera (for Dual-Channel Systems)
If you’re installing a dual-channel system, this is the most involved part of the physical installation.
- Route the Cable: The primary challenge is running the long cable from the main unit (usually mounted near the front windshield) to the rear camera.
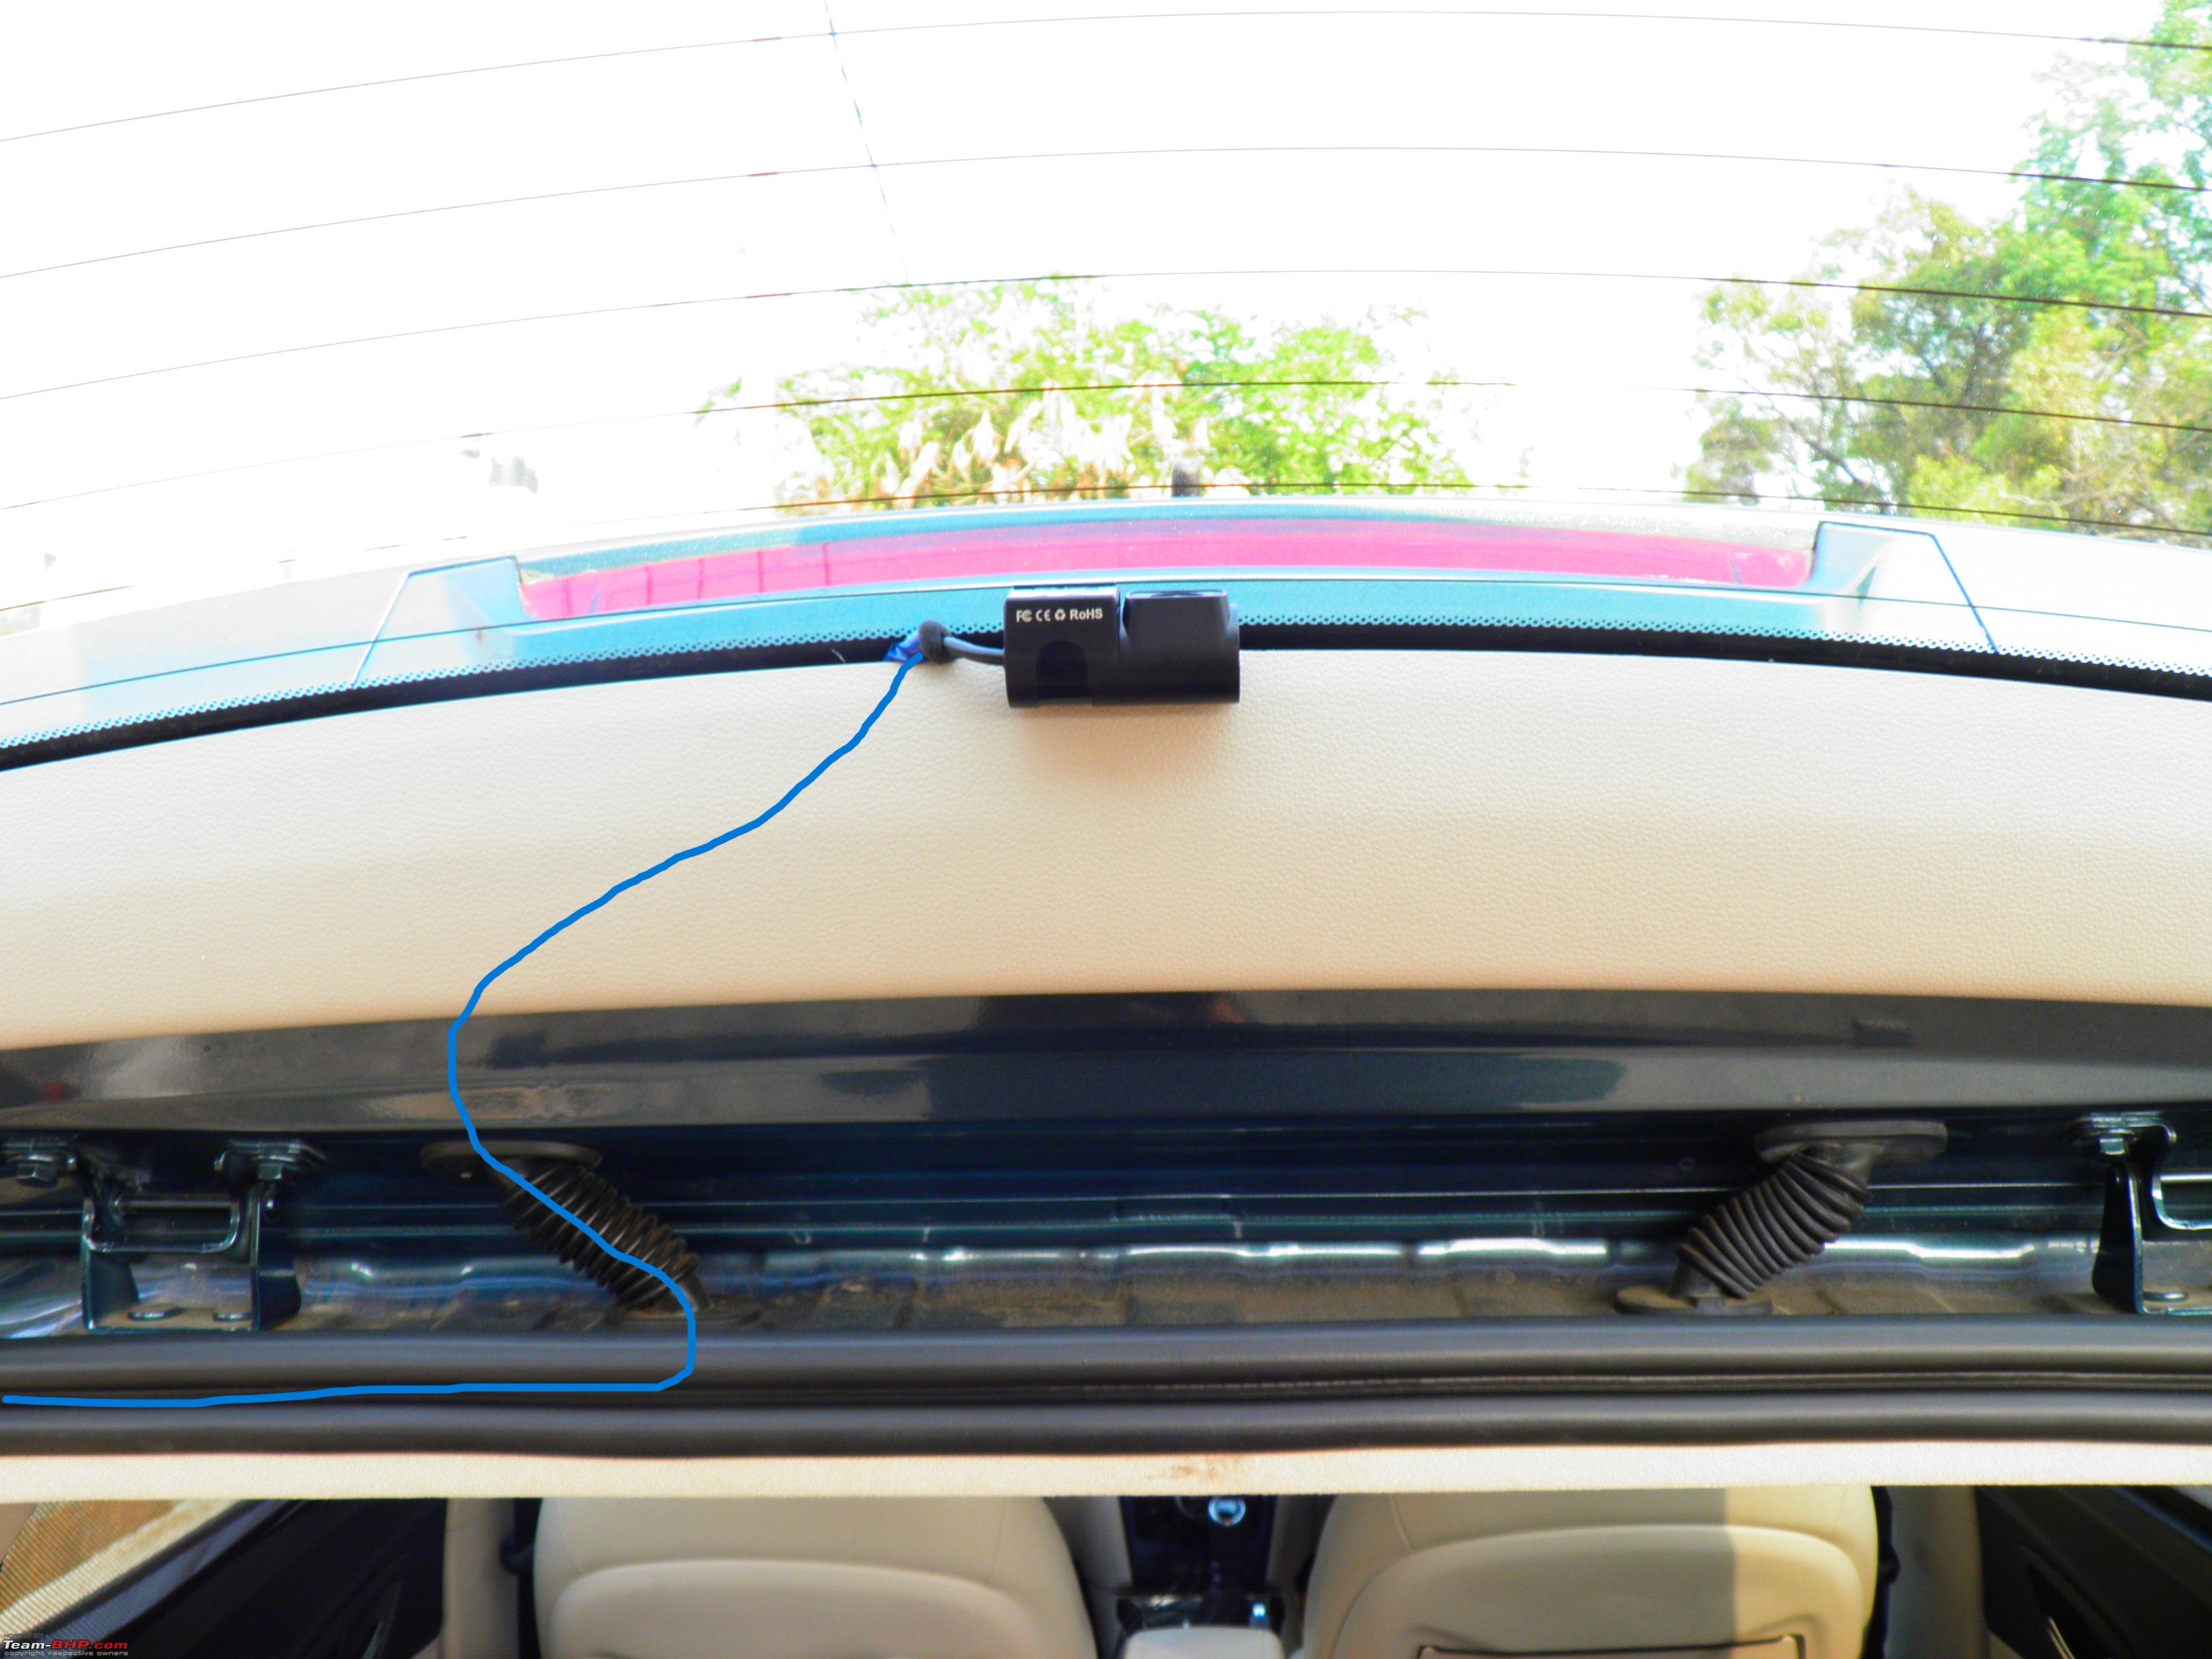
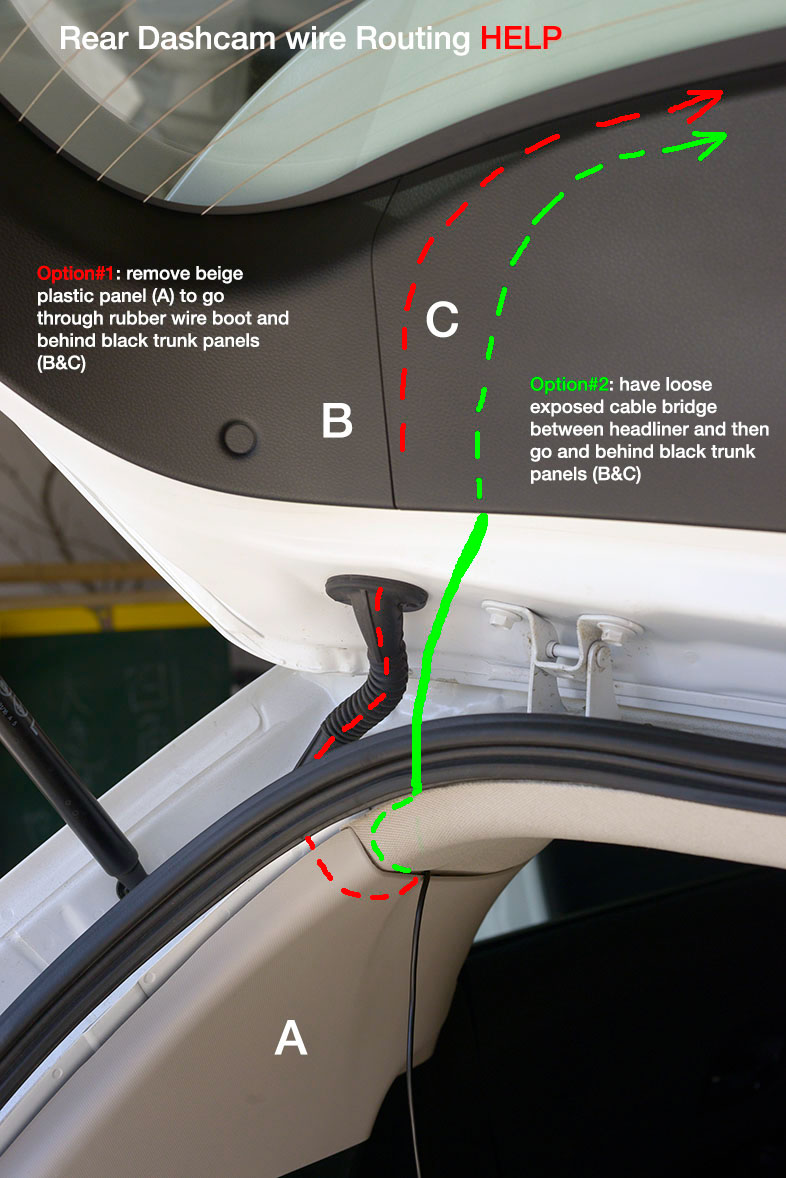
- Along the Headliner: The most common and cleanest method is to tuck the cable along the edge of the car’s headliner. Use your trim removal tools to gently pry open the edges of the headliner or the plastic trim panels along the roofline. Carefully feed the cable into the gap.
- Down the Pillars: You might need to run the cable down the A-pillar (front windshield pillar), B-pillar (between front and rear doors), or C-pillar (rear windshield pillar), depending on your car’s design. Again, use trim removal tools to access these areas and tuck the cable. Be cautious around airbags; avoid stuffing cables directly into airbag deployment zones.
- Along Door Seals: For a less invasive approach, you can sometimes route the cable along the rubber door seals. The flexibility of the seal can accommodate the cable.
- Secure the Cable: As you route the cable, use electrical tape or small cable ties to secure it intermittently to existing wiring harnesses or car body structures. This prevents it from sagging or becoming dislodged.
- Connect to the Rear Camera: Once the cable reaches the rear of the vehicle, connect it to the rear camera unit. Then, mount the rear camera as described in the previous section. The rear camera is often smaller and designed to be discreet.
H2: Powering Your Rear Dash Cam
How you power your dash cam significantly impacts its functionality and the neatness of your installation.
H3: Using the Cigarette Lighter Adapter
This is the simplest and most common method.
- Plug In: Connect the power adapter to your car’s 12V accessory socket (cigarette lighter port).
- Route the Cable: Run the power cable from the adapter to your dash cam, hiding it along the dashboard, under floor mats, or along the door sills, similar to how you routed the rear camera cable.
- Pros: Easy, no modification to your car’s wiring.
- Cons: The cable is visible, and the camera only powers on when the car’s ignition is on or in accessory mode, limiting features like parking mode.
H3: Hardwiring to the Fuse Box
For a cleaner look and access to parking mode features (which allow the dash cam to record even when the car is off), hardwiring is the preferred method. This requires a “Add-a-Circuit” fuse tap and a basic understanding of your car’s fuse box.
- Locate the Fuse Box: Your car’s fuse box is usually located under the dashboard, in the glove compartment, or in the engine bay. Consult your car’s owner’s manual.
- Identify Suitable Fuses: You’ll need two fuse slots: one that is constantly powered (for parking mode) and one that is only powered when the ignition is on (ACC). Again, your owner’s manual is key here.
- Install the Fuse Tap:
- Remove the existing fuse from the chosen slot.
- Insert the fuse tap into the slot, ensuring the prongs align correctly.
- Insert the original fuse into the lower slot of the fuse tap and a new fuse (usually supplied with the dash cam kit or fuse tap) into the upper slot.
- Connect the Power Wire: Connect the dash cam’s power wire to the fuse tap. Some kits come with specific connectors for this.
- Ground the System: Connect the ground wire from the dash cam’s power unit to a suitable metal grounding point in the car’s chassis. This is usually a bolt or screw attached directly to the car’s metal frame.
- Tidy Up: Secure all wires neatly using electrical tape or cable ties. Ensure no wires are dangling or obstructing any controls.
- Pros: Discreet, enables parking mode, more professional installation.
- Cons: Requires more technical skill, potential to blow fuses if done incorrectly. If you are not comfortable with electrical work, it is highly recommended to have a professional install this for you.
H2: Final Checks and Configuration
Once the physical installation is complete, it’s time to power up and configure your rear dash cam.
- Power On: Turn on your car’s ignition. The dash cam should power on. If you hardwired for parking mode, it might turn on even if the car is off, depending on your fuse selection.
- Test the Recording:
- View Live Feed: Access the live feed through the dash cam’s app or screen to ensure both the front (if applicable) and rear cameras are active and displaying a clear image.
- Start Recording: Manually start a recording or wait for it to begin automatically. Drive around for a few minutes.
- Review Footage: Stop the recording and review the video files on your computer or smartphone. Check the clarity of the footage, the field of view, and ensure there are no flickering or audio issues. Pay particular attention to the rear camera’s performance.
- Configure Settings: Access the dash cam’s settings menu (usually through the app or on the device itself) and configure the following:
- Date and Time: Ensure the correct date and time are set for accurate timestamping of footage.
- Resolution and Frame Rate: Select your preferred video quality.
- Loop Recording: Set the recording duration for each video file (e.g., 1, 3, or 5 minutes). This allows for continuous recording without manual intervention.
- G-Sensor Sensitivity: Adjust the sensitivity of the G-sensor, which detects impacts and automatically saves incident footage. Start with a medium setting and adjust if it’s too sensitive or not sensitive enough.
- Parking Mode (if applicable): Configure the duration or triggers for parking mode.
- Wi-Fi/Bluetooth: Connect your smartphone to the dash cam for easy access to footage and settings.
- Firmware Updates: Check for and install any available firmware updates for optimal performance and new features.
- Secure the Cables: Do a final check to ensure all cables are tucked away and secure, not dangling, and not obstructing your view or any vehicle controls.
By following these steps, you can successfully install your rear dash cam, significantly enhancing your vehicle’s safety and providing invaluable documentation for any unforeseen events on the road. This tech upgrade not only offers peace of mind but also supports your personal and financial well-being by safeguarding against potential liabilities and disputes.
aViewFromTheCave is a participant in the Amazon Services LLC Associates Program, an affiliate advertising program designed to provide a means for sites to earn advertising fees by advertising and linking to Amazon.com. Amazon, the Amazon logo, AmazonSupply, and the AmazonSupply logo are trademarks of Amazon.com, Inc. or its affiliates. As an Amazon Associate we earn affiliate commissions from qualifying purchases.