
Python’s power and versatility stem in large part from its vast ecosystem of modules and libraries. These pre-written pieces of code extend Python’s capabilities, allowing developers to tackle complex tasks with remarkable ease. Whether you’re delving into data science, web development, artificial intelligence, or any other technical field, you’ll inevitably need to install and utilize external modules. This guide will walk you through the essential methods and best practices for installing Python modules, ensuring you can effectively leverage the full potential of this dynamic programming language.
The process of installing Python modules is generally straightforward, but understanding the underlying mechanisms and available tools can make your development workflow significantly smoother. We’ll cover the fundamental approach using pip, Python’s de facto package installer, and explore more advanced scenarios like managing dependencies, installing specific versions, and working within virtual environments.
Understanding Python Packages and Modules
Before diving into installation, it’s crucial to grasp the terminology. A module is a single Python file containing definitions and statements. When you import a module, you gain access to the code and functionalities defined within it.
A package is a collection of modules organized in a directory hierarchy. Think of it as a folder containing related modules, often with an __init__.py file that signifies it as a Python package. This structure allows for better organization and prevents naming conflicts.
When we talk about “installing Python modules,” we’re typically referring to installing packages that contain one or more modules. These packages are often distributed through online repositories, the most prominent being the Python Package Index (PyPI).
Why Install External Modules?
The standard Python library is quite extensive, offering a wide range of functionalities for common tasks. However, the true magic of Python lies in its community-driven ecosystem. Developers worldwide create and share modules for virtually any purpose imaginable:
- Data Science and Machine Learning: Libraries like NumPy, Pandas, Scikit-learn, TensorFlow, and PyTorch have revolutionized these fields, providing powerful tools for data manipulation, analysis, and building sophisticated AI models.
- Web Development: Frameworks like Django and Flask simplify the creation of web applications, while libraries like Requests enable easy interaction with web services.
- Automation and Scripting: Modules can automate repetitive tasks, from file manipulation to system administration.
- Graphics and Visualization: Libraries like Matplotlib and Seaborn allow for the creation of compelling data visualizations.
- Game Development: Pygame is a popular choice for developing 2D games.
- And much, much more!
By installing these external modules, you avoid reinventing the wheel and can focus on the unique aspects of your project.
Installing Python Modules with pip
The primary tool for installing Python packages is pip. It’s a command-line utility that interacts with PyPI to download and install packages. In most modern Python installations, pip is included by default. If for some reason it’s not, you can typically install it separately by downloading get-pip.py and running it with your Python interpreter.
Verifying pip Installation
To check if pip is installed and accessible, open your terminal or command prompt and type:
pip --version
This command should display the version of pip you have installed, along with the Python version it’s associated with.
Basic Module Installation
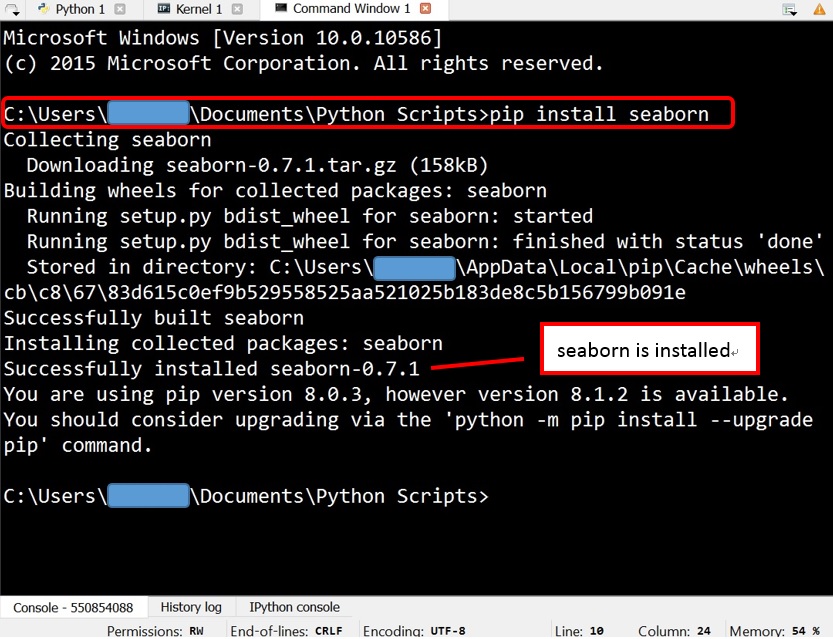
The most common way to install a module is by using the install command followed by the package name. For example, to install the popular requests library, you would execute:
pip install requests
pip will then:
- Search PyPI: It queries the Python Package Index for the requested package.
- Download: It downloads the package’s distribution files.
- Install: It installs the package and any of its dependencies (other packages it relies on) into your Python environment.
Installing Specific Package Versions
Sometimes, you might need to install a specific version of a package. This is crucial for ensuring compatibility or replicating a particular development environment. You can specify a version using double equals (==):
pip install requests==2.28.1
You can also install packages that are greater than, less than, or compatible with a certain version:
- Greater than or equal to:
pip install requests>=2.28.0 - Less than:
pip install requests<3.0.0 - Compatible with (semantic versioning):
pip install "requests~=2.28.0"(installs versions >= 2.28.0 and < 2.29.0)
Upgrading Packages
To upgrade an already installed package to its latest version available on PyPI, use the --upgrade (or -U) flag:
pip install --upgrade requests
Uninstalling Packages
If you no longer need a package, you can remove it from your environment using the uninstall command:
pip uninstall requests
pip will prompt you to confirm the uninstallation.
Managing Dependencies with requirements.txt
As your projects grow, they often depend on multiple external packages. Manually installing each one can become tedious and error-prone. The standard practice for managing these dependencies is to use a requirements.txt file.
Creating a requirements.txt File
This file is a simple text file that lists all the packages your project depends on, along with their specific versions. You can generate this file from your current environment using:
pip freeze > requirements.txt
This command will list all installed packages in the current environment and redirect their output to a file named requirements.txt. It’s a good practice to run this command within your project’s activated virtual environment (more on that later).
Installing from a requirements.txt File
Once you have a requirements.txt file, you can install all the listed dependencies in another environment with a single command:
pip install -r requirements.txt
This is incredibly useful when sharing your project with others or setting up your project on a new machine. It ensures that everyone is working with the same set of dependencies, preventing “it works on my machine” issues.

Advanced Installation Scenarios
While pip install package_name covers most use cases, there are other scenarios you’ll encounter in your development journey.
Installing from Version Control Systems (VCS)
You can install packages directly from Git repositories, Mercurial repositories, or Subversion repositories. This is often used for installing development versions of packages or forks.
pip install git+https://github.com/user/repo.git
You can also specify branches, tags, or commit hashes:
pip install git+https://github.com/user/repo.git@develop  # Install from 'develop' branch
pip install git+https://github.com/user/repo.git@v1.0    # Install from tag 'v1.0'
pip install git+https://github.com/user/repo.git@a1b2c3d  # Install from commit hash
Installing from Local Sources
If you’re developing a package or have downloaded the source code for a package, you can install it directly from a local directory. Navigate to the directory containing the package’s setup.py or pyproject.toml file and run:
pip install .
You can also install it in “editable” mode, which means changes you make to the source code will be immediately reflected without needing to reinstall. This is invaluable during package development:
pip install -e .
Installing Pre-release Versions
By default, pip installs stable versions of packages. To install pre-release versions (alphas, betas, release candidates), you need to use the --pre flag:
pip install --pre some-package
The Importance of Virtual Environments
One of the most critical practices for any Python developer is the use of virtual environments. A virtual environment is an isolated Python installation that allows you to manage dependencies for individual projects separately.
Why Use Virtual Environments?
- Dependency Isolation: Each project can have its own set of installed packages and specific versions, preventing conflicts between different projects that might require different versions of the same library.
- Clean Global Environment: Your system’s global Python installation remains clean and uncluttered, reducing the risk of breaking system-wide applications that rely on specific Python configurations.
- Reproducibility: By using
requirements.txtwithin a virtual environment, you ensure that your project’s dependencies are clearly defined and reproducible across different machines or for different developers.
Creating and Activating Virtual Environments
Python 3.3+ comes with the venv module built-in.
1. Create a virtual environment:
Navigate to your project’s root directory in the terminal and run:
python -m venv myenv # 'myenv' is the name of your virtual environment directory
This will create a directory (e.g., myenv) containing a copy of the Python interpreter and supporting files.
2. Activate the virtual environment:
- On Windows:
bash

.myenvScriptsactivate
- On macOS and Linux:
bash

source myenv/bin/activate
Once activated, your terminal prompt will usually change to indicate that you are inside the virtual environment (e.g., (myenv) C:UsersYourNameYourProject>).
3. Install packages within the activated environment:
Now, any pip commands you run will install packages into this isolated environment, not your global Python installation.
(myenv) pip install requests
4. Deactivate the virtual environment:
When you’re done working on a project, you can deactivate the environment:
(myenv) deactivate
Your terminal prompt will return to its normal state.
Using virtualenv (Older but still relevant)
The virtualenv package is an older, third-party alternative for creating virtual environments. If you’re working with older Python versions or prefer its features, you can install it:
pip install virtualenv
Then, create and activate it similarly:
virtualenv myenv
source myenv/bin/activate  # or .myenvScriptsactivate on Windows
Common Pitfalls and Troubleshooting
Even with pip and virtual environments, you might encounter issues. Here are some common ones:
- “pip” command not found: This usually means Python is not in your system’s PATH, or
pipwas not installed correctly. Ensure your Python installation includespipand that the Python Scripts directory is added to your PATH. - Permissions errors: If you’re trying to install packages globally without administrator privileges, you might encounter permission denied errors. This is another strong reason to use virtual environments.
- Dependency conflicts: If you install packages one by one and then encounter an error related to incompatible versions of dependencies, it’s often best to start with a fresh virtual environment and install all dependencies from a
requirements.txtfile. - Platform-specific issues: Some packages have compiled components that might require specific build tools or libraries on your operating system. Check the package’s documentation for any platform-specific installation instructions or prerequisites.
- Outdated
pip: An old version ofpipmight have trouble with newer packages or features. It’s good practice to keeppipupdated:
bash

python -m pip install --upgrade pip

Conclusion
Mastering the installation of Python modules is a fundamental skill for any Python developer. By understanding pip, requirements.txt, and the critical importance of virtual environments, you can build robust, reproducible, and maintainable Python applications. As you explore different technical domains and leverage the vast Python ecosystem, these tools will become indispensable companions on your coding journey, empowering you to integrate powerful functionalities and accelerate your development process. Happy coding!