
Python, a versatile and powerful programming language, has become an indispensable tool for developers, data scientists, and tech enthusiasts alike. Its readability, extensive libraries, and broad applicability make it a top choice for a wide range of projects, from web development and data analysis to artificial intelligence and automation. If you’re embarking on your journey with Python or looking to set up a new development environment on Ubuntu, the world’s leading open-source operating system, this guide will walk you through the essential steps.
Ubuntu, known for its user-friendliness and robust Linux foundation, often comes with Python pre-installed. However, the version might not always be the latest, or you might need to manage multiple Python versions for different projects. This article will cover how to install Python on Ubuntu, ensuring you have the right version for your needs, and touch upon crucial aspects of managing your Python environment.
Understanding Python Versions on Ubuntu
Before diving into the installation process, it’s important to grasp how Python is managed on Ubuntu. Ubuntu typically includes a system Python installation, which is essential for the operating system’s own functionality. It is strongly advised NOT to remove or alter this system Python installation, as doing so can break critical system components and lead to an unstable system.
Instead, for your development work, you’ll want to install separate, user-managed Python versions. This allows you to experiment with different Python releases, install specific package versions for projects without affecting the system, and maintain a clean, organized development environment.
Ubuntu repositories offer various Python versions, and you can also compile Python from source for the absolute latest releases or specific configurations. We’ll cover the most common and recommended methods.
Checking Your Current Python Installation
To start, let’s see which Python versions are already available on your Ubuntu system. Open your terminal by pressing Ctrl+Alt+T.
You can check the default Python 3 installation with the following command:
python3 --version
And for Python 2 (though Python 2 is end-of-life and not recommended for new projects, some older systems or specific legacy applications might still rely on it):
python --version
The output will display the version numbers found. If python3 command is not found, it means Python 3 is not installed by default, which is rare but possible on minimal installations. If python command points to Python 2, it’s a strong indicator to ensure you are using python3 for all your modern Python development.
Installing Python 3 from Ubuntu Repositories
The simplest and most common way to install Python 3 on Ubuntu is by using the apt package manager. This method ensures you get a stable, well-tested version of Python that is compatible with your Ubuntu release.
Updating Package Lists
It’s always a good practice to update your package lists before installing new software. This ensures you are getting the latest information about available packages and their versions.
sudo apt update
This command downloads the package information from all configured sources.
Installing the Latest Python 3 Package
Once your package lists are updated, you can install the default Python 3 package. On most recent Ubuntu versions, this will install the latest stable Python 3 available in the repositories.
sudo apt install python3
This command will install Python 3 along with its essential modules. After the installation is complete, you can verify the version again using:
python3 --version
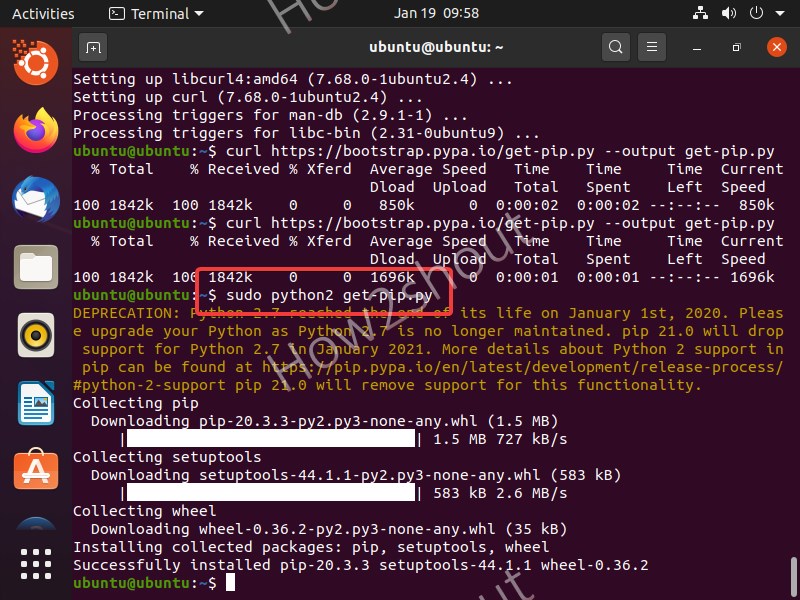
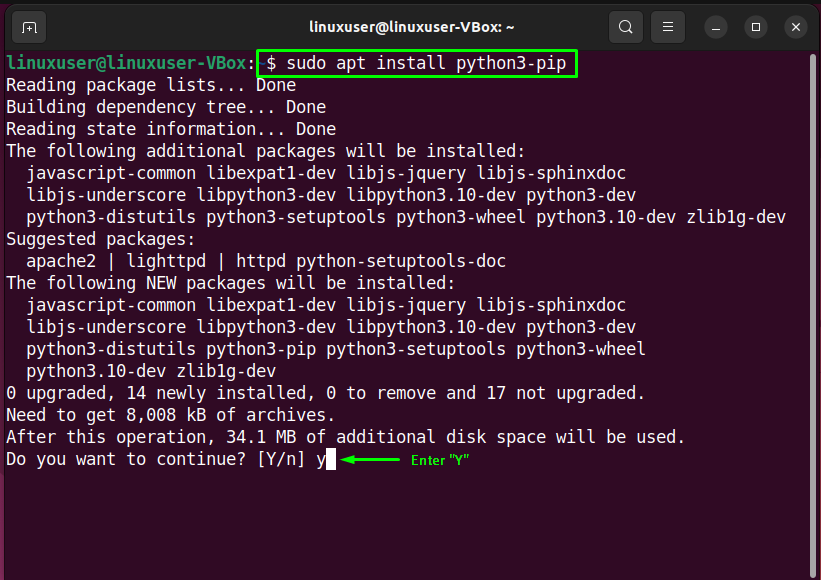
Installing Pip for Python 3
pip is the standard package installer for Python. It allows you to install and manage libraries and dependencies for your Python projects. Most Ubuntu installations of python3 do not include pip by default. You’ll need to install it separately.
sudo apt install python3-pip
After installing pip, you can verify its installation and version:
pip3 --version
Now you can use pip3 install <package_name> to install any Python library you need.
Installing Development Headers and Libraries
For many Python packages that need to be compiled from source (e.g., those with C extensions), you’ll need the Python development headers and libraries. Installing this package ensures you have the necessary tools for such installations.
sudo apt install python3-dev
This is particularly useful if you plan to work with libraries like NumPy, SciPy, or others that often require compilation.
Managing Multiple Python Versions with deadsnakes PPA
While Ubuntu repositories provide stable Python versions, they might not always have the very latest releases or specific older versions you might need for compatibility. A popular and reliable way to overcome this limitation is by using the deadsnakes PPA (Personal Package Archive). This PPA provides newer Python versions for Ubuntu.
Adding the deadsnakes PPA
First, you need to add the PPA to your system. Open your terminal and run:
sudo add-apt-repository ppa:deadsnakes/ppa
sudo apt update
The add-apt-repository command adds the PPA source to your system’s software sources. The apt update command then refreshes your package lists to include the packages from the newly added PPA.
Installing Specific Python Versions
Once the deadsnakes PPA is added, you can install specific Python versions. For example, to install Python 3.10, you would use:
sudo apt install python3.10
To install Python 3.11:
sudo apt install python3.11
And so on for other versions. You can also install pip for these specific versions:
sudo apt install python3.10-venv python3.10-dev python3.10-distutils
Note that for specific versions, you’ll use commands like python3.10 and pip3.10 to invoke them.
Setting a Default Python Version (with caution)
While you can install multiple versions, directly changing the default python3 symbolic link can be risky as it might affect system scripts. A safer and more flexible approach for managing default Python versions for your projects is using virtual environments, which we’ll discuss next. However, if you absolutely need to set a specific version as the default for the python3 command for your user, you can use the update-alternatives system.
First, list available Python 3 alternatives:
sudo update-alternatives --list python3
If your desired version isn’t listed, you’ll need to add it:
sudo update-alternatives --install /usr/bin/python3 python3 /usr/bin/python3.10 1
sudo update-alternatives --install /usr/bin/python3 python3 /usr/bin/python3.11 2
The numbers at the end (1, 2) represent the priority. Higher numbers mean higher priority. Then, you can configure which version is the default:
sudo update-alternatives --config python3
This will present an interactive menu where you can select the desired Python version. Again, exercise caution with this method.
Python Virtual Environments: Essential for Project Management
The most crucial aspect of working with Python on any system, including Ubuntu, is the proper use of virtual environments. A virtual environment is an isolated Python environment that allows you to install packages for a specific project without them interfering with other projects or the system’s global Python installation. This is fundamental for good software development practices.
Using venv (Built-in)
Python 3.3 and later versions come with the venv module built-in, making it the recommended way to create virtual environments.
1. Navigate to Your Project Directory:
Open your terminal and navigate to the root directory of your project:
cd /path/to/your/project
2. Create a Virtual Environment:
Use the venv module to create a virtual environment. It’s common to name the environment folder .venv or venv.
python3 -m venv .venv
This command creates a .venv directory within your project, containing a copy of the Python interpreter and a place to install packages.
3. Activate the Virtual Environment:
To use the virtual environment, you need to activate it.
source .venv/bin/activate
Your terminal prompt will change to indicate that the virtual environment is active (e.g., (.venv) yourusername@yourhostname:~/your/project$).
4. Install Packages:
With the virtual environment activated, any packages you install using pip will be installed only within this environment.
pip install requests beautifulsoup4
5. Deactivate the Virtual Environment:
When you’re done working in the environment, you can deactivate it:
deactivate
Your terminal prompt will return to its normal state.
Why Use Virtual Environments?
- Isolation: Prevents package conflicts between different projects.
- Reproducibility: Makes it easy to recreate the exact environment for your project on another machine or by another developer.
- Cleanliness: Keeps your global Python installation tidy and free from project-specific dependencies.
- Permissions: Avoids permission issues when installing packages, as you’re installing them within your user’s project directory.
Conclusion
Installing and managing Python on Ubuntu is a straightforward process, whether you’re using the default repositories or leveraging PPAs for newer versions. By understanding the importance of not tampering with the system Python and consistently using virtual environments, you can set up a robust and flexible Python development workflow.
For those delving into the vast world of tech, Python is a gateway to countless opportunities. From building sophisticated AI tools and developing dynamic web applications to analyzing complex datasets and automating tedious tasks, Python’s capabilities are immense. On Ubuntu, a stable and open-source operating system, Python thrives, empowering you to innovate and create.
Remember to always keep your package lists updated (sudo apt update), install Python 3 and pip using apt, and, most importantly, embrace virtual environments (venv) for every single one of your Python projects. This practice will save you headaches down the line and ensure your projects are maintainable and shareable. Happy coding with Python on Ubuntu!