
In today’s digitally driven world, the ability to seamlessly integrate our physical and digital lives is paramount. While we often focus on cloud storage, smart devices, and the latest software, the humble printer remains an essential tool for many. Whether you’re a student printing assignments, a professional churning out reports, or a creative harnessing your digital designs into tangible art, a reliable printer is indispensable. This guide is designed to walk you through the straightforward process of installing a printer on your Mac, ensuring you can get back to printing without a hitch.
Our focus on “Tech” as a core website pillar means we’re constantly exploring the latest in digital innovation, from cutting-edge software and AI tools to essential productivity hacks and digital security. Understanding how to set up fundamental peripherals like printers falls squarely within this expertise, empowering you to leverage your technology to its fullest. We believe that mastering these foundational aspects frees you up to explore more advanced topics, whether that’s optimizing your workflow with productivity apps or understanding the security implications of your connected devices.
The Basics: Connecting Your Printer to Your Mac
Before diving into the specific installation steps, it’s important to understand the different ways your printer can connect to your Mac. This will influence the installation process. The most common connection methods are:
- USB Connection: This is the most direct and often the simplest method. You’ll physically connect your printer to your Mac using a USB cable.
- Wi-Fi/Network Connection: Most modern printers are Wi-Fi enabled, allowing them to connect to your home or office network. This means your Mac doesn’t need to be directly connected to the printer, offering more flexibility in placement.
- Ethernet Connection: Similar to Wi-Fi, an Ethernet connection uses a network cable to link the printer to your router, providing a stable wired network connection.
Regardless of the connection type, the underlying principle for installing a printer on a Mac is consistent: macOS is designed to automatically detect and configure most printers. However, there are instances where a manual touch is required.
Preparing for Installation: What You’ll Need
To ensure a smooth installation, gather the following before you begin:
- Your Printer: Ensure it’s unpacked, powered on, and has ink or toner cartridges installed.
- Connection Cable: If using USB, have the appropriate USB cable ready. For network printers, ensure your Wi-Fi or Ethernet network is functional.
- Printer Model and Manufacturer: Knowing the exact model number and brand of your printer is crucial, especially if manual driver installation is needed. This information is usually found on the printer itself or its packaging.
- Internet Connection: A stable internet connection is often required for macOS to download the necessary software (drivers) for your printer.
- Administrator Privileges: You’ll need to be logged into your Mac with an administrator account to install software.
Automatic Printer Detection and Installation
macOS has become incredibly adept at recognizing and setting up printers. In most cases, when you connect your printer via USB or ensure it’s on the same network as your Mac, the operating system will automatically detect it.
Connecting via USB
- Power On and Connect: Turn on your printer. Then, connect the USB cable from the printer to an available USB port on your Mac.
- macOS Detection: Your Mac should detect the new hardware. You might see a notification or a pop-up window asking if you want to add the printer.
- Add Printer: If a prompt appears, click “Add Printer” or a similar option. macOS will then search for the appropriate software (drivers) and configure the printer for you.
- Driver Installation (If Prompted): In some cases, macOS might prompt you to download and install software. Follow the on-screen instructions. This usually involves a few clicks to accept terms and begin the installation.
Connecting via Wi-Fi or Ethernet
- Connect Printer to Network: Ensure your printer is connected to your Wi-Fi network (follow your printer’s manual for this) or via an Ethernet cable to your router.
- Power On Printer: Turn on your printer.
- Open System Settings (or System Preferences): Click the Apple menu in the top-left corner of your screen and select “System Settings” (on macOS Ventura and later) or “System Preferences” (on older macOS versions).
- Navigate to Printers & Scanners: In System Settings/Preferences, locate and click on “Printers & Scanners.”
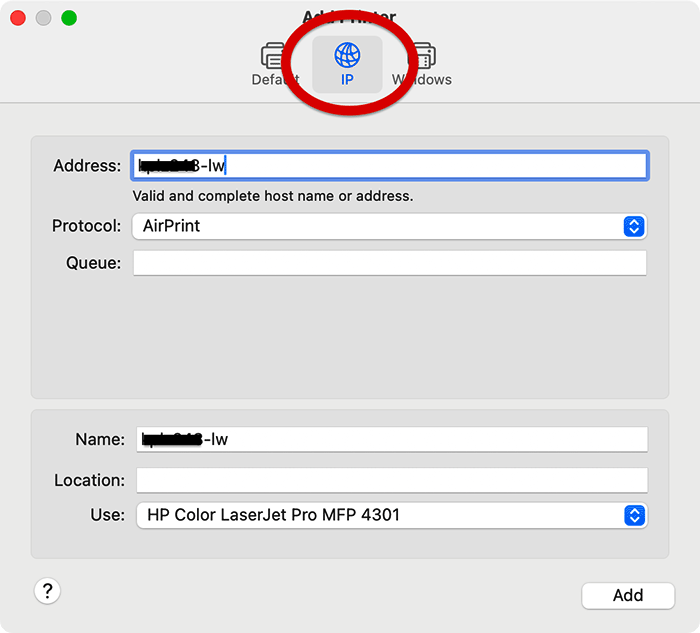
- Add Printer: Click the “Add Printer, Scanner, or Fax…” button (or the “+” button).
- macOS Search: Your Mac will scan your network for available printers.
- Select Your Printer: Once your printer appears in the list, select it. macOS will attempt to automatically identify the correct driver.
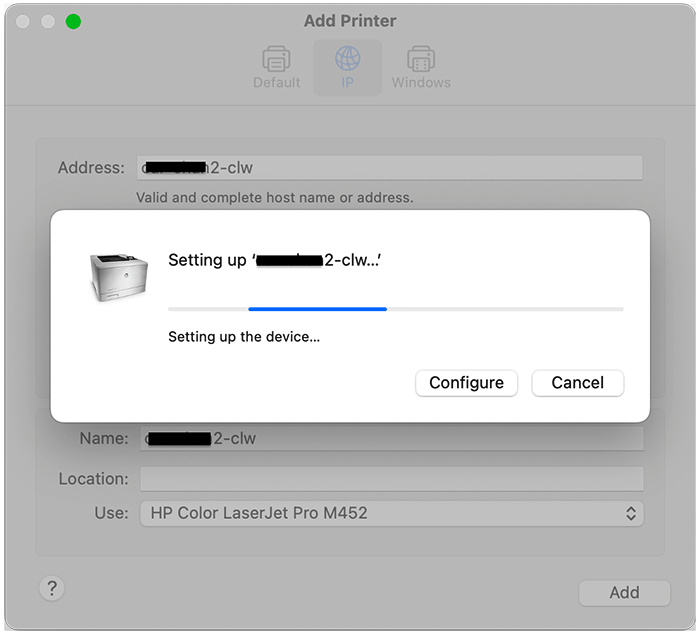
- Install and Add: Click “Add.” macOS will download and install the necessary software and add the printer to your list.
Manual Printer Installation: When Automatic Fails
While macOS is smart, sometimes it needs a little extra guidance. This is particularly true for older printers or those with specialized features. If your printer isn’t automatically detected, or if you encounter issues after automatic installation (like limited functionality), you’ll need to manually install the drivers.
Downloading and Installing Printer Drivers
Printer manufacturers provide specific software (drivers) that allow your Mac to communicate with their hardware.
- Identify Your Printer Model: Locate the exact model number of your printer. This is usually on the front or top of the printer.
- Visit the Manufacturer’s Website: Open your web browser and go to the official website of your printer manufacturer (e.g., HP, Canon, Epson, Brother).
- Navigate to the Support or Downloads Section: Look for a “Support,” “Downloads,” or “Drivers” section.
- Search for Your Model: Enter your printer’s model number into the search bar.
- Select Your Operating System: Crucially, choose “macOS” and then select the specific version of macOS you are running (e.g., macOS Sonoma, macOS Ventura, macOS Monterey). You can find your macOS version by clicking the Apple menu and selecting “About This Mac.”
- Download the Latest Driver: Download the recommended driver or software package for your printer and macOS version. This will typically be a
.dmgor.pkgfile. - Run the Installer:
- For
.dmgfiles: Double-click the downloaded.dmgfile to mount it. Inside, you’ll usually find an installer application (often a.pkgfile). Double-click this to launch the installer. - For
.pkgfiles: Simply double-click the downloaded.pkgfile to begin the installation.
- For
- Follow On-Screen Instructions: The installer will guide you through the process. You may need to agree to license agreements and choose installation options.
- Connect Printer and Add: After the driver installation is complete, connect your printer (if not already connected) and then follow the steps outlined in the “Automatic Printer Detection and Installation” section to add the printer via “Printers & Scanners” in System Settings/Preferences. This time, macOS should recognize the drivers you’ve just installed and configure the printer correctly.
Adding a Printer Manually in Printers & Scanners
Even after installing drivers, you might need to manually add the printer through macOS’s built-in settings.
- Open System Settings/Preferences: Click the Apple menu > “System Settings” (or “System Preferences”).
- Go to Printers & Scanners: Click on “Printers & Scanners.”
- Click the “Add Printer…” Button: Click the “+” button (or “Add Printer, Scanner, or Fax…”).
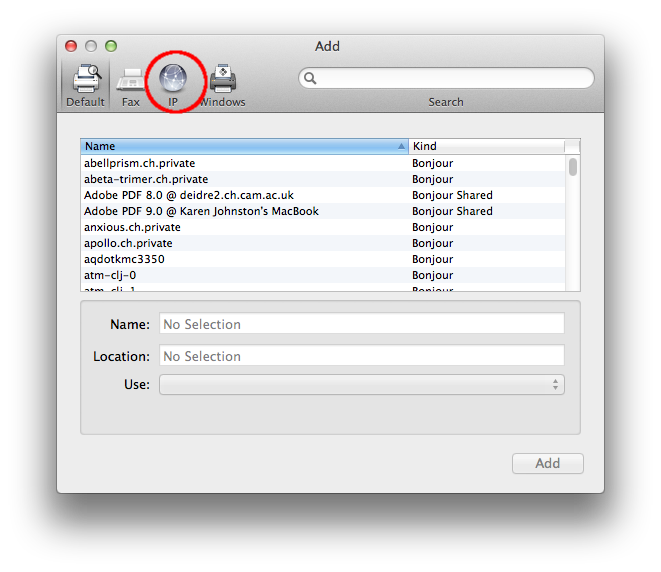
- Select the “Default” Tab: This tab shows printers that macOS can automatically detect on your network or via USB.
- If Your Printer Appears: Select your printer and click “Add.”
- If Your Printer Doesn’t Appear (and you’ve installed drivers):
- Use: Click the “Use” dropdown menu.
- Select Software: Choose “Select Software…”
- Find Your Printer: A list of installed printer drivers will appear. Scroll through and find the specific driver for your printer model.
- Select Driver and Add: Once you’ve selected the correct driver, click “OK,” and then click “Add” in the main Printers & Scanners window.
Troubleshooting Common Printer Installation Issues
While the process is generally smooth, occasional hiccups can occur. Here are some common issues and how to resolve them:
Printer Not Detected
- Check Connections: Ensure all cables (USB, Ethernet) are securely plugged in at both ends. For Wi-Fi, verify the printer is connected to the correct network and the signal is strong.
- Restart Devices: Sometimes a simple restart of your Mac, printer, and router can resolve detection problems.
- Firewall Issues: Your Mac’s firewall might be blocking the detection of network printers. Temporarily disable the firewall in “System Settings” > “Network” > “Firewall” to test, and if that resolves it, re-enable the firewall and configure it to allow printer communication.
- Printer in Correct Mode: Ensure your printer is not in sleep mode or an error state. Check the printer’s display for any error messages.
Incorrect Drivers or Limited Functionality
- Reinstall Drivers: The most common cause of limited functionality (e.g., unable to scan, poor print quality) is incorrect or outdated drivers. Uninstall any existing printer software (check the manufacturer’s website for an uninstaller or manually drag applications to the Trash) and then download and install the latest drivers from the manufacturer’s website.
- AirPrint Compatibility: If you have a modern printer, ensure it supports AirPrint. AirPrint is Apple’s built-in printing technology that often allows for driverless installation and greater functionality. If your printer supports AirPrint, macOS should automatically select it. If it defaulted to a generic driver, try removing and re-adding the printer, ensuring AirPrint is selected in the “Use” dropdown.
“Unable to Add Printer” Error
- Reset Printing System: This is a powerful troubleshooting step that removes all printers, scanners, and faxes from your Mac and allows you to start fresh.
- Open “System Settings” (or “System Preferences”) > “Printers & Scanners.”
- Right-click (or Control-click) in the empty space of the printer list on the left.
- Select “Reset printing system…”
- Confirm by clicking “Reset.”
- After the reset, try adding your printer again from scratch.
Beyond Installation: Optimizing Your Printing Experience
Once your printer is successfully installed, consider these tips to enhance your printing workflow:
- Set as Default Printer: If you use one printer most often, you can set it as the default. Go to “Printers & Scanners” in System Settings/Preferences, click “Default printer,” and select your preferred printer from the dropdown.
- Print Queue Management: You can monitor and manage your print jobs. Click on your printer’s name in the “Printers & Scanners” list to open its print queue. Here, you can pause, cancel, or restart print jobs.
- Explore Printer Settings: When printing a document, click “Show Details” in the print dialog box to reveal advanced settings. You can adjust paper size, orientation, quality, color, and other options specific to your printer.
- Regularly Update Software: Periodically check the printer manufacturer’s website for updated drivers or firmware. This can improve performance, fix bugs, and add new features.
- Digital Security Considerations: While installing a printer, be mindful of the source of your drivers. Always download them directly from the manufacturer’s official website to avoid malware. For network printers, ensure your Wi-Fi network is secured with a strong password.
By following these steps, you should be able to install and configure your printer on your Mac with ease. Whether you’re leveraging the latest tech trends, building your personal brand through high-quality printed materials, or managing the finances that support your printing needs, a functional printer is a key component of a productive setup. Enjoy the seamless transition from digital to physical with your newly installed printer!
aViewFromTheCave is a participant in the Amazon Services LLC Associates Program, an affiliate advertising program designed to provide a means for sites to earn advertising fees by advertising and linking to Amazon.com. Amazon, the Amazon logo, AmazonSupply, and the AmazonSupply logo are trademarks of Amazon.com, Inc. or its affiliates. As an Amazon Associate we earn affiliate commissions from qualifying purchases.