The Power Supply Unit (PSU) is often called the “heart” of your personal computer, and for good reason. It’s the critical component responsible for converting the AC power from your wall outlet into the stable DC power that every single component inside your PC – from the motherboard and CPU to the graphics card and storage drives – needs to operate. A reliable, well-chosen, and correctly installed PSU is not just a matter of convenience; it’s fundamental to the stability, longevity, and overall performance of your entire system.
Whether you’re building a new PC from scratch, upgrading an aging system, or replacing a faulty power supply, the installation process can seem daunting at first glance. However, with the right preparation, tools, and a systematic approach, it’s a perfectly manageable DIY task. This guide will walk you through every step, ensuring a smooth and successful installation, enhancing your understanding of PC internals, and empowering you to maintain your system with confidence. By handling this yourself, you’re not only gaining valuable tech skills but also making a smart financial choice, avoiding the costs of professional installation while safeguarding your valuable hardware investment.
Understanding Your Power Supply Unit (PSU): The Heart of Your PC
Before diving into the nuts and bolts of installation, it’s crucial to understand what your PSU does and how to select the right one. This knowledge isn’t just academic; it directly impacts your PC’s stability, energy efficiency, and potential for future upgrades, touching upon both the “Tech” and “Money” aspects of maintaining a modern system.
Why a Reliable PSU Matters
Think of the PSU as the unsung hero of your PC. It takes raw, fluctuating electricity and delivers clean, consistent power to every component. An unstable or insufficient power supply can lead to a litany of problems: system crashes, random reboots, component damage (especially to sensitive parts like your CPU and GPU), and even reduced lifespan of your hardware. Conversely, a high-quality PSU ensures stable voltages, protects against power surges, and maintains peak performance, directly contributing to your productivity and peace of mind. Investing in a good PSU is an investment in your PC’s future and your digital security, as it protects against unforeseen electrical hazards.
Choosing the Right PSU for Your System
Selecting the correct PSU involves more than just picking one off the shelf. It requires a bit of foresight and an understanding of your system’s demands.
- Wattage: The most obvious consideration is wattage. You need a PSU that can provide enough power for all your components under load. Too little wattage, and your system will be unstable or refuse to boot. Too much, and you’re potentially spending unnecessarily and operating outside the PSU’s most efficient range. A good rule of thumb is to use an online PSU calculator (readily available from PSU manufacturers or tech review sites) to estimate your total system wattage, then add a buffer of 15-25% for future upgrades or unexpected power spikes. For instance, a gaming PC with a powerful GPU might require 650W-850W, while a basic office PC might only need 350W-450W.
- Efficiency (80 Plus Certification): This often-overlooked factor is critical for long-term cost savings and system health. The “80 Plus” certification indicates how efficient the PSU is at converting AC to DC power. For example, an 80 Plus Bronze PSU is at least 82% efficient at 50% load, while an 80 Plus Platinum is at least 92% efficient. Higher efficiency means less wasted energy (as heat), lower electricity bills, and a cooler running system. From a financial perspective, a slightly more expensive but highly efficient PSU can pay for itself over time through reduced energy consumption, a concept relevant to personal finance and online income models that rely on continuous PC operation.
- Modularity: PSUs come in three main types:
- Non-modular: All cables are permanently attached. Cheapest, but cable management can be a nightmare.
- Semi-modular: Essential cables (24-pin ATX, 4/8-pin EPS) are attached, others are detachable. A good balance of cost and flexibility.
- Fully modular: All cables are detachable. Offers the best cable management and aesthetics, allowing you to connect only the cables you need, reducing clutter and improving airflow. This is a popular choice for those who value neatness and easy maintenance, directly impacting the “Brand” (aesthetics of a build) and “Productivity” (easier future upgrades/troubleshooting) aspects.
- Form Factor: Most desktop PCs use ATX form factor PSUs, but smaller cases might require SFX or TFX PSUs. Always double-check your case’s compatibility.
- Brand Reputation and Warranty: Stick to reputable brands known for quality and reliability (e.g., Corsair, Seasonic, EVGA, Cooler Master, be quiet!). A good warranty indicates the manufacturer’s confidence in their product and protects your investment. Checking gadget reviews and expert tutorials can guide your choice here.
Essential Preparations Before You Begin
Before you even think about opening your PC case, thorough preparation is key. This phase emphasizes safety, organization, and efficiency, embodying best practices in any technical tutorial.
Gathering Your Tools and Workspace
Having the right tools at hand will make the installation process smoother and prevent frustration. You’ll need:
- Phillips Head Screwdriver: The most essential tool.
- Zip Ties or Velcro Cable Straps: For neat cable management, crucial for good airflow and aesthetics.
- Anti-static Wrist Strap: Highly recommended to prevent electrostatic discharge (ESD) damage to sensitive components.
- Flashlight or Headlamp (Optional but Recommended): To illuminate dark corners inside the case.
- Small Container/Bowl: To keep screws organized and prevent them from getting lost.
- Clean, Well-Lit Workspace: A clear desk or table with enough room to maneuver your PC case.
Ensure your workspace is clean and free of clutter. A clear area reduces the risk of misplacing screws or tools and allows for better focus on the task at hand.
Prioritizing Safety First
Working with electronics, even when unplugged, carries inherent risks. Safety should be your absolute top priority.
- Unplug Everything: Before you touch anything inside your PC, disconnect it completely from the wall outlet. Do not just turn off the power strip; physically remove the plug from the wall.
- Discharge Residual Power: After unplugging, press and hold your PC’s power button for 5-10 seconds. This helps drain any residual power stored in capacitors, preventing accidental shocks or component damage.
- Ground Yourself: Wear an anti-static wrist strap, connecting it to an unpainted metal part of your PC case. Alternatively, if you don’t have a strap, frequently touch an unpainted metal part of the case to ground yourself and discharge static electricity from your body. ESD can invisibly damage components, leading to intermittent issues or outright failure down the line – a crucial aspect of digital security for your hardware.
- Work in a Dry Environment: Avoid working on carpeted surfaces or in humid conditions, which can increase static electricity.
Disconnecting Your Old PSU (If Applicable)
If you’re replacing an existing PSU, you’ll need to remove the old one first. This process is essentially the reverse of installation.
- Open Your PC Case: Remove the side panel(s) of your PC case to gain access to the interior. Consult your case’s manual if you’re unsure how.
- Document Cable Connections (Optional but Recommended): Before unplugging anything, take photos or make notes of where each cable is connected. This will serve as a helpful reference when installing the new PSU, especially for beginners.
- Disconnect All Power Cables: Systematically unplug every power cable from your components:
- 24-pin ATX power cable from the motherboard.
- 4/8-pin EPS (CPU) power cable from the motherboard.
- 6/8-pin PCIe power cables from your graphics card(s).
- SATA power cables from your SSDs, HDDs, and optical drives.
- Molex power cables from any case fans or other peripherals.
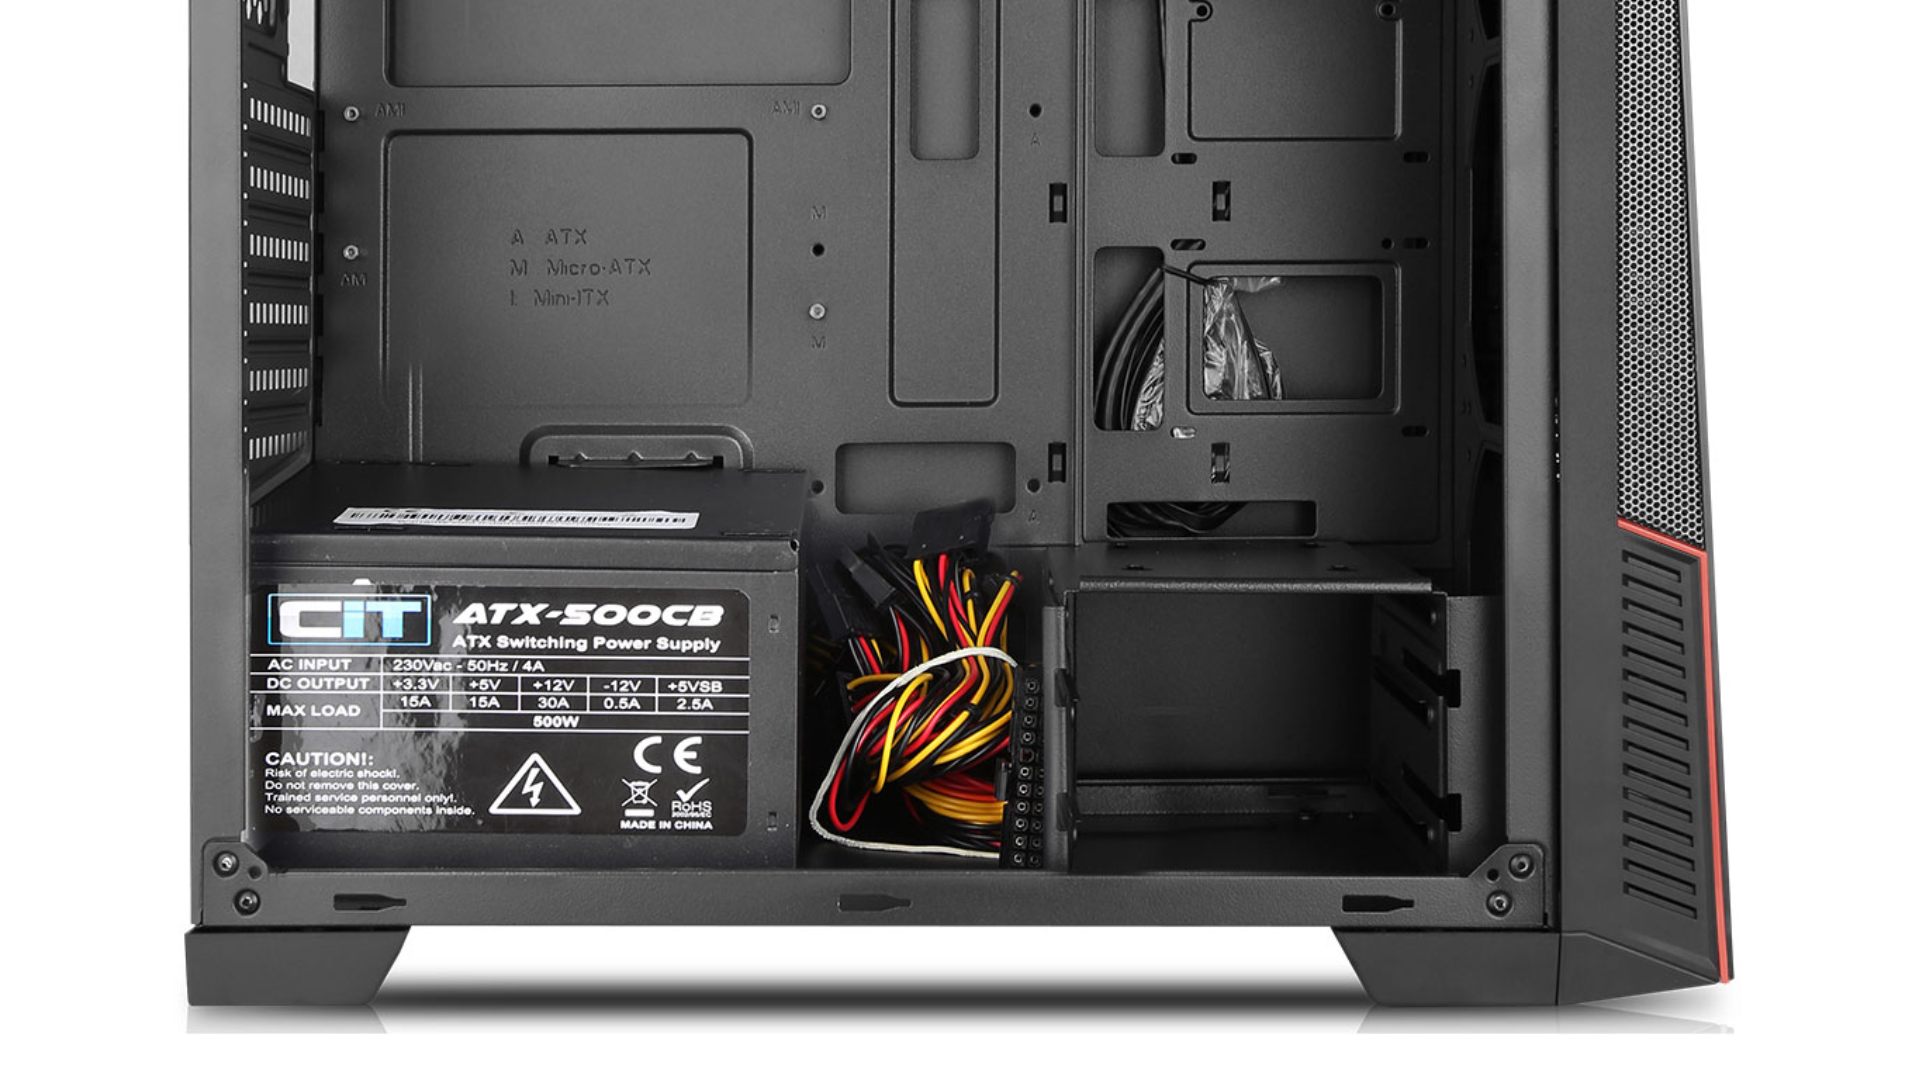
- Unscrew the Old PSU: The PSU is typically held in place by four screws at the back of the PC case. Unscrew these, being careful not to drop them.
- Remove the Old PSU: Once unscrewed and all cables are disconnected, carefully slide the old PSU out of its bay. You may need to gently wiggle it or maneuver it around existing cables.
Step-by-Step Installation of Your New PSU
With the old PSU removed (or if you’re starting a new build), it’s time to install the new one. This is where precision and attention to detail pay off.

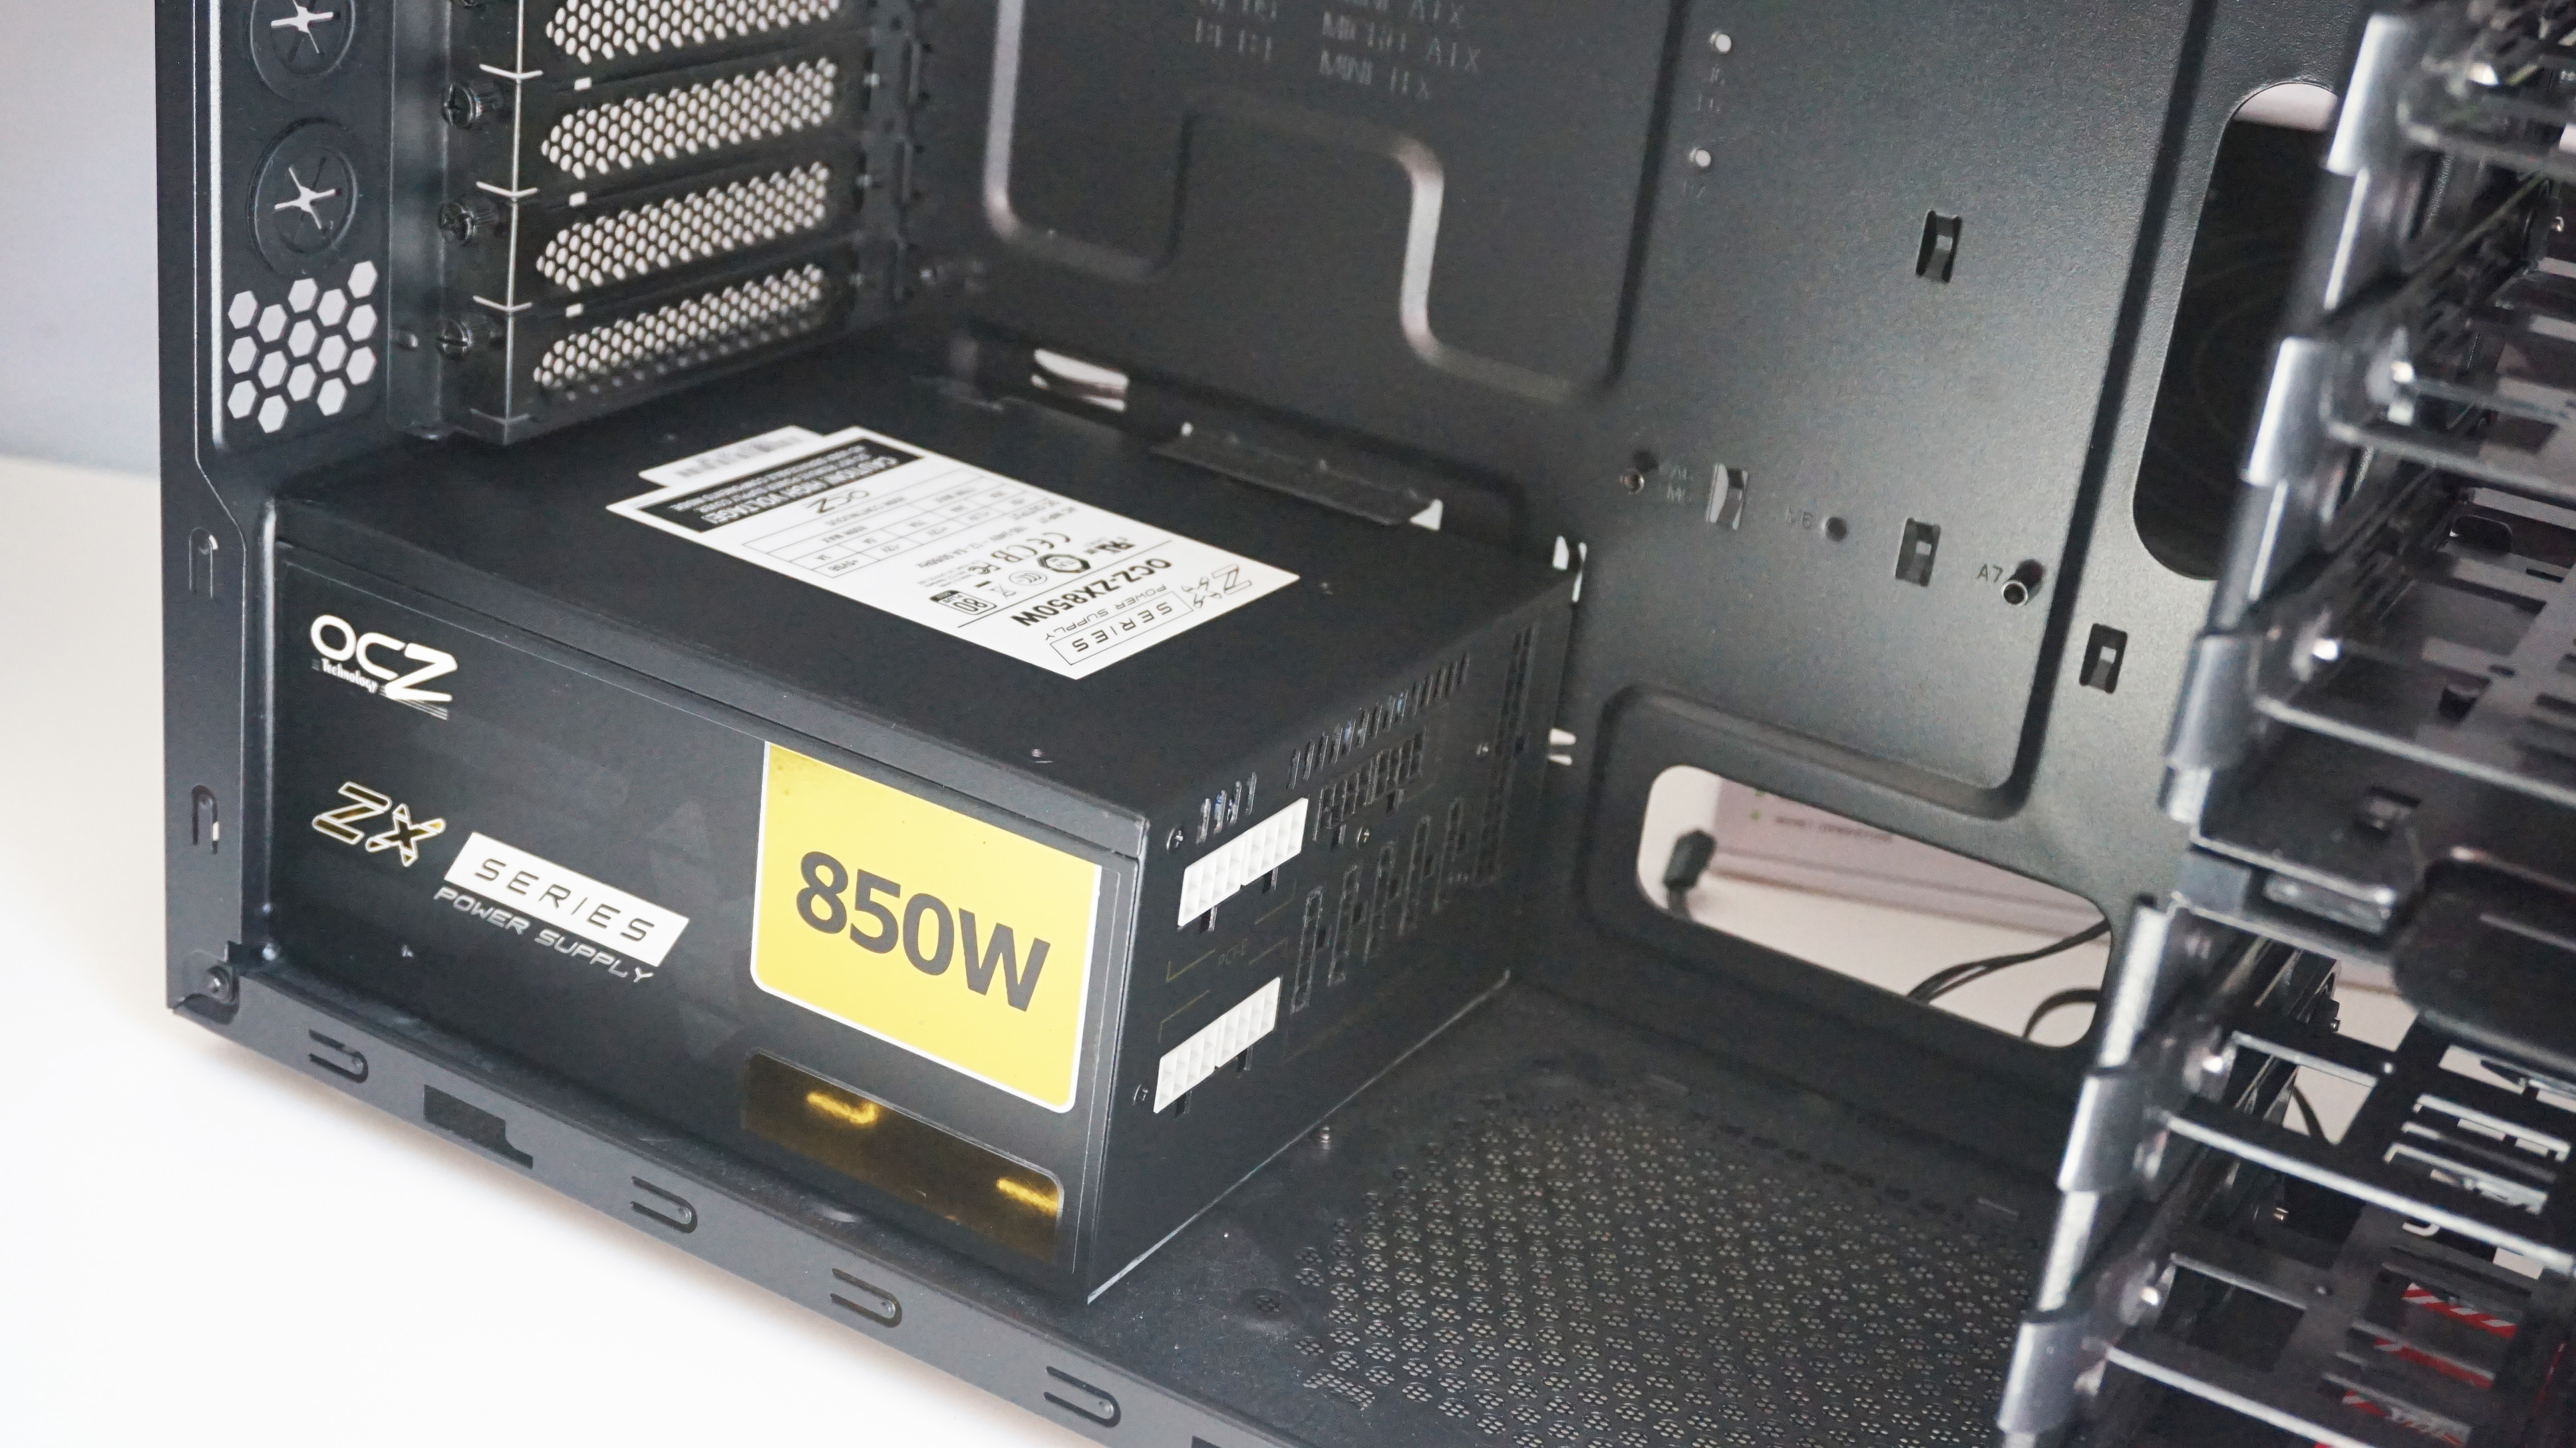
Mounting the Power Supply Unit
- Orient the PSU Correctly: Most modern cases have a dedicated PSU shroud or compartment at the bottom. The PSU fan typically faces downwards, drawing in cool air from outside the case and expelling it out the back. However, if your case has a solid bottom panel or limited clearance, the fan might need to face upwards, drawing air from inside the case. Consult your case manual for the recommended orientation.
- Slide the PSU into Place: Carefully slide your new PSU into its designated bay within the PC case. Ensure it sits flush against the back panel.
- Secure with Screws: Use the four screws provided with your PSU (or the screws from your old PSU if they match) to secure it to the back of the case. Tighten them firmly but don’t overtighten, as this can strip the threads.
Connecting Core Motherboard Power Cables
These are the most critical connections, providing power to your motherboard and CPU.
- 24-pin ATX Power: Locate the large, rectangular 24-pin connector on your motherboard. This is usually on the right edge. Connect the corresponding 24-pin cable from your PSU, ensuring it clicks firmly into place. It may come as a 20+4 pin design for compatibility with older motherboards.
- 4/8-pin EPS (CPU) Power: Look for a 4-pin or 8-pin connector (sometimes labeled “CPUPWR” or “ATX12V”) typically located in the top-left corner of your motherboard, near the CPU socket. Connect the appropriate 4+4-pin or 8-pin EPS cable from your PSU. This cable can often be split into two 4-pin sections. Some high-end motherboards might even have two 8-pin EPS connectors for extreme overclocking, so consult your motherboard manual.
Powering Your Graphics Card(s) (PCIe Power)
Graphics cards are often the most power-hungry component in a gaming or professional PC.
- Locate PCIe Power Ports: Graphics cards typically require 6-pin, 8-pin, or sometimes both (e.g., 6+2 pin, or two 8-pin connectors). These ports are usually found on the side or top edge of the graphics card.
- Connect PCIe Power Cables: Use the dedicated PCIe power cables from your PSU. They are often labeled “PCIe” or “VGA” and usually come as 6+2 pin connectors, allowing flexibility. Connect as many cables/pins as your graphics card requires. Do not use EPS (CPU) cables for your GPU, as they are keyed differently and can damage components.
Connecting Storage Devices and Peripherals
Finally, connect power to your storage drives and any other components.
- SATA Power Cables: These are wide, flat connectors used for SSDs, HDDs, and optical drives. Connect one end to the PSU and the other to your storage devices. Most SATA power cables have multiple connectors on a single string, allowing you to power several devices with one cable.
- Molex Power Cables (Less Common): Older case fans, fan controllers, or specific peripherals might use 4-pin Molex connectors. Connect these as needed. Modern PCs rarely use Molex, but it’s good to be aware.
Mastering Cable Management for Optimal Performance and Aesthetics
Once all the necessary cables are connected, don’t just leave them dangling. Effective cable management is crucial.
- Improve Airflow: Tidy cables reduce clutter, allowing air to circulate freely within your case. This leads to lower component temperatures, enhanced stability, and can prolong the life of your hardware.
- Aesthetics: A clean build looks professional and appealing, especially if your case has a tempered glass side panel. This attention to detail contributes to the “Brand” of your custom PC.
- Easier Maintenance: When cables are neatly routed, it’s much easier to access components for future upgrades or troubleshooting, boosting your overall productivity during maintenance.
Route cables behind the motherboard tray if your case allows. Use the provided zip ties or Velcro straps to bundle cables together and secure them to case tie-down points. Take your time with this step; it makes a huge difference.
Post-Installation Checks and Troubleshooting
You’re almost there! Before closing up your case, a few final checks are necessary to ensure everything works perfectly.
The Initial Power-Up Test
- Double-Check All Connections: Go back over every cable you’ve connected. Ensure the 24-pin, 4/8-pin EPS, PCIe, SATA, and Molex cables are all firmly seated. Make sure the PSU is securely screwed into the case.
- Verify PSU Switch: Crucially, ensure the main power switch on the back of the PSU (usually a large “I/O” rocker switch) is set to the “I” position (On). Many first-time builders overlook this simple step!
- Plug in Peripherals and Power: Reconnect your monitor, keyboard, mouse, and power cable to the wall outlet.
- Power On: Press your PC’s power button.
- Success! If your PC boots up, you see the manufacturer’s logo or the operating system loading, and all fans (CPU, case, GPU, PSU) are spinning, congratulations! You’ve successfully installed your new PSU. Power down, replace your side panel, and enjoy your revitalized machine.
- No Power/No Display: Don’t panic. Proceed to the troubleshooting section.
Common Issues and Quick Fixes
Even experienced builders can encounter snags. Here are some common problems and their solutions:
- PC Does Not Power On At All:
- Check if the PSU’s main power switch (the “I/O” switch) is set to “On”.
- Ensure the power cable is securely plugged into both the PSU and the wall outlet.
- Double-check the 24-pin ATX and 4/8-pin EPS (CPU) cables are fully seated on the motherboard.
- Confirm the front panel power switch connector is correctly attached to your motherboard (consult your motherboard manual for the exact pinout).
- PC Powers On (Fans Spin) but No Display:
- Ensure your monitor is plugged in and turned on, and that the correct input source is selected.
- Verify the graphics card (GPU) is fully seated in its PCIe slot.
- Confirm all PCIe power cables are securely connected to the graphics card.
- If you have integrated graphics, try connecting your monitor to the motherboard’s video output (after removing the dedicated GPU, if applicable) to rule out a GPU issue.
- Reseat your RAM modules. Sometimes they can become slightly dislodged.
- Random Restarts or Crashes Under Load:
- This might indicate an insufficient wattage PSU or a faulty unit. Reconfirm your system’s power requirements against your PSU’s capacity.
- Check component temperatures (CPU, GPU) using monitoring software. Overheating can lead to instability.
- Ensure all power connectors are properly seated and not loose.
- Loud Noise from PSU Fan:
- This could be normal for a brief period during startup. If it persists, check for any obstructions in the fan. If it’s a grinding noise, the fan bearing might be faulty, or the PSU might be under too much strain.
For more complex issues, consult your PSU and motherboard manuals, or seek advice from online tech forums. Often, another pair of eyes or a fresh perspective can identify an overlooked detail.
Final Thoughts on PC Building and Maintenance
Successfully installing a power supply is a significant step in understanding your PC and taking control of its maintenance. It’s a testament to the DIY spirit that underpins much of the tech world, allowing you to not only save money but also gain invaluable knowledge about the gadgets you rely on daily.
Regularly cleaning your PC’s interior and ensuring proper airflow, especially around the PSU, will contribute to its longevity. Always remember that a stable power supply is the bedrock of a stable system, whether you’re gaming, working, or creating content. By following this comprehensive guide, you’ve not only mastered a key PC assembly skill but also taken a proactive step in securing your digital workspace and optimizing your computing experience for years to come.
aViewFromTheCave is a participant in the Amazon Services LLC Associates Program, an affiliate advertising program designed to provide a means for sites to earn advertising fees by advertising and linking to Amazon.com. Amazon, the Amazon logo, AmazonSupply, and the AmazonSupply logo are trademarks of Amazon.com, Inc. or its affiliates. As an Amazon Associate we earn affiliate commissions from qualifying purchases.