
In the dynamic world of software development and data management, the ability to effectively store, manage, and retrieve data is paramount. PostgreSQL stands out as one of the most powerful, robust, and advanced open-source relational database management systems (RDBMS) available today. Revered for its reliability, feature richness, and performance, it has become a go-to choice for developers, data scientists, and organizations building everything from small web applications to large-scale enterprise systems. For Mac users, integrating PostgreSQL into their development environment is a straightforward process, opening up a world of possibilities for data-driven projects. This guide will walk you through the essential steps and best practices for installing PostgreSQL on your macOS system, ensuring you’re ready to harness its full potential.
Understanding PostgreSQL and Its Importance
Before diving into the installation process, it’s beneficial to understand what PostgreSQL is and why it holds such a prominent position in the database landscape. Its architectural design prioritizes data integrity, extensibility, and concurrency, making it a reliable backbone for countless applications.
What is PostgreSQL?
PostgreSQL, often simply called Postgres, is a free and open-source relational database management system emphasizing extensibility and SQL compliance. Developed by a global community of developers, it is known for its strong reputation for reliability, feature robustness, and performance. Unlike other database systems that might compromise on certain aspects for speed or simplicity, PostgreSQL provides a full spectrum of advanced features, including:
-
ACID Compliance: Ensures transactions are processed reliably (Atomicity, Consistency, Isolation, Durability).
-
Concurrency Control: Utilizes Multi-Version Concurrency Control (MVCC) to allow multiple users to access and modify data without locking entire tables.
-
Extensibility: Users can define their own data types, functions, operators, and even integrate other languages like Python or R for advanced data processing.
-
Rich Data Types: Supports not only traditional numerical and string types but also JSON/JSONB, arrays, range types, geometric types, and more, making it incredibly versatile for modern application needs.
-
Advanced Indexing: Offers various indexing techniques for optimizing query performance.
Why Choose PostgreSQL for Mac Development?
For Mac users, especially developers, PostgreSQL offers a compelling set of advantages that make it an ideal choice for local development and beyond:
-
Robust Local Development Environment: Installing PostgreSQL on your Mac provides a powerful and reliable database server right on your machine. This is crucial for developing applications without relying on remote servers, allowing for faster iteration and offline work.
-
Consistency with Production: Many cloud providers and hosting services offer PostgreSQL as a managed database option. Developing locally with PostgreSQL ensures consistency between your development and production environments, minimizing compatibility issues.
-
Open-Source Advantage: Being open-source means it’s free to use, distribute, and modify. It benefits from a large, active community that constantly improves it, provides extensive documentation, and offers support.
-
Versatility: Whether you’re building a web application with Ruby on Rails, Django, Node.js, or simply doing data analysis with Python, PostgreSQL’s flexibility and robust feature set make it suitable for a wide array of projects.
-
Integration with macOS Tools: As we’ll see, tools like Homebrew make the installation and management of PostgreSQL seamless on macOS, integrating well with the Unix-like environment.
Prerequisites and Preparation Before Installation
Before embarking on the installation journey, a few preparatory steps and considerations will ensure a smooth and successful setup of PostgreSQL on your Mac. Understanding your options and ensuring your system meets the basic requirements can save significant troubleshooting time later.
System Requirements
PostgreSQL is relatively lightweight for its capabilities, but it’s always good to ensure your system meets basic expectations:
-
macOS Version: PostgreSQL supports a wide range of macOS versions. Generally, if your macOS is reasonably current (e.g., macOS Mojave, Catalina, Big Sur, Monterey, Ventura, or Sonoma), you should have no issues.
-
Disk Space: A basic installation of PostgreSQL and its accompanying tools will require a few hundred megabytes. Your actual database files will consume more space as you add data, so ensure you have sufficient free disk space, especially if you plan to store large datasets.
-
RAM: While PostgreSQL can run on systems with limited RAM, performance will improve with more memory, especially for complex queries or heavy workloads. 8GB or more is recommended for development.
Essential Pre-Installation Checks
A few quick checks can prevent common installation pitfalls:
-
Xcode Command Line Tools: Many development tools on macOS, including Homebrew, rely on Xcode Command Line Tools. If you don’t have them installed, you can typically install them by running
xcode-select --installin your Terminal. -
Existing Installations: Check if you have any previous PostgreSQL installations or related components. Sometimes, remnants of old installations can conflict with new ones. While not always necessary, removing them or ensuring they are properly managed can help.
-
Network Configuration: Ensure your firewall is not blocking the default PostgreSQL port (5432) if you plan to access the database from other machines or applications on your network, though this is rarely an issue for local development.
Choosing Your Installation Method
On macOS, you generally have a few popular methods for installing PostgreSQL, each with its own advantages:
-
Homebrew (Recommended for Developers): Homebrew is the de facto package manager for macOS, simplifying the installation and management of various software packages, including PostgreSQL. It’s command-line driven and highly flexible.
-
Official Installer (EDB Installer): EnterpriseDB (EDB) provides an official graphical installer for PostgreSQL. This method is user-friendly, walks you through the process, and often includes additional tools like pgAdmin 4.
-
Docker: For those familiar with containerization, Docker offers an isolated and portable way to run PostgreSQL without directly installing it on your system. While powerful, it adds a layer of complexity for beginners.
This guide will focus primarily on the Homebrew and Official Installer methods, as they are the most common and accessible for Mac users.
Method 1: Installing PostgreSQL via Homebrew (Recommended for Developers)
Homebrew is the preferred method for many macOS developers due to its simplicity, ease of updates, and seamless integration with the command line. If you’re comfortable with the Terminal, this is likely your best option.
What is Homebrew?
Homebrew describes itself as “the missing package manager for macOS (or Linux).” It allows you to install various open-source software packages with a single command. It handles dependencies, updates, and uninstallation efficiently, keeping your system clean.
Installing Homebrew (if not already installed)
If you don’t have Homebrew yet, open your Terminal application (found in Applications/Utilities) and paste the following command:
/bin/bash -c "$(curl -fsSL https://raw.githubusercontent.com/Homebrew/install/HEAD/install.sh)"
Follow the on-screen prompts, which may include entering your user password and installing Xcode Command Line Tools if they are missing. After installation, it’s good practice to run brew doctor to check for any potential issues.
Installing PostgreSQL using Homebrew
Once Homebrew is installed, installing PostgreSQL is incredibly simple:
-
Update Homebrew: Always start by ensuring your Homebrew installation is up-to-date:
brew update -
Install PostgreSQL: Now, install PostgreSQL. Homebrew typically installs the latest stable version by default.
brew install postgresqlHomebrew will download PostgreSQL and its dependencies, then install them to
/usr/local/var/postgres(or/opt/homebrew/var/postgreson Apple Silicon Macs).
Starting and Stopping the PostgreSQL Service
After installation, PostgreSQL needs to be running to be used. Homebrew provides a convenient way to manage the service:
-
Start PostgreSQL:
brew services start postgresql -
Stop PostgreSQL:
brew services stop postgresql -
Restart PostgreSQL:
brew services restart postgresql -
Check Status:
brew services info postgresqlYou can also configure PostgreSQL to start automatically when your Mac boots:
brew services enable postgresql
Basic Configuration and Initial Setup
By default, Homebrew’s PostgreSQL installation creates a default superuser with the same name as your macOS username, with no password. You’ll likely want to create a dedicated user and set a password.
-
Connect to PostgreSQL:
psql postgresThis connects you to the default
postgresdatabase as your macOS user. -
Set a Password for Your User: Replace
your_macos_usernameandyour_new_passwordaccordingly.ALTER USER your_macos_username WITH PASSWORD 'your_new_password'; -
Create a New User (Optional, but recommended for applications):
CREATE ROLE myapp_user WITH LOGIN PASSWORD 'myapp_password'; -
Create a New Database:
CREATE DATABASE myapp_db OWNER myapp_user; -
Grant Privileges (if creating a new user/database):
GRANT ALL PRIVILEGES ON DATABASE myapp_db TO myapp_user; -
Exit psql:
q
Connecting to PostgreSQL
You can connect using the psql command-line client.
To connect to your newly created database as myapp_user:
psql -U myapp_user -d myapp_db
You’ll be prompted for the password you set.
Method 2: Installing PostgreSQL using the Official Installer (for a more guided approach)
The official EDB PostgreSQL installer offers a graphical, wizard-driven installation experience, which can be more comfortable for users who prefer not to use the command line extensively. It also bundles useful tools like pgAdmin 4, a popular graphical administration interface.
Downloading the Installer
-
Visit the EDB Website: Go to the official PostgreSQL downloads page, typically hosted by EDB (EnterpriseDB). Search for “PostgreSQL downloads” and navigate to the macOS installer section.
-
Select Version: Choose the latest stable version of PostgreSQL for macOS.
-
Download: Click the download link for the macOS installer (usually a
.dmgfile).
Step-by-Step Installation Process
Once the .dmg file is downloaded, double-click it to mount the disk image, and then double-click the installer package (.app) inside.
-
Welcome Screen: Click “Next” to begin.
-
Installation Directory: Choose where PostgreSQL will be installed. The default location (
/Library/PostgreSQL/X.Y) is generally fine. Click “Next”. -
Select Components: You’ll be presented with options:
-
PostgreSQL Server: Essential.
-
pgAdmin 4: A graphical tool for managing PostgreSQL databases. Highly recommended.
-
Stack Builder: A tool for downloading and installing additional modules, drivers, and applications.
-
Command Line Tools: Includes
psqland other utilities. Essential.
Keep all checked unless you have a specific reason not to. Click “Next”.
-
-
Data Directory: Specify where your database files will be stored. The default (
/Library/PostgreSQL/X.Y/data) is usually acceptable. Click “Next”. -
Password for Superuser: Set a strong password for the default database superuser (
postgres). Remember this password! Click “Next”. -
Port: PostgreSQL typically uses port 5432. Unless you have another application using this port, leave it as default. Click “Next”.
-
Advanced Options (Locale): Choose your locale setting. The default system locale is generally fine. Click “Next”.
-
Pre-Installation Summary: Review your choices and click “Next” to start the installation.
-
Installation Progress: Wait for the installer to complete.
-
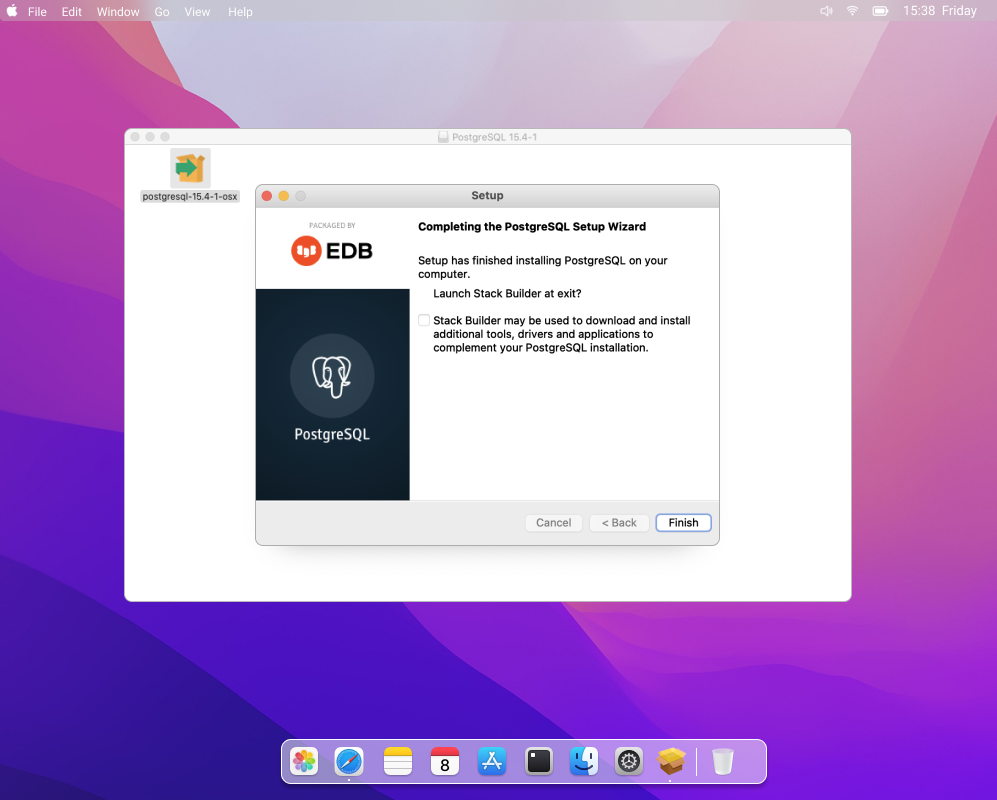
Stack Builder (Optional): After installation, the installer might launch Stack Builder. You can use it to install drivers (e.g., for Python or Java) or extensions. You can uncheck “Launch Stack Builder” and finish the installation if you don’t need it immediately. Click “Finish”.
Verifying the Installation
-
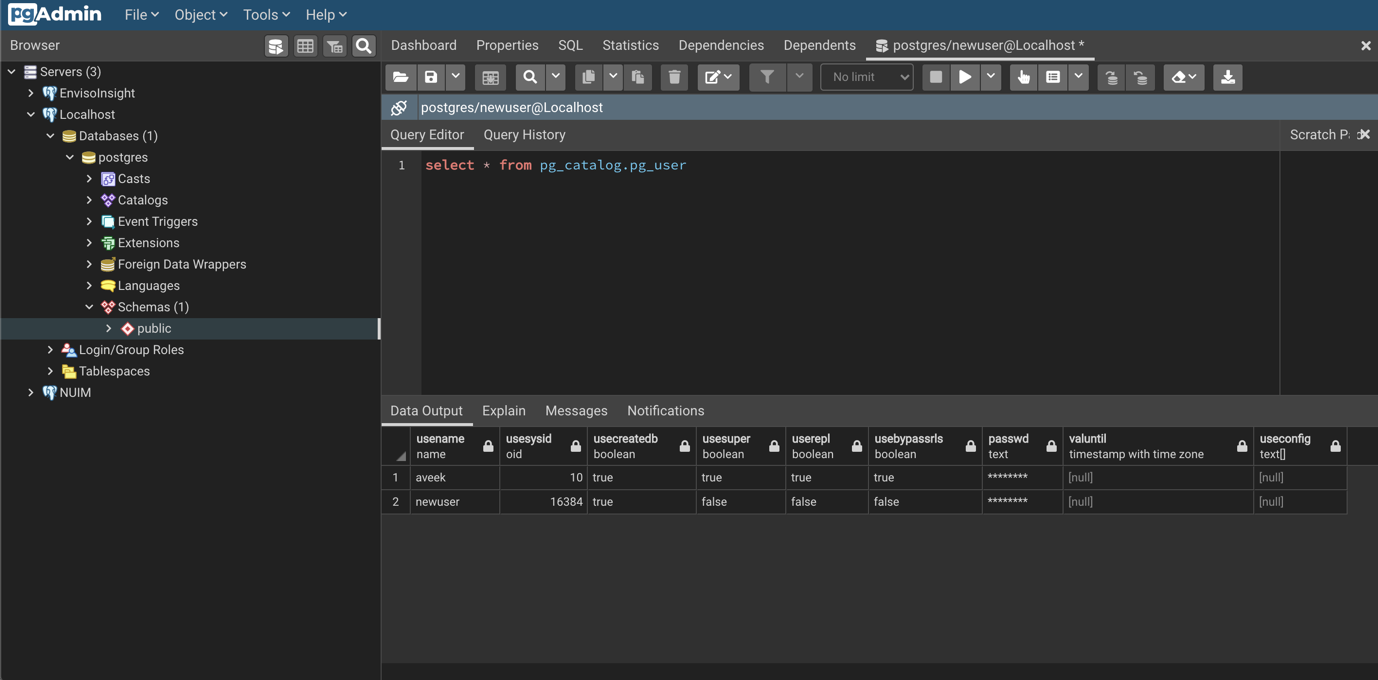
Using pgAdmin 4: If you installed pgAdmin 4, you can find it in your Applications folder. Launch it. It will open in your web browser. You should be able to connect to your local PostgreSQL server (usually listed under “Servers” as “PostgreSQL X.Y”). Use the
postgresusername and the password you set during installation. -
Using Command Line: Open Terminal and try connecting to the default
postgresdatabase:psql -U postgresYou’ll be prompted for the superuser password. If you can connect, the installation was successful.
Managing the PostgreSQL Server
The EDB installer usually sets up PostgreSQL as a launchd service, meaning it starts automatically with your Mac. You can manage the service through the command line if needed, though this is less common than with Homebrew. For EDB installations, service management is often done through the macOS launchd system or by restarting your machine. The simplest way to ensure it’s running is to check pgAdmin 4 or attempt a psql connection.
Post-Installation: Essential Steps and Tools
With PostgreSQL successfully installed, it’s time to learn how to interact with it, manage your databases, and leverage graphical tools to make your workflow more efficient.
Managing Databases and Users
Whether you used Homebrew or the EDB installer, the core commands for managing your database remain the same using the psql command-line interface:
-
Connect as Superuser:
psql -U postgres(or your macOS username if using Homebrew’s default) -
Create a New Database:
CREATE DATABASE my_project_db; -
Create a New User (Role):
CREATE USER dev_user WITH PASSWORD 'secure_password'; -
Grant Privileges to User on Database:
GRANT ALL PRIVILEGES ON DATABASE my_project_db TO dev_user; -
Connect to a Specific Database as a Specific User:
psql -U dev_user -d my_project_dbThis separates your application’s database and user credentials from the powerful superuser, a good security practice.
Connecting with GUI Tools
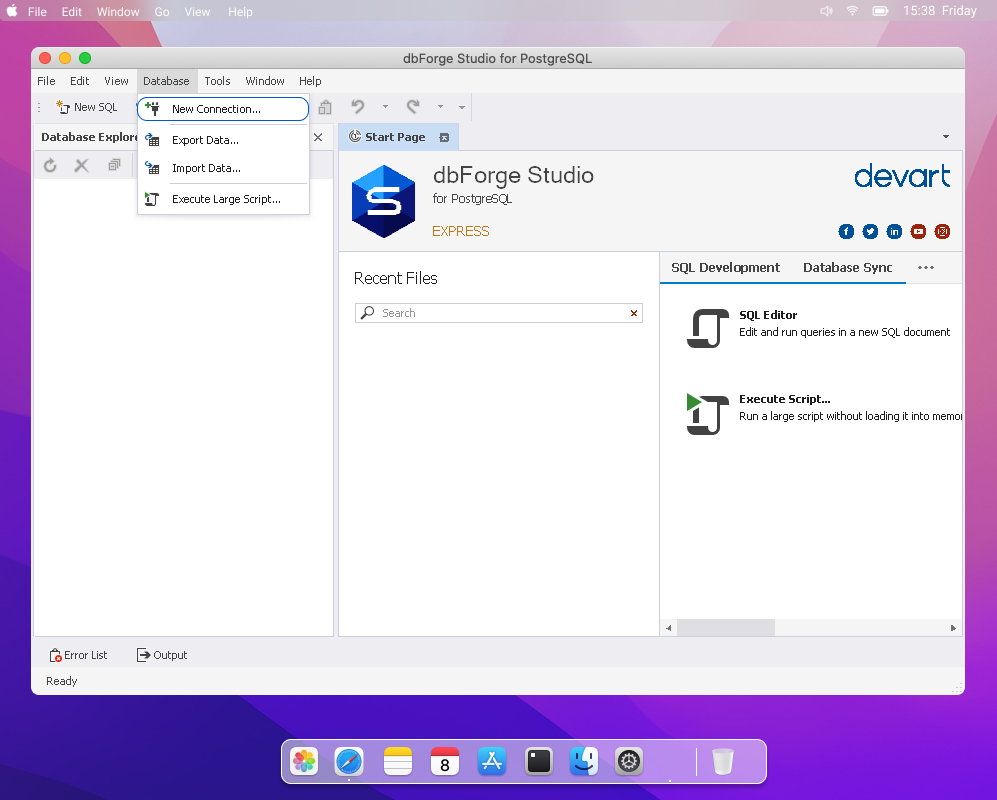
While psql is powerful, graphical user interface (GUI) tools can significantly enhance productivity, especially for visual exploration of data, schema design, and query building.
-
pgAdmin 4: (Included with EDB installer, or installable via Homebrew
brew install pgadmin4). This web-based application provides a comprehensive environment for PostgreSQL administration, offering a visual way to manage servers, databases, tables, users, and execute queries. -
DataGrip (JetBrains): A commercial, highly capable database IDE that supports PostgreSQL and many other databases. Offers advanced features like intelligent code completion, refactoring, and data manipulation.
-
DBeaver: A free and open-source universal database tool that supports PostgreSQL along with numerous other databases. It’s a robust alternative to pgAdmin, offering a desktop application experience.
-
TablePlus: A modern, native GUI tool for database management. It’s fast, lightweight, and supports multiple databases, including PostgreSQL, with a clean interface.
These tools allow you to connect to your local PostgreSQL instance (typically localhost, port 5432, using the user and password you’ve set up) and visually interact with your data.
Basic Commands and Operations
Once connected to your database, you can start performing basic SQL operations:
-
Create Table:
CREATE TABLE users (id SERIAL PRIMARY KEY, username VARCHAR(50) UNIQUE NOT NULL, email VARCHAR(100) UNIQUE NOT NULL, created_at TIMESTAMP WITH TIME ZONE DEFAULT CURRENT_TIMESTAMP);
-
Insert Data:
INSERT INTO users (username, email) VALUES ('john_doe', 'john@example.com'); INSERT INTO users (username, email) VALUES ('jane_smith', 'jane@example.com'); -
Query Data:
SELECT * FROM users; SELECT username, email FROM users WHERE id = 1; -
Update Data:
UPDATE users SET email = 'john.doe@newemail.com' WHERE username = 'john_doe'; -
Delete Data:
DELETE FROM users WHERE id = 2;
Troubleshooting Common Issues
-
PostgreSQL Service Not Starting:
-
Homebrew: Check
brew services info postgresql. Look at the logs if available (often mentioned in the service info). -
EDB: Check macOS Activity Monitor for
postgresprocesses. A restart of your Mac often resolves EDB-related service issues.
-
-
Port Conflicts: If another application is using port 5432, PostgreSQL might fail to start. You can change PostgreSQL’s port in its configuration file (
postgresql.conf), but it’s often easier to find and stop the conflicting application or restart your system. -
Authentication Failed: Double-check the username and password. Ensure the user has access to the specified database. For
psqlerrors, check yourpg_hba.conffile (PostgreSQL Host-Based Authentication) if you’re attempting remote connections or unusual local configurations. For basic local use, the defaulttrustormd5authentication forlocalhostis usually sufficient. -
“Database Does Not Exist”: Ensure you’ve created the database with the exact name you’re trying to connect to.
Conclusion
Installing PostgreSQL on your Mac is a foundational step for anyone engaging in data-driven development, analysis, or simply exploring the power of robust database management. Whether you choose the developer-friendly Homebrew method for its command-line elegance and integration or the guided simplicity of the official EDB installer, you’ve now set up one of the most reliable and feature-rich relational databases available.
With PostgreSQL up and running, your Mac transforms into a powerful workstation capable of hosting complex applications, managing vast datasets, and serving as a testing ground for innovative data solutions. Remember to explore the extensive documentation, leverage GUI tools like pgAdmin 4 for easier management, and practice your SQL skills. The journey into the world of data management with PostgreSQL has just begun, offering endless opportunities for learning and creation.
aViewFromTheCave is a participant in the Amazon Services LLC Associates Program, an affiliate advertising program designed to provide a means for sites to earn advertising fees by advertising and linking to Amazon.com. Amazon, the Amazon logo, AmazonSupply, and the AmazonSupply logo are trademarks of Amazon.com, Inc. or its affiliates. As an Amazon Associate we earn affiliate commissions from qualifying purchases.