
In the dynamic landscape of mobile gaming, titles like Pixel Gun 3D have carved out a significant niche, captivating millions with their vibrant blocky aesthetics and fast-paced shooter action. Originally designed for touchscreens, the desire to translate this immersive experience to the larger screen and more precise controls of a personal computer is a common quest for many enthusiasts. This comprehensive guide delves into the technical nuances of achieving exactly that, transforming your PC into a dedicated battleground for Pixel Gun 3D, all while adhering strictly to the principles of software installation, system optimization, and digital security that define the “Tech” domain.

The Allure of Pixel Gun 3D on a Larger Canvas
Pixel Gun 3D stands as a testament to the enduring appeal of accessible, engaging multiplayer experiences. Its transition from mobile devices to the PC, while not officially supported through a native PC client, is a testament to its popularity and the inherent advantages a desktop environment offers.
Understanding Pixel Gun 3D: A Brief Overview
Pixel Gun 3D is a multiplayer first-person shooter (FPS) developed by Cubic Games. Launched in 2013, it quickly gained traction for its Minecraft-inspired visual style, extensive weapon arsenal, and diverse game modes, ranging from classic deathmatches to battle royale and co-op campaigns. Players customize their characters, upgrade weapons, and engage in thrilling online combat against others worldwide. Its intuitive controls, frequent updates, and community-driven content have solidified its position as a mobile gaming phenomenon.
Why Emulate? The Advantages of PC Gameplay
The primary method for running Pixel Gun 3D on a PC involves using an Android emulator. While this introduces an additional layer of software, the benefits it confers are substantial, particularly for a fast-paced shooter:
-
Superior Control: The tactile feedback and precision of a keyboard and mouse significantly enhance aiming, movement, and overall gameplay compared to touchscreen controls. Customizable key mappings allow players to tailor their setup for optimal performance.
-
Enhanced Visuals: Playing on a larger monitor allows for a more expansive view of the battlefield, potentially revealing details missed on smaller mobile screens. Emulators can often render games at higher resolutions and frame rates, provided the PC hardware is capable, leading to a smoother, more visually engaging experience.
-
Improved Performance and Stability: Modern PCs typically boast more robust processors, ample RAM, and dedicated graphics cards compared to most mobile devices. This translates to fewer frame drops, faster loading times, and a generally more stable gaming environment, mitigating overheating issues common on phones during extended play.
-
Multitasking Capability: PCs are designed for multitasking. While engrossed in Pixel Gun 3D, players can seamlessly switch to other applications for communication, streaming, or browsing, without interrupting their game session.
-
Battery Independence: The perennial concern of mobile device battery life is entirely eliminated, allowing for uninterrupted gaming sessions without being tethered to a charger or fearing a sudden shutdown.
These advantages collectively underscore why many dedicated players seek to bring their mobile gaming experiences onto the PC platform, leveraging the desktop’s inherent power and flexibility.
Demystifying the Emulation Process: Choosing Your Platform
Emulation is the cornerstone of running mobile applications on a PC. Understanding how it works and selecting the right emulator are critical first steps.
What is an Android Emulator?
An Android emulator is a software application that creates a virtual Android device on your computer. It simulates the hardware and software environment of an Android smartphone or tablet, allowing Android applications, including games, to run seamlessly on a Windows or macOS operating system. Essentially, it tricks the Android app into believing it’s running on its native platform.
Top Android Emulators for Gaming
The market offers several robust Android emulators, each with its strengths and target audience. For gaming, performance, stability, and customization are paramount.
-
BlueStacks: Widely regarded as one of the most popular and feature-rich emulators, BlueStacks offers excellent game compatibility, a user-friendly interface, and extensive customization options for controls. It’s often optimized for a smooth gaming experience and receives frequent updates.
-
NoxPlayer: Known for its lightweight design and focus on gaming performance, NoxPlayer provides a clean interface and powerful customization tools, including macro recording and multi-instance management. It’s a strong contender for those prioritizing speed and efficiency.
-
LDPlayer: Specifically engineered for gaming, LDPlayer prides itself on high frame rates and a smooth overall experience. It features dedicated gaming optimizations, precise keyboard mapping, and a relatively low system resource footprint, making it ideal for systems with moderate specifications.
-
GameLoop (Tencent Gaming Buddy): While primarily known for officially supporting titles like Call of Duty Mobile and PUBG Mobile, GameLoop has expanded its library. It offers good performance for compatible games and is optimized for Tencent’s ecosystem. However, its broader Android app compatibility might be slightly less universal than the others.
Factors to Consider When Selecting an Emulator
Choosing the right emulator involves balancing several technical considerations:
-
System Requirements: Each emulator has specific minimum and recommended PC specifications. Ensure your system meets these, particularly concerning RAM, CPU cores, and virtualization support (VT-x/AMD-V, which should be enabled in your BIOS/UEFI).
-
Performance: Look for emulators known for high frame rates and low latency, crucial for an FPS like Pixel Gun 3D. Reviews and benchmark tests can provide insight.
-
User Interface and Ease of Use: A clear, intuitive interface simplifies installation, setup, and day-to-day use.
-
Customization Options: The ability to customize keyboard mappings, resolution, DPI, and allocate CPU/RAM resources is vital for optimizing gameplay.
-
Compatibility: While most popular emulators run a vast array of apps, checking specific game compatibility can prevent frustration.
-
Security and Reputation: Always download emulators from their official websites to avoid malware and ensure you’re getting legitimate, updated software.
A Step-by-Step Guide to Installation
Once you’ve selected your preferred emulator, the installation process for Pixel Gun 3D is straightforward, mirroring the steps you’d take on an actual Android device.
Step 1: Downloading and Installing Your Chosen Emulator
Navigate to the official website of your chosen emulator (e.g., BlueStacks.com, NoxPlayer.com, LDPlayer.net). Download the latest version of the installer for your operating system (Windows or macOS).
Run the installer and follow the on-screen prompts. This typically involves accepting the license agreement, choosing an installation directory (the default is usually fine), and waiting for the files to decompress and install. It’s recommended to perform a “clean install” rather than an upgrade if you’re switching emulators or encountering issues.
Step 2: Setting Up Google Play Store Access
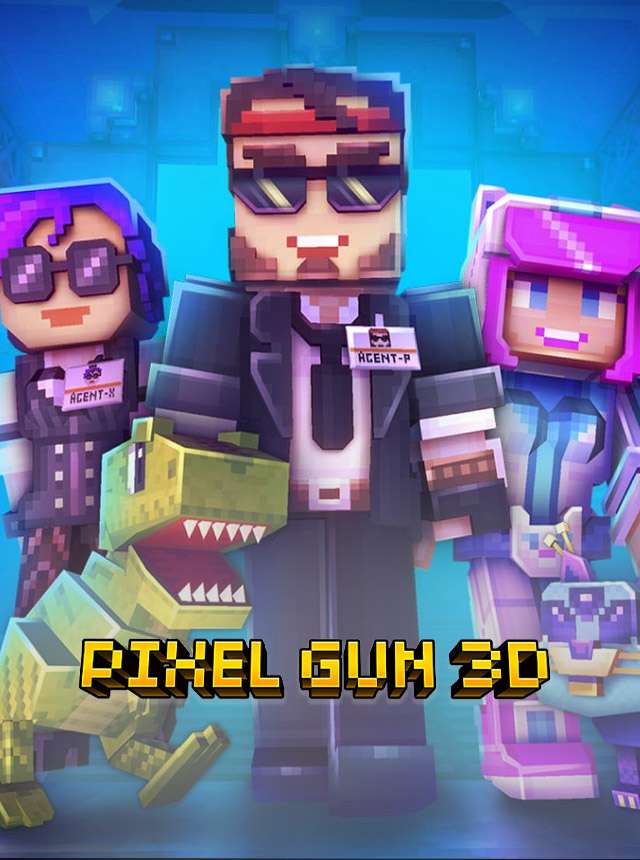
After the emulator finishes installing, launch it. The first time you run it, it may prompt you to log in with a Google account. This is essential, as the Google Play Store is the primary conduit for downloading Android applications.
Enter your existing Google account credentials (Gmail address and password). If you don’t have one, you’ll need to create a new account. This process is identical to setting up a new Android phone or tablet. Ensure you review and accept the terms of service.
Step 3: Locating and Installing Pixel Gun 3D
Once logged into your Google account, you’ll see a virtual Android home screen. Locate the Google Play Store icon (a colorful triangle) and click to open it.
In the Play Store’s search bar, type “Pixel Gun 3D” and press Enter.
The search results should display Pixel Gun 3D as one of the top entries. Click on the game’s icon.
On the game’s page, click the “Install” button. The emulator will download and install the game, just as an Android device would. The download size can be substantial, so ensure you have a stable internet connection.
Step 4: Launching and Initial Game Configuration
After installation, the “Install” button will change to “Open,” or a Pixel Gun 3D icon will appear on the emulator’s home screen. Click on either to launch the game.
The first launch might involve additional data downloads within the game itself, as well as tutorials or initial setup screens. Follow these prompts.
Crucially, you’ll want to navigate to the game’s settings and the emulator’s control settings. Configure your keyboard and mouse controls. Most emulators provide a default mapping for common games, but custom mapping allows for personalized precision. Experiment with sensitivity, button assignments, and potential macro creation to find your optimal setup for competitive play.
Optimizing Your Pixel Gun 3D Experience
Beyond just installation, optimizing the emulator and game settings is paramount for achieving the best possible performance and an immersive gaming experience.
Configuring Emulator Settings for Peak Performance
Access your emulator’s settings panel. Key areas to adjust include:
-
CPU Cores and RAM: Allocate more CPU cores and RAM to the emulator if your PC has ample resources. For most modern gaming, 4 cores and 4-8GB of RAM are a good starting point for the emulator itself, depending on total system resources.
-
Graphics Renderer: Choose between OpenGL, DirectX, or Vulkan. Experiment to see which performs best on your specific graphics card. DirectX is often a good default for Windows users.
-
Resolution and DPI: Match the emulator’s resolution to your monitor’s native resolution or slightly lower for better performance. Adjust DPI (Dots Per Inch) to make the interface elements readable and appropriately sized.
-
Frame Rate (FPS): Set the FPS to 60 or higher if your monitor supports it and your PC can maintain it. Many emulators offer a high FPS mode (e.g., 90 or 120 FPS).
-
Disk Performance: Ensure the emulator is installed on an SSD (Solid State Drive) if possible, as this dramatically improves loading times and overall responsiveness.
Customizing Controls for Desktop Precision
The most significant advantage of PC emulation is the control scheme. Emulators provide a “Keymapping” tool, usually accessed via a sidebar icon.
-
Drag and Drop: Drag virtual joystick, button, and aim icons onto the game’s respective on-screen controls.
-
Assign Keys: Click on the virtual control and press the desired keyboard key or mouse button to assign it.
-
WASD Movement: Map the left virtual joystick to WASD for character movement.
-
Mouse Aim: Configure the “Aim” or “Look” area to be controlled by your mouse. This is often an “FPS mode” toggle.
-
Additional Buttons: Map jump, shoot, reload, grenade, and weapon switch buttons to easily accessible keys (e.g., Spacebar, Left Click, R, G, Q/E).
-
Save Profiles: Save your custom control profile so you can easily reload it.
Essential PC Specifications for Smooth Gameplay
While emulators can run on modest hardware, a fluid Pixel Gun 3D experience demands certain minimums:
-
Processor (CPU): A multi-core Intel i5/i7 (8th Gen or newer) or AMD Ryzen 5/7 (2nd Gen or newer) is recommended. Crucially, Virtualization Technology (VT-x for Intel, AMD-V for AMD) must be enabled in your PC’s BIOS/UEFI settings.
-
RAM: 8GB of RAM is the absolute minimum, with 16GB or more being ideal for seamless multitasking and emulator performance.
-
Graphics Card (GPU): A dedicated graphics card (NVIDIA GeForce GTX 1050/AMD Radeon RX 560 or better) will significantly improve rendering quality and frame rates. Integrated graphics can work but may struggle at higher settings.
-
Storage: An SSD is highly recommended for installing the emulator and the game, dramatically reducing loading times.
-
Operating System: Windows 10/11 (64-bit) or macOS 10.12 Sierra or higher.
Troubleshooting and Best Practices for a Seamless Experience
Even with careful setup, technical glitches can occur. Knowing how to troubleshoot and maintain your setup ensures long-term enjoyment.
Common Installation and Performance Issues
-
Emulator Crashing/Freezing: Ensure your PC meets minimum requirements. Update your graphics drivers. Try allocating fewer or more CPU cores/RAM to the emulator. Reinstall the emulator if issues persist.
-
Game Not Loading/Crashing: Clear the game’s cache and data within the emulator’s Android settings. Verify the game files through the Play Store. Ensure your Google Play Services are up to date within the emulator.
-
Low FPS/Lag: Lower the emulator’s resolution, FPS cap, or graphics quality settings. Close background applications on your PC. Ensure virtualization (VT-x/AMD-V) is enabled.
-
Control Issues: Double-check your keymapping in the emulator. Ensure no conflicting keybinds exist. Reset controls to default and remap carefully.
-
“Virtualization not enabled” Error: This is a common issue. You must enable VT-x (Intel) or AMD-V (AMD) in your PC’s BIOS/UEFI settings. The method varies by motherboard manufacturer, so consult your PC’s manual or motherboard documentation.
Ensuring Digital Security While Emulating
Running an emulator involves installing third-party software and logging into your Google account. Exercise caution:
-
Official Sources Only: Download emulators only from their official websites to avoid modified versions that could contain malware.
-
Antivirus/Antimalware: Keep your PC’s antivirus software up-to-date and run regular scans.
-
Google Account Security: Use a strong, unique password for your Google account and enable two-factor authentication (2FA). This protects not only your game progress but also all associated Google services.
-
App Permissions: Be mindful of the permissions Pixel Gun 3D (or any other app) requests within the emulator. Grant only those that are logically necessary for the app to function.
Maximizing Longevity and Enjoyment
-
Regular Updates: Keep both your chosen emulator and Pixel Gun 3D updated to their latest versions. Updates often bring performance improvements, bug fixes, and new features.
-
System Maintenance: Regularly clean up temporary files on your PC, defragment your hard drive (if not an SSD), and ensure sufficient free storage space.
-
Community Resources: Leverage online communities, forums, and Discord servers dedicated to Pixel Gun 3D and your specific emulator. These can be invaluable sources for tips, troubleshooting, and staying informed about updates.
By meticulously following these technical guidelines for installation, optimization, and security, you can successfully bring the exhilarating world of Pixel Gun 3D to your PC, transforming your gaming experience with enhanced controls, visuals, and performance. This approach not only provides a superior platform for enjoyment but also underscores the adaptability and ingenuity inherent in the technological landscape of modern gaming.
aViewFromTheCave is a participant in the Amazon Services LLC Associates Program, an affiliate advertising program designed to provide a means for sites to earn advertising fees by advertising and linking to Amazon.com. Amazon, the Amazon logo, AmazonSupply, and the AmazonSupply logo are trademarks of Amazon.com, Inc. or its affiliates. As an Amazon Associate we earn affiliate commissions from qualifying purchases.