In the ever-evolving landscape of technology, Python has solidified its position as a cornerstone programming language. Its versatility and extensive ecosystem make it a go-to choice for a wide range of applications, from web development and data science to artificial intelligence and automation. At the heart of this vibrant ecosystem lies pip, the de facto package installer for Python. pip empowers developers to effortlessly download, install, and manage external libraries and modules, dramatically accelerating the development process and enabling access to a vast array of pre-built functionalities.
For Windows users, understanding how to install and utilize pip is a fundamental step towards unlocking the full potential of Python. Whether you’re a seasoned developer looking to streamline your workflow or a budding enthusiast eager to explore the world of Python programming, this comprehensive guide will walk you through the entire process. We’ll cover everything from verifying if pip is already installed to troubleshooting common issues, ensuring you have the knowledge and confidence to get pip up and running on your Windows machine.
Understanding PIP and its Importance in the Python Ecosystem
Before we dive into the installation process, it’s crucial to grasp what pip is and why it’s so indispensable. pip stands for “Pip Installs Packages” (a recursive acronym) or sometimes “Preferred Installer Program.” Its primary function is to interact with the Python Package Index (PyPI), a comprehensive repository containing thousands of open-source Python packages.
Think of PyPI as a massive digital library for Python code. Developers worldwide contribute their work to this repository, making it available for others to use. pip acts as your personal librarian, allowing you to search for, download, and install these packages with simple command-line instructions.
Why is this so important? Imagine having to manually download the source code for every library you wanted to use, then figuring out how to compile and integrate it into your project. This would be an incredibly tedious and error-prone process. pip automates this entirely. With a command like pip install requests, you can instantly have the powerful requests library, used for making HTTP requests, installed and ready to be imported into your Python scripts.
The benefits of using pip are numerous:
- Accelerated Development: Access to a vast collection of pre-built modules saves significant development time and effort.
- Dependency Management:
piphandles complex dependencies between packages, ensuring that all necessary components are installed correctly. - Version Control: You can specify and install specific versions of packages, crucial for maintaining compatibility and reproducibility in projects.
- Easy Updates and Uninstallation: Keeping your packages up-to-date or removing them when no longer needed is straightforward with
pip. - Community Collaboration:
pipfacilitates the sharing and adoption of Python code, fostering a collaborative and innovative community.
For anyone serious about Python development on Windows, mastering pip is not just a convenience; it’s a necessity.
Verifying PIP Installation on Windows
In many modern Python installations for Windows, pip is bundled by default. This is a significant improvement from older versions where it often required a separate installation step. Therefore, the first and most important step is to check if pip is already present on your system.
Checking the Command Prompt
-
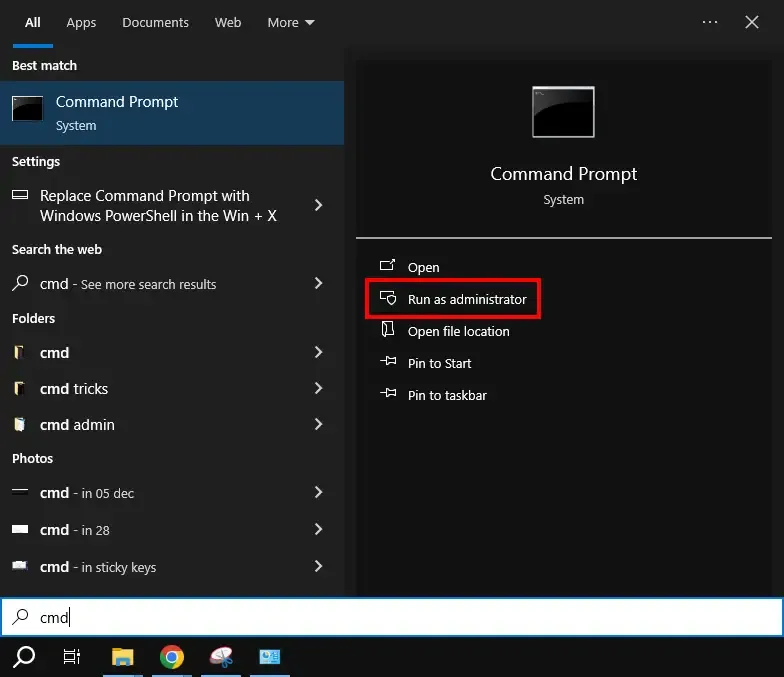
Open the Command Prompt: You can do this by searching for “Command Prompt” or “cmd” in the Windows search bar and pressing Enter.
-
Execute the
pipcommand: In the Command Prompt window, type the following command and press Enter:pip --versionor
pip3 --versionIf
pipis installed and recognized by your system, you will see output similar to this:pip 23.3.1 from c:usersyourusernameappdatalocalprogramspythonpython311libsite-packagespip (python 3.11)The exact version number and installation path will vary depending on your Python installation. The presence of this output indicates that
pipis ready to use.
What if pip is not recognized?
If you receive an error message like:
'pip' is not recognized as an internal or external command, operable program or batch file.
or a similar message indicating that the command is not found, it means that pip is either not installed or not added to your system’s PATH environment variable. In this case, you’ll need to proceed with the installation process.
Installing PIP on Windows: Step-by-Step Guide
If your initial check reveals that pip is not installed, don’t worry. The installation process on Windows is generally straightforward and involves downloading a small script provided by the Python community.
Method 1: Using the ensurepip Module (Recommended for Python 3.4+)
Since Python 3.4, Python comes with a built-in module called ensurepip specifically designed to bootstrap pip. This is the most reliable and recommended method if your Python version is 3.4 or newer.
-
Open the Command Prompt as Administrator: This is crucial to ensure that the installation has the necessary permissions. Search for “Command Prompt,” right-click on it, and select “Run as administrator.”
-
Navigate to your Python Scripts directory (Optional but good practice): While
ensurepipshould work regardless, sometimes explicitly setting the Python interpreter can help. You can use the following command, replacingpython.exewith the actual name of your Python executable if it’s different (e.g.,python3.exe):py -m ensurepip --upgradeIf you have multiple Python versions installed, you might need to specify the version:
py -3.11 -m ensurepip --upgrade(Replace
3.11with your Python version).The
ensurepipmodule will download and install the latest version ofpipandsetuptools(another essential package management tool) for your Python installation. -
Verify the installation: After the command completes, close and reopen your Command Prompt (without administrator privileges this time) and run:
pip --versionYou should now see the
pipversion information, confirming a successful installation.
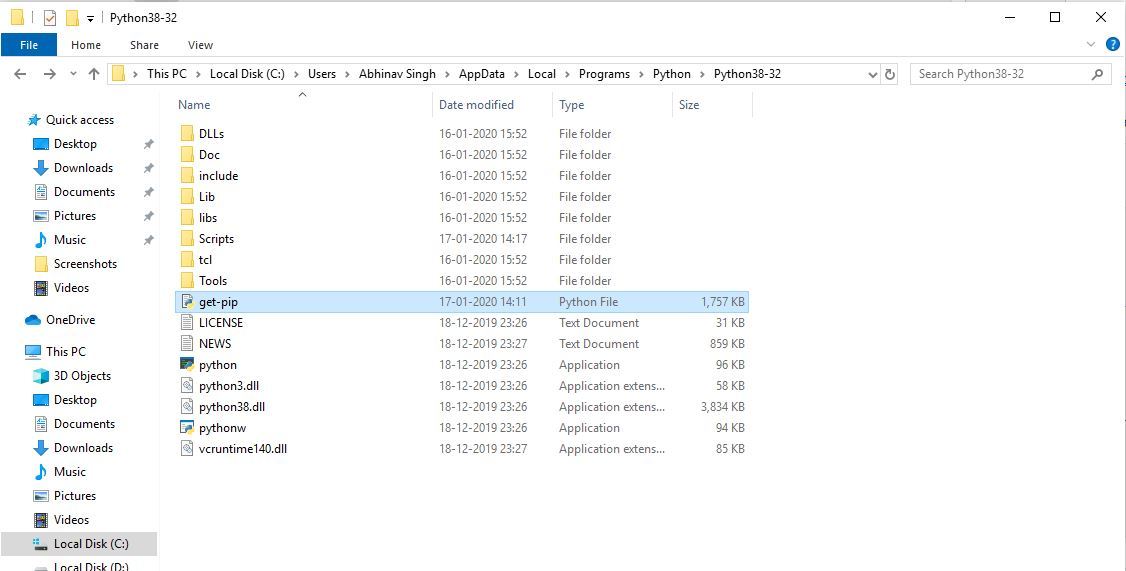
Method 2: Using the get-pip.py Script (For Older Python Versions or Troubleshooting)
If you are using an older version of Python (prior to 3.4) or if the ensurepip method encounters issues, you can use the official get-pip.py script.
-
Download the
get-pip.pyscript:- Open your web browser and go to the official
pipinstallation page: https://pip.pypa.io/en/stable/installation/ - Look for the section on installing
pipusing theget-pip.pyscript. - Right-click on the link for
get-pip.pyand select “Save link as…” or “Save target as…”. - Save the file to a convenient location on your computer, such as your Downloads folder or directly in a folder where you store Python-related scripts.
- Open your web browser and go to the official
-
Open the Command Prompt as Administrator: As with the previous method, running the Command Prompt with administrator privileges is recommended.
-
Navigate to the directory where you saved
get-pip.py: Use thecdcommand. For example, if you saved it in your Downloads folder:cd Downloads -
Run the installation script: Execute the following command, ensuring you replace
pythonwith your specific Python executable if necessary (e.g.,python3):python get-pip.pyThis script will download and install
pipandsetuptools. -
Verify the installation: Close and reopen your Command Prompt and run:
pip --versionYou should now see the
pipversion.
Adding PIP to Your System’s PATH Environment Variable
Even if pip is installed correctly, you might still encounter the “command not recognized” error if its executable’s directory is not included in your system’s PATH environment variable. The PATH variable tells Windows where to look for executable files.
How to Add PIP to PATH

-
Locate your Python Scripts Directory:
pipis typically installed within theScriptssub-directory of your Python installation. Common locations include:C:UsersYourUsernameAppDataLocalProgramsPythonPythonXXScripts(whereXXis your Python version, e.g.,Python311)C:PythonXXScripts(if installed in the root directory)
You can often find this path from the
pip --versionoutput ifpipis already installed but not in PATH. -
Open Environment Variables:
- Search for “environment variables” in the Windows search bar.
- Click on “Edit the system environment variables.”
- In the System Properties window, click the “Environment Variables…” button.
-
Edit the PATH Variable:
- In the “System variables” section, find the variable named
Pathand select it. - Click the “Edit…” button.
- In the “System variables” section, find the variable named
-
Add the Scripts Directory:
- In the “Edit environment variable” window, click “New.”
- Paste the full path to your Python
Scriptsdirectory (e.g.,C:UsersYourUsernameAppDataLocalProgramsPythonPython311Scripts). - Click “OK” on all open windows to save the changes.
-
Restart Command Prompt: Crucially, you must close and reopen your Command Prompt for the changes to take effect. The system rereads the PATH variable only when a new command interpreter instance is started.
-
Verify Again: Open a new Command Prompt and run
pip --version. It should now be recognized.
Using PIP to Install and Manage Python Packages
Once pip is successfully installed and accessible, you can start leveraging its power to manage your Python packages.
Installing a Package
The most common pip command is install. To install a package, open your Command Prompt and use the following syntax:
pip install package_name
For example, to install the popular web framework Flask:
pip install Flask
pip will then connect to PyPI, download Flask and any of its dependencies, and install them into your Python environment.
Installing a Specific Version
Sometimes, you might need to install a specific version of a package for compatibility reasons. You can do this by specifying the version number with ==:
pip install package_name==version_number
For instance, to install Flask version 2.0.0:
pip install Flask==2.0.0
You can also use comparison operators like >, <, >=, <=, or !=:
pip install Flask>=2.0.0,<3.0.0
Listing Installed Packages
To see a list of all packages currently installed in your environment, use:
pip list
Uninstalling a Package
If you no longer need a package, you can remove it with the uninstall command:
pip uninstall package_name
pip will ask for confirmation before proceeding with the uninstallation.
Upgrading a Package
To upgrade an installed package to its latest version:
pip install --upgrade package_name
Requirements Files
For managing dependencies in larger projects, it’s best practice to use a requirements.txt file. This file lists all the packages your project needs, often with specific version constraints.
To create a requirements.txt file from your current environment:
pip freeze > requirements.txt
To install all packages listed in a requirements.txt file:
pip install -r requirements.txt
This command is invaluable for ensuring that your project can be set up identically on different machines or by other developers.
Troubleshooting Common PIP Installation Issues
While the installation process is usually smooth, you might occasionally run into problems. Here are some common issues and their solutions:
pip Command Not Found
- Cause:
pipis not installed, or its directory is not in the PATH. - Solution: Ensure
pipis installed usingensurepiporget-pip.py. Then, meticulously follow the steps to add your PythonScriptsdirectory to the system’s PATH environment variable and restart your Command Prompt.
Permissions Errors
- Cause: You are trying to install packages without the necessary administrative privileges.
- Solution: Always open your Command Prompt as an administrator when installing or modifying system-level Python installations. If you are working within a virtual environment, administrator privileges are usually not required.
Proxy or Firewall Issues
- Cause: Your network might be blocking
pipfrom accessing PyPI. - Solution: If you are behind a corporate firewall or proxy, you may need to configure
pipto use your proxy server. You can do this by setting environment variables (HTTP_PROXY,HTTPS_PROXY) or by usingpip‘s configuration file. For more details, refer to thepipdocumentation on proxy support.
pip and Python Version Mismatches
- Cause: You have multiple Python versions installed, and
pipis associated with the wrong one. - Solution: Use the
pylauncher to explicitly specify the Python version. For example,py -3.11 -m pip install package_nameensures thatpipoperates with Python 3.11. Similarly,py -3.10 -m pip listwill show packages for Python 3.10.
Corrupted pip Installation
- Cause: The
pipinstallation itself might have become corrupted. - Solution: Try reinstalling
pip. You can attempt to uninstall it first (ifpipis recognized) and then useensurepiporget-pip.pyto install it again.
Conclusion
Mastering pip is an essential skill for any Python developer working on Windows. By understanding how to install, verify, and manage packages, you unlock a world of possibilities, enabling you to build sophisticated applications more efficiently. This guide has provided a thorough walkthrough of the installation process, from initial verification to advanced troubleshooting, empowering you to integrate pip seamlessly into your development workflow. Remember to always keep your pip updated (pip install --upgrade pip) to benefit from the latest features and security patches. With pip at your disposal, you are well-equipped to harness the immense power of the Python ecosystem.