In an increasingly interconnected digital landscape, the ability to transcend operating system boundaries on a single machine is more than just a convenience – it’s a powerful productivity and compatibility advantage. For Apple users, this often means needing to run Windows-specific applications or access unique features without committing to a separate PC. This is where Parallels Desktop for Mac steps in, offering a robust and elegant solution for virtualization that integrates the Windows experience directly into your macOS environment.
This comprehensive guide will walk you through every step of installing Parallels Desktop on your Mac, from initial preparation to the seamless integration of your first Windows virtual machine. We’ll delve into the technical nuances, explore the benefits for various user profiles, and provide insights that will help you optimize your virtualized environment for peak performance and efficiency. Whether you’re a creative professional relying on a niche Windows-only application, a developer testing cross-platform software, or simply a user curious about bridging the gap between two powerful operating systems, mastering Parallels Desktop is a valuable skill in your digital arsenal.
Unlocking Windows on Your Mac: Why Parallels Desktop?
The idea of running an entirely different operating system simultaneously on your Mac might sound complex, but Parallels Desktop simplifies this process into an intuitive experience. It’s not just about running Windows; it’s about having the flexibility to utilize any operating system – be it various versions of Windows, Linux distributions, or even older macOS versions – all within your familiar Mac interface.
The Power of Virtualization: Bridging Two Worlds
At its core, Parallels Desktop is a virtualization application. It creates a virtual machine (VM) on your Mac, which acts like a completely separate computer with its own virtual hardware. This virtual hardware then hosts another operating system, known as the “guest OS,” while your macOS remains the “host OS.” This ingenious technology allows you to switch between macOS and Windows applications as easily as you switch between native Mac apps, often without even realizing you’re running two operating systems.
The beauty of virtualization lies in its isolation. Any software, virus, or issue within the virtual machine is contained, protecting your primary macOS installation. This makes it an invaluable tool for testing new software, exploring unfamiliar operating systems, or running applications that might pose a security risk on your main system. For businesses and IT professionals, this isolation is key to maintaining digital security and managing diverse software environments efficiently.
Key Benefits for Mac Users: Productivity, Compatibility, and Beyond
Why do millions of Mac users turn to Parallels Desktop? The reasons are multifaceted and often intersect with the broader themes of technology, productivity, and even financial shrewdness.
- Unparalleled Software Compatibility: This is arguably the biggest draw. There are still thousands of critical applications – from specialized engineering software and accounting packages to niche gaming titles – that are exclusively designed for Windows. Parallels Desktop eliminates the need for a separate Windows PC, allowing you to run these essential programs directly on your Mac. This compatibility extends your Mac’s utility and ensures you’re never held back by platform limitations.
- Enhanced Productivity and Workflow: Imagine being able to use Microsoft Access for a database project while simultaneously editing a video in Final Cut Pro X, or running a Windows-based CAD program alongside your macOS-native design suite. Parallels Desktop enables seamless integration, allowing you to drag and drop files between macOS and Windows, copy and paste text, and even launch Windows applications directly from your Mac’s Dock. This fluidity boosts productivity by eliminating the friction of switching between physical machines or rebooting.
- Gaming on Mac: While macOS has a growing library of games, Windows remains the dominant platform for PC gaming. Parallels Desktop allows Mac users to access a vast array of Windows-exclusive games, turning their powerful Mac hardware into a dual-purpose entertainment and productivity machine. For many, this means a significant cost saving by not needing a dedicated gaming PC.
- Developer and IT Professional Tools: For those in tech, Parallels Desktop is an indispensable tool. Developers can test their applications across different operating systems and browsers without needing multiple physical devices. IT administrators can manage and deploy different OS environments, troubleshoot compatibility issues, and provide support more effectively.
- Cost-Effectiveness and Investment Protection: Rather than purchasing a completely separate Windows computer, Parallels Desktop leverages your existing Mac hardware, turning it into a versatile powerhouse. This represents a significant financial saving, maximizing the return on your initial Mac investment. For businesses, it streamlines hardware procurement and reduces maintenance overhead.
Preparing Your Mac for Parallels: Essential Prerequisites
Before diving into the installation process, it’s crucial to ensure your Mac meets the necessary requirements and that you have all the components ready. Proper preparation ensures a smooth installation and optimal performance of your virtual machines.
System Requirements: Ensuring a Smooth Experience
Parallels Desktop is designed to be efficient, but like any powerful software, it has minimum system requirements to guarantee a satisfactory user experience. These requirements can vary slightly depending on the specific version of Parallels Desktop you intend to install and the guest operating system you plan to run.
- Processor: Modern Intel processors (Core i5, i7, i9, Xeon) are fully supported. Crucially, Parallels Desktop has been expertly optimized for Apple Silicon Macs (M1, M2, M3 chips), offering exceptional performance and power efficiency. Ensure your Mac’s processor is compatible.
- Memory (RAM): While Parallels might state a minimum of 4GB of RAM, we strongly recommend 8GB as a practical minimum, and 16GB or more for optimal performance, especially if you plan to run demanding applications or multiple virtual machines simultaneously. Remember, your Mac needs RAM for macOS itself, plus the RAM allocated to your virtual machine.
- Storage: You’ll need sufficient free disk space. The Parallels Desktop application itself takes up a few hundred megabytes, but your virtual machine and its installed operating system will require substantial space. A Windows 11 installation can easily consume 20-30GB, and that’s before you install any applications or store files. We recommend at least 100GB of free space if you’re running one VM, and more for multiple or larger VMs. An SSD (Solid State Drive) is highly recommended over a traditional HDD for significantly faster performance.
- Operating System: Parallels Desktop typically supports the latest macOS versions and often a few previous ones. Always check the official Parallels website for the most current compatibility list. For instance, the latest Parallels Desktop might require macOS Ventura or Sonoma.
- Internet Connection: A stable internet connection is required for downloading Parallels Desktop, activating your license, and downloading Windows updates.
Licensing and Software Acquisition: Choosing Your Parallels Edition
Parallels Desktop is a commercial product, meaning you’ll need to purchase a license. There are generally a few editions available, each catering to different user needs and budgets:
- Parallels Desktop Standard Edition: Ideal for most home users, students, and basic business needs. It provides robust performance for everyday Windows applications and general productivity.
- Parallels Desktop Pro Edition: Aimed at developers, designers, and power users. This edition offers more virtual CPU/RAM allocation, advanced networking tools, integration with popular development tools (like Visual Studio, Docker, Vagrant), and premium support.
- Parallels Desktop Business Edition: Designed for organizations and IT departments. It includes centralized license management, mass deployment tools, enhanced security features, and a unified volume license key.
You can purchase a license directly from the official Parallels website or authorized resellers. They often offer a free trial, which is an excellent way to test the software’s performance and features before committing to a purchase. Choosing the right edition ensures you have the features you need without overspending, aligning with smart financial planning.
Acquiring a Windows Operating System (ISO/Key)
Beyond Parallels Desktop itself, you’ll also need a copy of the Windows operating system that you intend to install within your virtual machine.
- Windows 10/11 ISO Image: The most common method is to download an ISO file (disk image) of Windows directly from Microsoft’s official website. Microsoft provides tools and direct download links for Windows 10 and Windows 11. Ensure you download the correct architecture (64-bit) and preferred language.
- Product Key: Remember that even if you download the ISO, you will generally need a valid Windows product key to activate your operating system. If you have an existing Windows license that you’re no longer using on a physical PC, you might be able to transfer it, but always check Microsoft’s licensing terms. Otherwise, you’ll need to purchase a new Windows license.
Having the Windows ISO and product key ready before you start the Parallels installation will streamline the process significantly.
Step-by-Step Installation of Parallels Desktop
With your Mac prepared and your Windows ISO at hand, you’re ready to begin the core installation of Parallels Desktop. The process is remarkably straightforward and user-friendly.
Downloading Parallels Desktop: Your Gateway to Virtualization
- Visit the Official Website: Open your preferred web browser and navigate to the official Parallels Desktop website (parallels.com).
- Choose Your Edition: Select either “Download Free Trial” or “Buy Now,” depending on whether you’re testing the software or have already purchased a license. If you bought it, you’ll likely receive a download link via email or be directed to a download page.
- Initiate Download: Click the appropriate download button. The installer file, typically a
.dmg(disk image) file, will begin downloading to your Mac’sDownloadsfolder. The file size can be substantial (over 300MB), so ensure you have a stable internet connection.
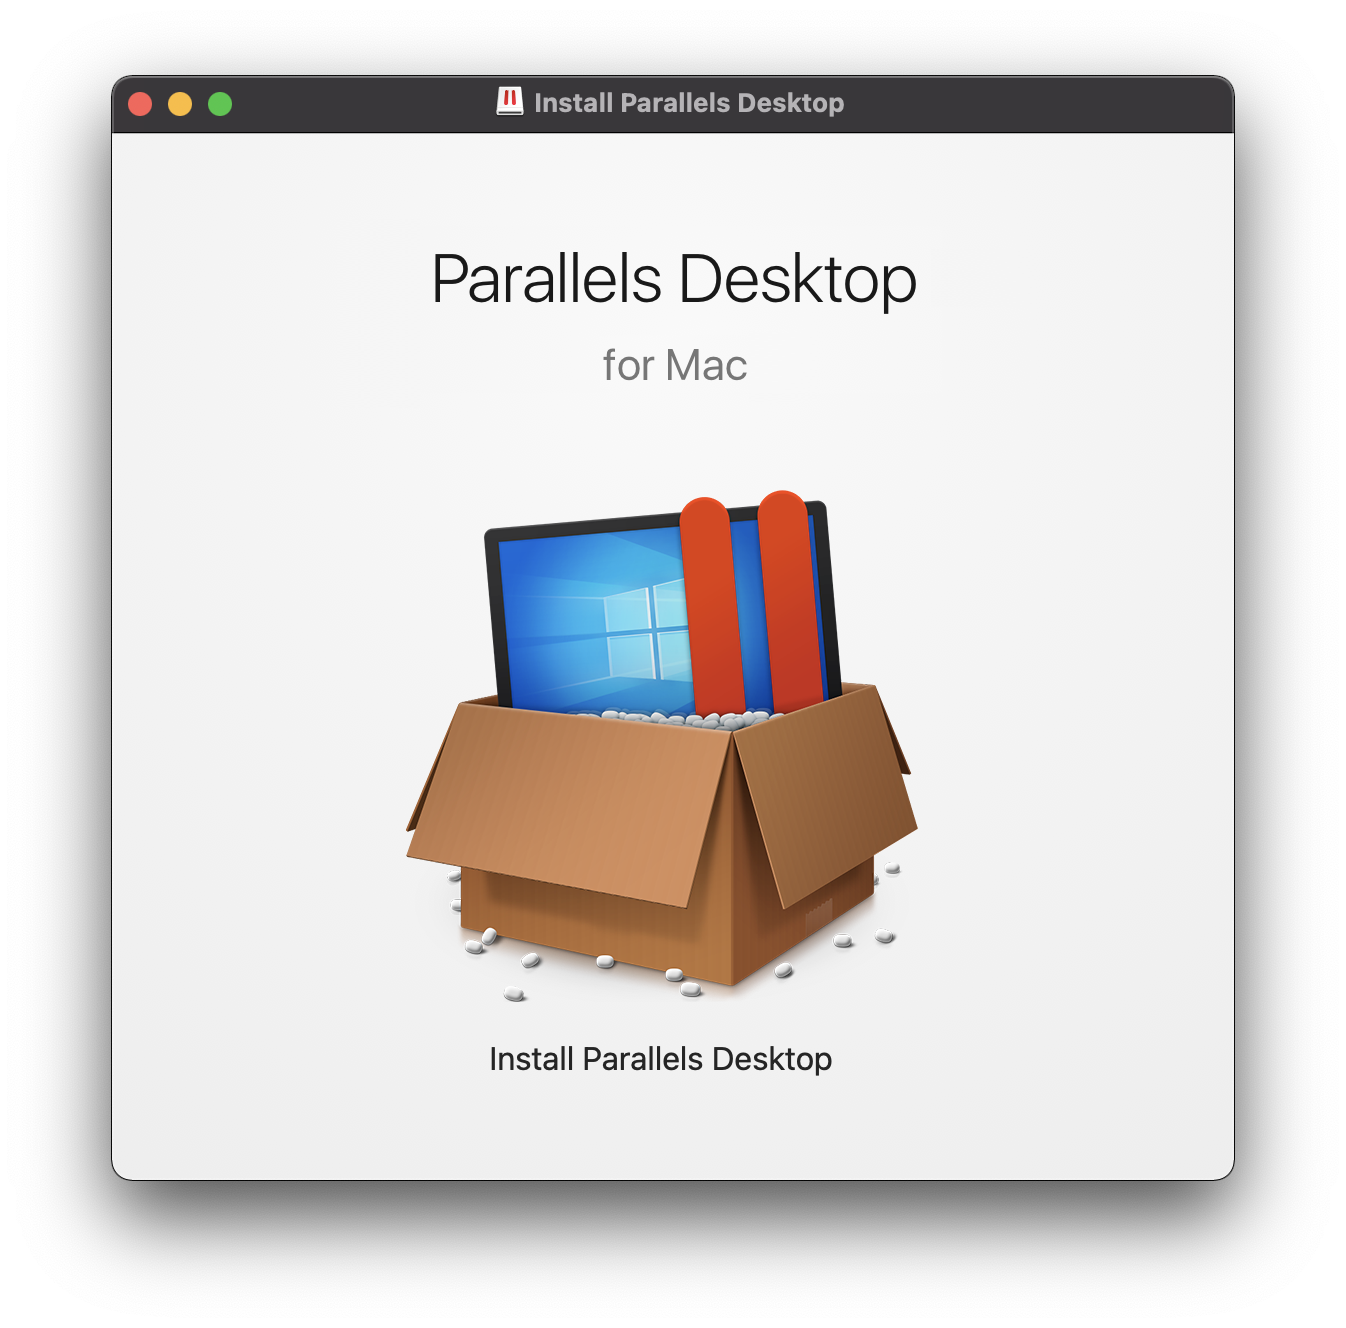
Running the Parallels Installer: A Walkthrough
Once the download is complete, the installation process for Parallels Desktop is much like installing any other Mac application.
- Mount the Disk Image: Locate the downloaded
.dmgfile (e.g.,ParallelsDesktop.dmg) in yourDownloadsfolder and double-click it. This will mount the disk image, opening a new Finder window. - Launch the Installer: Inside the mounted disk image window, you’ll typically see the Parallels Desktop icon and potentially an alias to your Applications folder. Double-click the “Install Parallels Desktop” icon or similar executable within the
.dmg. - Grant Permissions: macOS’s security features will prompt you to confirm that you want to open an application downloaded from the internet. Click “Open.” You may also be asked to enter your Mac’s administrator password.
- Accept Terms and Conditions: Read through the Parallels Desktop End-User License Agreement. If you agree, click “Accept.”
- Installation Progress: The installer will then begin copying the necessary files to your Applications folder and setting up the core components of Parallels Desktop. This process usually takes a few minutes.
Initial Setup and Permissions: Granting Access for Seamless Operation
After the initial file installation, Parallels Desktop needs specific permissions to function correctly and integrate deeply with macOS.
- System Extensions Blocked (Apple Silicon Macs): On Apple Silicon Macs (M1, M2, M3), you might encounter a message stating “System Extension Blocked.” This is a standard security measure. Follow the on-screen instructions carefully. You’ll likely need to go to
System Settings > Privacy & Security, scroll down, and allow system software from “Parallels International GmbH.” For some specific permissions, you might even need to restart your Mac into Recovery Mode to adjust your security policy, but Parallels usually guides you through this directly. - Accessibility, Full Disk Access, and Screen Recording: Parallels Desktop will request various permissions to function optimally, such as:
- Accessibility: To allow the virtual machine to interact with your mouse and keyboard seamlessly.
- Full Disk Access: To enable shared folders between macOS and Windows.
- Screen Recording: To facilitate features like Coherence mode, which blends Windows apps directly into your macOS desktop.
Carefully review and grant these permissions as prompted. You can manage them later inSystem Settings > Privacy & Securityif needed.
- Activate Your License: If you purchased a license, you’ll be prompted to enter your activation key. If you’re on a trial, you can usually proceed without a key for a limited period.
Installing Your First Virtual Machine: Windows on Demand
With Parallels Desktop successfully installed and activated, the next crucial step is to create your first virtual machine and install an operating system like Windows.
Choosing Your Operating System: Windows, Linux, or macOS
Parallels Desktop offers flexibility in installing various operating systems:
- Install Windows: This is the most common choice. Parallels Desktop is excellent at detecting Windows ISO files or even existing Windows installations.
- Install macOS: You can also run other versions of macOS in a VM, which is useful for testing or running older applications.
- Install Linux: Parallels supports popular Linux distributions like Ubuntu, Fedora, Debian, and more.
- Migrate from a PC: Parallels even provides tools to migrate an existing Windows installation from a physical PC directly into a virtual machine on your Mac.
For this guide, we’ll focus on installing Windows.
The Express Installation Process: Quick and Easy
Parallels Desktop excels at making the Windows installation process incredibly simple through its “Express Installation” feature.
- Launch Parallels Desktop: Open Parallels Desktop from your Applications folder or via Spotlight.
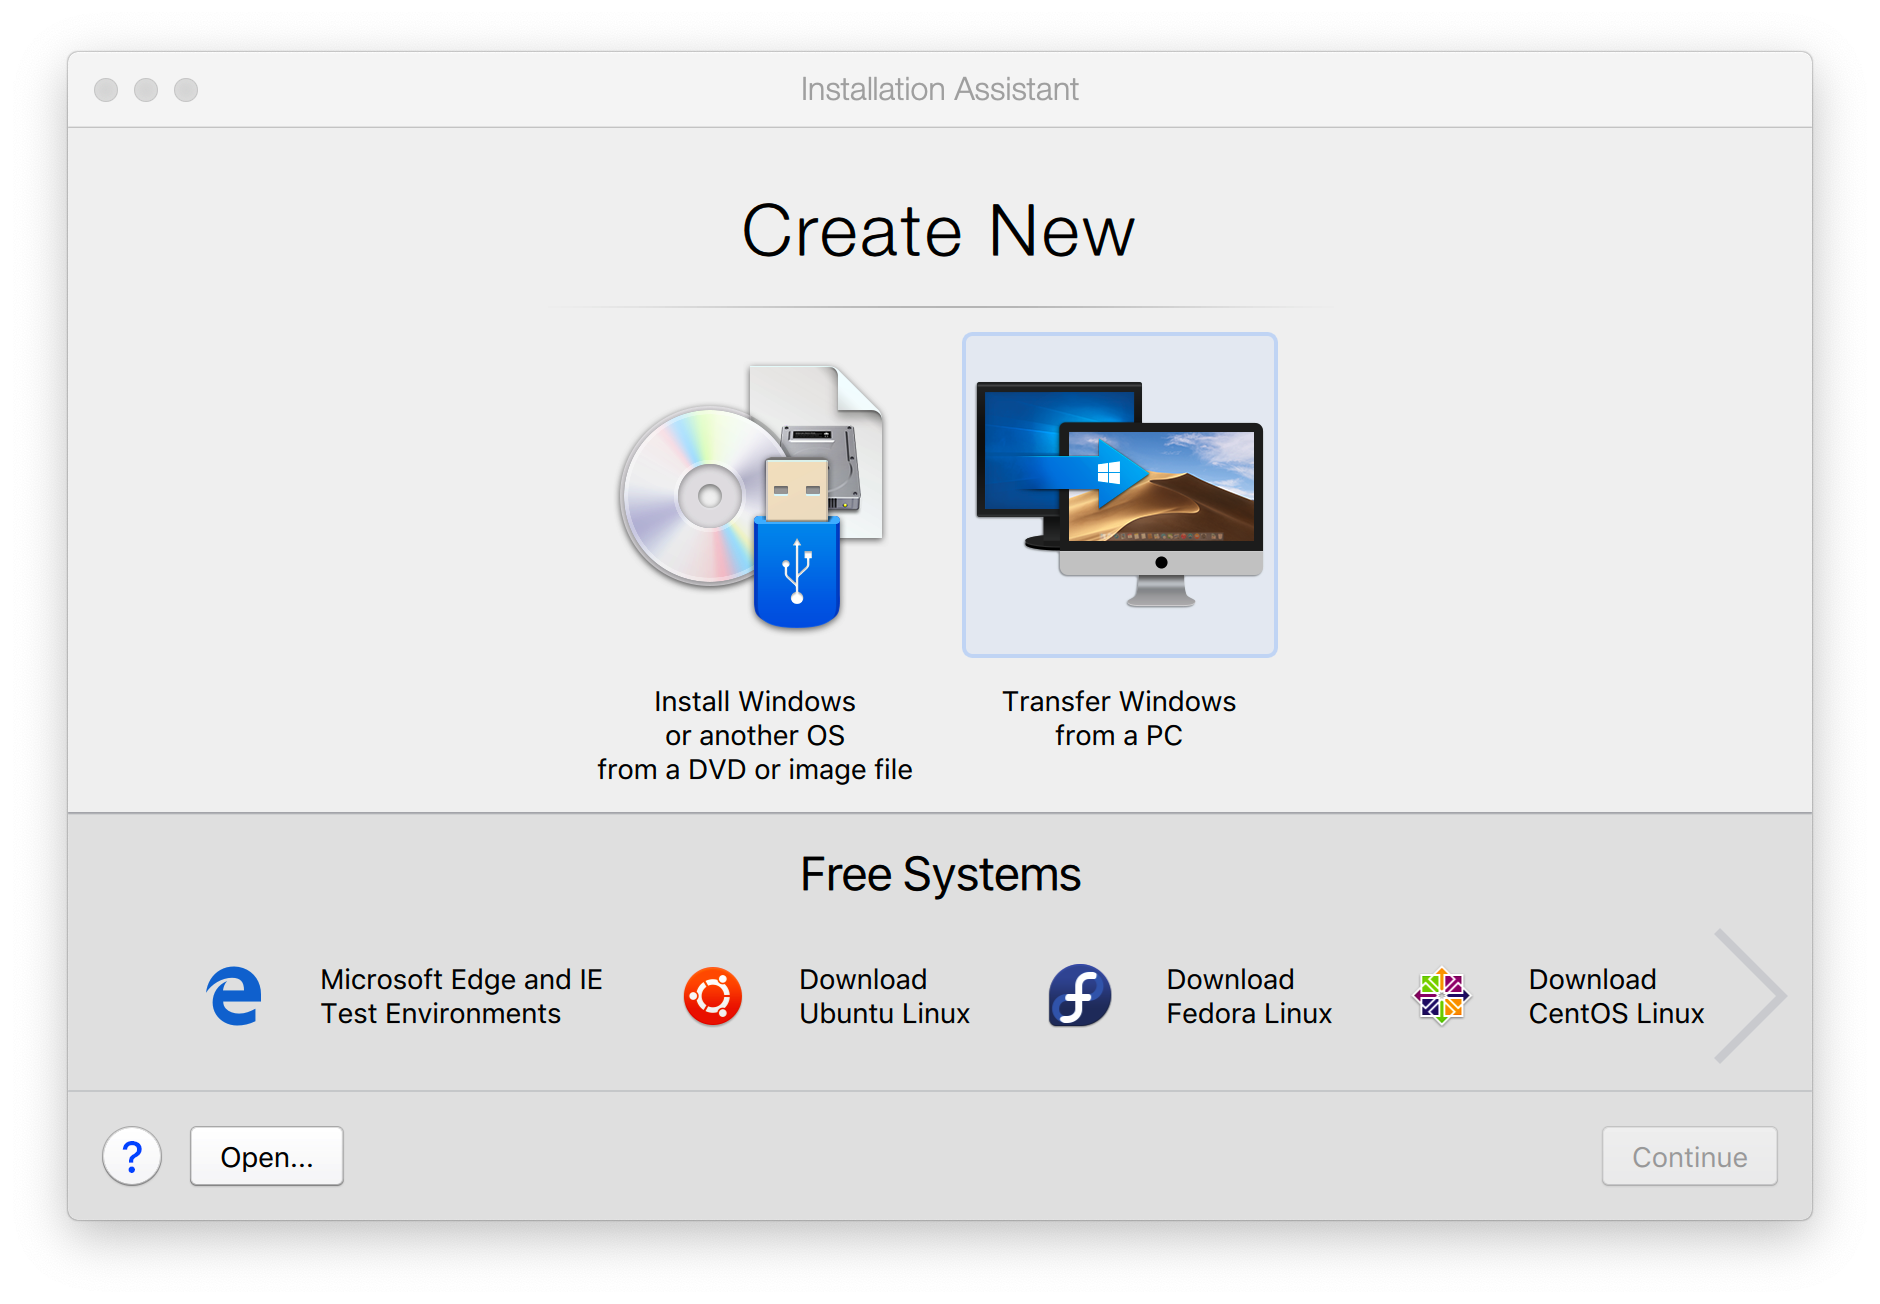
- New Virtual Machine Wizard: The first time you launch it, or if you click “File > New,” the New Virtual Machine wizard will appear.
- Select Installation Source: Parallels is intelligent. It will often automatically detect any Windows ISO files in your Downloads folder. If it doesn’t, you can click “Install Windows or another OS from a DVD or image file” and then “Select an Image File” to browse for your Windows ISO.
- Windows Product Key (Optional for Setup): The wizard will prompt you for your Windows product key. Entering it here allows for a fully automated installation without further intervention. If you don’t have it ready or prefer to activate later, you can click “Continue” and enter it once Windows is installed.
- Choose Your Edition (if applicable): If your ISO contains multiple Windows editions (e.g., Home, Pro), you’ll be asked to select your preferred version.
- Virtual Machine Name and Location: Give your virtual machine a descriptive name (e.g., “Windows 11”) and choose where to save its files on your Mac’s drive.
- Click “Create”: Parallels will now create the virtual machine, mount the Windows ISO, and begin the installation process automatically. You’ll see the standard Windows installation screens, but Parallels handles most of the clicks and settings behind the scenes. This express method significantly reduces setup time and complexity.
Customizing Your Virtual Machine: Tailoring Performance and Resources
While the Express Installation gets you up and running quickly, you might want to customize your VM’s settings for optimal performance based on your specific needs.
- Access VM Configuration: Before or after the Windows installation, you can access your VM’s configuration. With the VM selected in the Parallels Control Center, click the “gear” icon or go to
Actions > Configure. - General Tab: Here you can change the VM’s name, description, and icon.
- Hardware Tab: This is critical for performance:
- CPU & RAM: Allocate more CPU cores and RAM if you plan to run demanding applications within Windows. Remember to leave enough resources for macOS to run smoothly. A good rule of thumb is to dedicate half your Mac’s physical cores and half your RAM to the VM, though you can adjust this based on your Mac’s total resources.
- Hard Disk: You can expand the virtual hard disk size if needed.
- Graphics: Adjust video memory. For gaming or graphic-intensive tasks, allocate more.
- Network: Choose between “Shared Network” (most common, VM shares Mac’s IP) or “Bridged Network” (VM gets its own IP).
- USB & Bluetooth: Configure how USB devices and Bluetooth are shared between macOS and Windows.
- Options Tab:
- Sharing: Configure shared folders between macOS and Windows, enabling seamless file access. You can specify which macOS folders are accessible to Windows and vice-versa.
- Coherence Mode: Enable this feature for the ultimate integration, allowing Windows application windows to appear directly on your macOS desktop, as if they were native Mac apps.
- SmartMount: Automatically mount Mac volumes in Windows.
- Startup and Shutdown: Define how the VM behaves when Parallels Desktop starts or quits.
Experiment with these settings to find the optimal balance between VM performance and macOS responsiveness.
Understanding Parallels Tools: Enhancing Integration
After Windows has finished installing within the virtual machine, the next crucial step is to install Parallels Tools. This suite of drivers and utilities is essential for seamless integration and optimal performance.
- Automatic Prompt: Parallels Desktop usually prompts you to install Parallels Tools immediately after Windows is installed and running for the first time.
- Manual Installation: If not prompted, start your Windows VM, then go to the Parallels Desktop menu bar at the top of your Mac screen and select
Actions > Install Parallels Tools. - Run Installer: Inside the Windows VM, the Parallels Tools installer will appear as a virtual CD drive. Double-click to run it. Follow the on-screen prompts, which typically involve a few clicks and a VM restart.
Once Parallels Tools are installed, you’ll notice significant improvements:
- Smooth mouse movement between macOS and Windows.
- Shared clipboard (copy/paste between OSes).
- Drag and drop functionality for files.
- Dynamic resolution scaling (VM resolution adjusts to window size).
- Shared folders access.
- Enhanced graphics and network performance.
Optimizing Your Parallels Experience and Beyond
Installing Parallels Desktop and a Windows VM is just the beginning. To truly harness its power and ensure a smooth, efficient workflow, consider these optimization tips and additional insights.
Performance Tips for Your Virtual Machine
Maximizing the performance of your virtual machine involves a delicate balance of resource allocation and maintenance.
- Allocate Sufficient Resources (but don’t overdo it): As discussed, allocate enough CPU and RAM in the VM’s configuration, but avoid giving the VM all your Mac’s resources. macOS needs resources to run smoothly too. Start with half and adjust as needed.
- Use an SSD: If your Mac has a traditional hard drive, upgrading to an SSD will dramatically improve VM performance. Virtual machines involve constant disk I/O, and SSDs are vastly superior.
- Keep Windows Updated: Ensure your Windows VM is always up-to-date with the latest security patches and feature updates. Outdated OSes can be slow and vulnerable.
- Install Only What You Need: Avoid installing unnecessary software or bloatware in your Windows VM. Keep it lean to conserve disk space and resources.
- Disable Unnecessary Windows Features: Turn off features like Windows Search indexing for drives not actively used, visual effects, or background apps if they’re not critical for your workflow.
- Run Disk Cleanup and Defragmentation (for HDDs): Periodically run Windows’ built-in Disk Cleanup. If your VM is stored on an HDD (uncommon for modern Macs, but possible via external drives), defragmenting the virtual disk can help. For SSDs, defragmentation is unnecessary and potentially harmful.
- Snapshots: Use Parallels snapshots wisely. They’re great for creating restore points before major software installations or updates, but too many snapshots can consume significant disk space and slightly impact performance.
- Reclaim Disk Space: Parallels has a “Reclaim Disk Space” feature (under
Configure > Hardware > Hard Disk) that can shrink the virtual disk file on your Mac, reclaiming space that Windows no longer uses internally.
Managing Multiple Virtual Machines
Parallels Desktop allows you to create and manage multiple virtual machines, each with a different operating system or configuration. This is incredibly useful for developers, IT professionals, or users who need to test various software environments.
- Control Center: The Parallels Control Center (accessible from
Window > Control Centerin the menu bar) is your hub for managing all your VMs. You can start, stop, pause, clone, or delete VMs from here. - Cloning VMs: To save time, you can clone an existing VM. This is perfect for creating test environments without having to install an OS from scratch every time.
- Templates: Create a “golden image” VM with a clean OS and essential software, then use it as a template for future VMs.
Troubleshooting Common Issues
Even with a smooth installation, you might encounter minor issues. Here are a few common ones and their solutions:
- VM Won’t Start/Slow Performance:
- Check your Mac’s available RAM and CPU resources. Close other demanding macOS applications.
- Review the VM’s allocated CPU/RAM in its configuration.
- Ensure Parallels Tools are installed and up-to-date.
- Verify you have enough free disk space on your Mac.
- No Internet in VM:
- Check your Mac’s internet connection.
- In VM configuration (
Hardware > Network), ensure “Shared Network” or “Bridged Network” is selected and connected. - Run Windows network troubleshooter inside the VM.
- USB Device Not Detected:
- In VM configuration (
Hardware > USB & Bluetooth), ensure the device is set to connect to the VM (or ask each time). - Plug the USB device in after the VM has started.
- In VM configuration (
- “System Extension Blocked” (on Apple Silicon Macs):
- Revisit
System Settings > Privacy & Securityand explicitly allow the Parallels system software. You might need to temporarily lower security settings in Recovery Mode if prompted by Parallels.
- Revisit
- Windows Activation Issues:
- Double-check your Windows product key.
- Ensure your VM has an active internet connection to contact Microsoft’s activation servers.
Most issues can be resolved by checking the VM’s configuration, ensuring Parallels Tools are installed, and verifying your Mac’s system health. The Parallels knowledge base and support forums are excellent resources for more specific problems.
The Financial Advantage: Maximizing Your Investment
Beyond the technical convenience, using Parallels Desktop on your Mac offers tangible financial benefits. By allowing your single Mac to function as both a macOS and Windows machine, you avoid the significant expense of purchasing, maintaining, and upgrading a separate PC. This consolidation of hardware simplifies your tech setup and reduces your overall cost of ownership. For businesses, this translates into streamlined IT budgets, easier asset management, and increased employee flexibility. The ability to access critical Windows-only software without additional hardware expenditure maximizes the value derived from your existing Mac investment.

Conclusion: Harnessing the Full Potential of Your Mac
Installing Parallels Desktop on your Mac is a transformative step that unlocks a world of possibilities, blending the elegance and power of macOS with the versatility and broad software compatibility of Windows. By following this comprehensive guide, you’ve equipped your Mac to handle virtually any software challenge, enhancing your productivity, expanding your creative toolkit, and ensuring you’re prepared for whatever digital demands come your way.
From setting up your system for seamless virtualization to optimizing your virtual machines for peak performance, you now possess the knowledge to confidently navigate the dual operating system environment. Parallels Desktop is more than just a piece of software; it’s a bridge between worlds, empowering you to maximize your technological investment and elevate your digital experience. Embrace the flexibility, enjoy the expanded capabilities, and discover how truly limitless your Mac can be.
aViewFromTheCave is a participant in the Amazon Services LLC Associates Program, an affiliate advertising program designed to provide a means for sites to earn advertising fees by advertising and linking to Amazon.com. Amazon, the Amazon logo, AmazonSupply, and the AmazonSupply logo are trademarks of Amazon.com, Inc. or its affiliates. As an Amazon Associate we earn affiliate commissions from qualifying purchases.