In the rapidly evolving landscape of digital technology, Node.js stands out as a pivotal runtime environment for executing JavaScript code outside a web browser. Its adoption has soared among developers and enterprises alike, thanks to its non-blocking, event-driven architecture that makes it ideal for building scalable network applications, real-time services, APIs, and even command-line tools. Whether you’re a budding developer looking to master the foundations of modern web development, an experienced engineer aiming to optimize workflow, or a business owner keen on understanding the tools that drive innovation, installing Node.js is a crucial first step. This comprehensive guide will walk you through various installation methods, ensuring you get Node.js up and running on your system, ready to power your next project or deepen your understanding of the tech world.

Why Node.js Matters: A Foundation for Modern Web Development
Node.js isn’t just another programming tool; it’s a cornerstone of contemporary web development, fundamentally changing how applications are built and deployed. Its unique advantages make it an indispensable asset in a developer’s toolkit, contributing significantly to both personal growth and organizational success.
The Power and Versatility of Node.js
At its core, Node.js leverages Google Chrome’s V8 JavaScript engine, offering blazing-fast execution of JavaScript code. What makes it truly revolutionary is its ability to use JavaScript for both front-end (client-side) and back-end (server-side) development. This “JavaScript everywhere” paradigm streamlines development, reduces context switching, and allows for greater code reuse, leading to more efficient development cycles.
Its asynchronous, non-blocking I/O model is a game-changer for applications requiring high concurrency and real-time capabilities. Think of chat applications, streaming services, or collaborative tools – Node.js excels in these environments because it can handle many connections simultaneously without requiring extensive threading or complex synchronization mechanisms. This efficiency translates directly into faster, more responsive applications that can scale to meet growing user demands, a critical factor for any modern brand vying for user engagement and retention. Furthermore, the vast ecosystem of Node Package Manager (npm), the world’s largest software registry, provides developers with access to millions of open-source libraries, accelerating development and allowing teams to build sophisticated functionalities with remarkable speed.
Beyond Backend: How Node.js Shapes the Digital Landscape
While Node.js is famous for its prowess in backend development, its influence extends far beyond server-side logic. It’s used for building sophisticated frontend tooling (like Webpack, Babel, and Gulp), desktop applications (via Electron), and even embedded systems. This versatility means that learning Node.js doesn’t just open doors to backend roles; it enhances a developer’s overall marketability and provides a deeper understanding of the entire software development lifecycle.
For individuals, mastering Node.js can significantly boost career prospects and earning potential in the competitive tech job market. Companies are constantly seeking developers proficient in Node.js due to its efficiency and scalability benefits. For businesses, adopting Node.js can lead to faster time-to-market for new products and features, lower infrastructure costs due to its lightweight nature, and improved developer productivity. Leading brands like Netflix, LinkedIn, PayPal, and NASA leverage Node.js to power their critical infrastructure, showcasing its reliability and performance at an enterprise scale. Understanding how to install and utilize this technology is the first step towards participating in this powerful ecosystem, whether you’re aiming to build the next big app or simply optimize existing digital processes.
Preparing for Installation: Essential Prerequisites
Before diving into the installation process, it’s wise to ensure your system is prepared. A little preliminary setup can save you considerable troubleshooting later on.
Understanding Your Operating System
Node.js is cross-platform, meaning it runs on Windows, macOS, and various Linux distributions. The installation method can vary slightly depending on your operating system, primarily due to how each OS manages software packages and environment variables. Knowing your OS version (e.g., Windows 10/11, macOS Ventura/Sonoma, Ubuntu 22.04 LTS) will help you choose the most appropriate and stable installation method. Generally, it’s recommended to have an up-to-date version of your operating system to ensure compatibility and access to the latest security patches.
Command Line Basics: Your Gateway to Node.js
While some installation methods involve graphical installers, working with Node.js and its package manager (npm) extensively requires familiarity with the command line interface (CLI). This includes knowing how to:
- Open a terminal/command prompt:
- Windows: Search for “cmd” or “PowerShell” in the Start menu.
- macOS: Search for “Terminal” in Spotlight (Cmd + Space) or find it in Applications > Utilities.
- Linux: Typically accessible via Ctrl + Alt + T or by searching for “Terminal” in your applications menu.
- Navigate directories: Using commands like
cd(change directory). - Execute commands: Typing commands and pressing Enter.
- Understand environment variables: Especially the
PATHvariable, which tells your system where to find executable programs. Node.js installers typically handle this for you, but it’s good to be aware of its function for advanced configurations or troubleshooting.
Even if you’re new to the command line, don’t worry. The commands for Node.js are straightforward, and this guide will provide them clearly. Think of the command line as your direct conversation channel with the computer, a fundamental skill that significantly enhances your productivity in the tech realm.
Comprehensive Installation Methods for Node.js
There are several reliable ways to install Node.js, each with its own advantages. We’ll cover the most popular and recommended methods, allowing you to choose the one that best suits your comfort level and specific needs.
Method 1: Utilizing Official Installers (Windows, macOS)
This is often the simplest method for beginners, as it provides a guided graphical interface to install Node.js and npm (which comes bundled with Node.js).
-
Download the Installer:
- Visit the official Node.js website: https://nodejs.org/
- You’ll typically see two download options:
- LTS (Long Term Support) version: This is the recommended version for most users and production environments due to its stability and extended support.
- Current version: This includes the latest features but might be less stable and is intended for active development and testing.
- Download the appropriate installer for your operating system (e.g.,
.msifor Windows,.pkgfor macOS).
-
Run the Installer:
- Windows: Double-click the
.msifile. The Node.js Setup Wizard will appear.- Click “Next” on the welcome screen.
- Accept the end-user license agreement and click “Next.”
- Choose the destination folder (the default is usually fine) and click “Next.”
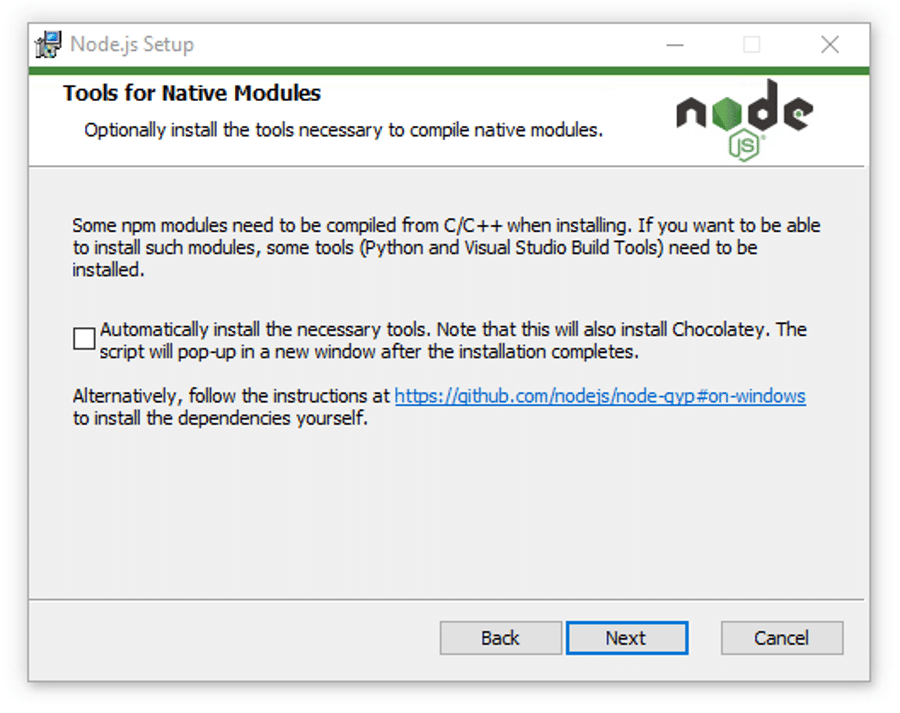
- On the “Custom Setup” screen, ensure “Node.js runtime,” “npm package manager,” and “Add to PATH” are selected. The “Tools for Native Modules” option can be useful if you plan to compile native add-ons, but it’s not strictly necessary for basic Node.js development. Click “Next.”
- Click “Install” to begin the installation. You might be prompted for administrator permissions.
- Once finished, click “Finish.”
- macOS: Double-click the
.pkgfile. The Node.js Installer will guide you.- Click “Continue” on the introduction.
- Read and agree to the license agreement.
- Choose the installation location (default is fine) and click “Install.”
- You’ll likely need to enter your macOS password to authorize the installation.
- Once complete, click “Close.”
- Windows: Double-click the
This method ensures that Node.js and npm are correctly installed and added to your system’s PATH environment variable, making them accessible from any terminal window.
Method 2: Streamlined Installation with Package Managers (macOS Homebrew, Windows Chocolatey, Linux apt/yum)
For users comfortable with the command line, package managers offer a more elegant and often preferred way to install and manage software. They simplify updates and dependency management.
macOS Homebrew
Homebrew is the unofficial package manager for macOS, widely regarded as essential for developers.
-
Install Homebrew (if you haven’t already):
Open your Terminal and run:/bin/bash -c "$(curl -fsSL https://raw.githubusercontent.com/Homebrew/install/HEAD/install.sh)"Follow the on-screen instructions, which may include installing Xcode Command Line Tools and entering your password.
-
Install Node.js with Homebrew:
Once Homebrew is installed, simply run:brew install nodeHomebrew will download and install the latest stable version of Node.js and npm.
-
Update Node.js (later):
To update Node.js using Homebrew in the future, run:
bash

brew update

brew upgrade node
Windows Chocolatey
Chocolatey is a robust package manager for Windows, akin to Homebrew for macOS.
-
Install Chocolatey (if you haven’t already):
Open PowerShell as an Administrator. Run the following command:Set-ExecutionPolicy Bypass -Scope Process -Force; [System.Net.ServicePointManager]::SecurityProtocol = [System.Net.ServicePointManager]::SecurityProtocol -bor 3072; iex ((New-Object System.Net.WebClient).DownloadString('https://community.chocolatey.org/install.ps1'))Ensure you see “Chocolatey installed successfully!” before proceeding.
-
Install Node.js with Chocolatey:
In your Administrator PowerShell window, run:choco install nodejs-ltsThe
nodejs-ltspackage installs the Long Term Support version, which is generally recommended. -
Update Node.js (later):
To update Node.js using Chocolatey:
powershell

choco update nodejs-lts
Linux apt/yum (Debian/Ubuntu & CentOS/Fedora)
For Linux users, your distribution’s native package manager is a reliable choice.
-
For Debian/Ubuntu-based systems (using
apt):
It’s recommended to use NodeSource repositories for more up-to-date versions of Node.js than what’s often available in the defaultaptrepositories.-
Add NodeSource repository:
curl -fsSL https://deb.nodesource.com/setup_lts.x | sudo -E bash -(Replace
lts.xwith a specific major version like18.xor20.xif you need an older LTS). -
Install Node.js:
bash

sudo apt-get install -y nodejs
-
-
For CentOS/Fedora-based systems (using
yum/dnf):
Similar to Debian/Ubuntu, using NodeSource is generally preferred.- Add NodeSource repository:
bash

curl -fsSL https://rpm.nodesource.com/setup_lts.x | sudo -E bash -
(Again, replacelts.xas needed).
- Add NodeSource repository:

2.  **Install Node.js:**
    ```bash
    sudo yum install -y nodejs # For CentOS/RHEL 7
    sudo dnf install -y nodejs # For Fedora/CentOS 8+
    ```
Method 3: The Flexibility of Node Version Manager (NVM)
Node Version Manager (NVM) is arguably the most recommended installation method for developers, especially those who work on multiple projects that might require different Node.js versions. NVM allows you to install, switch between, and manage multiple Node.js versions on the same machine without conflicts. This flexibility is invaluable for maintaining compatibility across diverse projects and exploring new Node.js features without impacting stable environments.
Installing NVM
The installation process for NVM is similar across macOS and Linux, involving a simple script. For Windows, there’s a separate, community-maintained project called nvm-windows.
-
For macOS and Linux:
- Open your Terminal.
- Download and run the installation script:
bash

curl -o- https://raw.githubusercontent.com/nvm-sh/nvm/v0.39.7/install.sh | bash
(Always check the NVM GitHub page for the latest version number to replacev0.39.7). - Configure NVM in your shell: The script will attempt to add NVM’s sourcing lines to your shell’s profile file (e.g.,
~/.bashrc,~/.zshrc,~/.profile). You might need to close and reopen your terminal or manually runsource ~/.bashrc(or your respective profile file) for NVM to be available. - Verify NVM installation:
bash

nvm --version
You should see the NVM version number. If not, double-check the sourcing steps.
-
For Windows (nvm-windows):
- Uninstall any existing Node.js installations before proceeding, as
nvm-windowsmanages its own installations. - Visit the
nvm-windowsGitHub repository releases page: https://github.com/coreybutler/nvm-windows/releases - Download the
nvm-setup.zipfile from the latest release. - Extract the ZIP file and run the
nvm-setup.exeinstaller. Follow the wizard. The installer will prompt for installation locations for NVM and where Node.js versions will be stored. - Verify NVM installation: Open a new command prompt or PowerShell window (as Administrator if you installed with admin rights) and run:
bash

nvm version
You should see thenvm-windowsversion.
- Uninstall any existing Node.js installations before proceeding, as
Managing Node.js Versions with NVM
Once NVM is installed, managing Node.js versions becomes incredibly straightforward:
-
List available Node.js versions:
nvm ls-remoteThis command displays a long list of all Node.js versions available for installation.
-
Install a specific Node.js version:
To install the latest LTS version:nvm install ltsTo install a specific version (e.g., 20.10.0):
nvm install 20.10.0To install the latest stable version:
nvm install node -
List installed Node.js versions:
nvm lsThis shows all versions you have installed and indicates which one is currently active.
-
Switch between Node.js versions:
nvm use 20.10.0This command activates the specified version for your current terminal session.
-
Set a default Node.js version:
bash

nvm alias default 20.10.0
This sets a particular version to be used automatically in new terminal sessions.
NVM is a powerful tool for developers who juggle multiple projects, offering the agility to adapt to different version requirements without system-wide conflicts. This is particularly beneficial for organizations managing a diverse portfolio of applications built on varying Node.js versions, streamlining development and ensuring project compatibility.
Verifying Your Node.js Installation and Taking the First Steps
After completing the installation using any of the methods above, it’s crucial to verify that Node.js and npm are correctly installed and accessible from your system’s command line.
Confirming Node.js and npm Are Ready
Open a new terminal or command prompt window (don’t use one that was open during the installation, as it might not have the updated PATH environment variable).
-
Check Node.js version:
node -vYou should see the installed Node.js version number (e.g.,
v20.10.0). -
Check npm version:
bash

npm -v
You should see the installed npm version number (e.g.,10.2.3). npm is always bundled with Node.js, so if Node.js is installed, npm should be too.
If both commands return version numbers without errors, congratulations! Node.js and npm are successfully installed on your system. This confirmation is not just a formality; it signifies that your development environment is correctly configured, laying the groundwork for more complex coding challenges and allowing you to start building the next generation of applications.
Your First Node.js Application: A Simple “Hello World”
To truly confirm your installation and take the first step into Node.js development, let’s create a classic “Hello World” program.
-
Create a new directory for your project and navigate into it:
mkdir my-first-node-app cd my-first-node-app -
Create a new file named
app.js(orindex.js) using a text editor or your IDE (VS Code, Sublime Text, Atom, etc.). -
Add the following JavaScript code to
app.js:console.log("Hello, Node.js World!"); -
Save the file.
-
Run the application from your terminal in the
my-first-node-appdirectory:
bash

node app.js
You should see Hello, Node.js World! printed in your terminal. This simple exercise confirms that Node.js can execute JavaScript files on your system. This foundational step is paramount, marking the transition from installation to active development, a key milestone for anyone delving into technology trends and software creation.
Troubleshooting Common Installation Issues and Best Practices
While Node.js installation is generally smooth, you might occasionally encounter issues. Knowing how to troubleshoot and follow best practices can save significant time and frustration.
Resolving PATH Environment Variable Problems
The most common installation issue, especially after manual installations or if using specific command prompts, is that the node and npm commands are not recognized. This usually points to an issue with your system’s PATH environment variable.
- Symptoms:
node: command not foundor'node' is not recognized as an internal or external command. - Solution:
- Reinstall using an official installer or NVM: These methods are designed to correctly configure your
PATH. - Manually add Node.js to PATH:
- Windows: Search for “Environment Variables” in the Start menu. Click “Edit the system environment variables” > “Environment Variables…” > Under “System variables,” find
Path, select it, and click “Edit…” > Click “New” and add the path to your Node.js installation directory (e.g.,C:Program Filesnodejs). Make sure to restart your terminal/PowerShell after making changes. - macOS/Linux: Open your shell configuration file (
~/.bashrc,~/.zshrc,~/.profile). Add a line likeexport PATH="/usr/local/bin:$PATH"if Node.js is in/usr/local/bin(common for Homebrew installs). For NVM, ensure NVM’s sourcing lines are correctly added and active. Remember tosourcethe file or reopen your terminal.
- Windows: Search for “Environment Variables” in the Start menu. Click “Edit the system environment variables” > “Environment Variables…” > Under “System variables,” find
- For
nvm-windowsusers: If you’re still having PATH issues, ensure you installed it as an administrator and that no other Node.js installations are conflicting.nvm-windowsmanages its own PATH entries.
- Reinstall using an official installer or NVM: These methods are designed to correctly configure your
Keeping Node.js Updated and Secure
Regularly updating Node.js and npm is a crucial best practice for security, performance, and access to new features.
- Using NVM: This is the easiest for updates. Simply install the new version (
nvm install lts), then switch to it (nvm use lts). You can remove older versions once you’re sure you no longer need them (nvm uninstall <version>). - Using Package Managers (Homebrew, Chocolatey, apt/yum): Refer to the update commands provided in Method 2 (e.g.,
brew upgrade node,choco update nodejs-lts,sudo apt-get update && sudo apt-get upgrade nodejs). - Using Official Installers: Download and run the latest installer from the Node.js website. It will typically upgrade your existing installation.
Beyond Node.js itself, it’s vital to keep your npm packages updated. Regularly running npm audit and npm update within your projects helps fix known security vulnerabilities and ensures you’re leveraging the latest bug fixes and features from your dependencies. This proactive approach to updates is a hallmark of robust digital security practices and contributes to the overall “health” and longevity of your software projects. For businesses, maintaining up-to-date software minimizes security risks and ensures compliance, protecting both brand reputation and financial assets.
Conclusion: Empowering Your Development Journey with Node.js
The installation of Node.js marks a significant milestone in your journey through the ever-expanding world of technology. Whether you chose the straightforward official installer, the elegant simplicity of a package manager, or the versatile control offered by a Node Version Manager, you’ve now equipped your system with a powerful, flexible, and highly efficient runtime environment.
Node.js is more than just a tool; it’s a gateway to building dynamic web applications, scalable APIs, real-time services, and a plethora of other digital solutions that shape our modern world. Its “JavaScript everywhere” paradigm fosters efficiency, making it a favorite for startups and established enterprises alike, keen on optimizing their development processes and time-to-market.
By successfully installing Node.js, you’ve not only adopted a critical piece of modern software but also invested in your own digital literacy and potential. For developers, this translates into expanded career opportunities and the ability to contribute to cutting-edge projects. For businesses, it means unlocking the potential for faster development cycles, improved application performance, and a more robust digital infrastructure.
As you move forward, embrace the vast npm ecosystem, explore popular frameworks like Express.js and NestJS, and delve into database integration. The Node.js community is vibrant and supportive, offering countless resources for learning and problem-solving. Your first “Hello World” application is just the beginning. The world of Node.js is ripe with possibilities, ready for you to build, innovate, and contribute to the next wave of technological advancements.
aViewFromTheCave is a participant in the Amazon Services LLC Associates Program, an affiliate advertising program designed to provide a means for sites to earn advertising fees by advertising and linking to Amazon.com. Amazon, the Amazon logo, AmazonSupply, and the AmazonSupply logo are trademarks of Amazon.com, Inc. or its affiliates. As an Amazon Associate we earn affiliate commissions from qualifying purchases.