Node.js has revolutionized the way we approach web development, bridging the gap between client-side and server-side programming. For macOS users—who often comprise a significant portion of the global developer community—setting up a robust Node.js environment is usually the first step toward building modern, scalable applications. Whether you are a seasoned software engineer or a student embarking on your first JavaScript project, knowing how to properly install and manage Node.js on your Mac is essential.
In this guide, we will explore the various methods of installation, ranging from simple installers to sophisticated version managers, while delving into the technical nuances that make macOS a premier platform for JavaScript development.
Understanding the Node.js Ecosystem on macOS
Before diving into the installation steps, it is vital to understand what Node.js is and why the installation method you choose matters. Node.js is a cross-platform, open-source JavaScript runtime environment that executes JavaScript code outside a web browser. Built on Chrome’s V8 JavaScript engine, it utilizes an event-driven, non-blocking I/O model that makes it lightweight and efficient.
On macOS, developers have several paths to get Node.js up and running. While it might be tempting to simply download the first file you see, your choice affects how you will manage dependencies, update your software, and handle different project requirements in the future.
The Importance of NPM and NPX
When you install Node.js, you aren’t just getting the runtime; you are also getting NPM (Node Package Manager). NPM is the world’s largest software registry, containing hundreds of thousands of reusable code packages. Alongside it, you typically get NPX, a package runner that allows you to execute binaries from the NPM registry without permanently installing them. Understanding these tools is crucial because they form the backbone of the “Tech” workflow in JavaScript development.
Apple Silicon vs. Intel Architectures
Modern Macs run on either Intel processors or Apple’s own M-series chips (M1, M2, M3). This distinction is important for software installation. Fortunately, Node.js has provided native support for Apple Silicon since version 15. When choosing an installation method, ensuring compatibility with your specific architecture ensures peak performance and prevents issues related to Rosetta 2 translation.
Method 1: Installing via the Official Node.js Installer
The most straightforward method for beginners is using the macOS Installer (.pkg) provided by the official Node.js website. This method is “plug-and-play” and requires minimal interaction with the terminal.
Step-by-Step Guide to the .pkg Installer
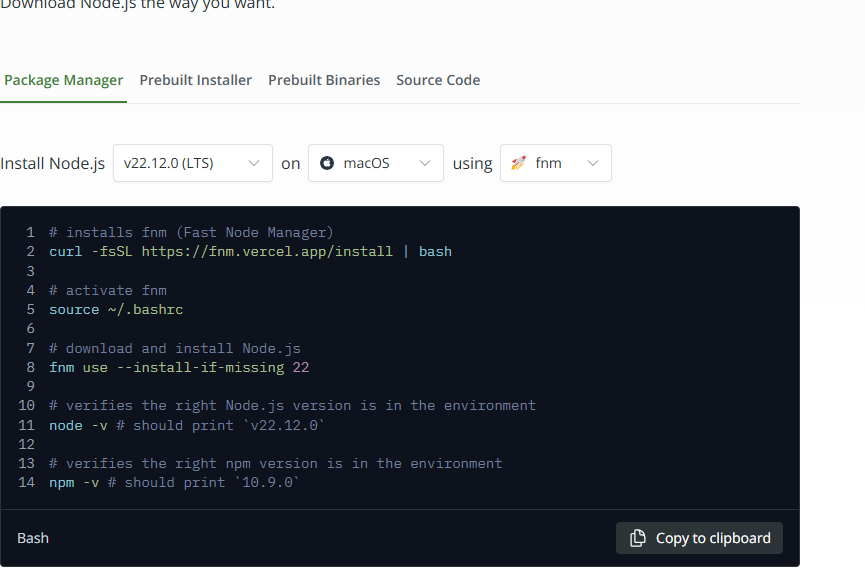
To begin, navigate to the official Node.js website. You will be presented with two versions: LTS (Long Term Support) and Current. For most users and production environments, the LTS version is recommended because it is tested for stability and security.
- Download: Click on the macOS Installer (.pkg) for the LTS version.
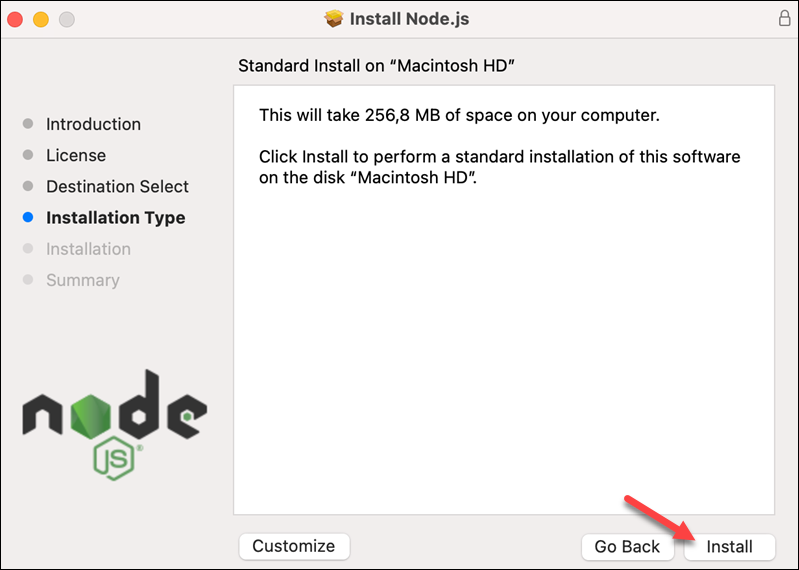
- Execution: Open the downloaded file to launch the installation wizard.
- Authentication: Follow the prompts, accept the license agreement, and enter your Mac’s administrator password when requested.
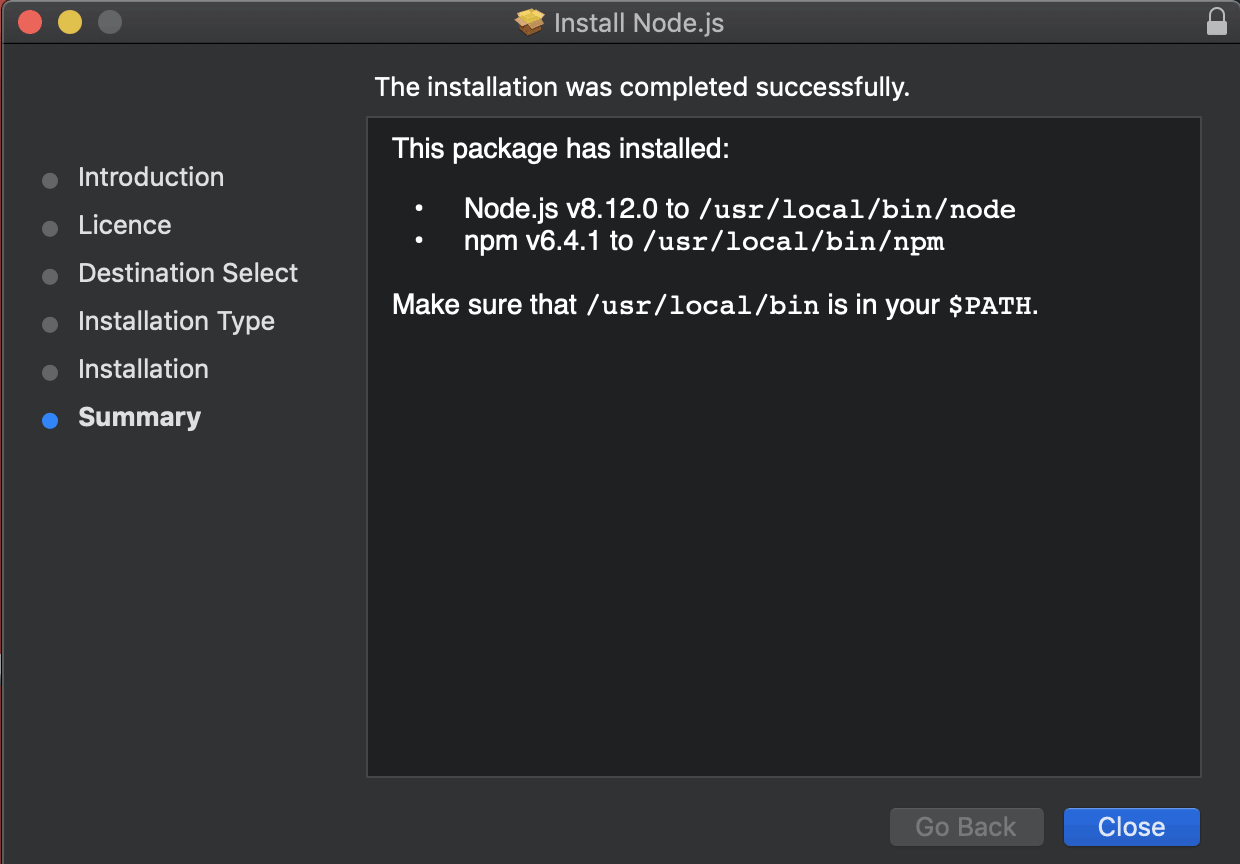
- Completion: The installer will place the Node.js binary and NPM in your
/usr/local/bindirectory.
Pros and Cons of the Direct Installer
While this is the easiest route, it has a significant drawback: permission management. Because the installer places files in system-protected directories, you might encounter “EACCES” errors later when trying to install global packages. Developers often find themselves forced to use sudo, which is a security risk and can lead to corrupted file permissions in your development environment.
Method 2: Using Homebrew for Streamlined Management
For many macOS users, Homebrew is the “missing package manager for macOS.” It simplifies the installation of software by handling dependencies and keeping binaries neatly organized within the /opt/homebrew (on Apple Silicon) or /usr/local (on Intel) directories.
Setting Up Homebrew
If you don’t have Homebrew installed, you can set it up by pasting the installation script from the official Homebrew website into your Terminal. Once Homebrew is ready, installing Node.js becomes a single-command process.
Installing Node.js via Terminal
To install Node.js using Homebrew, open your Terminal and type:
brew install node
This command fetches the latest stable version of Node.js. One of the primary advantages of using Homebrew is the ease of updates. Instead of manually downloading a new installer every few months, you can simply run brew update followed by brew upgrade node to keep your environment current.
Managing Versions with Homebrew
Homebrew also allows you to install specific versions if the latest one isn’t compatible with your project. For example, to install Node.js 18, you would use:
brew install node@18
Afterward, you must link the version to your path so the system recognizes it as the default. This flexibility makes Homebrew a favorite among developers who prefer a clean, command-line-centric workflow.
Method 3: The Professional Choice – Node Version Manager (NVM)
In a professional tech environment, you rarely work on just one project. You might have a legacy project that requires Node.js 14 and a cutting-edge application that requires Node.js 20. Switching between these versions manually is a nightmare. This is where NVM (Node Version Manager) shines.
Why NVM is the Industry Standard
NVM allows you to install multiple versions of Node.js on a single machine and switch between them instantly. It operates within your user directory, meaning you never have to use sudo to install global packages. This circumvents the permission issues found in the .pkg installer method.
Installing and Configuring NVM
To install NVM, you typically use a cURL or Wget script found on the NVM GitHub repository. Once the script runs, you need to add the NVM configuration to your shell profile (usually .zshrc for modern macOS versions).
- Install NVM: Run the install script in your terminal.
- Update Profile: Ensure your
.zshrcfile contains the exports that point to the NVM directory. - Verify: Type
command -v nvmto ensure it is installed.
Operating NVM
With NVM installed, managing versions becomes intuitive:
- To install the latest LTS version:
nvm install --lts - To install a specific version:
nvm install 16.14.0 - To switch versions:
nvm use 18 - To set a default version:
nvm alias default 20
This granular control is why NVM is considered the gold standard for software engineers and DevOps professionals working on macOS.
Post-Installation: Verification and Environment Setup
Regardless of the method you chose, verifying the installation is a critical final step. This ensures that the paths are correctly configured and that your terminal can communicate with the Node.js runtime.
Verifying the Installation
Open your Terminal and run the following commands:
node -vnpm -v
If successful, the terminal will return version numbers (e.g., v20.10.0). If you receive a “command not found” error, it usually means your shell’s PATH variable was not updated correctly, a common issue that can be fixed by restarting the terminal or manually editing your .zshrc or .bash_profile.
Configuring Your Development Environment
Once Node.js is active, you should consider the global packages that will aid your development. Tools like nodemon (for auto-restarting applications during development) or typescript (for type-safe JavaScript) are often installed globally.
With NVM, you can simply run:
npm install -g nodemon
This adds the tool to your current Node.js version’s environment, keeping your system clean and organized.
Best Practices for Maintaining Node.js on Mac
Installation is just the beginning. To maintain a healthy development environment, you should follow tech best practices regarding updates and security.
Regular Updates and Security Audits
The Node.js community is highly active, frequently releasing security patches. If you use Homebrew or NVM, checking for updates monthly is a good habit. Furthermore, when working on specific projects, use the npm audit command. This tool scans your project’s dependencies for known vulnerabilities and provides suggestions for fixes, ensuring that the applications you build are secure from the ground up.
Avoiding Common Pitfalls
One of the most frequent mistakes is mixing installation methods—for example, installing Node via the .pkg installer and then trying to manage it with Homebrew. This creates path conflicts that can lead to unpredictable behavior. Stick to one method. If you decide to switch to NVM (which is highly recommended), make sure to uninstall any existing versions of Node.js first to ensure a clean slate.
By following these professional guidelines, your macOS machine will serve as a powerful, efficient workstation for any Node.js project. Whether you’re building a small script or a massive enterprise-level backend, a solid installation is the foundation of your success in the tech world.
aViewFromTheCave is a participant in the Amazon Services LLC Associates Program, an affiliate advertising program designed to provide a means for sites to earn advertising fees by advertising and linking to Amazon.com. Amazon, the Amazon logo, AmazonSupply, and the AmazonSupply logo are trademarks of Amazon.com, Inc. or its affiliates. As an Amazon Associate we earn affiliate commissions from qualifying purchases.