Node.js has become an indispensable tool for modern web development, powering everything from server-side applications and APIs to command-line tools and frontend build processes. Its asynchronous, event-driven architecture makes it highly efficient for building scalable network applications. If you’re a Windows user looking to dive into the world of Node.js development, this comprehensive guide will walk you through the installation process, covering everything you need to know to get started.
Whether you’re a seasoned developer looking to expand your toolkit, a budding entrepreneur exploring new tech ventures, or a student eager to learn cutting-edge technologies, understanding how to install and manage Node.js on your Windows machine is a crucial first step. This guide is designed to be accessible, providing clear instructions and explanations that cater to various levels of technical expertise. We’ll cover the standard installation method, essential considerations, and how to verify your installation, ensuring you’re ready to start building your next project.
The world of technology is constantly evolving, and Node.js is at the forefront of many exciting advancements. From AI tools that are revolutionizing how we work to productivity apps that streamline our daily tasks, the underlying infrastructure often relies on robust platforms like Node.js. By mastering its installation and basic usage, you’re not just learning a new skill; you’re equipping yourself with a powerful asset in the ever-growing tech landscape.
Understanding Node.js and Its Significance in the Tech Ecosystem
Before we jump into the installation process, it’s important to understand what Node.js is and why it has gained such immense popularity.
What is Node.js?
Node.js is not a programming language itself; rather, it is a JavaScript runtime environment. This means it allows you to run JavaScript code outside of a web browser. Traditionally, JavaScript was confined to the frontend, executing in the user’s browser to add interactivity and dynamic features to web pages. Node.js breaks this limitation by providing a server-side environment, enabling developers to use JavaScript for backend development, build APIs, create command-line tools, and even develop desktop applications.
At its core, Node.js is built on Chrome’s V8 JavaScript engine, the same engine that powers Google Chrome. This means it benefits from the engine’s high performance and continuous optimization. Node.js also employs a non-blocking, event-driven I/O model, which makes it exceptionally well-suited for handling a large number of concurrent connections with high throughput. This efficiency is a key reason why many large-scale applications and services opt for Node.js.
Why is Node.js Important?
The significance of Node.js in the modern tech ecosystem cannot be overstated. Here are some key reasons:
- Full-Stack JavaScript: Node.js enables developers to use a single programming language (JavaScript) for both frontend and backend development. This “JavaScript everywhere” paradigm streamlines development workflows, reduces context switching, and allows for code sharing between the client and server. This is a massive advantage for productivity and team collaboration.
- Scalability and Performance: Its event-driven, non-blocking I/O model makes Node.js incredibly efficient for I/O-bound operations, such as handling network requests and database queries. This allows applications built with Node.js to scale effectively and handle a large volume of traffic without significant performance degradation.
- Vast Ecosystem (NPM): Node.js comes with npm (Node Package Manager), the largest ecosystem of open-source libraries and packages in the world. With millions of packages available, npm significantly accelerates development by providing pre-built solutions for almost any task, from web frameworks and database drivers to utility tools and testing libraries. This vast community-driven repository is a testament to Node.js’s widespread adoption.
- Community Support: Node.js boasts a massive and active community of developers. This means abundant resources, tutorials, forums, and readily available help when you encounter issues. The vibrant community actively contributes to the development and improvement of Node.js and its associated packages.
- Versatility: Node.js is used for a wide range of applications:
- Web Servers and APIs: Building robust and scalable backend services.
- Real-time Applications: Powering chat applications, online gaming, and collaborative tools.
- Command-Line Tools: Creating custom scripts and utilities for development workflows.
- Desktop Applications: Using frameworks like Electron.
- Microservices: Building modular and independently deployable services.
- Internet of Things (IoT): Developing applications for connected devices.
For anyone interested in tech trends, software development, or even building their own digital products, understanding Node.js is an investment in valuable skills. Its ubiquity means that proficiency in Node.js can open doors to numerous career opportunities and empower you to bring your innovative ideas to life.
Installing Node.js on Windows: The Official Way
The most straightforward and recommended method for installing Node.js on Windows is by using the official installer provided by the Node.js project. This method ensures you get a stable and well-supported version of Node.js and its package manager, npm.
Downloading the Node.js Installer
- Visit the Official Node.js Website: Open your web browser and navigate to the official Node.js download page: https://nodejs.org/en/download/.
- Choose Your Version: On the download page, you will see two primary download options for Windows:
- LTS (Long Term Support): This is the recommended version for most users. LTS releases are the most stable and receive long-term support, meaning they are well-tested and receive security updates and bug fixes for an extended period. If you are new to Node.js or planning to build production applications, always opt for the LTS version.
- Current: This version includes the latest features and is often used by developers who want to experiment with new additions or contribute to the Node.js project. However, it may be less stable than the LTS version.
- Select the Windows Installer: For each version (LTS and Current), you’ll find options for different operating systems. Click on the Windows Installer link for your chosen version. You will typically see options for 64-bit and 32-bit installers. Most modern Windows systems are 64-bit, so select the Windows Installer (64-bit) unless you have a specific reason to use the 32-bit version.
- Download the Executable: Your browser will download the
.msi(Microsoft Installer) file for Node.js. Save this file to a location you can easily access, such as your Downloads folder.
Running the Node.js Installer
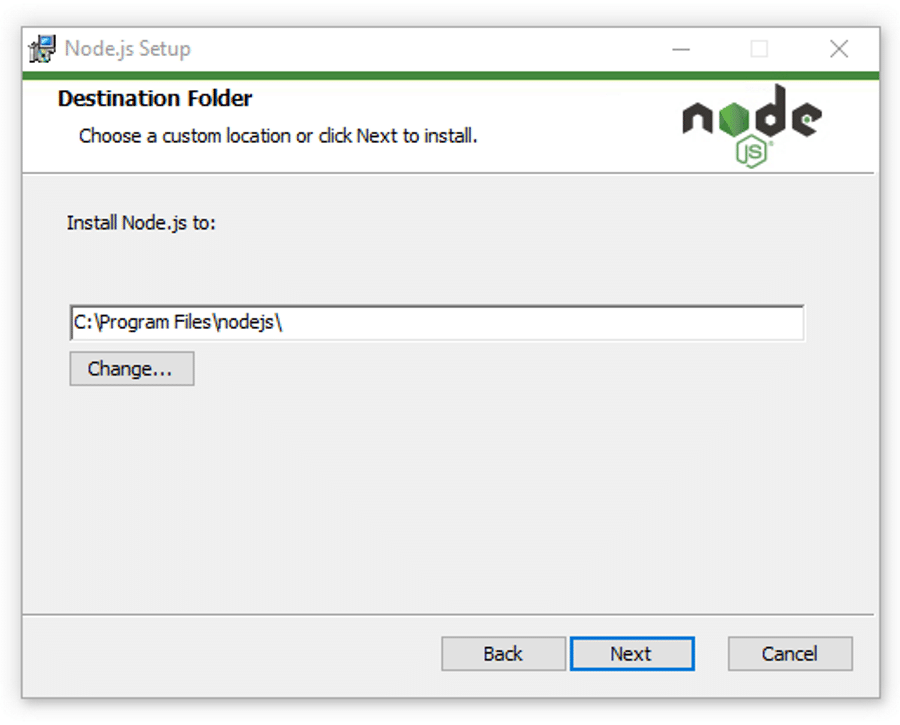
Once the download is complete, locate the downloaded .msi file and double-click it to start the installation process.
- Welcome Screen: The Node.js Setup wizard will launch. Click Next to proceed.
- End-User License Agreement: Read through the license agreement. If you agree to the terms, select the checkbox that says “I accept the terms in the License Agreement” and click Next.
- Custom Setup: This screen allows you to choose which components to install. By default, the following are selected:
- Node.js runtime: This is the core Node.js environment.
- npm package manager: This is essential for installing Node.js modules and dependencies.
- Add to PATH: This is crucial. Ensure this option is selected, as it allows you to run Node.js and npm commands from any directory in your command prompt or PowerShell.
- Node.js runtime: Essential.
- npm package manager: Essential.
- Online documentation shortcuts: Optional, but can be helpful.
- Add to PATH: Absolutely essential.
- Select optional tools: This option allows you to install tools like Chocolatey (a package manager for Windows) and other helpful utilities. It is generally recommended to check this box if you want a more comprehensive development environment setup. If checked, it will often prompt you to install these additional tools after Node.js itself is installed.
Click Next after reviewing your selections.
- Ready to Install: The wizard will inform you that Node.js is ready to be installed. Click Install.
- User Account Control: Windows may prompt you with a User Account Control (UAC) dialog asking for permission to make changes to your device. Click Yes to allow the installation.
- Installation Process: The installer will now proceed to install Node.js and npm on your system. This may take a few minutes.
- Optional Tools (If Selected): If you selected the option to install “Other tools,” a separate window might pop up after the Node.js installation is complete, guiding you through the installation of these additional tools. This often involves running a command in the command prompt to install Chocolatey and then using Chocolatey to install other development tools. Follow the on-screen instructions carefully.
- Completion: Once the installation is finished, you will see a “Completed the Node.js Setup Wizard” screen. Click Finish to exit the installer.
Verifying Your Node.js Installation
After successfully installing Node.js, it’s vital to verify that it has been installed correctly and that your system can find the Node.js and npm executables. This is done through your command-line interface.
Using the Command Prompt or PowerShell

- Open Your Command Line: You can open the Command Prompt or PowerShell in a few ways:
- Press the Windows key, type
cmdorpowershell, and press Enter. - Right-click on the Start button and select Command Prompt or Windows PowerShell.
- Press the Windows key, type
- Check Node.js Version: In the command prompt, type the following command and press Enter:
bash

node -v
If the installation was successful, this command will display the version number of Node.js that you just installed (e.g.,v18.17.0). - Check npm Version: Next, check the version of npm to ensure it’s also installed and accessible. Type the following command and press Enter:
bash

npm -v
This command should output the version number of npm (e.g.,9.6.7).
If both commands return version numbers, congratulations! You have successfully installed Node.js and npm on your Windows machine. You are now ready to start exploring the vast capabilities of Node.js.
Troubleshooting Common Installation Issues
While the official installer is generally robust, you might encounter a few issues:
- “node” is not recognized as an internal or external command: This almost always means that Node.js was not added to your system’s PATH environment variable. Double-check during the installation that “Add to PATH” was selected. If not, you may need to uninstall Node.js and reinstall it, ensuring the option is checked. Alternatively, you can manually add Node.js to your PATH, but this is a more advanced step.
- Permissions Errors: If you encounter errors during installation related to permissions, try running the installer as an administrator. Right-click the
.msifile and select “Run as administrator.” - Outdated npm: Occasionally, the npm version bundled with Node.js might be slightly older than the latest release. You can update npm to its latest version by running the following command in your command prompt after Node.js is installed:
bash

npm install -g npm@latest
The-gflag means this update will be applied globally.
Managing Node.js Versions with NVM for Windows
As you delve deeper into Node.js development, you’ll likely encounter situations where you need to work with different Node.js versions for various projects. Some projects might require an older version for compatibility, while others might benefit from the latest features of a newer release. Manually switching between installations can be cumbersome. This is where a Node Version Manager comes in handy.
While Node.js itself doesn’t ship with a built-in version manager, there are excellent third-party tools designed for this purpose. For Windows, the most popular and effective tool is NVM for Windows.
What is NVM for Windows?
NVM for Windows is a script that allows you to install, manage, and easily switch between multiple Node.js versions on your Windows machine. It’s crucial to note that NVM for Windows is a separate project from the original NVM (Node Version Manager) which is primarily for Linux/macOS.
Installing NVM for Windows
- Download NVM for Windows: Go to the NVM for Windows GitHub repository release page: https://github.com/coreybutler/nvm-windows/releases.
- Find the Latest Release: Look for the latest release tag and download the
nvm-setup.zipfile. - Run the Installer: Extract the contents of the
nvm-setup.zipfile and run thenvm-setup.exeinstaller. - Follow the Installer Prompts: Similar to the Node.js installer, accept the license agreement and choose the installation directory for NVM and the Node.js symlink. Ensure that NVM is added to your system’s PATH.
Using NVM for Windows
Once NVM for Windows is installed, you can use it from your command prompt or PowerShell.
-
List Available Node.js Versions:
nvm list availableThis command will show you a list of all Node.js versions you can download and install.
-
Install a Specific Node.js Version: To install a particular version, use the
installcommand followed by the version number. For example, to install Node.js version 18.17.0:nvm install 18.17.0NVM will download and install this version. It will also automatically install npm for that version.
-
List Installed Node.js Versions:
nvm listThis command shows you all the Node.js versions you have installed locally, with an asterisk
(*)indicating the currently active version. -
Use a Specific Node.js Version: To switch to a different installed version, use the
usecommand:nvm use 18.17.0After running this, subsequent Node.js commands will use the specified version.
-
Set a Default Node.js Version: You can set a default version that NVM will use when you open a new terminal session:
bash

nvm alias default 18.17.0
Using NVM for Windows is highly recommended for any developer who works on multiple Node.js projects, as it simplifies version management significantly and avoids potential conflicts between project dependencies that might require different Node.js runtimes. This level of control is invaluable for maintaining a smooth and efficient development workflow, aligning perfectly with the productivity goals within the tech sphere.

Conclusion
Installing Node.js on Windows is a straightforward process, thanks to the official installer provided by the Node.js project. By following the steps outlined in this guide, you can ensure a clean and successful installation that sets you up for a productive development journey. Understanding the core concepts of Node.js, its significance in the tech ecosystem, and the importance of version management with tools like NVM for Windows will empower you to tackle a wide array of projects.
Whether you’re building your first web application, contributing to open-source projects, or exploring new technological frontiers, Node.js on Windows is a powerful combination. The vast npm ecosystem, the active community, and the efficiency of Node.js make it an attractive choice for developers across the globe.
As you continue your exploration of Node.js, remember to consult the official documentation, leverage community resources, and experiment with different packages and frameworks. The world of technology is constantly evolving, and mastering tools like Node.js is a key step in staying ahead of the curve, enabling you to build innovative solutions, enhance your personal brand as a tech professional, and even explore new avenues for income and business ventures. Happy coding!
aViewFromTheCave is a participant in the Amazon Services LLC Associates Program, an affiliate advertising program designed to provide a means for sites to earn advertising fees by advertising and linking to Amazon.com. Amazon, the Amazon logo, AmazonSupply, and the AmazonSupply logo are trademarks of Amazon.com, Inc. or its affiliates. As an Amazon Associate we earn affiliate commissions from qualifying purchases.