
In an increasingly data-driven world, the demand for robust and ample storage solutions for our computers is ever-present. Whether you’re a gamer needing more space for the latest AAA titles, a creative professional managing vast media libraries, or simply someone who finds their system constantly battling “disk full” warnings, upgrading your hard drive is often the most practical and cost-effective solution. This comprehensive guide will walk you through the entire process, from understanding the ‘why’ behind an upgrade to the meticulous steps of physical installation and software configuration, empowering you to breathe new life into your desktop or laptop.
Far from being a daunting task reserved for IT professionals, installing a new hard drive is a manageable endeavor for anyone with a basic understanding of computer components and a willingness to follow instructions carefully. With the right tools and a systematic approach, you can significantly enhance your system’s performance, expand its storage capacity, and extend its overall lifespan. Let’s delve into the nuances of this essential hardware upgrade.
The Imperative of Storage Expansion: Why Upgrade Your Hard Drive?
Understanding the benefits of a hard drive upgrade is the first step in appreciating its value. It’s not just about adding more gigabytes; it’s about transforming your computing experience.
Enhanced Performance and Speed
The type of storage drive profoundly impacts your computer’s speed. Older systems often rely on traditional Hard Disk Drives (HDDs), which, while offering large capacities at lower costs, are significantly slower than Solid State Drives (SSDs). Upgrading from an HDD to an SSD, especially for your operating system drive, can dramatically reduce boot times, application loading speeds, and overall system responsiveness. Even upgrading an existing SSD to a newer, faster NVMe (Non-Volatile Memory Express) SSD can yield noticeable improvements in data-intensive tasks like video editing or large file transfers. This performance boost is not just a convenience; it’s a fundamental change that makes your entire computing experience smoother and more efficient.
Overcoming Storage Limitations
Modern software, high-resolution media, and extensive game libraries consume vast amounts of storage. A full hard drive can lead to frustrating slowdowns, system errors, and the inability to install new applications or save important files. Upgrading to a larger capacity drive, whether an SSD or HDD, resolves these limitations. It provides the freedom to store more of what you need without constantly worrying about managing space or deleting precious data. For many, this means being able to keep an extensive photo archive, a vast collection of movies, or a full suite of professional software without compromise.
Extending the Lifespan of Your System
Instead of purchasing an entirely new computer, a hard drive upgrade can be a cost-effective way to extend the useful life of your existing system. Many older computers still have perfectly capable processors and RAM, but are hampered by slow or insufficient storage. By replacing an aging, slow drive with a modern, high-capacity SSD, you can revitalize a sluggish machine, making it feel faster and more responsive, often postponing the need for a complete system overhaul by several years. This not only saves money but also reduces electronic waste, contributing to a more sustainable tech approach.
Essential Preparations Before You Begin
Proper preparation is paramount for a successful and safe hard drive installation. Skipping these crucial steps can lead to data loss or damage to your hardware.
Identifying Your Drive Type and Interface (SATA SSD/HDD vs. NVMe M.2)
Before purchasing a new drive, you must understand your computer’s compatibility.
-
SATA (Serial ATA) Drives: These are the most common interface for both HDDs and 2.5-inch SSDs. They connect via a SATA data cable and a SATA power cable from your power supply. Most modern desktop PCs and many laptops support SATA drives.
-
NVMe M.2 SSDs: These drives are much smaller, resembling a stick of gum, and plug directly into a dedicated M.2 slot on your motherboard. They offer significantly higher speeds than SATA SSDs due to their direct connection to the PCIe bus. Check your motherboard’s specifications or laptop’s manual to confirm if it has an available M.2 slot and if it supports NVMe. Some M.2 slots only support SATA M.2 drives, which are slower.
Knowing your system’s existing drive types and available slots will guide your purchase, ensuring compatibility and optimal performance.
Gathering Necessary Tools and Materials
Having the right tools at hand makes the process smoother and safer.
-
Screwdrivers: A Philips head screwdriver is typically sufficient for most computer cases and drive mounts. Some newer cases or laptops might require a Torx screwdriver.
-
Anti-static Wrist Strap: Essential for preventing static electricity discharge, which can damage sensitive internal components. If you don’t have one, regularly touch a grounded metal object (like your computer’s unpainted metal frame) before and during the process.
-
Flashlight or Headlamp: To illuminate the tight spaces inside your computer case.
-
SATA Data Cables (for SATA drives): Your new drive might come with one, but it’s good to have spares.
-
Adapter/Mounting Bracket (if necessary): If you’re installing a 2.5-inch SSD into a 3.5-inch desktop drive bay, you’ll need a conversion bracket.
-
External Enclosure or USB-to-SATA Adapter (optional but recommended): Useful for cloning your old drive or formatting the new one externally.
-
USB Drive with OS Installer: If you plan a fresh operating system installation.
Crucial Data Backup and System Preparation
This is the most critical step. Before opening your computer, back up all essential data from your existing drive. Use cloud services, an external hard drive, or a network-attached storage (NAS) device. Data loss due to unforeseen errors during hardware upgrades is a real risk.
-
Create a System Restore Point: In Windows, this can act as a fallback.
-
Note Down License Keys: For any paid software you might need to reinstall.
-
Deactivate Encryption: If your drive is encrypted (e.g., BitLocker), decrypt it beforehand.
Power Management and Safety Precautions
Always ensure your computer is completely powered down and disconnected from the power source before opening it. For laptops, remove the battery if possible. Static electricity is a silent killer of electronic components. Use an anti-static wrist strap or frequently discharge yourself by touching a grounded metal object. Work in a clean, well-lit environment free of static-generating materials like carpet.
The Physical Installation: A Step-by-Step Guide
With preparations complete, we can now move to the hands-on part of the installation.
Accessing Your Computer’s Interior
-
Desktop PC: Lay the tower on its side on a stable surface. Locate and unscrew the thumb screws or regular screws holding the side panel (usually the left side when viewed from the front). Carefully slide the panel off.
-
Laptop: This is generally more complex. Consult your laptop’s service manual or search for specific disassembly guides for your model online (e.g., YouTube tutorials, iFixit guides). Laptops often require removing the bottom panel, keyboard, or even the entire top casing to access internal components. Ensure you keep track of all screws, noting their original positions, as they can vary in size.
Locating Drive Bays and M.2 Slots
-
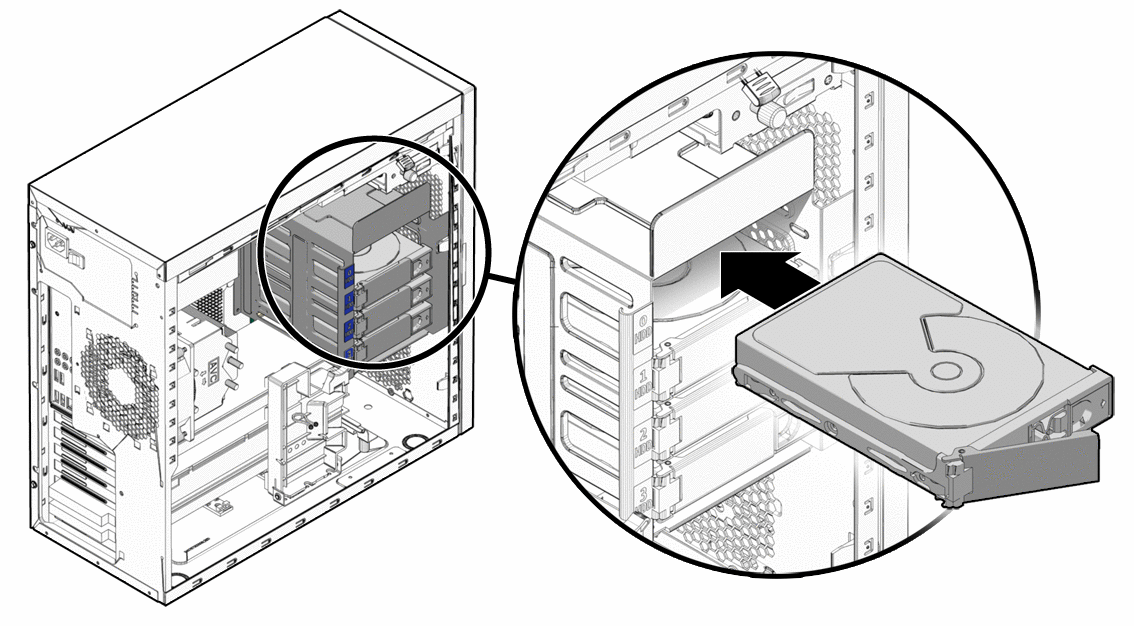
Desktop PC (SATA): Look for 3.5-inch or 2.5-inch drive bays. These are often cages or sleds located at the front or bottom of the case. Some modern cases have tool-less drive sleds.
-
Desktop PC (NVMe M.2): The M.2 slot is typically a small horizontal slot directly on the motherboard. It’s usually labeled “M.2” and might be near the CPU or PCIe slots. It often has a small standoff screw for securing the drive.
-
Laptop: Again, refer to your laptop’s specific guide. M.2 slots are usually visible once the bottom panel is removed, or SATA drives are in a dedicated compartment.
Mounting and Securing the New Drive
-
For 3.5-inch HDDs (Desktops): Slide the drive into an available 3.5-inch bay. Secure it with screws on both sides or use the case’s tool-less mechanism (e.g., plastic clips or trays).
-
For 2.5-inch SATA SSDs (Desktops): If using a 3.5-inch bay, you’ll need a 2.5-inch to 3.5-inch adapter bracket. Mount the SSD to the bracket, then slide the bracket into the bay and secure it. Some cases have dedicated 2.5-inch bays.
-
For NVMe M.2 SSDs (Desktops & Laptops): Gently slide the M.2 drive into the slot at a slight angle. Once fully seated, push down the end of the drive and secure it with the small screw into the standoff on the motherboard. Do not overtighten.
-
For 2.5-inch SATA Drives (Laptops): The old drive usually slides out after removing a securing screw or bracket. Insert the new drive into the same connector, often securing it with a small bracket and screws.
Connecting Power and Data Cables
-
For SATA Drives (Desktops):
-
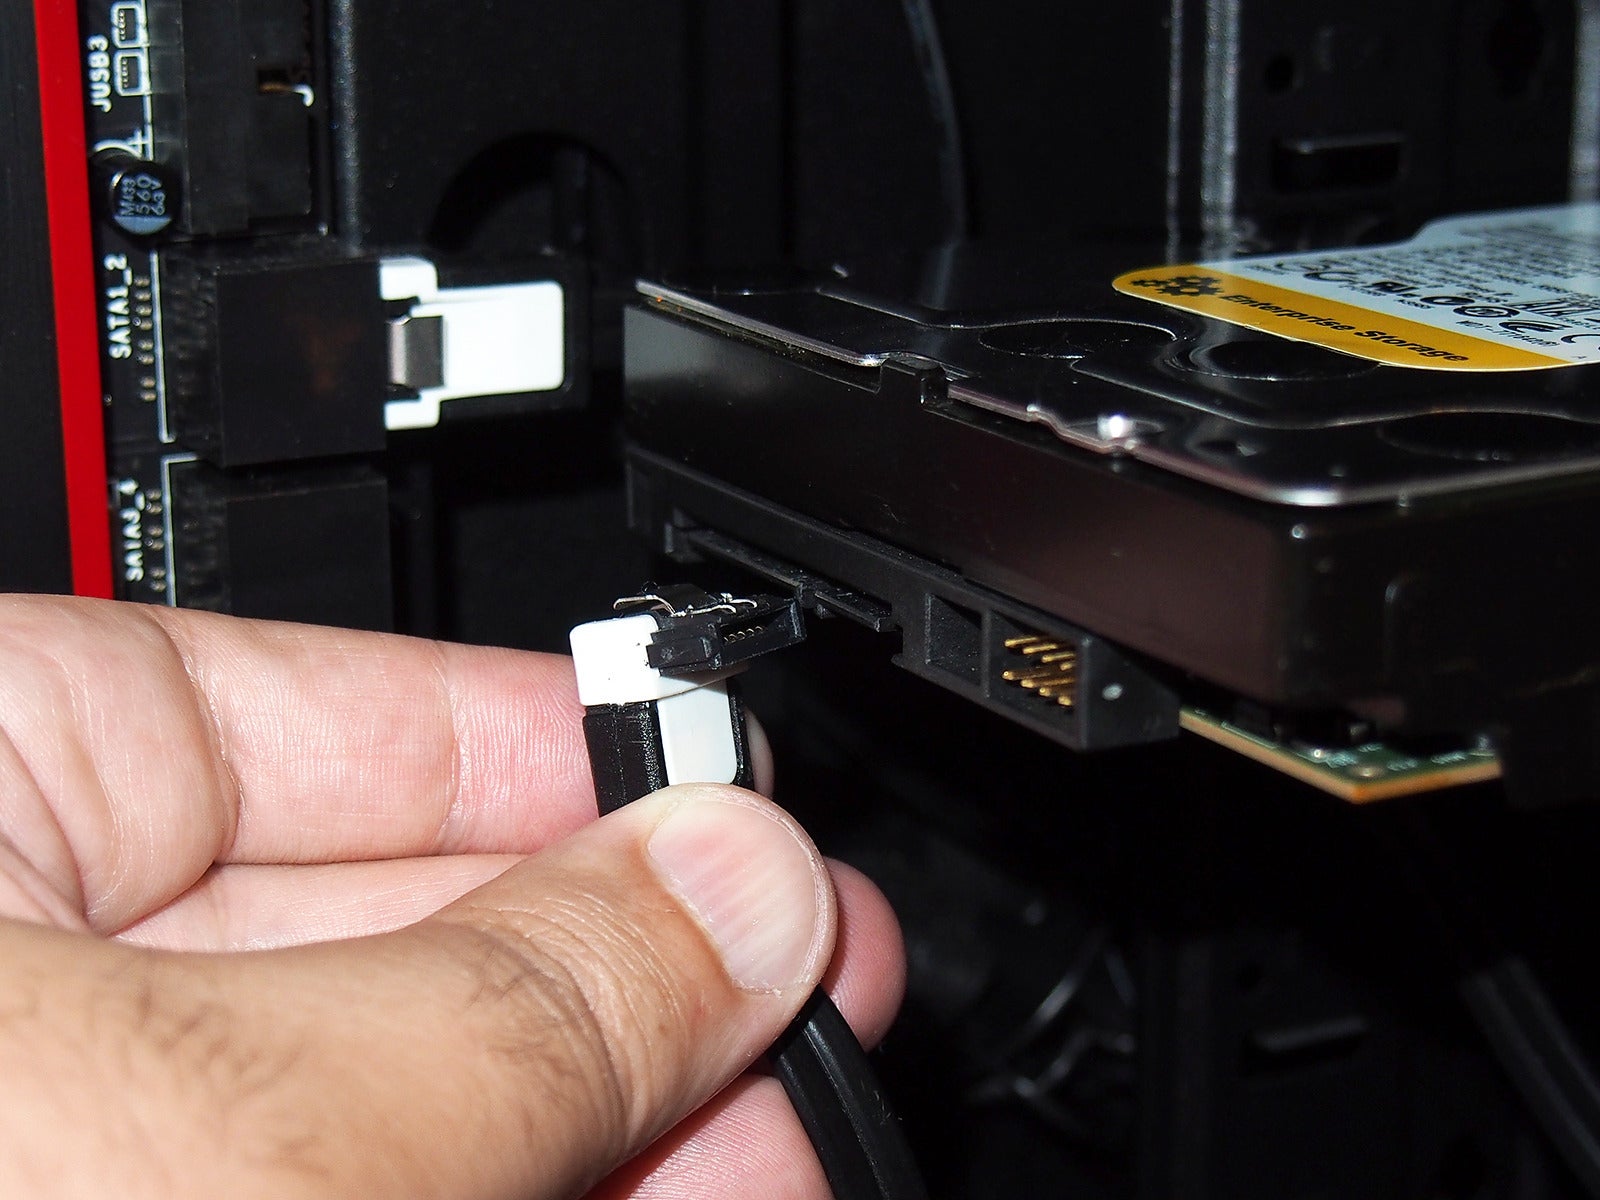
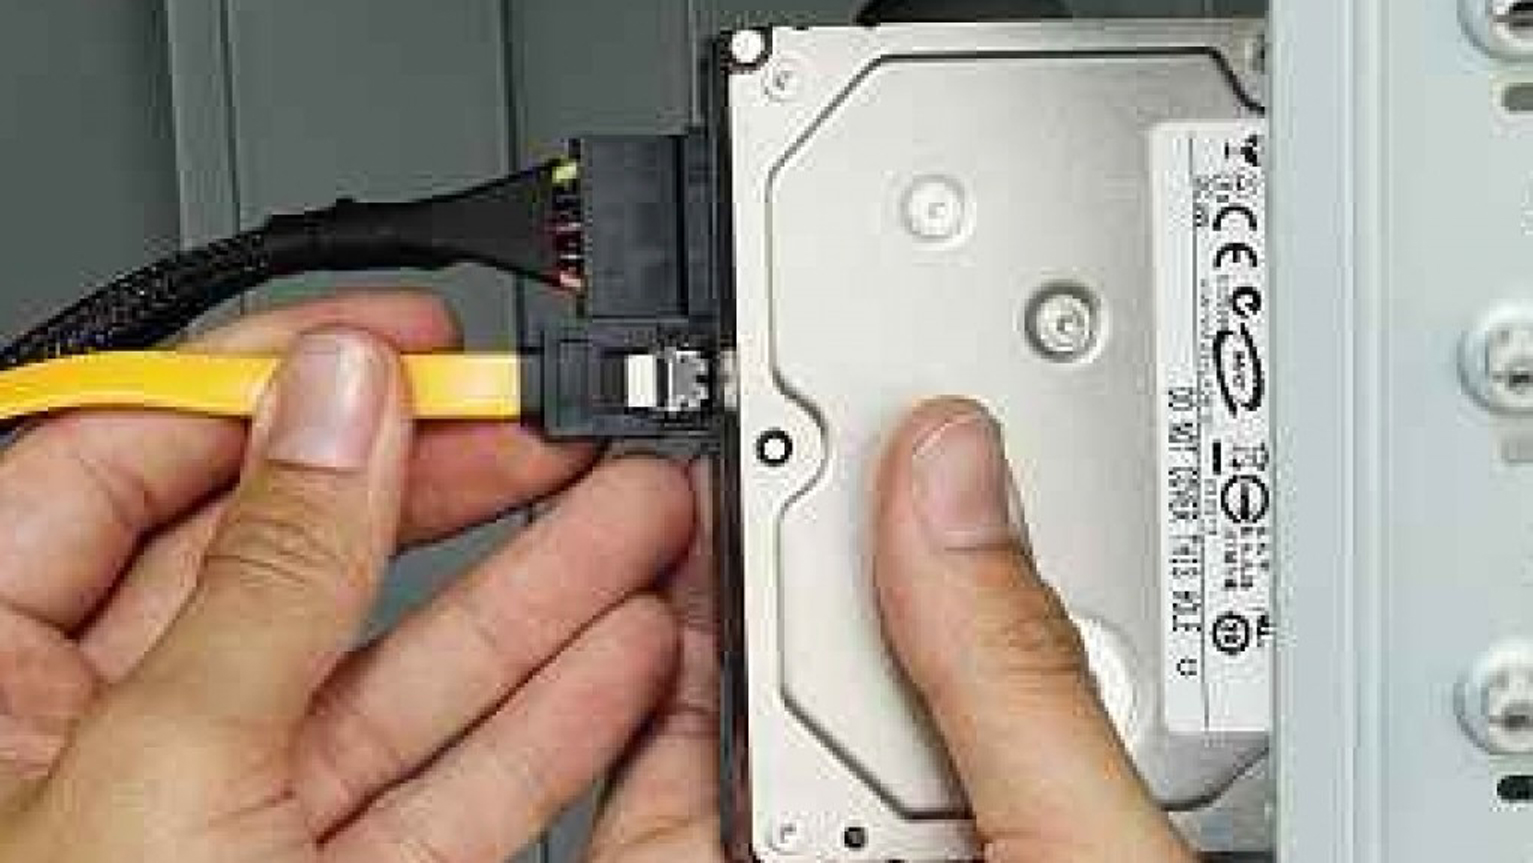
Data Cable: Connect one end of a SATA data cable to the SATA port on your new drive and the other end to an available SATA port on your motherboard. Motherboard SATA ports are usually clearly labeled.
-
Power Cable: Connect a SATA power connector from your power supply unit (PSU) to the power port on your new drive. These are flat, wide connectors.
-
-
For NVMe M.2 SSDs: These drives do not require separate power or data cables as they draw power and transmit data directly through the M.2 slot on the motherboard.
-
For Laptop Drives: Laptop drives connect directly to the motherboard via a proprietary connector, eliminating the need for separate cables once the drive is seated in its bay.
Once all connections are made, double-check that everything is securely in place and that no cables are obstructing fans or airflow. Replace the computer’s side panel or bottom casing, re-insert screws, and reconnect peripherals.
Post-Installation: Configuring Your New Drive
The physical installation is only half the battle. Your operating system needs to recognize and prepare the new drive for use.
Initializing and Partitioning the Drive
After booting your computer for the first time with the new drive, it won’t immediately appear in “My Computer” or “This PC.” You need to initialize it.
-
Windows: Right-click the Start button and select “Disk Management.” You should see your new drive listed as “Unknown” or “Not Initialized.” Right-click it and select “Initialize Disk.” Choose GPT (GUID Partition Table) for drives larger than 2TB or if your system uses UEFI, otherwise MBR (Master Boot Record) is acceptable for smaller drives on older BIOS systems. After initialization, right-click the unallocated space and select “New Simple Volume” to create a partition.
-
macOS: Open “Disk Utility” (found in Applications > Utilities). Select your new drive from the sidebar, click “Erase,” choose a format (e.g., APFS for SSDs, Mac OS Extended for HDDs), and click “Erase.”
Formatting for Optimal Use
Formatting prepares the drive’s file system, making it ready for data storage.
-
Windows: During the “New Simple Volume” wizard in Disk Management, you’ll be prompted to format the drive. Choose NTFS as the file system for Windows drives. Give it a volume label (e.g., “Data Drive,” “Games”).
-
macOS: The “Erase” process in Disk Utility also formats the drive.
-
Linux: Use tools like GParted or the
mkfscommand to format with filesystems like ext4.
Operating System Installation or Data Migration
You have a few options for using your new drive:
-
Fresh OS Installation: If your new drive is replacing your old boot drive, you’ll need to install a fresh copy of your operating system. Boot from your USB installer (created previously), follow the on-screen prompts, and direct the installation to your new drive. This is often the cleanest option, but requires reinstalling all your applications.
-
Cloning Your Old Drive: If you want to transfer your entire operating system, applications, and data from your old drive to the new one, you can use disk cloning software (e.g., Macrium Reflect, EaseUS Todo Backup). This creates an exact copy, making the new drive a bootable duplicate of the old one. This usually requires connecting both drives to the computer simultaneously or using an external adapter.
-
As a Secondary Data Drive: If your new drive is for additional storage, simply format it as described above and start saving files to it.
Driver Installation and System Updates
After a fresh OS installation, ensure all necessary drivers for your motherboard, chipset, and graphics card are installed. Run Windows Update (or equivalent for macOS/Linux) to download and install the latest system updates. For NVMe SSDs, check if the manufacturer offers specific drivers that might enhance performance.
Troubleshooting Common Issues and Optimizing Performance
Even with careful planning, issues can arise. Knowing how to troubleshoot and optimize can save you headaches.
Addressing Recognition Problems
-
Drive Not Appearing in Disk Management/Disk Utility:
-
Check Cables: Ensure all SATA data and power cables are firmly connected at both ends. For M.2 drives, ensure it’s fully seated and the screw is in place.
-
BIOS/UEFI Settings: Enter your computer’s BIOS/UEFI (usually by pressing DEL, F2, F10, or F12 during startup). Check the storage configuration settings to ensure the SATA port or M.2 slot is enabled and that the drive is detected.
-
Power Supply: Verify your PSU has enough wattage to power all connected components.
-
Faulty Drive/Port: Test the new drive in a different port or another computer if possible.
-
-
“Operating System Not Found”: If you cloned your drive or performed a fresh OS install, ensure the correct drive is set as the primary boot device in your BIOS/UEFI settings.
Performance Bottlenecks and Solutions
-
Slower than Expected SSD Speeds:
-
SATA vs. NVMe: Ensure you’re not trying to run an NVMe SSD in a slower SATA M.2 slot (if applicable).
-
SATA Mode: In BIOS/UEFI, ensure your SATA controller is set to AHCI mode, not IDE.
-
Firmware Updates: Check the drive manufacturer’s website for firmware updates for your SSD.
-
TRIM Enabled: For Windows, open Command Prompt as administrator and type
fsutil behavior query DisableDeleteNotify. If it returnsDisableDeleteNotify = 1, TRIM is disabled. Set it to0withfsutil behavior set DisableDeleteNotify 0.
-
-
General System Sluggishness: Even with a new drive, other factors like insufficient RAM, an old CPU, or bloatware can affect performance. Regularly clean up temporary files and uninstall unused programs.
Best Practices for Drive Maintenance
-
Regular Backups: Continue backing up your data regularly.
-
Avoid Overfilling SSDs: Try to keep at least 15-20% of an SSD’s capacity free to maintain optimal performance and lifespan.
-
Monitor Drive Health: Use tools like CrystalDiskInfo (Windows) or the drive’s manufacturer utility to monitor S.M.A.R.T. status and health parameters.
-
Defragment HDDs (but not SSDs): Regularly defragment HDDs to optimize file access. Never defragment SSDs, as it’s unnecessary and reduces their lifespan.
By following this comprehensive guide, you are well-equipped to successfully install a new hard drive, unlocking enhanced performance, expanded storage, and a prolonged lifespan for your valuable computer system. Embrace the power of an upgraded machine and enjoy a smoother, more efficient digital experience.
aViewFromTheCave is a participant in the Amazon Services LLC Associates Program, an affiliate advertising program designed to provide a means for sites to earn advertising fees by advertising and linking to Amazon.com. Amazon, the Amazon logo, AmazonSupply, and the AmazonSupply logo are trademarks of Amazon.com, Inc. or its affiliates. As an Amazon Associate we earn affiliate commissions from qualifying purchases.