
In the fast-paced world of technology, staying updated and optimizing your digital experience is paramount. Whether you’re a seasoned tech enthusiast looking for a new operating system or a complete beginner curious about Linux, installing a new OS can feel like a daunting task. However, with the right guidance, it can be a smooth and rewarding process. This article will serve as your definitive guide on how to install Mint, specifically focusing on Linux Mint, a popular, user-friendly, and powerful Linux distribution. We’ll cover everything from understanding why you might choose Mint to the step-by-step installation process, ensuring you can embark on your Linux journey with confidence.
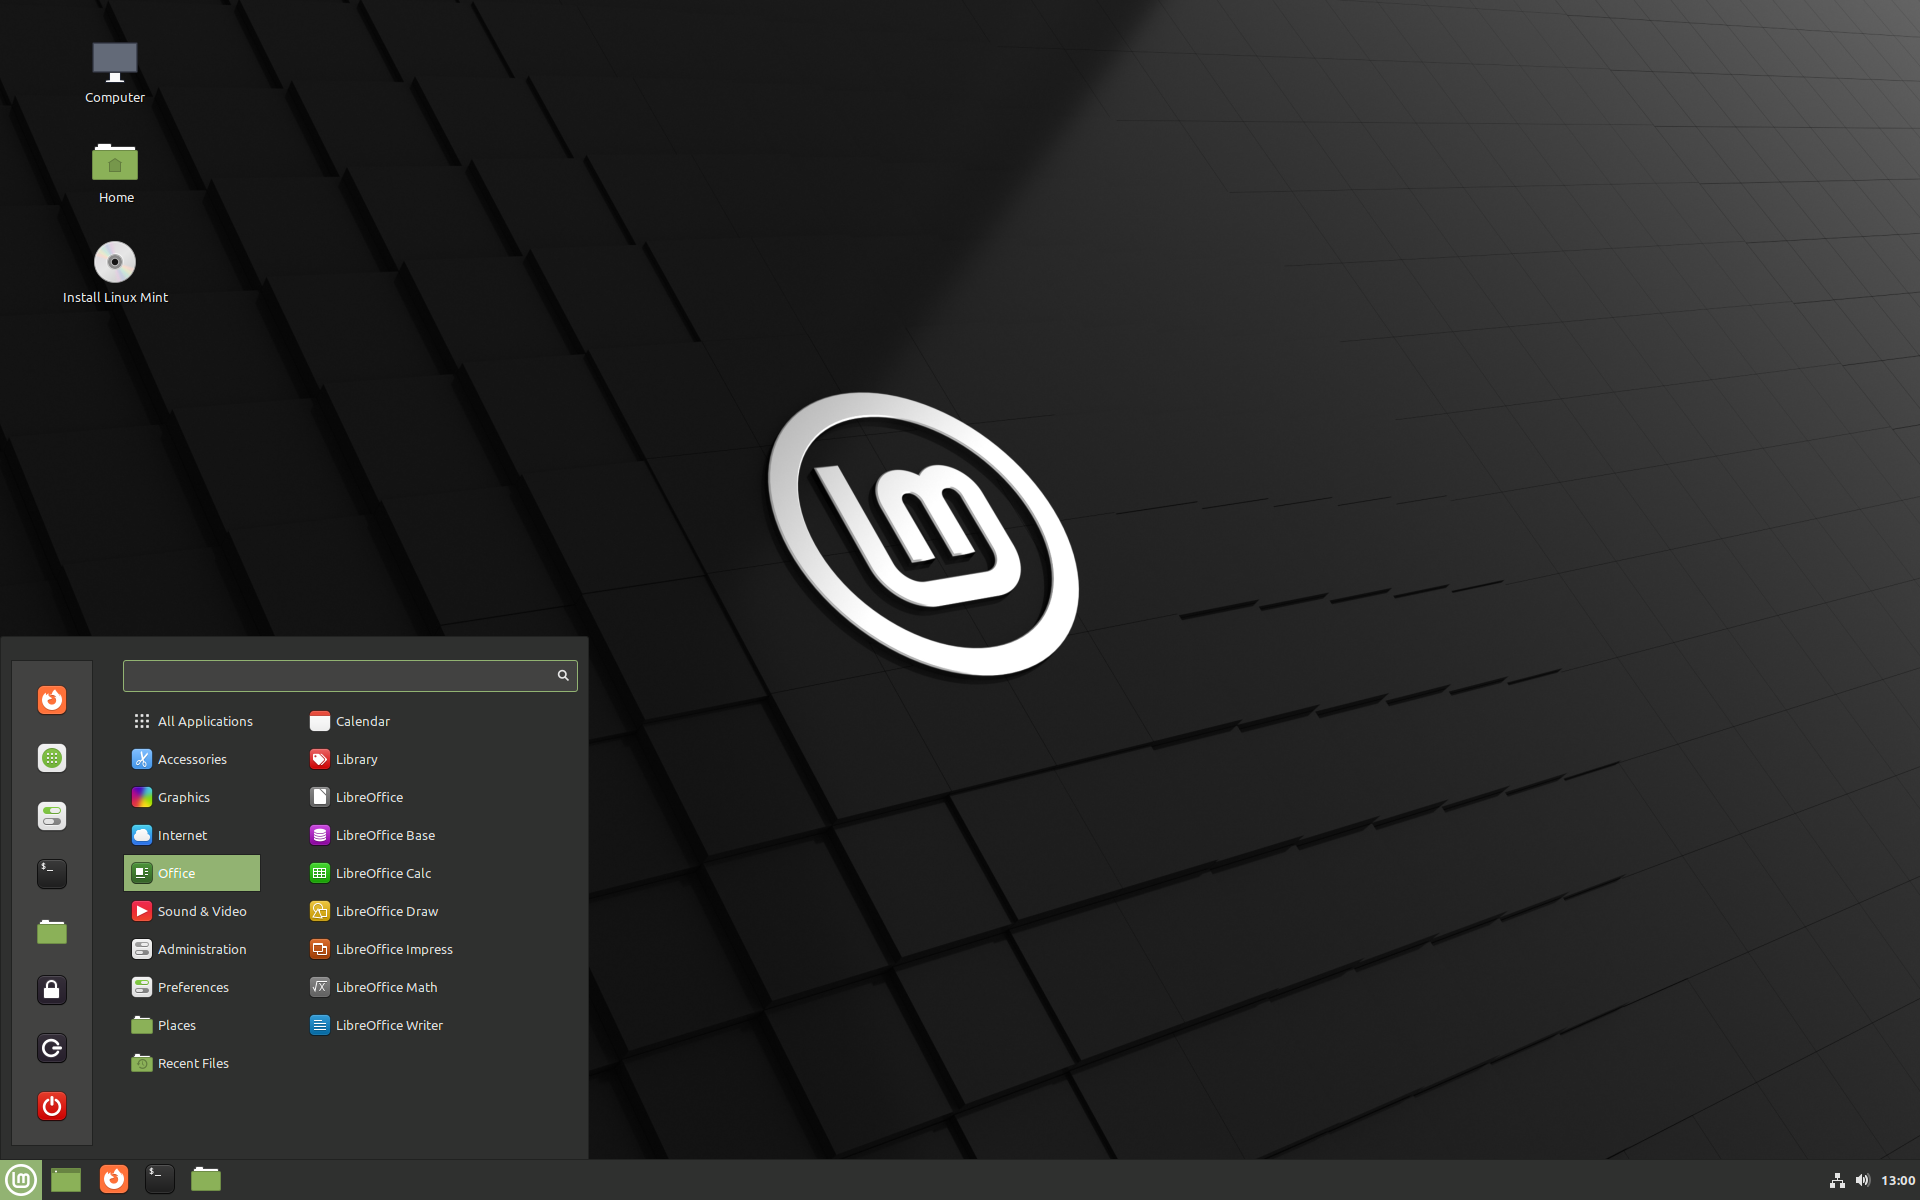
The decision to install a new operating system is often driven by a desire for improved performance, enhanced security, greater customization, or simply a fresh perspective on your computing experience. Linux Mint, renowned for its ease of use and familiar desktop environment, is an excellent choice for those transitioning from Windows or macOS, as well as for experienced Linux users seeking a stable and feature-rich platform. This guide is structured to demystify the installation process, breaking it down into manageable steps.
Understanding Linux Mint: Why Choose This Distribution?
Before we dive into the installation itself, it’s crucial to understand what makes Linux Mint a compelling option. Its popularity isn’t accidental; it’s built on a foundation of user-centric design and robust functionality.
What is Linux Mint?
Linux Mint is a free and open-source operating system based on Ubuntu, which itself is based on Debian. It aims to provide a modern, elegant, and powerful operating system that is both easy to use and beautiful. It is widely praised for its accessibility, making it a fantastic entry point into the world of Linux.
Key Advantages of Linux Mint
- User-Friendliness: Mint’s desktop environments (Cinnamon, MATE, and XFCE) are designed to be intuitive and familiar to users accustomed to Windows. This significantly reduces the learning curve, allowing you to get productive quickly.
- Pre-installed Software: Out of the box, Linux Mint comes with a comprehensive suite of essential software, including a web browser (Firefox), office suite (LibreOffice), media players, and various system tools. This means you can start using your computer for everyday tasks immediately after installation without needing to download and install many applications.
- Stability and Reliability: Mint is built on a stable base, ensuring a reliable computing experience. Its update manager is also designed to be user-friendly, allowing you to manage system updates with confidence.
- Hardware Compatibility: Linux Mint generally boasts excellent hardware support, making it compatible with a wide range of computers, both new and old.
- Community Support: As a popular Linux distribution, Mint benefits from a large and active online community. This means abundant resources, forums, and tutorials are available if you encounter any issues or have questions.
- Cost-Effective: Like most Linux distributions, Mint is completely free to download, install, and use. This makes it an incredibly cost-effective solution, especially for businesses or individuals looking to avoid expensive software licensing fees.
Popular Desktop Environments
Linux Mint offers several desktop environments, each with its unique look and feel. The most popular are:
- Cinnamon: This is Mint’s flagship desktop environment, offering a modern and feature-rich experience with a traditional layout. It’s highly customizable and visually appealing.
- MATE: A more traditional desktop environment, MATE is lightweight and stable, appealing to users who prefer a classic GNOME 2 look and feel.
- XFCE: Known for its speed and low resource usage, XFCE is an excellent choice for older hardware or for users who prioritize performance above all else.
For the purpose of this installation guide, we will primarily focus on the Cinnamon desktop environment, as it’s the most widely used and recommended for new users. However, the core installation steps remain largely the same regardless of your chosen desktop.
Preparing for Installation: What You Need
Before you embark on the installation process, proper preparation is key to a smooth and successful setup. This section outlines the essential steps and materials you’ll need.
Downloading the Linux Mint ISO Image
The first step is to obtain the Linux Mint installation file, known as an ISO image.
- Visit the Official Linux Mint Website: Navigate to linuxmint.com.
- Go to the Download Section: Find and click on the “Download” link.
- Choose Your Edition: You’ll be presented with options for different editions, primarily distinguished by their desktop environment (Cinnamon, MATE, XFCE). Select the edition that best suits your preferences.
- Select a Download Mirror: You’ll then need to choose a download mirror. These are servers located geographically closer to you to ensure faster download speeds. Select a mirror and click to download the ISO file.
Ensure you download the correct version for your system architecture (most modern computers are 64-bit).
Creating a Bootable USB Drive
Once you have the ISO image, you need to transfer it to a bootable USB drive. This USB drive will act as the installation media for Linux Mint.
What you’ll need:
- A USB flash drive with at least 8GB of storage. Note: All data on the USB drive will be erased during this process, so back up anything important.
- A tool to create the bootable USB. Popular and reliable options include:
- Rufus (Windows): A free and open-source utility that is very effective for creating bootable USB drives.
- balenaEtcher (Windows, macOS, Linux): A cross-platform, user-friendly tool that makes creating bootable drives straightforward.
- UNetbootin (Windows, macOS, Linux): Another popular choice for creating bootable live USB drives.
Steps using Rufus (example for Windows):
- Download and Run Rufus: Download Rufus from its official website and run the executable.
- Select Your USB Drive: In Rufus, under “Device,” select your USB flash drive.
- Select the ISO Image: Click on the “SELECT” button next to “Boot selection” and browse to the Linux Mint ISO file you downloaded.
- Configure Options: Rufus will usually auto-detect the correct settings. Ensure “Partition scheme” is set to GPT and “Target system” is set to UEFI (non-CSM) for modern systems, or MBR and BIOS (or UEFI-CSM) for older systems. If unsure, GPT and UEFI are generally recommended.
- Start the Process: Click “START.” You will likely see a prompt about downloading Syslinux or GRUB files; click “Yes” to proceed. You will also receive a warning that all data on the USB drive will be destroyed. Confirm by clicking “OK.”
- Wait for Completion: Rufus will now write the ISO image to the USB drive. This can take several minutes. Once it’s finished, you’ll see a “READY” status. Close Rufus.
For macOS and Linux users, balenaEtcher offers a very similar, intuitive graphical interface for this process.
Backing Up Your Existing Data
This is a critical step that should not be overlooked. Installing a new operating system can involve reformatting your hard drive, which will erase all existing data.
- Identify Important Files: Determine what data you need to keep (documents, photos, videos, personal settings, etc.).
- Use External Storage: Back up your important files to an external hard drive, a cloud storage service (like Google Drive, Dropbox, OneDrive), or another reliable storage medium.
- Consider Application Settings: If you use specific applications with custom settings, you might want to back up their configuration files as well, although this is less common for basic installations.
Understanding Your Hardware and BIOS/UEFI Settings
While Linux Mint is known for its broad hardware compatibility, it’s good to have a general understanding of your computer’s components. More importantly, you’ll need to know how to access your computer’s BIOS or UEFI settings. This is where you’ll tell your computer to boot from the USB drive instead of its internal hard drive.
- Accessing BIOS/UEFI: The key to enter BIOS/UEFI varies by manufacturer but is typically one of the following keys pressed immediately after powering on your computer:
F2,F10,F12,DEL, orESC. You may see a brief message on your screen indicating which key to press. - Boot Order: Within the BIOS/UEFI settings, you’ll need to find the “Boot Order” or “Boot Sequence” section. Here, you’ll need to move your USB drive to the top of the list, so it’s the first device your computer tries to boot from.
- Secure Boot (UEFI systems): Some UEFI systems have “Secure Boot” enabled, which might prevent the Linux Mint installer from booting. You may need to disable Secure Boot temporarily during the installation process. Consult your computer’s manual or manufacturer’s website for specific instructions on how to adjust these settings.
The Installation Process: Step-by-Step
With your bootable USB drive ready and your data backed up, you’re prepared to begin the installation. This section guides you through the entire process, from booting from the USB to finalizing your new Linux Mint system.
Booting from the USB Drive
- Insert the Bootable USB: Plug your newly created bootable Linux Mint USB drive into your computer.
- Restart Your Computer: If your computer is on, restart it. If it’s off, power it on.
- Access BIOS/UEFI: Immediately after your computer starts to power on, press the key to enter your BIOS/UEFI settings (e.g.,
F2,DEL,F10,ESC). - Adjust Boot Order: Navigate to the boot order settings and ensure your USB drive is set as the primary boot device. Save your changes and exit the BIOS/UEFI. Your computer will then restart.
- Boot into Linux Mint Live Environment: Your computer should now boot from the USB drive, and you’ll see a boot menu. Select the option to “Start Linux Mint” (or similar). This will load a “Live” version of Linux Mint directly from the USB drive, allowing you to try it out without making any changes to your hard drive.
Launching the Installer
Once Linux Mint has booted into the Live environment:
- Locate the Installer Icon: On the desktop, you’ll find an icon usually labeled “Install Linux Mint.” Double-click this icon.
- Welcome Screen: The installer will launch. The first screen will welcome you and ask you to choose your preferred language for the installation process. Select your language and click “Continue.”
Keyboard Layout and Updates
The next steps involve configuring your keyboard and deciding on software installations.
- Keyboard Layout: Select your keyboard layout. You can type in the provided text box to test your layout. If it’s not correct, choose the appropriate layout from the dropdown menus. Click “Continue.”
- Multimedia Codecs (Optional but Recommended): The installer will ask if you want to install third-party software for graphics drivers, Wi-Fi hardware, Flash, and media codecs. It is highly recommended to check this box. This will ensure that you can play MP3s, watch videos, and use other multimedia content smoothly right after installation. Click “Continue.”
Installation Type: Partitioning Your Drive
This is arguably the most crucial step, as it determines how your hard drive will be used. You have several options:
Option 1: Erase Disk and Install Linux Mint (Simplest)
- Description: This option will delete all existing operating systems and data on your hard drive and install Linux Mint as the sole operating system.
- When to use: This is the easiest method if you are dedicating this computer solely to Linux Mint or if you have backed up all your important data.
- Caution: This will permanently delete all data on the selected drive.
Option 2: Install Linux Mint Alongside Existing Operating Systems (Dual Boot)
- Description: This allows you to keep your current operating system (e.g., Windows) and install Linux Mint on a separate partition. You’ll be able to choose which OS to boot into when you start your computer.
- When to use: If you want to experiment with Linux Mint without removing your current OS, or if you need to use both for specific purposes.
- Process: The installer will present a slider that allows you to allocate space between your existing OS and Linux Mint. You’ll need to ensure you leave enough space for both.
Option 3: Something Else (Manual Partitioning)
- Description: This advanced option gives you complete control over how your hard drive is partitioned. You can create, delete, and resize partitions manually.
- When to use: This is for experienced users who want to set up specific partition schemes (e.g., separate
/homepartition) or have complex storage requirements. - Key Partitions to Consider (if manually partitioning):
/(root): This is where the operating system files will be installed. A minimum of 20-30GB is recommended./home: This is where your personal files, documents, and settings will be stored. It’s good practice to have a separate/homepartition so you can reinstall the OS without losing your personal data.swap: Used as virtual memory when your RAM is full. The size is often recommended to be equal to your RAM, or at least 2GB.
For most users, either “Erase Disk and Install Linux Mint” or “Install Linux Mint Alongside Existing Operating Systems” will be the most appropriate choices. Carefully read the descriptions and choose the option that best fits your needs.
Once you’ve made your choice, click “Install Now.”
Where Are You? (Timezone)
A map will appear. Click on your geographical location to set your timezone. This is important for accurate timekeeping and scheduling. Click “Continue.”
Who Are You? (User Account Creation)
This is where you create your user account:
- Your Name: Enter your full name.
- Your Computer’s Name: This is the name your computer will be known by on a network (e.g.,
my-mint-pc). - Username: This is the username you’ll use to log in (e.g.,
john). - Password: Choose a strong password and re-enter it to confirm.
- Login Options: You can choose to “Log in automatically” or “Require my password to log in.” For security reasons, “Require my password to log in” is generally recommended, especially if you are dual-booting or have sensitive data.
Click “Continue.”
Installation Progress
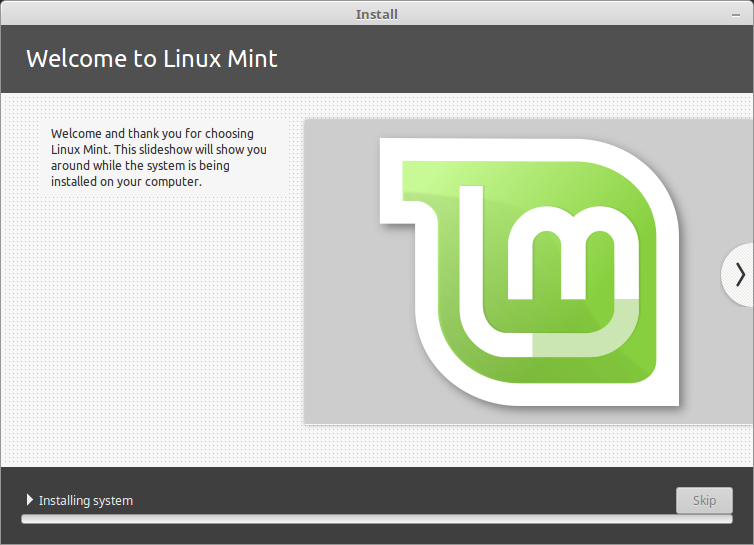
The installer will now begin copying files and installing Linux Mint onto your hard drive. This process can take anywhere from 10 minutes to over an hour, depending on your computer’s speed, the chosen installation options, and whether you’re installing alongside another OS. You’ll see a slideshow showcasing Linux Mint’s features while the installation proceeds.
Installation Complete: Restart Your Computer
Once the installation is finished, you’ll see a prompt indicating that the installation is complete.
- Restart: Click the “Restart Now” button.
- Remove Installation Media: Your computer will restart. When prompted by a message like “Please remove the installation medium, then press ENTER,” remove the USB drive and then press ENTER. This is crucial to prevent your computer from booting back into the installer.
Post-Installation: First Steps with Linux Mint
Congratulations! You’ve successfully installed Linux Mint. Now it’s time to get acquainted with your new operating system and make it work for you.
Welcome Screen and System Updates
Upon your first login, you’ll likely see the “Welcome” screen. This is a very helpful tool that guides you through initial setup and configuration.
- System Updates: The most important first step is to ensure your system is fully up-to-date. Click on the “Update Manager” icon (often looks like a shield or update symbol) in the system tray or search for it in the menu. It will check for available updates. Install all available updates to ensure you have the latest security patches and software versions. This might require a system restart.
- Driver Manager: Access the “Driver Manager” from the menu. This tool scans your hardware and suggests any proprietary drivers that might improve performance or enable specific hardware features (like Wi-Fi cards or graphics cards). Install any recommended drivers.
- System Settings: Explore the “System Settings” to personalize your Mint experience. You can change themes, wallpapers, adjust display settings, configure power management, and much more.
Installing New Software
Linux Mint comes with a good selection of pre-installed software, but you’ll likely want to install more applications.
- Software Manager: Linux Mint has an excellent “Software Manager” that acts like an app store. You can browse thousands of free and open-source applications, search for specific software, and install them with a few clicks.
- Synaptic Package Manager: For more advanced users, the Synaptic Package Manager offers a more detailed view of all available software and allows for more granular control over installations and removals.
- Terminal (Advanced): For those comfortable with the command line, you can install software using the
aptpackage manager. For example, to install a package namedexample-app, you would open the Terminal (search for “Terminal” in the menu) and type:sudo apt update && sudo apt install example-app. You’ll be prompted for your password.
Exploring and Customizing
Take some time to explore the Cinnamon desktop environment. Familiarize yourself with the Mint Menu, the system tray, and the file manager. Customize the appearance to your liking – change themes, icons, and panel layouts.

Conclusion
Installing Linux Mint is a rewarding process that opens the door to a powerful, flexible, and user-friendly computing experience. By following this comprehensive guide, from preparing your installation media to navigating the post-installation steps, you can confidently install Mint and begin enjoying all the benefits it offers. Whether you’re looking for improved performance, enhanced security, or simply a fresh, modern operating system, Linux Mint is an excellent choice for users of all levels. Welcome to the world of Linux!
aViewFromTheCave is a participant in the Amazon Services LLC Associates Program, an affiliate advertising program designed to provide a means for sites to earn advertising fees by advertising and linking to Amazon.com. Amazon, the Amazon logo, AmazonSupply, and the AmazonSupply logo are trademarks of Amazon.com, Inc. or its affiliates. As an Amazon Associate we earn affiliate commissions from qualifying purchases.