
The allure of macOS X (now simply known as macOS) is undeniable. Its sleek interface, robust performance, and seamless integration with Apple’s ecosystem have made it a coveted operating system for millions. Whether you’re a seasoned Mac user looking to perform a clean install, a newcomer eager to experience the Apple ecosystem, or someone repurposing older hardware, understanding the installation process is key. This guide will walk you through the essential steps, offering insights relevant to tech trends, brand considerations, and even financial implications.
Pre-Installation Essentials: Setting the Stage for Success
Before diving into the installation process, meticulous preparation is crucial. This phase is akin to a robust brand strategy – laying a solid foundation ensures a smooth and successful outcome. From a technological standpoint, it’s about ensuring compatibility and minimizing potential roadblocks.

### Understanding Your Mac’s Compatibility
The first and arguably most critical step is verifying your Mac’s compatibility with the macOS version you intend to install. Apple provides clear specifications for each macOS release, detailing which Mac models are supported. Ignoring this can lead to wasted time and frustration.
- Identifying Your Mac Model: Navigate to the Apple menu () in the top-left corner of your screen, select “About This Mac.” This will display a summary of your hardware, including the Mac model and its year of release.
- Checking macOS Requirements: Once you know your Mac’s model, visit Apple’s official support website or search for “[macOS version] compatibility” online. You’ll find lists of supported Mac models for each operating system. For instance, if you’re looking to install the latest macOS Ventura, you’ll need to ensure your Mac is on the compatible list. Older Macs might only support older versions of macOS. This is a crucial step, especially if you’re considering a clean installation on an older machine.
### Backing Up Your Data: The Digital Security Imperative
Data loss can be a devastating experience, akin to a significant brand reputation crisis. Therefore, a comprehensive backup strategy is non-negotiable. This protects your valuable documents, photos, applications, and system settings.
- Time Machine: macOS’s built-in backup solution, Time Machine, is incredibly user-friendly. Connect an external hard drive and enable Time Machine through System Settings/Preferences. It will automatically back up your entire system at regular intervals.
- Cloud Storage: For critical files, consider supplementing Time Machine with cloud storage services like iCloud Drive, Google Drive, or Dropbox. This provides an off-site backup solution, offering an extra layer of security.
- Manual Backups: For specific important files, consider copying them to an external drive or a USB stick as an additional precaution.
### Gathering Necessary Tools and Resources
Successful installation often hinges on having the right tools. In the context of technology, this means having the correct installation media and, if necessary, an internet connection.
- macOS Installer: The most common way to install or reinstall macOS is through the Mac App Store. You can download the installer for the latest or previous versions directly from Apple. If you’re looking to install an older version, you might need to search for it in your purchase history on the App Store or obtain it from legitimate sources.
- USB Flash Drive (for Clean Installs): For a clean installation, where you want to completely erase your drive and start fresh, you’ll need a bootable USB installer. This requires a USB flash drive of at least 16GB. You’ll use a utility to create this bootable drive from the downloaded macOS installer.
- Internet Connection: A stable internet connection is essential for downloading the macOS installer and, in some cases, for completing the installation process (especially for updates and initial setup).
The Installation Process: Step-by-Step Guidance
With your preparations complete, you’re ready to embark on the installation. This section breaks down the process, covering both upgrade and clean install scenarios.
### Upgrading to a Newer macOS Version
Upgrading is often the simplest method, as it preserves your existing applications and data. This is analogous to a brand refresh, building upon an existing identity.
- Check for Updates: Go to System Settings (or System Preferences on older macOS versions) and select “General” > “Software Update.” Your Mac will check for available macOS updates.
- Download and Install: If an update is available, you’ll see an option to “Upgrade Now” or “Download.” Click the appropriate button. Your Mac will download the installer and then prompt you to restart to begin the installation.
- Follow On-Screen Prompts: During the installation, your Mac will restart multiple times. Follow the on-screen instructions to complete the process. This usually involves agreeing to terms and conditions and waiting for the installation to finish.
### Performing a Clean Installation (The Bootable USB Method)
A clean installation is recommended for troubleshooting persistent issues, improving performance, or when installing macOS on a new drive. This is like a complete brand overhaul, starting from a blank slate.
Creating a Bootable USB Installer

This is a technical step that requires precision.
-
Format the USB Drive: Insert your USB flash drive into your Mac. Open “Disk Utility” (found in Applications > Utilities). Select your USB drive from the sidebar, click “Erase,” choose “Mac OS Extended (Journaled)” as the format and “GUID Partition Map” as the scheme. Click “Erase.”
-
Use the Terminal Command: Open the “Terminal” application (also in Applications > Utilities). You’ll need to use a command-line tool called
createinstallmedia. The exact command varies slightly depending on the macOS version you are installing.For example, to create a bootable installer for macOS Monterey, the command might look like this (ensure you have downloaded the Monterey installer to your Applications folder):
sudo /Applications/Install macOS Monterey.app/Contents/Resources/createinstallmedia --volume /Volumes/MyVolumeReplace
/Volumes/MyVolumewith the actual name of your formatted USB drive. The terminal will ask for your administrator password and then proceed to create the bootable installer. This process can take a significant amount of time.
Installing macOS from the Bootable USB
Once your bootable USB is ready, you can begin the installation.
- Boot from the USB:
- Intel Macs: Restart your Mac and immediately press and hold the Option (Alt) key. Keep holding it until you see the Startup Manager, which will display bootable drives. Select your USB installer.
- Apple Silicon Macs (M1, M2, etc.): Shut down your Mac. Press and hold the power button until you see “Loading startup options.” Click on your USB installer.
- macOS Utilities: Once your Mac boots from the USB, you’ll see the macOS Utilities window.
- Disk Utility: Before installing, it’s highly recommended to erase your internal drive to ensure a completely clean installation.
- Select “Disk Utility” from the macOS Utilities window.
- In Disk Utility, select your internal drive (usually named “Macintosh HD” or similar) from the sidebar.
- Click “Erase.” Choose “APFS” as the format and “GUID Partition Map” as the scheme. Click “Erase.” This will wipe all data from your internal drive.
- Quit Disk Utility.
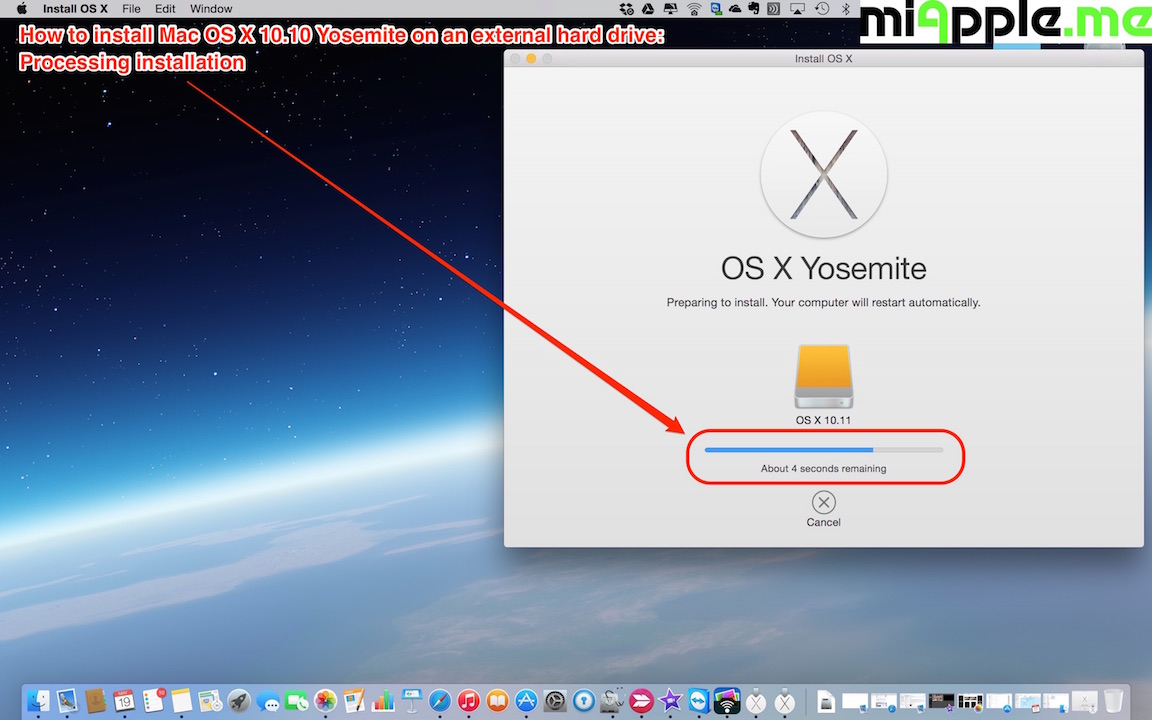
- Install macOS: Back in the macOS Utilities window, select “Install macOS” and click “Continue.” Follow the on-screen prompts to select your internal drive as the installation destination. Your Mac will then begin installing macOS from the USB drive. This process can take a considerable amount of time, and your Mac will restart multiple times.
- Setup Assistant: After the installation is complete, your Mac will restart into the Setup Assistant, where you’ll set up your user account, connect to Wi-Fi, and configure other initial settings.
Post-Installation Best Practices: Optimizing Your New macOS Experience
The installation is just the beginning. To truly leverage the power of macOS and maintain optimal performance, several post-installation steps are crucial, mirroring ongoing brand management and digital security practices.
### Updating macOS and Applications
Even after a fresh install, there are often minor updates to macOS and your applications. These updates often include security patches and performance improvements.
- System Updates: Go back to System Settings > General > Software Update to check for any immediate macOS updates.
- App Store Updates: Open the App Store and click on the “Updates” tab to update all your installed applications.
- Third-Party Apps: For applications installed from outside the App Store, visit the developer’s website or use their built-in update mechanisms.
### Restoring Your Data and Personalizing Your Setup
Now is the time to bring your digital life back to your Mac.
- Time Machine Restore: If you backed up with Time Machine, the Setup Assistant during installation will offer to restore your data. You can also do this later by connecting your Time Machine drive and using the Migration Assistant.
- Manual Data Transfer: Copy your backed-up files from your external drives or cloud storage back to your Mac.
- Personalize Settings: Configure your System Settings (display, sound, privacy, etc.) to your preferences. Set up your Dock, desktop wallpaper, and login items to create a personalized and productive environment.
### Enhancing Productivity and Digital Security
With your system up and running, consider how to optimize your workflow and protect your digital assets.
- Essential Apps: Reinstall your favorite productivity apps, creative software, and communication tools. Consider exploring new AI tools or productivity apps that align with current tech trends.
- Security Software: While macOS has built-in security features, consider installing reputable antivirus or anti-malware software for an added layer of protection, especially if you handle sensitive data or frequently download files from the internet.
- Password Management: Use a password manager to create and store strong, unique passwords for all your online accounts. This is a fundamental aspect of digital security.
Conclusion: Embracing the macOS Ecosystem
Installing macOS X (or any modern macOS version) is a rewarding process that opens the door to a powerful and intuitive computing experience. By diligently preparing, following the installation steps carefully, and implementing robust post-installation practices, you can ensure a smooth transition and a secure, productive computing environment. This journey into macOS is not just about technology; it’s about building a digital workspace that supports your personal brand, enhances your financial management through efficient tools, and keeps you secure in the ever-evolving digital landscape. Enjoy your revitalized Mac!
aViewFromTheCave is a participant in the Amazon Services LLC Associates Program, an affiliate advertising program designed to provide a means for sites to earn advertising fees by advertising and linking to Amazon.com. Amazon, the Amazon logo, AmazonSupply, and the AmazonSupply logo are trademarks of Amazon.com, Inc. or its affiliates. As an Amazon Associate we earn affiliate commissions from qualifying purchases.