
In the ever-evolving landscape of personal computing, the choice of operating system profoundly impacts our digital experience, productivity, and even our financial outlays. While macOS offers a refined, user-friendly environment, a growing number of Mac users are exploring the robust, open-source world of Linux. This comprehensive guide will walk you through the process of installing Linux on your Mac, unlocking a universe of possibilities from enhanced performance to unparalleled customization, and even extending the lifespan of your trusted Apple hardware. Whether you’re a developer seeking a powerful command-line interface, a privacy advocate, or simply curious about an alternative OS, bringing Linux to your Mac is a journey worth taking.

Linux, a Unix-like operating system kernel, serves as the foundation for countless distributions (distros) like Ubuntu, Fedora, Mint, and Debian. Its open-source nature means it’s free to use, modify, and distribute, fostering a vibrant global community of developers and users. Installing Linux on a Mac isn’t just a technical endeavor; it’s a strategic move for anyone looking to maximize their hardware investment, expand their skill set, and embrace the ethos of digital freedom. By understanding the motivations, preparing diligently, and following the right steps, you can seamlessly integrate Linux into your Mac ecosystem, either as a dual-boot companion or a standalone power driver.
Why Choose Linux for Your Mac? Unlocking New Potentials
Deciding to install an operating system different from the one pre-loaded on your device is a significant decision. For Mac users, the allure of Linux stems from a compelling array of benefits that touch upon technology, personal branding, and even financial prudence.
Performance and Resource Efficiency
One of the most immediate advantages of Linux, especially for older Macs, is its incredible efficiency. macOS can be resource-intensive, and as hardware ages, performance often declines. Linux distributions, particularly lightweight ones like XFCE or LXQt-based distros, can breathe new life into an aging MacBook Pro or iMac. They demand fewer CPU cycles, less RAM, and minimal storage, resulting in a snappier, more responsive system. This isn’t just about speed; it’s about extending the usable life of your hardware, turning a potentially obsolete machine into a capable daily driver, which is a smart financial move, delaying the need for an expensive upgrade.
Open-Source Freedom and Customization
At its core, Linux embodies the spirit of open-source. This means transparency, community collaboration, and the freedom to inspect, modify, and distribute the code. For users, this translates into unparalleled customization. From choosing your desktop environment (GNOME, KDE, XFCE, Cinnamon, etc.) to tweaking every aspect of the user interface and underlying system behavior, Linux offers a level of control that proprietary operating systems simply can’t match. This freedom is particularly appealing to tech enthusiasts, developers, and anyone who prefers their tools to adapt to them, rather than the other way around. It fosters a sense of ownership and deep understanding of your computing environment, contributing to a more capable and adaptable “personal brand” in the tech world.
Enhanced Security and Privacy
While macOS boasts a strong security posture, Linux offers a different kind of advantage: a less attractive target for mainstream malware and a community deeply committed to privacy. Due to its diverse ecosystem and smaller market share compared to Windows, Linux is less frequently targeted by widespread viruses and ransomware. Furthermore, the open-source nature allows security experts worldwide to scrutinize its code for vulnerabilities, often leading to quicker patches. Many Linux distributions come with strong privacy defaults, minimal telemetry, and tools that empower users to control their data, aligning perfectly with the growing demand for digital self-sovereignty.
Access to Diverse Software Ecosystem and Development Tools
Linux is the undisputed champion for developers, system administrators, and anyone working with open-source technologies. It provides a native environment for a vast array of programming languages, frameworks, and command-line tools that are often easier to set up and manage than on macOS (or Windows). From Docker and Kubernetes to Python, Node.js, and Ruby on Rails, Linux offers a seamless development experience. Beyond development, it provides access to a rich repository of free and open-source software for graphic design (GIMP, Inkscape), office productivity (LibreOffice), video editing (Kdenlive), and much more, often providing powerful alternatives to commercial applications without the recurring subscription costs, directly impacting your “money” spent on software.
Skill Development and Career Opportunities
Learning Linux isn’t just about using an operating system; it’s about acquiring a valuable skill set. Proficiency in Linux is highly sought after in various tech industries, including cloud computing, cybersecurity, web development, and server administration. By installing and managing Linux on your Mac, you gain practical experience with command-line interfaces, package management, system configuration, and troubleshooting – all skills that can significantly enhance your professional portfolio and open doors to new career opportunities. This directly contributes to building a stronger “personal brand” and increasing your marketability in the competitive tech job market.
Essential Preparations Before You Begin
The journey to installing Linux on your Mac requires careful planning and preparation to ensure a smooth, successful, and data-safe process. Skipping these crucial steps can lead to data loss or system instability, making them non-negotiable.
Back Up Your Mac: Your Digital Safety Net
This is the single most critical step. Installing a new operating system, especially when modifying disk partitions, carries inherent risks. A comprehensive backup ensures that all your precious photos, documents, applications, and settings are safe, allowing you to restore your Mac to its original state if anything goes wrong.
- Time Machine: The easiest method for macOS users. Connect an external drive (at least twice the size of your Mac’s internal storage) and let Time Machine perform a full backup.
- Cloud Services: For specific files, services like iCloud, Google Drive, or Dropbox can supplement your local backup.
- Disk Cloning: For advanced users, tools like Carbon Copy Cloner or SuperDuper! can create a bootable clone of your macOS drive.
- Tip for Money/Brand: Investing a bit of time here saves potential weeks of lost work and the cost of data recovery services, protecting both your financial stability and professional reputation.
Choose Your Linux Distribution: Tailoring to Your Needs
The world of Linux distributions is vast, each offering a unique blend of features, aesthetics, and philosophies. Your choice depends on your experience level, hardware, and intended use.
- Ubuntu: Highly popular, user-friendly, and excellent for beginners. It has a massive community and extensive documentation. Great for general use and development.
- Linux Mint: Based on Ubuntu, Mint offers a more traditional desktop experience (often likened to Windows) and includes many multimedia codecs out-of-the-box. Another excellent choice for newcomers.
- Fedora: Known for adopting the latest open-source technologies quickly. It offers a clean GNOME desktop and is a favorite among developers.
- Debian: The foundational distribution for many others (including Ubuntu). It’s incredibly stable and robust but can have a steeper learning curve.
- Elementary OS: Focuses on a macOS-like aesthetic and user experience, prioritizing simplicity and elegance.
- Arch Linux/Gentoo: For advanced users who want ultimate control and a deep understanding of their system, but involve manual configuration.
- Consideration: For older Macs, lightweight options like Xubuntu, Lubuntu, or Pop!_OS might offer better performance. For Apple Silicon Macs, Asahi Linux is the leading (and practically only) native option.
Gather Necessary Tools and Resources
Before starting, ensure you have the following:
- USB Flash Drive (at least 8GB): This will be used to create a bootable Linux installer. Ensure it’s empty or you’re okay with losing its contents.
- Stable Internet Connection: For downloading the Linux ISO file and potential driver updates during or after installation.
- Power Adapter: Keep your Mac plugged in throughout the entire installation process to avoid power interruptions.
- External Keyboard/Mouse (Optional but Recommended): Some Macs might have temporary issues with built-in peripherals during early installation stages.
- Documentation: Have this guide or other relevant resources accessible on another device in case you encounter issues.
Check Compatibility and Hardware Considerations
- Intel Macs: Most Intel-based Macs (generally 2006-2019) are highly compatible with various Linux distributions. The biggest challenge often involves proprietary Wi-Fi or graphics drivers.
- Apple Silicon (M1/M2/M3) Macs: Installing traditional Linux distributions on Apple Silicon Macs is significantly more complex due to Apple’s custom ARM architecture and strict security measures. Asahi Linux is the only project actively developing a functional Linux port for these machines, offering a native experience. Other methods typically involve virtualization (Parallels Desktop, UTM) rather than bare-metal installation.
- Disable Secure Boot and Gatekeeper (Intel Macs): For dual-booting or replacing macOS, you may need to adjust security settings.
- Secure Boot: Found in Startup Security Utility (boot into Recovery Mode:
Command + Rat startup). Set to “No Security” or “Medium Security.” - Gatekeeper: While not directly affecting boot, Gatekeeper might prevent you from running unverified applications like ISO burners. You can temporarily adjust settings in
System Preferences > Security & Privacy > General.
- Secure Boot: Found in Startup Security Utility (boot into Recovery Mode:
Methods for Installing Linux on Your Mac
There are several approaches to getting Linux onto your Mac, each with its own advantages, disadvantages, and specific use cases. Your choice will depend on your desired level of integration, technical comfort, and hardware.
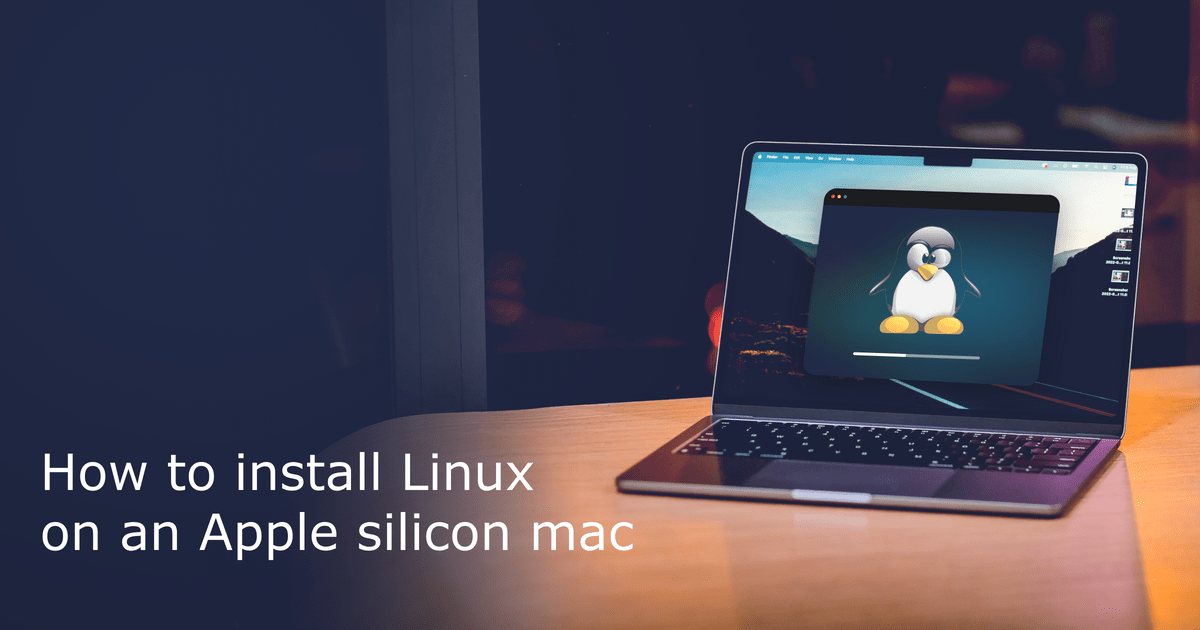
1. Dual Booting: macOS and Linux Side-by-Side
This is the most popular method for those who want the best of both worlds. You can choose which operating system to boot into at startup.
- Pros: Full native performance for both macOS and Linux; allows you to keep macOS for specific applications while leveraging Linux for others.
- Cons: Requires partitioning your drive, which can be daunting; takes up more storage space.
- Steps:
- Shrink Your macOS Partition: Open Disk Utility (from
Applications/Utilities). Select your main Macintosh HD, click “Partition,” then “Subtract” (-) to create free space. Ensure you leave enough space for macOS (at least 50-100GB) and allocate sufficient space for your Linux installation (minimum 30-50GB, more if you plan to install many applications). Do not format the new free space; leave it as “Free Space.” - Create a Bootable Linux USB:
- Download your chosen Linux distribution’s ISO file.
- Use a tool like Etcher (Balena Etcher) or UNetbootin to “burn” the ISO onto your USB drive. These tools are cross-platform and user-friendly.
- Boot from the USB:
- Plug in the bootable USB.
- Restart your Mac and immediately hold down the
Option(Alt) key. - You’ll see a boot menu. Select your USB drive (often labeled “EFI Boot” or “Windows”).
- Install Linux:
- Once the Linux live environment loads, you’ll usually find an “Install [Distribution Name]” icon on the desktop.
- Follow the on-screen prompts. When asked about installation type, choose “Something else” or “Manual partitioning.”
- Identify the free space you created earlier. Create at least two new partitions within this free space:
- Root Partition (
/): Primary partition, Ext4 filesystem. Allocate most of your Linux space here (e.g., 20-40GB). - Swap Area: Logical partition. Size should be roughly equal to your RAM (or 2x if you have less than 4GB RAM), for hibernation and memory overflow.
- (Optional) Home Partition (
/home): Logical partition, Ext4. This keeps your personal files separate, making future reinstallations easier.
- Root Partition (
- Bootloader Installation: Crucially, ensure the bootloader (GRUB) is installed to the EFI partition of your main drive (usually
/dev/sdaor/dev/nvme0n1for internal drives, not/dev/sda1or a specific partition). This allows GRUB to manage booting both macOS and Linux. - Complete the installation and restart. If GRUB doesn’t appear, you might need to adjust boot order in macOS Startup Disk or use a tool like rEFInd (an open-source boot manager).
- Shrink Your macOS Partition: Open Disk Utility (from
2. Virtual Machine: Linux Within macOS
For those who need to use Linux occasionally or want to experiment without altering their disk, a virtual machine (VM) is ideal.
- Pros: No partitioning required; completely safe for your macOS installation; easy to revert changes; can run multiple Linux distros simultaneously.
- Cons: Performance is generally lower than native installation; consumes macOS resources; not ideal for heavy graphical tasks or bare-metal hardware access.
- Steps:
- Install Virtualization Software: Popular choices include VirtualBox (free, open-source), VMware Fusion (paid), or Parallels Desktop (paid, excellent for Apple Silicon Macs).
- Download Linux ISO: Get the ISO file of your desired Linux distribution.
- Create a New Virtual Machine:
- Launch your virtualization software.
- Create a new VM, selecting “Linux” and your specific distribution type.
- Allocate RAM (e.g., 4GB), CPU cores (e.g., 2), and virtual disk space (e.g., 30GB).
- Point the VM to your downloaded Linux ISO file as the virtual CD/DVD drive.
- Install Linux in the VM: Start the VM, and it will boot from the ISO. Follow the standard Linux installation prompts, choosing “Erase disk and install Linux” as you are installing on a virtual disk, not your real hardware.
- Install Guest Additions/Tools: After installation, install the “Guest Additions” (VirtualBox) or “VMware Tools” for better performance, screen resizing, and shared clipboard functionality.
- Note for Apple Silicon: Parallels Desktop offers excellent performance for ARM-based Linux distributions (like Ubuntu for ARM) on M-series Macs, effectively bridging the compatibility gap. UTM is a free, open-source alternative.
3. Replacing macOS Entirely: A Full Linux Conversion
For the purist or those who no longer need macOS, this method dedicates your entire Mac to Linux.
- Pros: Maximum performance and resource utilization for Linux; simpler installation (no dual-boot complexities); complete control over your hardware.
- Cons: Irreversible without a macOS reinstall; no access to macOS applications; requires full commitment to Linux.
- Steps:
- Create Bootable Linux USB: Same as for dual-booting.
- Boot from USB: Restart your Mac, hold
Option, and select your USB. - Install Linux: When prompted, choose “Erase disk and install Linux.” This will wipe your entire hard drive, including macOS, and install Linux. Ensure your backup is complete before proceeding!
- Complete the installation.
4. Running Linux from a Live USB (Temporary)
This is a non-destructive way to try out Linux without installing anything.
- Pros: No changes to your Mac’s storage; perfect for testing different distros; ideal for troubleshooting or data recovery.
- Cons: Slower performance; no persistent changes (everything resets on reboot); cannot install software permanently.
- Steps: Create a bootable USB as described above. Boot from it by holding
Option. Choose “Try Linux” or “Live Session” instead of “Install.”
Special Considerations for Apple Silicon (M1/M2/M3) Macs
As mentioned, M-series Macs present a unique challenge. Apple’s custom ARM architecture, coupled with sophisticated security chips (Secure Enclave), means traditional Intel-based Linux distributions won’t work natively.
- Asahi Linux: This pioneering project is dedicated to bringing a fully functional Linux experience to Apple Silicon Macs. It’s under active development but already offers impressive compatibility for basic desktop use. Installation typically involves running a script from macOS that partitions your drive and sets up the Asahi environment. This is the closest to a “native” bare-metal Linux installation for M-series Macs.
- Virtualization: Solutions like Parallels Desktop, UTM, or even Docker Desktop (for containerized Linux environments) allow you to run ARM-based Linux distros within macOS. This is often the easiest and most stable way to get a Linux environment on Apple Silicon without complex partitioning.
Post-Installation Steps and Optimization
Once Linux is successfully installed, a few essential steps will ensure your system is up-to-date, secure, and tailored to your needs.
Update Your System and Drivers
This is paramount immediately after installation.
- Open your terminal (Ctrl+Alt+T) and run:
bash

sudo apt update

sudo apt upgrade

sudo apt dist-upgrade # For Debian/Ubuntu-based distros

sudo reboot
(Commands vary slightly for other distros like Fedora:sudo dnf update). - Check for proprietary drivers (especially for Wi-Fi, graphics, and Bluetooth on older Macs). Many distros offer a “Driver Manager” tool to help you install these. For Nvidia or AMD GPUs, their official drivers often provide better performance.
Install Essential Software
Linux offers vast software repositories.
- Web Browser: Firefox is usually pre-installed, but you can easily install Chrome/Chromium or Brave.
- Office Suite: LibreOffice is the default, offering excellent compatibility with Microsoft Office formats.
- Media Player: VLC Media Player is a versatile choice for almost all formats.
- Development Tools: If you’re a developer, install your preferred IDE (VS Code, Sublime Text), version control (Git), and programming language runtimes.
- Utilities: Tools like GIMP (image editing), Inkscape (vector graphics), Kdenlive (video editing), and various command-line utilities.
Customize Your Desktop Environment
This is where Linux truly shines. Explore different desktop environments and themes.
- Desktop Environments: If you started with Ubuntu (GNOME), you might try KDE Plasma, XFCE, Cinnamon, MATE, or LXQt. You can install multiple and switch at login.
- Themes and Icons: Personalize your desktop with new themes, icon packs, fonts, and widgets.
- Conky: A highly customizable system monitor that displays information on your desktop.
Secure Your Linux Installation
While generally more secure, taking proactive steps is always wise.
- Strong Passwords: Use unique, complex passwords.
- Firewall: Enable the built-in firewall (UFW – Uncomplicated Firewall for Ubuntu/Debian).
sudo ufw enable - Regular Updates: Keep your system updated to patch vulnerabilities.
- Antivirus (Optional): While not strictly necessary for most desktop Linux users, ClamAV is available if you deal with files from Windows systems.
- Learn Basic Security Practices: Understand file permissions, use
sudojudiciously, and be cautious about running scripts from unknown sources.
Troubleshooting Common Issues
- Wi-Fi or Bluetooth Not Working: Often due to missing proprietary drivers. Check your distro’s driver manager or search online for your specific Mac model and Linux distro.
- Graphics Issues: Install proprietary graphics drivers if available. For older Intel Macs, ensure
firmware-b43-installer(for Broadcom Wi-Fi) is installed. - No Sound: Check
alsamixerin the terminal to ensure channels aren’t muted. Reinstall audio drivers if needed. - Bootloader Issues: If you can’t boot into macOS or Linux, you might need to repair GRUB using a live USB or use a tool like rEFInd.
Conclusion
Installing Linux on your Mac is more than just a technical procedure; it’s an opportunity to redefine your computing experience. Whether you choose to dual-boot, virtualize, or fully embrace Linux, you’re tapping into a world of open-source innovation, unparalleled customization, and robust performance. This journey empowers you with greater control over your hardware, enhances your digital security, and can even contribute to your professional growth by expanding your technical skill set.
By extending the life of older Macs, utilizing free and powerful software, and gaining valuable technical expertise, adopting Linux is a smart decision from both a technological and financial perspective, while also boosting your personal brand in the tech sphere. The learning curve, though present, is immensely rewarding. So, take the leap, experiment with different distributions, and discover the vibrant, flexible, and powerful world that Linux brings to your Mac. Your journey into the open-source frontier starts now.
aViewFromTheCave is a participant in the Amazon Services LLC Associates Program, an affiliate advertising program designed to provide a means for sites to earn advertising fees by advertising and linking to Amazon.com. Amazon, the Amazon logo, AmazonSupply, and the AmazonSupply logo are trademarks of Amazon.com, Inc. or its affiliates. As an Amazon Associate we earn affiliate commissions from qualifying purchases.