
In the intricate world of personal computing, the keyboard stands as one of the most fundamental interfaces between human and machine. It’s the primary conduit for inputting commands, crafting documents, and navigating digital landscapes. While many might consider the keyboard an inseparable, static component of their laptop, circumstances often arise that necessitate its installation or replacement. Whether due to wear and tear, liquid damage, a desire for an upgraded layout, or even accidental damage, understanding how to properly install a keyboard on a laptop is a valuable technical skill for any computer user.
This comprehensive guide will demystify the process, walking you through the critical considerations, essential preparations, and detailed steps involved in successfully installing a keyboard on your laptop. We’ll delve into both internal and external keyboard scenarios, ensuring you have the knowledge to approach this task with confidence and precision. Adhering strictly to a technical focus, we will provide insights into hardware compatibility, safety protocols, and troubleshooting common issues, empowering you to maintain and optimize your laptop’s functionality.
Understanding Your Keyboard Installation Needs
Before embarking on any installation project, a clear understanding of the ‘why’ and ‘what’ is paramount. Laptops come in myriad designs, and keyboards, despite their seemingly universal function, have significant variations that directly impact the installation process.
Internal vs. External Keyboards: A Crucial Distinction
The first and most critical distinction is between internal and external keyboards.
-
Internal Keyboards: These are the integrated keyboards built directly into the laptop chassis. Replacing an internal keyboard is a more involved process, requiring opening the laptop, disconnecting existing components, and carefully seating the new unit. This is typically done when the original internal keyboard is damaged, has failed, or you wish to upgrade to a specific layout (e.g., from an international layout to a US layout or vice-versa, or a backlit version). The installation steps for internal keyboards form the core of the hands-on technical tutorial.
-
External Keyboards: These are standalone peripherals that connect to your laptop via USB (wired or wireless dongle) or Bluetooth. Installing an external keyboard is generally a plug-and-play operation, requiring minimal technical expertise beyond ensuring driver compatibility or Bluetooth pairing. While simpler, understanding proper connection and driver management is still a technical aspect. For the purpose of this article, the emphasis will primarily be on the more complex internal keyboard installation, as it presents a more significant technical challenge and learning opportunity.
Compatibility Check: Ensuring a Seamless Fit
Compatibility is the linchpin of any hardware installation. For internal keyboards, this means matching the exact model of your laptop. Keyboards are specific to laptop models, and sometimes even sub-models within a series.
-
Model Number: Always verify your laptop’s exact model number, usually found on a sticker on the underside or within the BIOS/system information.
-
Part Number: New keyboards often have specific part numbers that must match your original or an officially compatible replacement. Look for the part number on the back of your existing keyboard once removed, or consult your laptop manufacturer’s documentation.
-
Layout and Language: Ensure the new keyboard has the desired language layout (e.g., QWERTY US, AZERTY French, QWERTZ German) and any special features like backlighting, if applicable.
-
Connector Type: The flex cable that connects the keyboard to the motherboard must match the connector on your specific motherboard. These vary significantly in width and pin configuration.
-
Mounting Points: The screw holes and clips on the new keyboard must align perfectly with the laptop’s chassis.
For external keyboards, compatibility is simpler but still important:
-
Connectivity: USB-A, USB-C, Bluetooth version.
-
Operating System: While most external keyboards are universally compatible, some advanced features or software might require specific OS versions.
Why Replace or Install a New Keyboard?
Understanding the common triggers for keyboard replacement can help diagnose issues and prepare for the installation:
-
Physical Damage: Spilled liquids, broken keys, missing keycaps, or a physically damaged frame.
-
Component Failure: Individual keys not responding, ghosting (multiple keys registering from a single press), or complete keyboard non-functionality due to internal circuit damage.
-
Wear and Tear: Faded key labels, worn-out key mechanisms affecting typing experience.
-
Upgrade or Customization: Desire for a backlit keyboard where one didn’t exist, a different language layout, or a specific key-travel feel.
-
Hygiene/Sanitation: In some environments, replacing a keyboard is preferred over extensive cleaning for hygiene purposes.
Essential Preparations Before Installation
A successful technical installation hinges on meticulous preparation. Rushing the process or neglecting critical steps can lead to further damage or frustrating setbacks.
Gathering the Right Tools and Workspace
Having the correct tools readily available will streamline the process and prevent damage.
-
Screwdriver Set: A precision screwdriver set, typically including Phillips head (PH00, PH0, PH1) and sometimes Torx (T5, T6) or Pentalobe drivers, is essential. Magnetic tips are a significant advantage for tiny screws.
-
Pry Tools: Plastic spudgers or guitar picks are invaluable for gently prying open laptop cases, bezels, and clips without scratching or marring the plastic. Avoid metal tools unless specifically instructed, as they can easily damage delicate components.
-
Tweezers: Fine-tipped tweezers can be very useful for handling small screws, ribbon cables, and connectors.
-
Anti-Static Wrist Strap: An anti-static wrist strap connected to a grounded surface is highly recommended to protect sensitive electronic components from electrostatic discharge (ESD), which can cause permanent damage.
-
Small Container/Mat: A small magnetic mat or compartmentalized container to organize screws as you remove them. Labeling or drawing a diagram of screw locations can be immensely helpful, as screws often vary in length and type.
-
Clean, Well-Lit Workspace: A clear, stable, and well-lit surface ensures you can see all components clearly and work without obstruction.
Prioritizing Safety: Powering Down and Static Discharge
Safety is paramount when working with electronics.
-
Power Down Completely: Ensure the laptop is completely powered off, not just in sleep mode. Disconnect the power adapter.
-
Remove Battery: For laptops with removable batteries, always remove the battery before opening the chassis. For laptops with internal batteries, disconnect the battery connector from the motherboard as soon as you gain access to prevent accidental short circuits or power surges during the repair. This is a critical step for preventing component damage and electric shock.
-
ESD Protection: As mentioned, an anti-static wrist strap is crucial. If one is not available, frequently touch a grounded metal object (like an unpainted metal pipe or the metal chassis of a desktop computer) to discharge any static electricity built up on your body before touching internal components. Work on an anti-static mat if possible.
Backing Up Your Data: A Prudent Precaution
While replacing a keyboard typically doesn’t directly impact data, any procedure that involves opening your laptop carries an inherent, albeit small, risk.
-
Data Integrity: As a best practice, always back up critical data before performing any internal hardware work. This safeguards against potential accidental damage during the process that could render your laptop inoperable or lead to data loss.
-
System Restore Point: Create a system restore point on Windows or a Time Machine backup on macOS. This provides a software-level recovery option should any driver or system configuration issues arise post-installation.
The Step-by-Step Guide to Keyboard Installation
The actual installation process varies significantly between laptop models. The following steps provide a general framework; always consult your laptop’s specific service manual or a reputable disassembly guide for your exact model.
Disassembling Your Laptop: Accessing the Keyboard Compartment
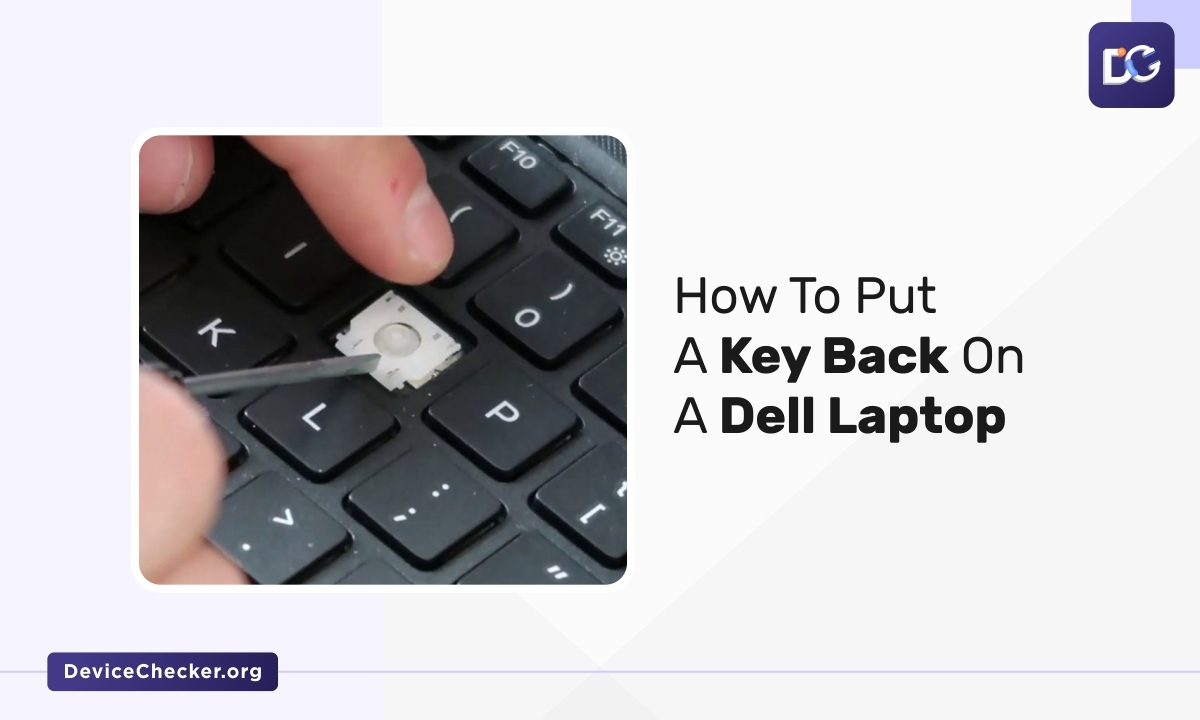
This is often the most time-consuming part.
-
Remove External Covers: Begin by carefully removing any screws from the bottom cover of the laptop. These screws can be hidden under rubber feet or stickers. Use plastic pry tools to gently separate the bottom cover from the main chassis, working your way around the edges.
-
Disconnect Battery: Once the bottom cover is off, locate the battery and carefully disconnect its power cable from the motherboard. This is a vital safety step.
-
Identify Keyboard Fasteners: The keyboard might be secured by screws from the bottom, clips from the top, or even riveted/glued into the top case. Some laptops require removing the entire top case (palm rest) assembly to access the keyboard. Others allow access by removing a small bezel above the keyboard or prying up the keyboard itself from the top.
-
Remove Other Components (if necessary): Depending on your laptop’s design, you may need to remove other components like the optical drive, hard drive, SSD, or even the motherboard itself to get to the keyboard screws or mounting points. Take photos at each step to aid reassembly.
Disconnecting the Old Keyboard (if applicable)
Once you’ve gained access to the keyboard’s underside or its connection point:
-
Locate the Ribbon Cable: Identify the flat, flexible ribbon cable (flex cable) that connects the keyboard to the motherboard. It’s usually secured by a small ZIF (Zero Insertion Force) connector.
-
Open the ZIF Connector: Gently flip up the small retaining clip (often black or brown) on the ZIF connector. Do not force it; these are delicate.
-
Carefully Extract the Cable: Once the clip is open, the ribbon cable should slide out easily. Avoid pulling on the cable itself; always handle it by its reinforced end.
-
Remove Mounting Screws/Clips: Unscrew any screws holding the old keyboard in place. If it’s riveted or glued, you may need to gently pry it out, exercising extreme caution not to damage the laptop’s plastic frame. Some keyboards are integrated into the palm rest and require replacing the entire top case assembly.
Connecting the New Keyboard Flex Cable
With the old keyboard removed:
-
Position the New Keyboard: Carefully place the new keyboard into its designated slot, ensuring all mounting holes align perfectly.
-
Insert the Flex Cable: Take the new keyboard’s flex cable and gently slide it into the ZIF connector on the motherboard. Ensure it’s fully seated and straight, without any folds or twists.
-
Close the ZIF Connector: Carefully push down the retaining clip on the ZIF connector until it locks into place, securing the ribbon cable. Double-check that the cable is firmly held and cannot be easily pulled out.
-
Secure the Keyboard: Fasten any screws that hold the keyboard in place. If it uses clips, ensure it’s snapped securely into the chassis.
Securing the Keyboard and Reassembling the Laptop
Reverse the disassembly process methodically.
-
Reconnect Internal Components: Reconnect any components you disconnected to access the keyboard (e.g., hard drive, optical drive, Wi-Fi card).
-
Reconnect Battery: Reconnect the battery’s power cable to the motherboard.
-
Reattach Bottom Cover: Carefully align the bottom cover and press it into place, ensuring all clips engage properly. Screw it back in, making sure each screw goes into its original hole. Do not overtighten screws, as this can strip the plastic threads.
-
Final Checks: Before powering on, give the laptop a quick visual inspection to ensure no tools are left inside, all covers are secure, and no cables are pinched.
Post-Installation Verification and Troubleshooting
The installation isn’t truly complete until you’ve verified full functionality and addressed any potential issues.
Initial Power-Up and Functionality Test
-
Power On: Reconnect the power adapter and power on your laptop. Listen for any unusual noises and observe the boot process.
-
Key Test: Once logged into your operating system, open a text editor (like Notepad, Word, or a browser’s address bar). Systematically press every single key on the new keyboard, ensuring each key registers correctly and without delay. Pay special attention to function keys (Fn), number pad keys, and modifier keys (Shift, Ctrl, Alt).
-
Backlight Test (if applicable): If your new keyboard has backlighting, test its functionality and brightness adjustments.
-
Touchpad/TrackPoint Test: If the keyboard installation required disconnecting or moving the touchpad/TrackPoint, ensure these also function correctly.
Driver Installation and Software Configuration
Most modern operating systems will automatically detect and configure a new keyboard, especially if it’s an internal replacement matching the original.
-
Automatic Drivers: In many cases, Windows or macOS will install the necessary drivers upon first boot.
-
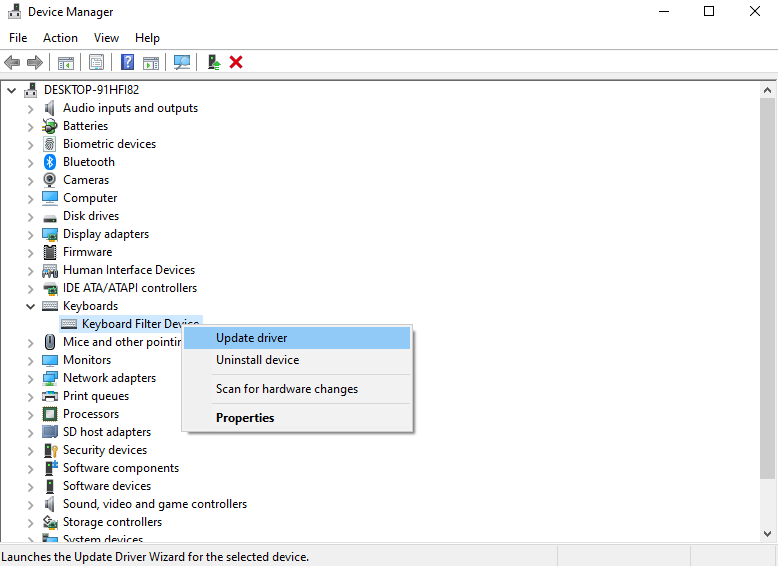
Manufacturer Drivers: If you encounter issues (e.g., function keys not working, backlight control missing), visit your laptop manufacturer’s support website. Download and install the latest keyboard or hotkey drivers specific to your laptop model.
-
Language Settings: Verify that your operating system’s keyboard layout settings match the physical layout of your new keyboard to avoid confusion (e.g., if you installed a German QWERTZ layout, set your OS to German keyboard).
-
BIOS/UEFI Check: In rare cases, some advanced keyboard features might have settings in the BIOS/UEFI. Access this menu during startup (usually by pressing Del, F2, F10, or F12) to verify.
Common Issues and How to Address Them
Even with careful installation, issues can arise.
-
Keys Not Working or Malfunctioning:
-
Loose Ribbon Cable: The most common culprit. Power down, open the laptop, and reseat the keyboard flex cable in its ZIF connector. Ensure the clip is fully engaged.
-
Bent Pins/Damaged Cable: Inspect the flex cable for any creases, tears, or bent pins. A damaged cable will need replacement.
-
Driver Issue: Reinstall or update keyboard drivers from the manufacturer’s website.
-
Faulty Keyboard: Though rare for new parts, a defective new keyboard is possible. Test with an external keyboard to rule out motherboard issues.
-
-
Backlight Not Working:
-
Connection: Ensure the backlight ribbon cable (if separate from the main keyboard cable) is properly connected.
-
Drivers/Software: Install manufacturer’s hotkey or utility software.
-
BIOS Settings: Check if backlight is disabled in BIOS.
-
-
Laptop Not Powering On After Installation:
-
Disconnected Battery: Double-check that the battery cable is firmly connected to the motherboard.
-
Loose Components: Ensure all internal components, especially the power button flex cable, are properly reconnected.
-
Short Circuit (rare): If a metallic tool was used or components were mishandled, a short circuit might have occurred. Disassemble carefully and inspect for burn marks or damage. If this is suspected, seek professional help.
-
-
Screws Left Over/Missing: Always account for all screws. If you have leftovers, retrace your steps. If you’re missing one, try to identify its location and if it’s critical. Small cosmetic screws are less critical than structural ones.
Maintaining Your New Keyboard and Future Considerations
Installing a new keyboard is an investment in your laptop’s longevity and usability. Proper maintenance will ensure it serves you well for years to come.
Best Practices for Keyboard Longevity
-
Avoid Liquids: The primary killer of laptop keyboards is liquid spills. Keep beverages away from your laptop. If a spill occurs, immediately power down, disconnect power, and turn the laptop upside down to drain liquid. Seek professional cleaning if possible.
-
Regular Cleaning: Use compressed air to blow out dust and debris from under the keycaps. Wipe the keycaps with a microfiber cloth lightly dampened with isopropyl alcohol for sanitization and to remove oils.
-
Gentle Usage: Avoid excessively hard typing or slamming keys, which can accelerate wear on key mechanisms.
-
Protective Covers: Consider a silicone keyboard cover, especially if you work in dusty environments or are prone to spills.
Exploring External Keyboard Options
While an internal replacement restores your laptop’s integrated functionality, external keyboards offer flexibility and ergonomic benefits:
-
Ergonomics: External keyboards, especially mechanical ones or ergonomic designs, can provide a superior typing experience and reduce strain, particularly for prolonged use.
-
Portability: A small, compact external keyboard can be useful for travel.
-
Damage Control: If your internal keyboard is damaged, an external keyboard offers an immediate workaround without needing internal repair.
-
Specialized Use: Gamers, programmers, or content creators often prefer specialized external keyboards with programmable macros or unique key switches.
Professional Assistance: When to Call an Expert
While DIY repairs can be rewarding and cost-effective, there are times when professional intervention is warranted:
-
Complex Disassembly: Some laptops, particularly ultra-thin models, have extremely complex internal layouts, requiring specialized tools or techniques that make DIY repair risky.
-
Integrated Components: If your keyboard is riveted or integrated into the top case and requires replacing the entire palm rest assembly, the cost might be higher, and the process more intricate.
-
Uncertainty/Lack of Confidence: If you’re unsure at any step, lack the necessary tools, or feel uncomfortable with the process, it’s always safer to consult a qualified technician. Attempting a repair beyond your skill level can lead to further, more expensive damage.
-
Warranty Concerns: Performing a DIY repair will almost certainly void your laptop’s warranty. If your laptop is still under warranty and the issue is covered, seek an authorized repair to avoid invalidating it.
Installing a keyboard on a laptop is a testament to the modularity of modern electronics and a skill that enhances your technological self-reliance. By approaching the task with careful preparation, methodical execution, and thorough testing, you can successfully breathe new life into your laptop, ensuring its continued role as an indispensable tool in your digital endeavors.
aViewFromTheCave is a participant in the Amazon Services LLC Associates Program, an affiliate advertising program designed to provide a means for sites to earn advertising fees by advertising and linking to Amazon.com. Amazon, the Amazon logo, AmazonSupply, and the AmazonSupply logo are trademarks of Amazon.com, Inc. or its affiliates. As an Amazon Associate we earn affiliate commissions from qualifying purchases.