
JavaScript, often abbreviated as JS, is one of the foundational technologies of the World Wide Web, alongside HTML and CSS. It’s a high-level, interpreted programming language that brings interactivity and dynamic content to websites, transforming static pages into rich, engaging user experiences. However, the term “install JavaScript” can be a bit misleading, as JavaScript isn’t typically “installed” in the same way you’d install a software application. Instead, it encompasses ensuring your browser is configured to run it, and more broadly, setting up a development environment to write and execute JavaScript code for web development, server-side applications, and beyond.
This comprehensive guide will demystify the process, addressing both the client-side (browser-based) and server-side (Node.js) aspects of getting started with JavaScript. Whether you’re a budding developer eager to build dynamic web applications, a business owner looking to enhance your online presence, or simply someone trying to understand a core component of modern technology, understanding how JavaScript works and how to set up your environment is crucial. We’ll delve into the necessary steps, connecting them to key areas like Technology Trends, Software utilization, and the Productivity gains that mastering this language can offer.
Understanding JavaScript: More Than Just an Installation
Before diving into the practical steps, it’s essential to grasp the dual nature of “installing” JavaScript. For most users encountering a website, JavaScript is already “installed” and enabled within their web browser. For developers, “installation” refers to setting up a robust environment that allows them to write, test, and deploy JavaScript code both on the client-side and server-side.
JavaScript in the Browser: The Client-Side Powerhouse
The most common context for JavaScript is within web browsers. Every major web browser—Chrome, Firefox, Edge, Safari, Opera—comes with a built-in JavaScript engine. This engine is responsible for interpreting and executing the JavaScript code embedded in websites, enabling features like interactive forms, animated graphics, dynamic content updates, and much more. Without JavaScript, the modern web as we know it would cease to exist, reverting to static, text-heavy pages.
For the vast majority of users, JavaScript is enabled by default in their browser settings. You typically don’t need to “install” anything to view JavaScript-powered websites. However, in rare instances or for specific troubleshooting, you might need to check or modify your browser’s JavaScript settings.
How to Check and Enable JavaScript in Popular Browsers:
- Google Chrome:
- Open Chrome and type
chrome://settings/content/javascriptinto the address bar and press Enter. - Ensure “Sites can use JavaScript” is selected. If it says “Don’t allow sites to use JavaScript,” toggle it to “Sites can use JavaScript.”
- Open Chrome and type
- Mozilla Firefox:
- Firefox doesn’t have a direct graphical setting to disable JavaScript easily. It’s almost always enabled by default. If you suspect it’s off, it might be due to an extension (like NoScript).
- To check programmatically: Type
about:configin the address bar, accept the risk, then search forjavascript.enabled. Ensure its value istrue.
- Microsoft Edge:
- Open Edge and go to
edge://settings/content/javascript. - Ensure the toggle for “Allowed (recommended)” is switched on.
- Open Edge and go to
Unless you have a specific reason (e.g., security testing or extreme privacy concerns), it’s highly recommended to keep JavaScript enabled in your browser. Disabling it will severely limit your ability to interact with most modern websites, making them appear broken or dysfunctional. This browser-based JavaScript is key to delivering rich user experiences, which directly impacts Brand perception and user engagement.
JavaScript Beyond the Browser: Node.js and Server-Side Development
While JavaScript started as a client-side language, its capabilities have expanded dramatically with the advent of Node.js. Node.js is an open-source, cross-platform JavaScript runtime environment that allows you to execute JavaScript code outside of a web browser. This means you can use JavaScript to build server-side applications, command-line tools, desktop applications, and even connect to databases, effectively becoming a full-stack language.
This is where a true “installation” process comes into play. Installing Node.js on your machine equips you with the JavaScript runtime and its powerful package manager, npm (Node Package Manager), which is essential for modern web development workflows. It’s a cornerstone for anyone looking to delve deeper into web development, explore AI tools built with JavaScript, or develop sophisticated applications that transcend the browser’s limitations. Node.js aligns perfectly with current Technology Trends, enabling developers to build scalable and efficient systems using a single language for both frontend and backend.
Setting Up Your JavaScript Development Environment
For anyone aspiring to write, test, and deploy JavaScript code, setting up a proper development environment is the real “installation” process. This involves installing Node.js, choosing a suitable code editor, and understanding how to integrate JavaScript into your projects.
Installing Node.js: The Server-Side & Tooling Foundation
Node.js is the backbone for server-side JavaScript and provides access to npm, a vast ecosystem of open-source packages and tools that accelerate development.
Step-by-Step Installation Guide:
-
Download Node.js:
- Navigate to the official Node.js website: https://nodejs.org/.
- You’ll typically see two download options:
- LTS (Long Term Support): This is the recommended version for most users and production environments due to its stability and extended support.
- Current (Latest Features): This version includes the newest features but may be less stable. Unless you need a specific new feature, stick with the LTS version.
- Download the installer appropriate for your operating system (Windows, macOS, Linux). The website usually auto-detects your OS.
-
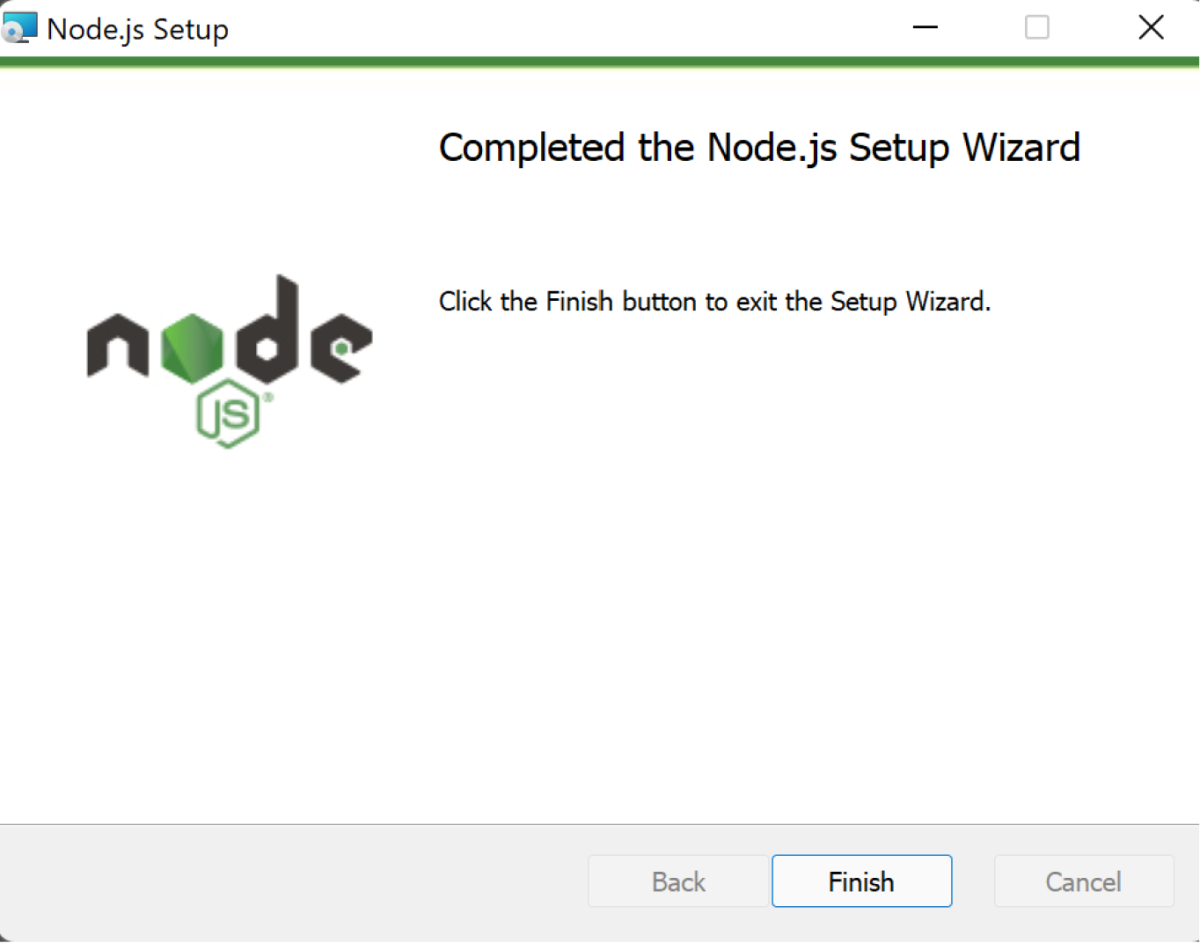
Run the Installer:
- Windows:
- Double-click the downloaded
.msifile. - Follow the prompts in the installation wizard. Accept the license agreement, choose the installation destination, and ensure “Node.js runtime” and “npm package manager” are selected (they usually are by default).
- It’s often recommended to check the “Automatically install the necessary tools for Native Modules” box, which installs additional tools like Chocolatey (a package manager) and Python, useful for compiling certain npm packages.
- Double-click the downloaded
- macOS:
- Double-click the downloaded
.pkgfile. - Follow the prompts, accepting the license and choosing the installation location.
- Double-click the downloaded
- Linux:
- While a binary installer is available, it’s often more common and recommended to use your distribution’s package manager (e.g.,
aptfor Debian/Ubuntu,yumfor CentOS/RHEL) or a version manager likenvm(Node Version Manager). For example, on Ubuntu:
bash

sudo apt update

sudo apt install nodejs npm
Usingnvmprovides more flexibility:
bash

curl -o- https://raw.githubusercontent.com/nvm-sh/nvm/v0.39.1/install.sh | bash

nvm install --lts

nvm use --lts
(Replacev0.39.1with the latest nvm version if needed)
- While a binary installer is available, it’s often more common and recommended to use your distribution’s package manager (e.g.,
- Windows:
-
Verify Installation:
- After the installation completes, open your terminal or command prompt (Windows: search for
cmdor PowerShell; macOS/Linux:Terminal). - Type the following commands and press Enter:
bash

node -v

npm -v
- If the installation was successful, you should see the version numbers for Node.js and npm printed on your screen. This confirms Node.js and npm are installed and correctly added to your system’s PATH, making them accessible from any directory.
- After the installation completes, open your terminal or command prompt (Windows: search for
The installation of Node.js is a crucial step for boosting developer productivity. npm, in particular, opens the door to millions of open-source packages, allowing you to leverage existing solutions for common problems, speeding up development, and reducing the need to write everything from scratch. This directly contributes to efficient software development within the Tech domain.
Choosing Your Code Editor: The Developer’s Canvas
While Node.js provides the runtime, a good code editor is your primary tool for writing JavaScript. A robust code editor enhances productivity with features like syntax highlighting, autocompletion, debugging tools, and integrated terminals.
Recommended Code Editors for JavaScript Development:
- Visual Studio Code (VS Code): This is by far the most popular and highly recommended free editor, developed by Microsoft. It’s lightweight, incredibly powerful, and boasts a vast ecosystem of extensions that can transform it into a full-fledged IDE for almost any language or framework.
- Sublime Text: A fast, sleek, and highly customizable text editor, popular for its performance and minimalist interface. It’s shareware, meaning you can use it for free with occasional purchase reminders.
- Atom: Developed by GitHub, Atom is a hackable text editor built using web technologies. It’s highly customizable and has a strong community, though it can sometimes be heavier than VS Code or Sublime Text.
- WebStorm: A powerful commercial IDE by JetBrains, specifically designed for web development. It offers advanced features like intelligent code analysis, sophisticated debugging, and deep integration with web frameworks, making it an excellent choice for professional developers who can afford its subscription.
Installing Visual Studio Code (Recommended):
- Download VS Code: Visit the official VS Code website: https://code.visualstudio.com/.
- Run the Installer: Download the appropriate installer for your OS and follow the on-screen instructions. The process is straightforward for Windows and macOS.
- Install Extensions: Once installed, open VS Code. You can enhance its functionality for JavaScript by installing recommended extensions. Go to the Extensions view (Ctrl+Shift+X or Cmd+Shift+X), and search for extensions like:
- “ESLint” (for code linting and style enforcement)
- “Prettier – Code formatter” (for automatic code formatting)
- “Live Server” (for a local development server for static/dynamic pages)
- Language-specific extensions for frameworks you might use (e.g., “React Snippets”).
A well-configured code editor like VS Code significantly contributes to developer productivity, making the coding process smoother, faster, and less error-prone. This aligns directly with the “Software” and “Productivity” aspects of our website’s Tech focus.
Integrating JavaScript into Your Web Projects
Once you have your browser enabling JavaScript and your development environment (Node.js + Code Editor) set up, the next logical step is to understand how to actually use JavaScript in your web projects.
Embedding JavaScript in HTML:
JavaScript code is typically linked to or embedded within HTML documents using the <script> tag. There are a few ways to do this:
- Inline JavaScript: Directly within an HTML tag (generally discouraged for maintainability).
html

<button onclick="alert('Hello from inline JS!');">Click Me</button>
- Internal JavaScript: Within a
<script>tag in the<head>or<body>of an HTML file.
html

<!DOCTYPE html>

<html lang="en">

<head>

    <meta charset="UTF-8">

    <meta name="viewport" content="width=device-width, initial-scale=1.0">

    <title>Internal JS Example</title>

    <script>

        // JavaScript code goes here

        console.log('Hello from internal JavaScript!');

    </script>

</head>

<body>

    <h1>Check your browser console!</h1>

</body>

</html>
- External JavaScript (Recommended): The most common and best practice is to link to external
.jsfiles. This keeps your HTML clean and allows you to reuse JavaScript code across multiple pages.- Create a file named
script.js(or any name with a.jsextension). - In your
index.htmlfile, add a<script>tag with thesrcattribute pointing to your.jsfile, ideally just before the closing</body>tag for performance.
html
<!DOCTYPE html>
<html lang="en">
<head>
<meta charset="UTF-8">
<meta name="viewport" content="width=device-width, initial-scale=1.0">
<title>External JS Example</title>
</head>
<body>¨K33K
¨K34K
</body>
</html>
- Inside
script.js:
javascript

// This is script.js

console.log('Hello from external JavaScript!');

alert('External script loaded!');
- Create a file named
Best Practices for <script> Tags:
- Placement: Place external
<script>tags just before the closing</body>tag. This ensures the HTML content loads and renders before the JavaScript attempts to manipulate it, preventing visual glitches and improving perceived page load speed. deferandasyncAttributes:defer: Tells the browser to download the script in parallel with parsing the HTML, but execute it only after the HTML document has been fully parsed. This is generally preferred for scripts that depend on the DOM.async: Tells the browser to download the script in parallel with parsing the HTML and execute it as soon as it’s downloaded, without waiting for the HTML parsing to complete. This is suitable for independent scripts that don’t rely on the DOM order.
html¨K36K
¨K37K
Verifying Your JavaScript Setup and First Steps
After setting up your environment, it’s crucial to verify that everything is working as expected. This involves running simple tests for both browser-side and Node.js environments.
Browser-Side Verification
-
Create a simple HTML file:
<!DOCTYPE html> <html lang="en"> <head> <meta charset="UTF-8"> <meta name="viewport" content="width=device-width, initial-scale=1.0"> <title>JS Test Page</title> </head> <body> <h1>Is JavaScript Working?</h1> <p>Loading...</p><script> document.getElementById('message').innerText = 'Yes, JavaScript is working!'; console.log('JavaScript successfully executed in the browser.'); </script></body>
</html>
-
Save the file as
index.htmlon your desktop. -
Open it in your web browser: Double-click the file, or drag it into your browser window.
-
Check the output: You should see “Yes, JavaScript is working!” displayed on the page.
-
Open the browser’s developer console: Press F12 (Windows) or Cmd+Option+I (macOS), navigate to the “Console” tab. You should see the message “JavaScript successfully executed in the browser.” This confirms your browser is executing JavaScript correctly.
Node.js Verification
-
Create a simple JavaScript file:
-
Open your code editor (e.g., VS Code).
-
Create a new file and add the following code:
// This is my first Node.js script
console.log('Hello from Node.js!');

const sum = (a, b) => a + b;
console.log('2 + 3 =', sum(2, 3));
-
-
Save the file as
app.js(or any.jsname) in a folder (e.g.,C:UsersYourUsermy-js-projector~/Documents/my-js-project). -
Open your terminal/command prompt:
- Navigate to the directory where you saved
app.jsusing thecdcommand. For example:
bash

cd C:UsersYourUsermy-js-project

# or on macOS/Linux:

cd ~/Documents/my-js-project
- Navigate to the directory where you saved
-
Run the script:
- Type
node app.jsand press Enter. - You should see the output:
Hello from Node.js!

2 + 3 = 5
This confirms that Node.js is correctly installed and can execute JavaScript files from your command line.
- Type
Troubleshooting Common Issues
- JavaScript not running in browser:
- Double-check browser settings (as described earlier).
- Clear browser cache and cookies.
- Ensure no browser extensions are blocking JavaScript (e.g., ad blockers, NoScript).
- External JavaScript not loading:
- Verify the
srcpath in your<script>tag is correct relative to your HTML file. - Check the browser’s developer console (Network tab) for errors indicating the script file wasn’t found (404 error).
- Verify the
nodecommand not found:- This usually means Node.js wasn’t added to your system’s PATH environment variable. Re-run the installer (especially on Windows) and ensure the “Add to PATH” option is selected. For Linux, ensure your
~/.bashrcor~/.zshrcis correctly configured if you usednvm.
- This usually means Node.js wasn’t added to your system’s PATH environment variable. Re-run the installer (especially on Windows) and ensure the “Add to PATH” option is selected. For Linux, ensure your
- Syntax Errors:
- If your script produces unexpected behavior or an error, check the browser’s console (for client-side JS) or the terminal output (for Node.js) for specific error messages and line numbers. Your code editor’s linting features (like ESLint) can help catch these proactively.
Beyond Installation: Leveraging JavaScript for Your Tech & Business Goals
“Installing” JavaScript is merely the first step on a journey that can lead to immense technological and financial opportunities. With your environment set up, you’re now poised to dive into the vast world of JavaScript development.
JavaScript in the Modern Tech Landscape
JavaScript is not just for simple website interactivity anymore; it’s a universal language permeating every layer of the technology stack:
- Frontend Frameworks & Libraries: Tools like React, Angular, and Vue.js (all JavaScript-based) have revolutionized frontend development, enabling the creation of complex, single-page applications (SPAs) with reactive user interfaces. These frameworks are at the forefront of Technology Trends in web development.
- Backend Development: With Node.js, JavaScript powers robust and scalable server-side applications, APIs, and microservices. Frameworks like Express.js are popular choices for building high-performance backends.
- Mobile App Development: Frameworks such as React Native and NativeScript allow developers to build truly native mobile applications for iOS and Android using JavaScript, significantly reducing development time and cost compared to platform-specific languages. This directly influences the “Apps” domain.
- Desktop Applications: Electron, another JavaScript-based framework, enables the creation of cross-platform desktop applications (like VS Code itself, Slack, Discord, Microsoft Teams) using web technologies.
- AI/Machine Learning: Libraries like TensorFlow.js bring machine learning capabilities directly into the browser and Node.js environments, allowing for client-side AI inference and even training smaller models. This showcases JavaScript’s relevance in “AI Tools.”
- DevOps & Automation: Node.js can be used to write scripts for automating development tasks, build processes, and deployment pipelines, enhancing overall “Productivity.”
Monetizing Your JavaScript Skills & Projects
Mastering JavaScript not only opens doors to cutting-edge technology but also presents significant opportunities for financial gain and brand enhancement:
- Career Opportunities: JavaScript developers are in high demand across the globe. Roles like Frontend Developer, Backend Developer, Full-Stack Developer, Mobile Developer, and UI/UX Engineer command competitive salaries. Learning JavaScript is a direct investment in your “Personal Finance” and career growth.
- Freelancing and Side Hustles: The versatility of JavaScript makes it ideal for freelancing. You can build websites, web applications, mobile apps, or backend services for clients, offering a flexible path to “Online Income” and “Side Hustles.”
- Building Digital Products: JavaScript empowers entrepreneurs to create their own Software as a Service (SaaS) platforms, e-commerce sites, or custom web applications that can generate passive income or form the basis of a startup. This directly ties into “Business Finance” and creating tangible assets.
- Enhancing Brand Strategy: For businesses, a highly interactive, responsive, and performant website built with modern JavaScript frameworks significantly enhances “Corporate Identity” and “Brand Reputation.” A smooth user experience fostered by JavaScript leads to higher engagement, better conversion rates, and a stronger digital presence. JavaScript skills are critical for executing effective “Marketing” and “Design” strategies online.

Conclusion
“Installing” JavaScript is a multifaceted concept. It involves ensuring your web browser is configured to run it for basic web interaction, and more fundamentally, setting up a robust development environment with Node.js and a powerful code editor like VS Code to actively write, test, and deploy JavaScript applications.
By following the steps outlined in this guide, you will have successfully laid the groundwork for your JavaScript journey. From enabling browser-side interactivity to harnessing the full power of Node.js for server-side applications, you’re now equipped to explore the vast possibilities this language offers. JavaScript’s omnipresence across the modern tech landscape, from dynamic websites to mobile apps and AI tools, makes it an indispensable skill for anyone looking to innovate, boost productivity, enhance brand presence, or unlock new financial opportunities in the digital era. The installation is just the beginning; the real power lies in what you build with it.
aViewFromTheCave is a participant in the Amazon Services LLC Associates Program, an affiliate advertising program designed to provide a means for sites to earn advertising fees by advertising and linking to Amazon.com. Amazon, the Amazon logo, AmazonSupply, and the AmazonSupply logo are trademarks of Amazon.com, Inc. or its affiliates. As an Amazon Associate we earn affiliate commissions from qualifying purchases.