
In the ever-evolving landscape of digital information, storage remains a critical component of any computing system. Whether you’re a gamer seeking faster load times, a creative professional managing vast media libraries, or simply someone looking to expand their PC’s capabilities, knowing how to install an internal hard drive is a fundamental skill. This comprehensive guide will demystify the process, transforming what might seem like a daunting technical task into an achievable DIY project. We’ll cover everything from initial preparation to the final software configuration, ensuring your new storage is ready to tackle your digital demands.
An internal hard drive serves as the primary or secondary storage unit within your computer, housing your operating system, applications, and all your files. Upgrading or adding a new internal drive can dramatically improve system performance, provide much-needed storage capacity, or even serve as a backup solution. While the specific steps can vary slightly depending on your computer’s form factor (desktop vs. laptop) and the type of drive (HDD, SATA SSD, NVMe SSD), the core principles remain consistent.
This guide aims to provide a professional, insightful, and engaging walkthrough for anyone looking to undertake this essential hardware upgrade. By understanding the underlying mechanics and following best practices, you can confidently enhance your system’s storage infrastructure, paving the way for improved efficiency and expanded digital horizons.
Preparing for Installation: Essential Pre-requisites
Before you even think about opening your computer case, a thorough preparation phase is crucial. This not only streamlines the installation process but also minimizes potential risks, ensuring a smooth and successful upgrade.
Identifying Your Needs: HDD vs. SSD, Form Factors
The first step is to determine what type of drive best suits your requirements and what your system can accommodate.
-
Hard Disk Drives (HDDs): These are traditional storage devices, offering large capacities at a lower cost per gigabyte. They are ideal for mass storage of files like documents, photos, and videos, but are slower than SSDs. They typically come in 3.5-inch (for desktops) and 2.5-inch (for laptops) form factors, connecting via SATA cables.
-
Solid State Drives (SSDs): SSDs utilize flash memory for storage, providing significantly faster boot times, application loading, and overall system responsiveness compared to HDDs. They are more expensive per gigabyte but offer superior performance and durability due to the absence of moving parts.
-
SATA SSDs: These drives come in the 2.5-inch form factor and connect via SATA cables, similar to 2.5-inch HDDs. They are a direct performance upgrade for older systems with SATA ports.
-
NVMe SSDs (M.2): These are the fastest consumer-grade SSDs, connecting directly to the motherboard via a dedicated M.2 slot and utilizing the PCIe interface. They are physically smaller, resembling a stick of RAM, and offer unparalleled speed. Ensure your motherboard has an available M.2 slot and supports NVMe (not all M.2 slots do, some are SATA-only).
-
-
Compatibility Check: Before purchasing, consult your computer’s motherboard manual or manufacturer’s specifications to confirm the available drive bays, SATA ports, and M.2 slots. This will prevent purchasing an incompatible drive.
Gathering Your Tools and Supplies
Having the right tools on hand will make the installation process much smoother.
-
Screwdriver Set: A basic Phillips head screwdriver is usually sufficient for most computer cases and drive mounts. Some cases may require a flathead or Torx driver.
-
Anti-static Wrist Strap: This is highly recommended to prevent electrostatic discharge (ESD), which can damage sensitive computer components. If you don’t have one, regularly touch a bare metal part of your computer case (while it’s unplugged) to ground yourself.
-
SATA Data Cable (if installing a SATA drive): Often, new drives don’t come with this. Ensure you have a spare or purchase one if adding a second drive.
-
Screws: Your new drive might not come with mounting screws. Check your computer case’s accessory box or existing drive bays for spares. M.2 NVMe drives usually require a specific small screw that should come with your motherboard or the drive itself.
-
Flashlight (optional but helpful): For illuminating tight spaces inside the case.
-
Soft, Clean Surface: A large, clutter-free workspace to place your computer and components.
Safety First: Static Electricity and Power
Electrical safety is paramount when working inside a computer.
-
Power Down and Unplug: Completely shut down your computer and unplug it from the wall outlet. Hold the power button for a few seconds after unplugging to discharge any residual power.
-
Ground Yourself: Wear an anti-static wrist strap, or repeatedly touch a bare metal part of your unpowered computer case to dissipate any static charge from your body. This prevents ESD damage to your sensitive components.
-
Work in a Clean Environment: Avoid working on carpeted surfaces, as they generate more static electricity.
Step-by-Step Installation Guide (Desktop PCs)
This section details the physical installation process for a desktop PC, which typically involves more space and clearer access to components.
Opening Your Computer Case
Carefully open the side panel(s) of your computer case. Most cases use thumbscrews or standard screws at the rear. Once loosened, the panel usually slides backward and then lifts off. Lay the case on its side on your clean workspace to provide a stable platform for working.
Mounting the Hard Drive
Finding an available drive bay is the next step.
-
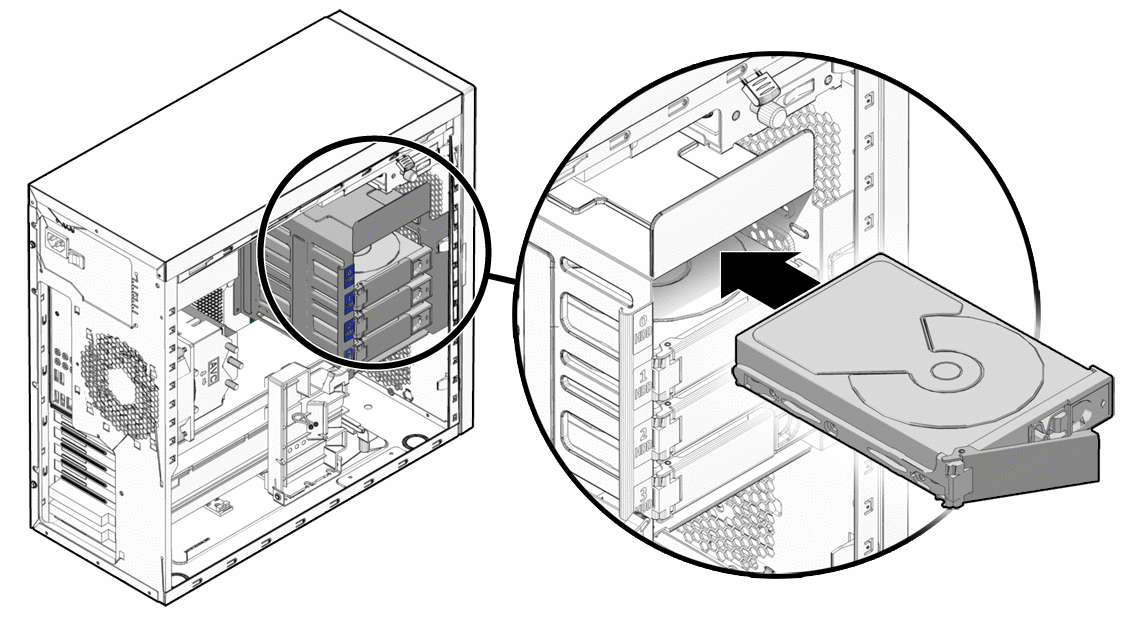
3.5-inch HDDs: These typically slide into 3.5-inch drive bays, often secured with screws from the side or with tool-less caddies that clip into place. Align the drive so the connector ports face the inside of the case.
-
2.5-inch HDDs/SATA SSDs: These often mount into dedicated 2.5-inch bays, or they might require an adapter bracket to fit into a 3.5-inch bay. Secure them with screws. Many cases also have dedicated mounting points behind the motherboard tray for 2.5-inch drives.
-
M.2 NVMe SSDs: Locate an available M.2 slot on your motherboard. It’s usually a small horizontal slot with a screw stand-off nearby. Gently insert the M.2 drive at an angle into the slot, then push it down until it’s flat. Secure it with the small screw provided with your motherboard or drive onto the stand-off.
Connecting Power and Data Cables
This is where the drive gets its power and can communicate with the rest of your system.
-
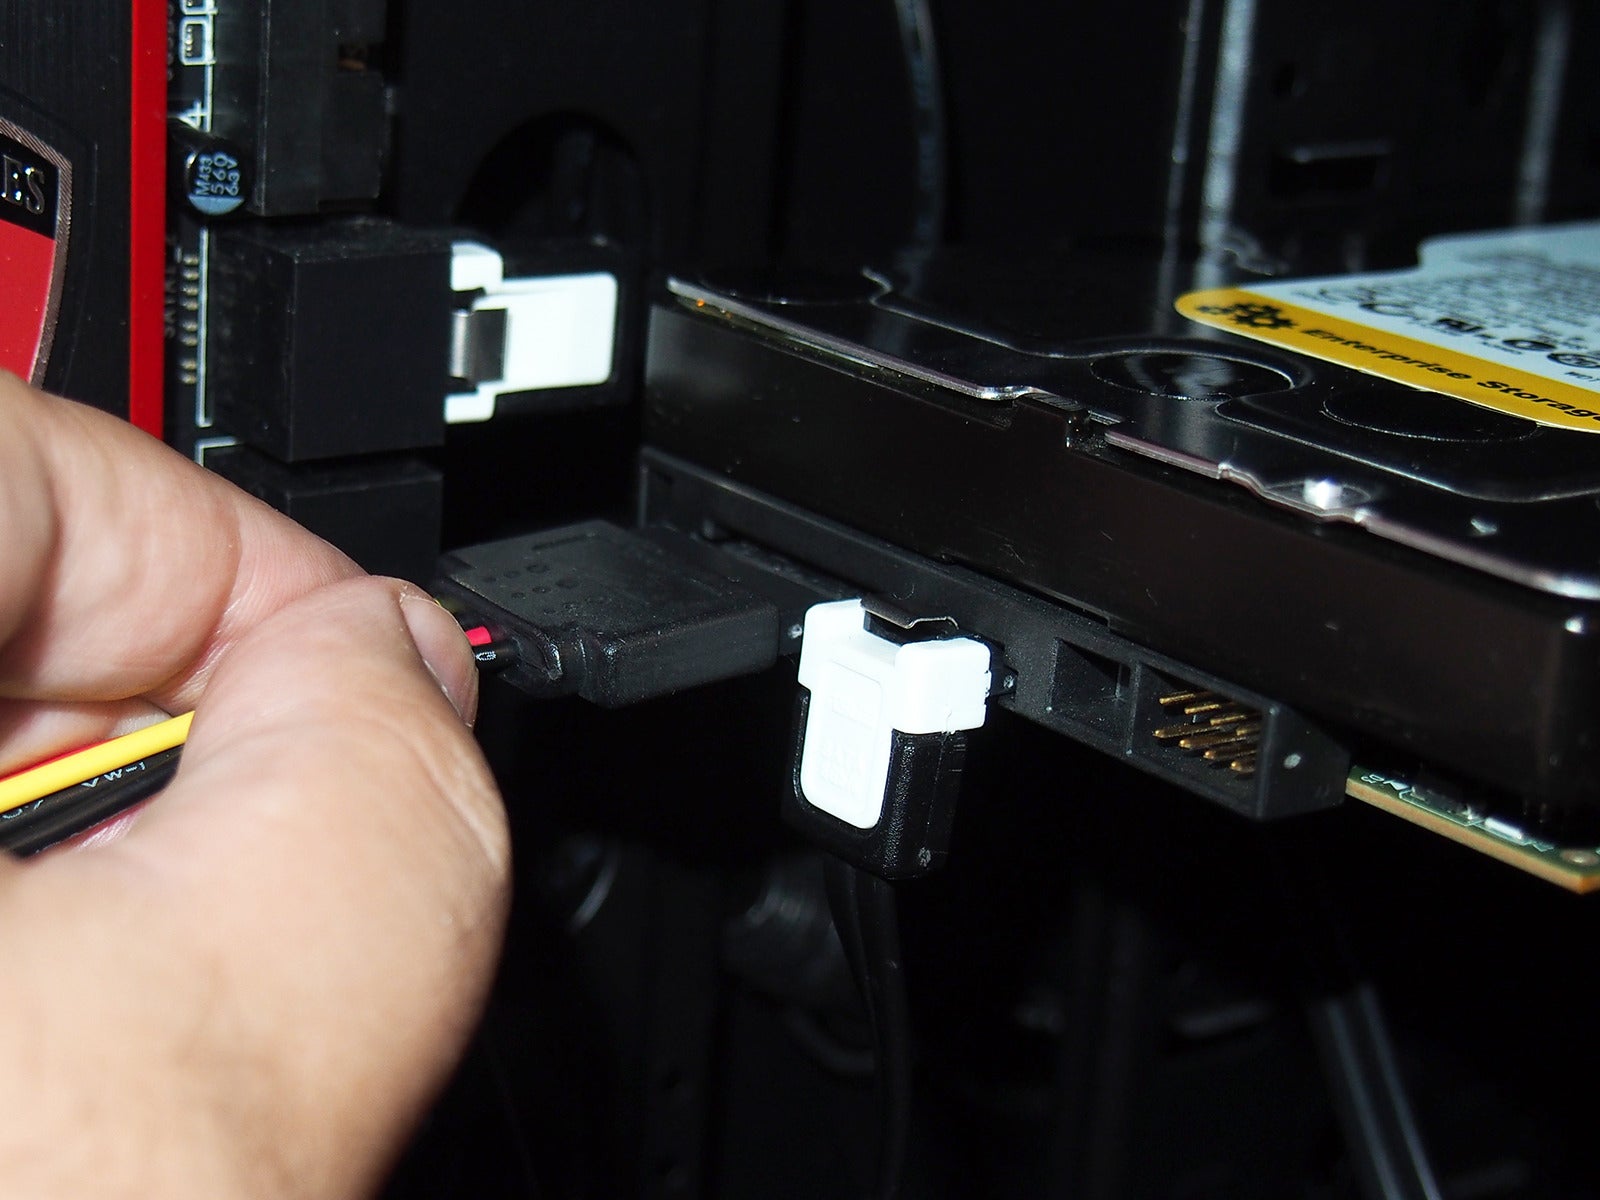
SATA Power Cable: Locate a SATA power connector from your power supply unit (PSU). These are typically flat, L-shaped connectors. Plug one firmly into the back of your new SATA HDD or SSD.
-
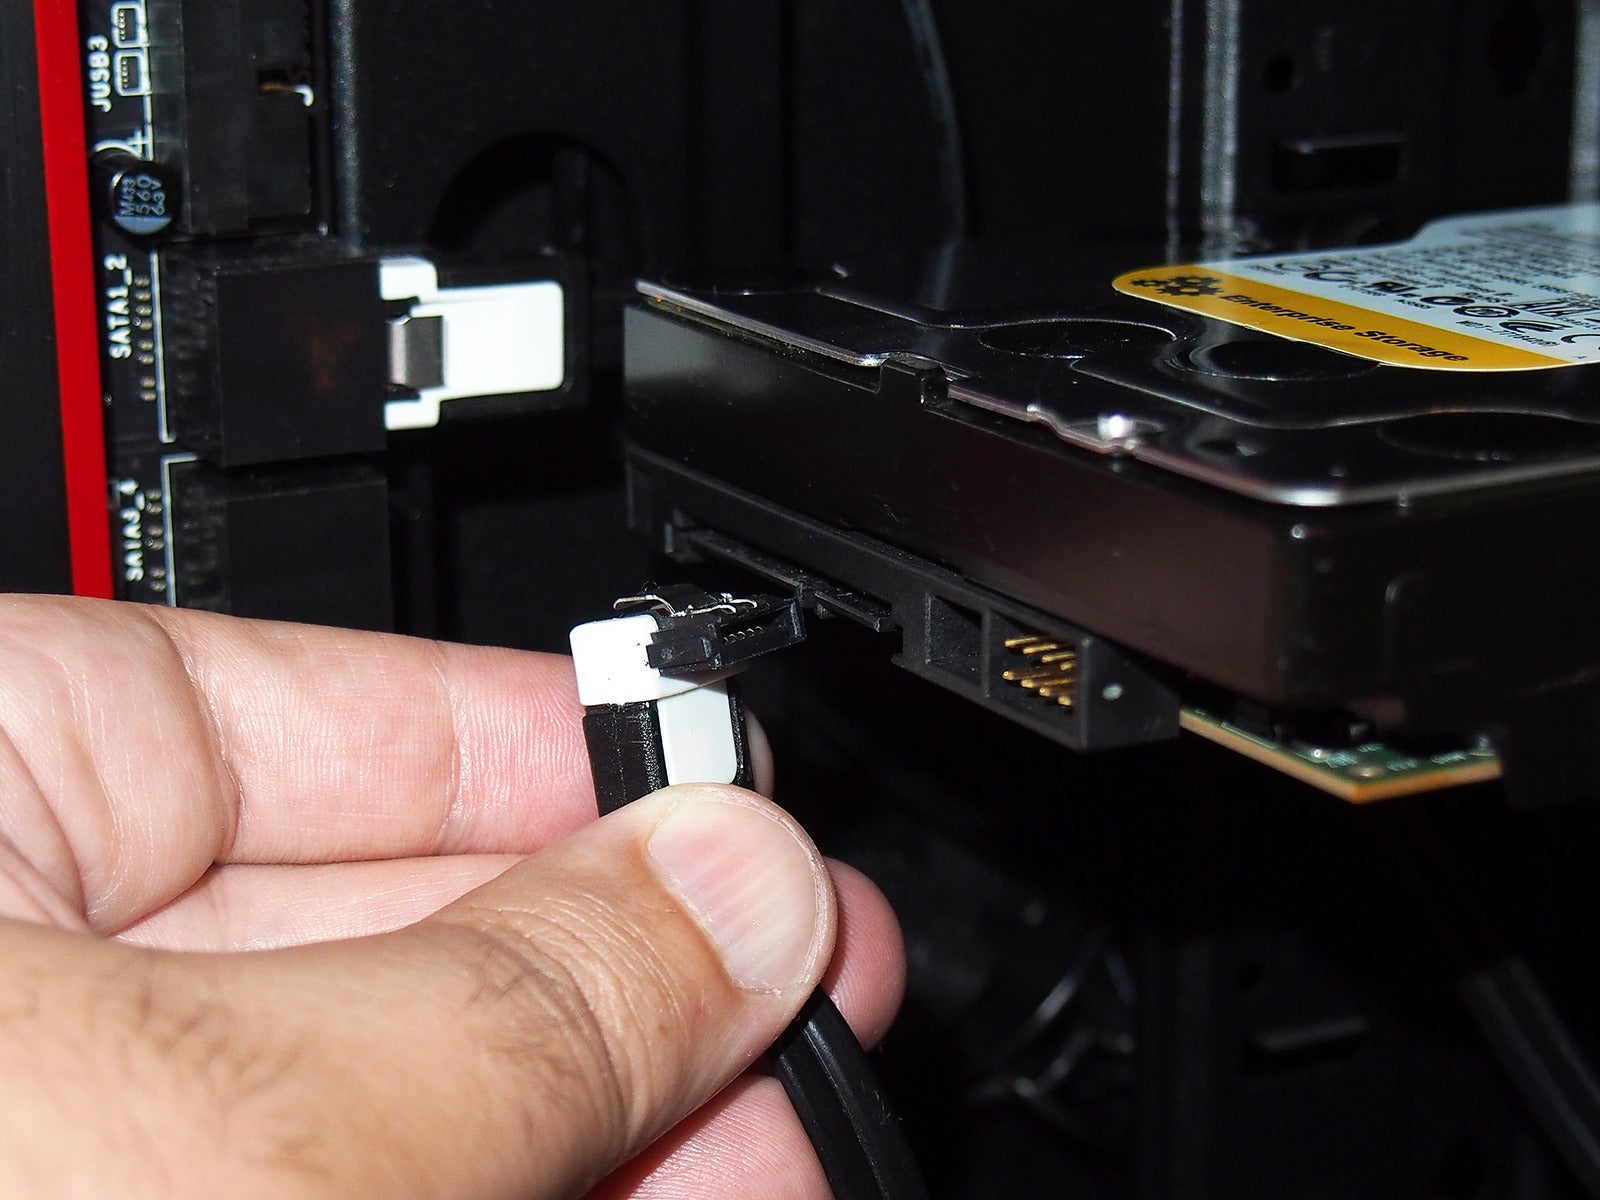
SATA Data Cable: Connect one end of a SATA data cable (the thinner, L-shaped cable) to the back of your new SATA HDD or SSD. Connect the other end to an available SATA port on your motherboard. Motherboard SATA ports are usually labeled (e.g., SATA1, SATA2). It generally doesn’t matter which port you use, but some motherboards have specific ports that are optimized or disabled depending on other hardware configurations (like M.2 drives). Refer to your motherboard manual if unsure.
-
M.2 NVMe SSDs: These drives do not require separate power or data cables. They draw power and communicate directly through the M.2 slot on the motherboard.
Closing the Case
Once all connections are secure and the drive is firmly mounted, reattach the side panel(s) of your computer case. Ensure all cables are tucked away neatly to promote good airflow. Plug your computer back in and power it on.
Initializing and Formatting Your New Drive (Software Configuration)
Installing the physical hardware is only half the battle. For your operating system to recognize and utilize the new drive, it must be initialized and formatted. This process is typically done within Windows Disk Management or macOS Disk Utility.
Accessing Disk Management (Windows)
After booting into Windows, right-click the Start button and select “Disk Management.” Alternatively, press Win + R, type diskmgmt.msc, and press Enter.
Initializing the Disk
When Disk Management opens, it should automatically detect the new, uninitialized drive and prompt you to initialize it. If not, look for a disk marked “Unknown” and “Not Initialized.”
-
Choose a Partition Style: You’ll be asked to choose between MBR (Master Boot Record) and GPT (GUID Partition Table).
-
GPT: Recommended for drives larger than 2TB and for UEFI-based systems (most modern PCs). It’s more robust and supports more partitions.
-
MBR: Legacy option, suitable for drives 2TB or smaller and older BIOS systems.
-
For new drives in modern systems, always choose GPT.
-
-
Select your partition style and click “OK.” The disk will now be “Online” but will show “Unallocated” space.
Creating and Formatting a New Partition
To make the drive usable, you need to create a partition and format it.
-
Create Simple Volume: Right-click on the “Unallocated” space of your new drive and select “New Simple Volume.”
-
New Simple Volume Wizard: Follow the wizard prompts:
-
Specify Volume Size: You can use the entire drive for one partition or divide it into multiple partitions. For most users, using the maximum size (default) is fine.
-
Assign Drive Letter: Choose an available letter (e.g., D:, E:).
-
Format Partition:
-
File System: For Windows,
NTFSis the standard. -
Allocation Unit Size: Leave as “Default.”
-
Volume Label: Give your drive a descriptive name (e.g., “Data Drive,” “Games”).
-
Perform a quick format: Check this box for faster formatting.
-
-
-
Click “Next” and then “Finish.” Windows will format the drive, and it will then appear as a usable drive in File Explorer.
Special Considerations and Troubleshooting
While the process is largely straightforward, certain scenarios and issues might arise.
Laptop Hard Drive Installation Nuances
Installing a hard drive in a laptop is generally more challenging due to compact designs.
-
Access Panel: Laptops usually have a dedicated access panel on the bottom, secured by small screws, specifically for RAM and storage upgrades.
-
Specific Brackets/Caddies: Laptop drives often sit in a specific caddy or bracket that needs to be removed from the old drive and attached to the new one.
-
Battery Removal: Always remove the laptop battery before performing any internal work.
-
NVMe M.2 Slots: Many modern thin and light laptops will have M.2 slots for NVMe SSDs, often simplifying the upgrade process by eliminating cables.
M.2 NVMe SSD Installation
While covered above, it’s worth reiterating the simplicity and importance of secure mounting.
-
Angle of Insertion: M.2 drives insert at a slight angle (around 30 degrees) before being pushed flat.
-
Securing Screw: The tiny screw holds the drive down. Ensure it’s not overtightened, but firm enough to prevent movement. Losing this screw is a common pitfall.
Common Issues and Solutions
-
Drive Not Detected in BIOS/UEFI:
-
Check Cables: Ensure both power and data cables (for SATA drives) are firmly connected at both ends. For M.2, ensure it’s fully seated.
-
Check SATA Port: Try a different SATA port on the motherboard. Some ports might be disabled if certain M.2 slots are in use.
-
BIOS/UEFI Settings: Enter your system’s BIOS/UEFI settings (usually by pressing DEL or F2 during boot) and check if the drive is listed under storage devices. Ensure the SATA controller mode is set to AHCI (for SSDs) if not already.
-
-
Drive Detected but Not in Disk Management:
- This is rare if detected in BIOS. Ensure you’ve scrolled through all disks in Disk Management to locate “Unknown” or “Unallocated” space.
-
Slow Performance:
-
SATA vs. NVMe: Ensure you’re connecting a SATA drive to a SATA port and an NVMe drive to an NVMe-compatible M.2 slot. Using a SATA M.2 in an NVMe-only slot (or vice-versa, though rarer) won’t work optimally.
-
AHCI Mode: Verify AHCI mode is enabled in your BIOS/UEFI for SATA SSDs.
-
Driver Updates: Ensure your motherboard’s chipset drivers are up to date.
-
Maximizing Your New Storage: Best Practices
Once your new drive is installed and configured, consider these practices to make the most of your expanded storage.
Data Migration Strategies
If you’ve installed a new primary drive (especially an SSD to replace an HDD), you’ll likely want to migrate your operating system and files.
-
Clean Install: The simplest and often recommended approach is a fresh installation of Windows or macOS on the new drive. This ensures a clean slate, free from old clutter.
-
Cloning Software: For those who want to avoid reinstalling everything, disk cloning software (e.g., Macrium Reflect Free, EaseUS Todo Backup) can duplicate your old drive’s contents to the new one. Ensure the new drive is at least as large as the used space on your old drive.
Regular Maintenance and Backup
A new drive is an opportunity to establish good data hygiene.
-
Organize Files: Create a logical folder structure to keep your files easily accessible.
-
Regular Backups: Implement a consistent backup strategy. Use your new drive as a backup destination for critical files, or use cloud services/external drives for redundancy.
-
Monitoring Health: Utilize drive health monitoring tools (e.g., CrystalDiskInfo for Windows) to keep an eye on your drive’s SMART status, especially for HDDs.
By following this comprehensive guide, you can confidently install an internal hard drive, unlocking new levels of performance and storage capacity for your computer. This DIY upgrade not only saves you money but also empowers you with a deeper understanding of your system’s hardware, a valuable asset in the digital age.
aViewFromTheCave is a participant in the Amazon Services LLC Associates Program, an affiliate advertising program designed to provide a means for sites to earn advertising fees by advertising and linking to Amazon.com. Amazon, the Amazon logo, AmazonSupply, and the AmazonSupply logo are trademarks of Amazon.com, Inc. or its affiliates. As an Amazon Associate we earn affiliate commissions from qualifying purchases.