
macOS, a robust and user-friendly operating system, provides an excellent environment for both casual users and developers. However, when it comes to managing software packages, especially command-line tools and developer utilities, macOS traditionally lacked a native, efficient package manager comparable to those found in Linux distributions. This is where Homebrew steps in, revolutionizing how users install, update, and manage software on their Apple machines. Known affectionately as “the missing package manager for macOS,” Homebrew simplifies the complex process of compiling and installing applications from source, providing a clean, command-line interface to a vast repository of software.
This comprehensive guide will walk you through every step of installing Homebrew on your macOS system, from initial prerequisites to basic usage and troubleshooting. By the end of this tutorial, you’ll be equipped to leverage Homebrew’s power, transforming your macOS into an even more versatile and productive development environment.
Understanding Homebrew: The Missing Package Manager for macOS
Before diving into the installation process, it’s essential to grasp what Homebrew is and why it has become an indispensable tool for countless macOS users, particularly developers and system administrators.
What is Homebrew?
Homebrew is a free and open-source package management system that simplifies the installation of software on Apple’s macOS operating system, as well as Linux. It allows users to install a wide range of command-line tools, utilities, and developer software that Apple does not include by default. Instead of manually downloading source code, compiling it, and managing dependencies – a often tedious and error-prone process – Homebrew automates these tasks. It pulls software from official repositories, compiles it if necessary, and installs it to a sensible location, ensuring a clean and manageable system.
Homebrew works by utilizing a collection of “formulae” (Ruby scripts) that contain instructions for downloading, compiling, and installing specific software packages. When you request to install a package, Homebrew consults its relevant formula, handles all dependencies, and places the software in /usr/local/Cellar (or an equivalent location for newer macOS versions and Apple Silicon Macs), then symlinks it into /usr/local/bin (or /opt/homebrew/bin for Apple Silicon) so it’s easily accessible from your PATH.
Why Use Homebrew? The Power of Simplicity and Control
The advantages of using Homebrew are numerous and profound, especially for those who frequently interact with the command line or require access to developer tools.
-
Simplicity: Homebrew dramatically simplifies the software installation process. A single command,
brew install [package-name], is often all it takes to get complex software up and running. -
Centralized Management: All Homebrew-installed software is managed from a single system. This makes it incredibly easy to update, upgrade, or uninstall packages, maintaining a clean and organized environment.
-
Access to a Vast Software Library: Homebrew boasts an enormous collection of packages, including popular tools like Git, Node.js, Python, Ruby, PostgreSQL, and countless others. If a command-line tool exists, there’s a good chance Homebrew can install it.
-
Dependency Resolution: Homebrew automatically handles software dependencies. If a package requires other libraries or tools to function, Homebrew will identify and install them for you, preventing common installation headaches.
-
Non-Intrusive: Homebrew installs packages into its own directory (
/usr/local/Cellaror/opt/homebrew/Cellar), which keeps them separate from the macOS system files. This minimizes the risk of system instability and makes it easy to revert changes if needed. -
Homebrew Casks: Beyond command-line tools, Homebrew Cask extends Homebrew’s capabilities to include graphical macOS applications. With Cask, you can install apps like Google Chrome, Visual Studio Code, or VLC Player with
brew install --cask [app-name], bringing GUI application management to the command line.
Who Benefits from Homebrew?
While Homebrew is an invaluable tool for developers, its utility extends beyond coding. Anyone who frequently uses the command line, works with open-source tools, or simply wants a more efficient way to manage software on macOS can benefit. This includes:
-
Software Developers: For programming languages, version control systems, databases, and build tools.
-
System Administrators: For network utilities, monitoring tools, and server management software.
-
Data Scientists: For Python libraries, R tools, and data processing utilities.
-
Power Users: For advanced command-line utilities, text editors like Vim/Neovim, or system diagnostic tools.
-
Anyone seeking a streamlined software management experience on macOS.
Preparing Your macOS System for Homebrew Installation
Before you execute the Homebrew installation command, a couple of prerequisites need to be met to ensure a smooth and successful setup.
Essential Prerequisites: Xcode Command Line Tools
The most critical prerequisite for Homebrew is the Xcode Command Line Tools. These tools include essential compilers (like gcc), build utilities (like make), and other development utilities that Homebrew relies upon to compile and install various packages. While Xcode itself is a large IDE, you only need the lighter Command Line Tools package.
To install the Xcode Command Line Tools:
-
Open Terminal: You can find Terminal in
Applications/Utilitiesor by searching for it with Spotlight (Cmd + Space, then type “Terminal”). -
Execute the following command:
xcode-select --install -
Follow the prompts: A software update window will appear, asking if you want to install the tools. Click “Install” and then “Agree” to the terms and conditions. The download and installation process will begin. This might take a few minutes depending on your internet connection.
-
Verify Installation: Once complete, you can verify by typing
xcode-select -p. It should return a path like/Library/Developer/CommandLineTools.
If you already have Xcode installed, the Command Line Tools are typically included. However, running xcode-select --install is a safe way to ensure they are present and up-to-date.
System Requirements and Compatibility Checks
Homebrew is designed to work with recent versions of macOS. Generally, it supports macOS Big Sur (11) or newer. For older macOS versions, Homebrew might still function, but official support might be limited, and some newer formulae might not compile.
-
Operating System: Ensure your macOS is up-to-date. You can check this by going to
System Settings(orSystem Preferenceson older macOS versions) >General>Software Update. -
Processor Architecture: Homebrew works seamlessly on both Intel-based Macs and Apple Silicon (M1/M2/M3) Macs. The installation path for Homebrew differs slightly:
/usr/local/binfor Intel and/opt/homebrew/binfor Apple Silicon. Homebrew intelligently handles this distinction during installation. -
Internet Connection: A stable internet connection is required to download Homebrew itself and all subsequent packages.
Understanding Terminal and Shell Environments (Bash vs. Zsh)
Homebrew is a command-line tool, meaning you’ll interact with it via your macOS Terminal. macOS Catalina and newer versions use Zsh as the default shell, while older versions used Bash. Homebrew is compatible with both. You’ll need to be aware of your shell environment when configuring your system’s PATH variable, which tells your shell where to look for executable programs. We’ll cover this in the post-installation steps. You can check your current shell by typing echo $SHELL in Terminal.
The Step-by-Step Homebrew Installation Process
With the prerequisites in place, you’re ready to install Homebrew. The process is straightforward, involving a single command.
Executing the Installation Command
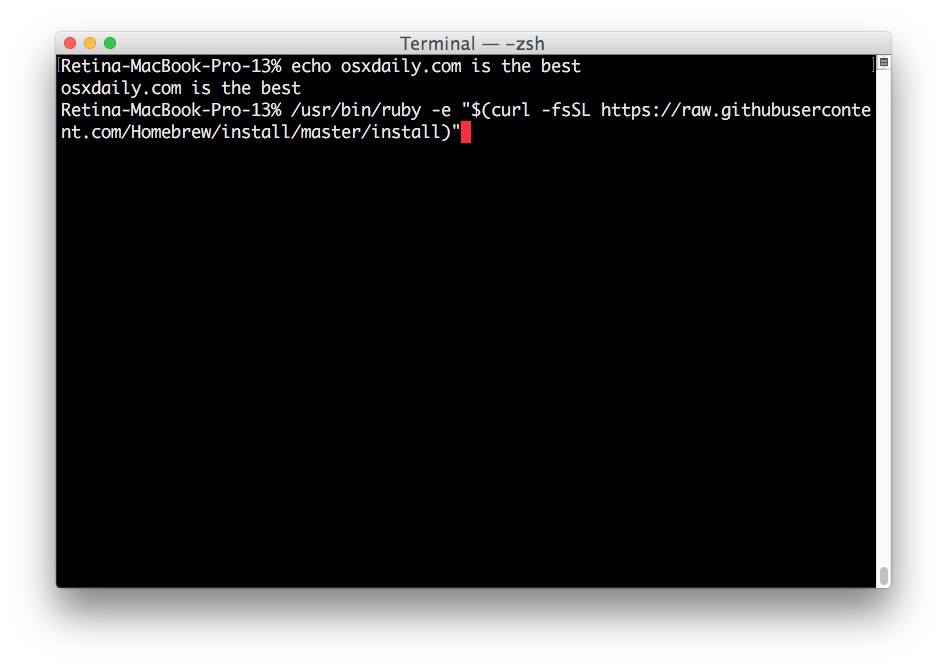
Homebrew provides a convenient one-liner script for installation.
-
Open Terminal.
-
Copy and paste the following command:
/bin/bash -c "$(curl -fsSL https://raw.githubusercontent.com/Homebrew/install/HEAD/install.sh)"-
Explanation of the command:
-
/bin/bash -c: Executes the following string as a Bash command. -
curl -fsSL https://raw.githubusercontent.com/Homebrew/install/HEAD/install.sh: Downloads the Homebrew installation script from GitHub.-
curl: A tool for transferring data with URLs. -
-f: Fail silently (no output on HTTP errors). -
-s: Silent mode (don’t show progress meter or error messages). -
-S: Show error (only with -s). -
-L: Follow redirects.
-
-
$(): This is command substitution, meaning the output of thecurlcommand (the installation script itself) is executed bybash.
-
-
-
Press Enter.
-
Follow the on-screen prompts:
-
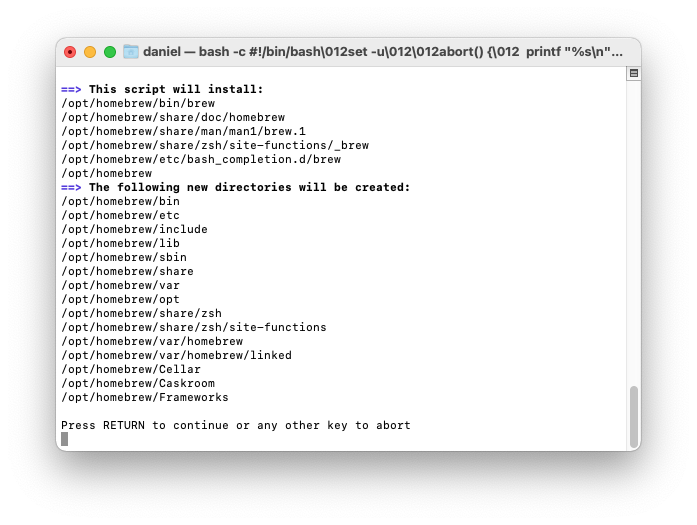
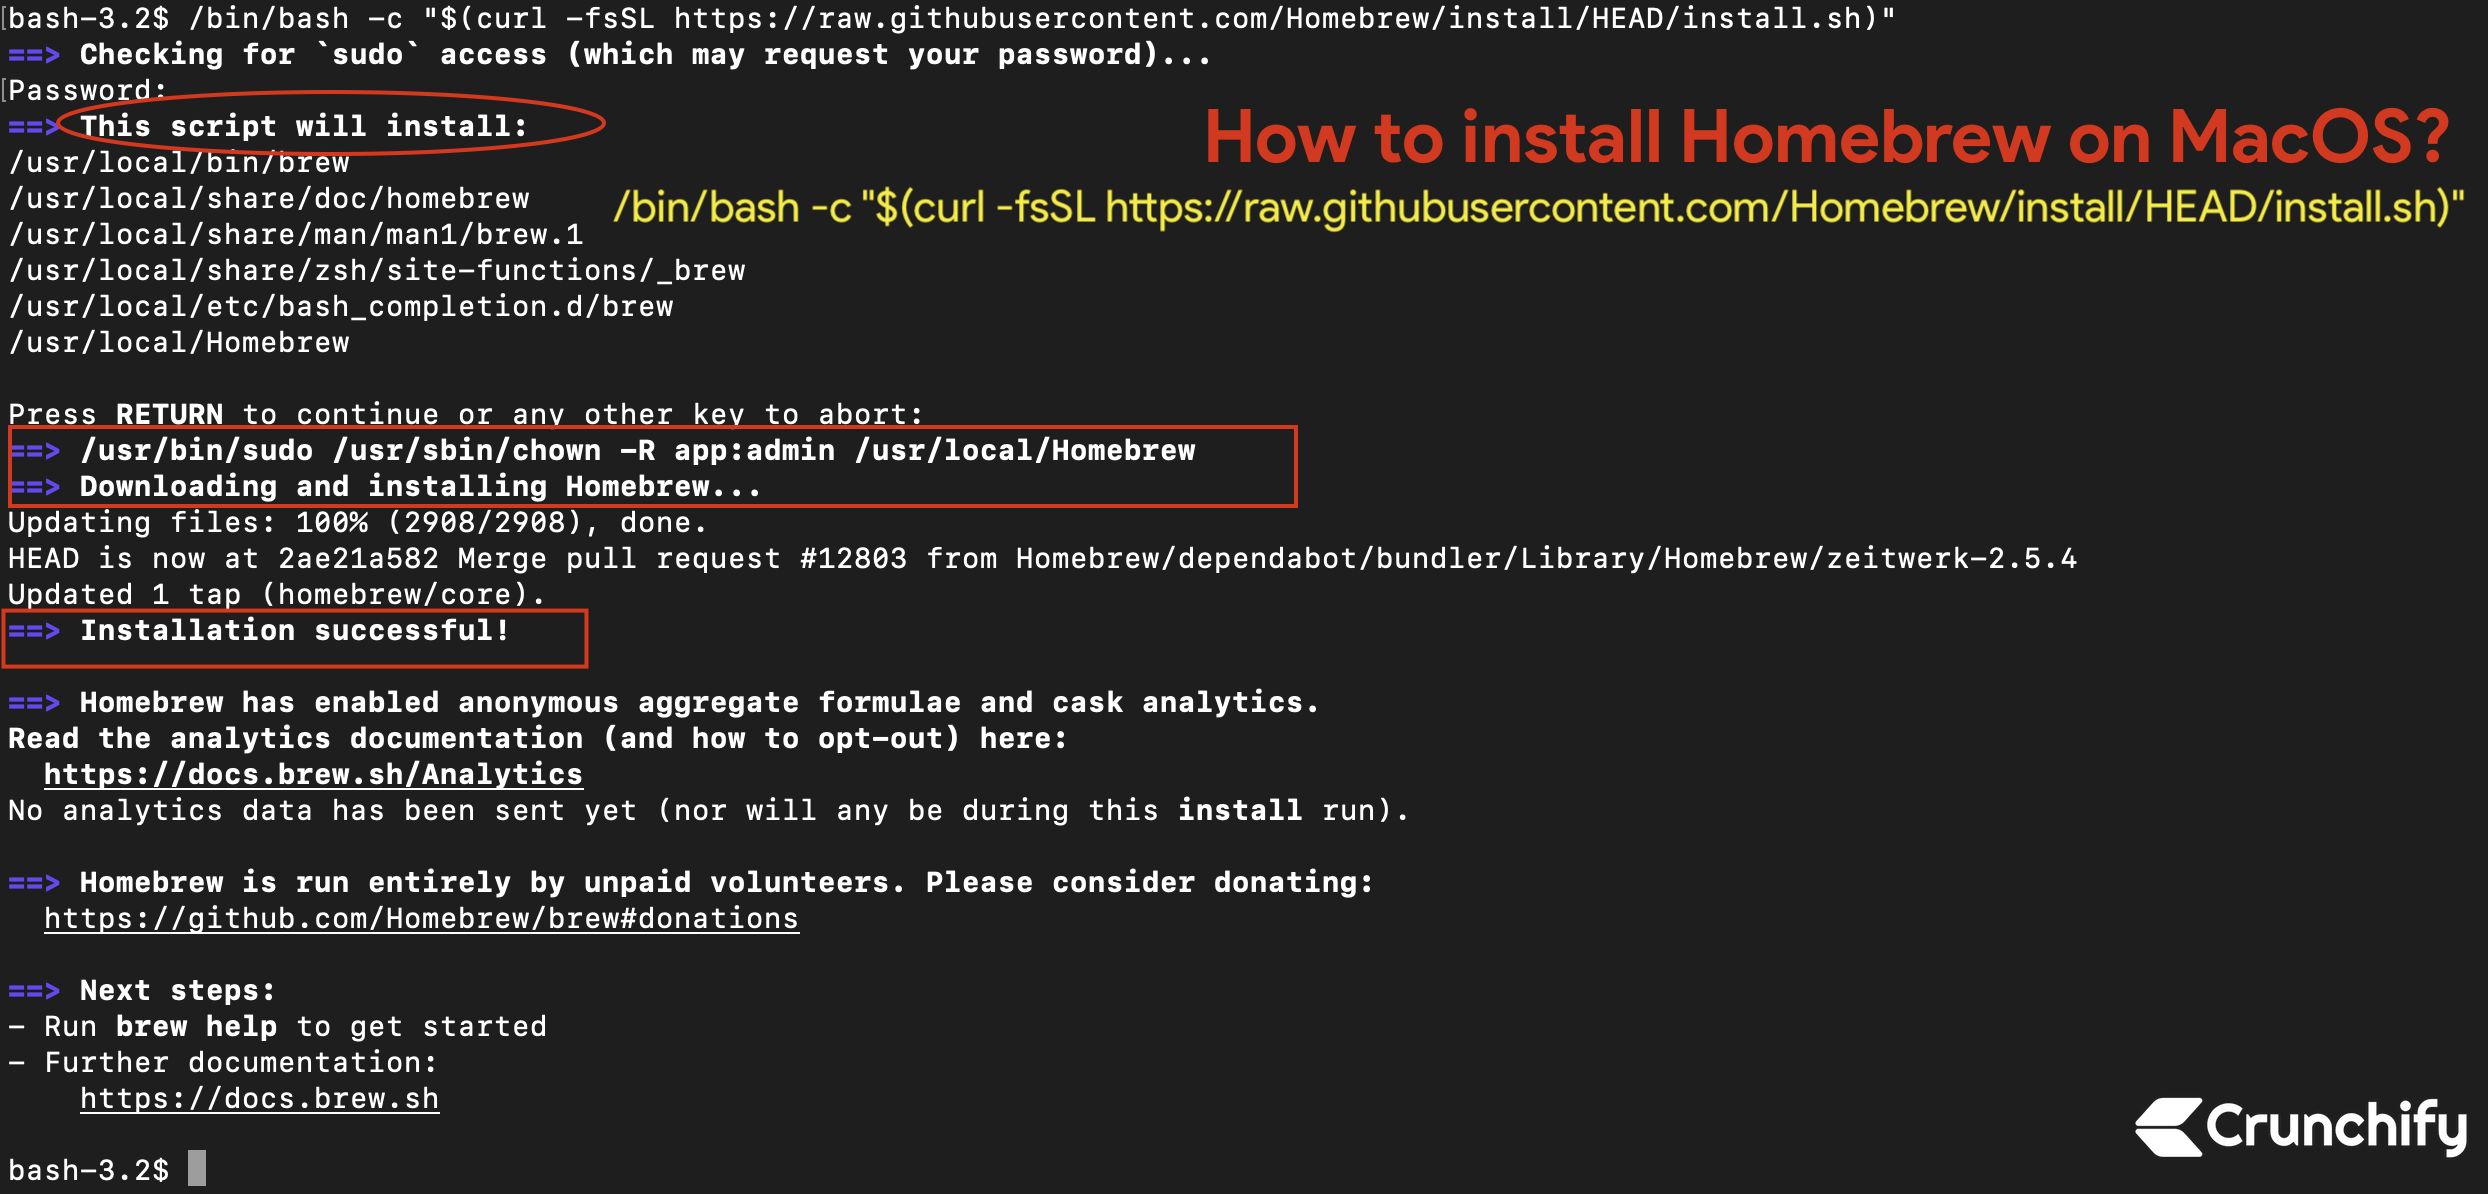
The script will first explain what it’s about to do and list the directories it will create and modify.
-
It will prompt you to press
RETURNto continue or any other key to abort. PressRETURN. -
You might be asked to enter your macOS user password. This is required for Homebrew to gain the necessary permissions to create directories and install files in system-level locations (
/usr/localor/opt/homebrew). Type your password (it won’t echo characters) and pressEnter. -
The installation process will proceed, downloading files and installing Homebrew. This may take several minutes.
-
Post-Installation: Configuring Your PATH
After Homebrew finishes installing, you might see a message in your Terminal instructing you to add Homebrew to your system’s PATH. This is a crucial step because your shell needs to know where to find the brew command and the executables of the packages you install with Homebrew.
Homebrew itself will typically output the exact commands you need to run. For Apple Silicon Macs, this is generally:
echo 'eval "$(/opt/homebrew/bin/brew shellenv)"' >> ~/.zprofile

eval "$(/opt/homebrew/bin/brew shellenv)"
For Intel Macs, it would be:
echo 'eval "$(/usr/local/bin/brew shellenv)"' >> ~/.zprofile

eval "$(/usr/local/bin/brew shellenv)"
Let’s break down what this means for different shells:
-
For Zsh (default on macOS Catalina and newer):
-
The instructions will likely tell you to add the
eval "$(/opt/homebrew/bin/brew shellenv)"line to your~/.zprofilefile (or~/.zshrc). -
To do this, simply copy and paste the
echo ... >> ~/.zprofilecommand provided by Homebrew into your Terminal and press Enter. -
Then, run the
eval ...command directly to apply the changes to your current terminal session. This avoids needing to close and reopen Terminal immediately.
-
-
For Bash (on older macOS versions or if you’ve manually switched):
-
You’ll need to add a similar line to your
~/.bash_profileor~/.bashrcfile. -
The command will likely be
echo 'export PATH="/usr/local/bin:$PATH"' >> ~/.bash_profile(for Intel) followed bysource ~/.bash_profile(orexec bash) to reload your shell configuration.
-
Important: Always follow the specific instructions provided by the Homebrew installer in your Terminal, as paths can change.
Verifying a Successful Homebrew Installation
Once you’ve configured your PATH, you can verify that Homebrew is correctly installed and accessible.
-
Open a new Terminal window (or run
source ~/.zprofile/source ~/.bash_profilein your current one if you just configured PATH). -
Type the following command:
brew helpIf Homebrew is installed correctly, you will see a list of Homebrew commands and options.
-
To get information about your Homebrew installation:
brew doctorbrew doctoris an excellent tool that checks for potential issues with your Homebrew setup, such as outdated formulae, missing dependencies, or permission problems. Ideally, it should report:Your system is ready to brew.If it reports warnings, address them as suggested by the output.
Harnessing the Power of Homebrew: Basic Usage and Management
With Homebrew installed, you’re ready to start using it to manage software.
Installing Software with brew install
This is the most fundamental Homebrew command.
brew install <package-name>
Example: To install git:
brew install git
Homebrew will download the git formula, resolve its dependencies, compile it if necessary, and install it.
Uninstalling Software with brew uninstall
To remove a package installed via Homebrew:
brew uninstall <package-name>
Example: To uninstall git:
brew uninstall git
Homebrew will remove the package and any associated files, but it generally leaves dependencies that might be used by other packages.
Keeping Homebrew and Your Packages Up-to-Date
Maintaining an up-to-date Homebrew environment is crucial for security and access to the latest software features.
-
Update Homebrew’s formulae:
brew updateThis command fetches the latest version of Homebrew itself and all its formulae from GitHub. It doesn’t upgrade your installed packages, only the definitions.
-
Upgrade installed packages:
brew upgradeAfter running
brew update,brew upgradewill upgrade all your installed packages to their latest stable versions based on the updated formulae. -
Clean up old versions:
brew cleanupThis command removes old versions of installed packages that are no longer needed, freeing up disk space. It’s good practice to run this periodically.
Exploring Homebrew Commands: Search, Info, List
Homebrew provides several commands to help you discover and manage packages:
-
Search for packages:
brew search <keyword>Example:
brew search pythonwill list all formulae related to Python. -
Get information about a package:
brew info <package-name>Example:
brew info pythonwill show details like its version, dependencies, installation options, and where it’s linked. -
List all installed packages:
brew listThis shows a list of all packages you have installed via Homebrew.
Homebrew Casks: Installing GUI Applications
Homebrew Cask extends Homebrew’s capabilities to graphical macOS applications.
brew install --cask <app-name>
Example: To install Google Chrome:
brew install --cask google-chrome
Casks typically install applications to your /Applications folder, just like dragging and dropping from a DMG. You can manage Cask-installed applications with brew upgrade --cask and brew uninstall --cask.
Troubleshooting Common Homebrew Installation and Usage Issues
While Homebrew is generally robust, you might encounter issues. Here are some common problems and their solutions.
Permissions Errors
If you see errors related to permissions (e.g., “Permission denied”), it often means Homebrew cannot write to its default installation directory.
-
Solution: Ensure your user has ownership of the Homebrew prefix directory. For Intel Macs, this is typically
/usr/local. For Apple Silicon Macs, it’s/opt/homebrew.# For Intel Mac: sudo chown -R $(whoami) /usr/local/* # For Apple Silicon Mac: sudo chown -R $(whoami) /opt/homebrew/*Then, run
brew doctoragain to check.
“Command not found” After Installation
If brew help or brew doctor results in “command not found,” it usually means Homebrew’s binary path isn’t correctly added to your shell’s PATH environment variable.
-
Solution:
-
Revisit the “Configuring Your PATH” section.
-
Ensure the correct
eval "$(/path/to/brew shellenv)"line is in your~/.zprofile(for Zsh) or~/.bash_profile(for Bash). -
Open a new Terminal window or tab, or run
source ~/.zprofile(orsource ~/.bash_profile) to reload your shell configuration.
-
Handling Brew Doctor Warnings
brew doctor is your best friend for diagnosing Homebrew issues. If it reports warnings, read them carefully.
-
Common warnings:
-
“Your Xcode Command Line Tools are outdated.”: Run
xcode-select --installagain. -
“Warning: Some directories in /usr/local are not writable.”: This often points to permission issues. Use the
sudo chowncommands described above. -
“Warning: You have unlinked kegs in your Cellar.”: This means some packages are installed but not symlinked.
brew link <package-name>usually fixes this. -
“Warning: Your .zprofile/.bash_profile has too many entries.”: Review your shell configuration files (
~/.zprofile,~/.bash_profile,~/.zshrc,~/.bashrc) and remove redundant or incorrect PATH entries.
-
Reinstalling Homebrew
If you encounter persistent, unresolvable issues, or if your Homebrew installation becomes corrupted, you might consider reinstalling it.
-
Uninstall Homebrew:
/bin/bash -c "$(curl -fsSL https://raw.githubusercontent.com/Homebrew/install/HEAD/uninstall.sh)"This script will ask for confirmation and remove all Homebrew-managed files.
-
Reinstall: Follow the installation steps outlined in “The Step-by-Step Homebrew Installation Process.”
Conclusion
Installing Homebrew on macOS is a transformative step for anyone looking to efficiently manage software packages and developer tools. By following this guide, you have not only successfully set up Homebrew but also gained a foundational understanding of its core functionalities and management commands. From effortlessly installing command-line utilities to streamlining the acquisition of graphical applications with Homebrew Cask, you are now equipped with a powerful tool that significantly enhances your macOS experience.
Embrace the simplicity and control that Homebrew offers. Keep your system updated with brew update and brew upgrade, leverage brew doctor for troubleshooting, and explore the vast world of available software. Homebrew truly is “the missing package manager for macOS,” making your system more capable, cleaner, and a joy to work with. Happy brewing!