
In an era defined by ever-increasing digital footprints, from high-resolution media and sprawling game libraries to extensive professional datasets and meticulous personal archives, storage capacity remains a critical consideration for any PC user. While Solid State Drives (SSDs) have revolutionized speed and responsiveness, Hard Disk Drives (HDDs) continue to offer an unparalleled cost-per-gigabyte ratio, making them an indispensable component for mass storage. This tutorial delves into the practical process of installing an HDD in your personal computer, offering a professional, insightful, and engaging walkthrough for enhancing your system’s capabilities. Whether you’re upgrading an older machine, expanding storage for a new build, or simply need more space for your digital life, mastering HDD installation is a fundamental skill for any tech enthusiast.
Why Expand Your PC’s Storage? Understanding the Need for an HDD
The digital world we inhabit is constantly expanding, and with it, our need for robust and reliable storage solutions. From professional creatives to casual gamers, the demand for space to house large files, applications, and operating systems continues to grow exponentially. Understanding why and how to expand your PC’s storage is not just about convenience; it’s about optimizing your workflow, safeguarding your data, and ensuring your system can keep pace with evolving technological demands.
The Evolving Landscape of Digital Storage
Gone are the days when a few gigabytes sufficed for an entire computer system. Today, a single high-definition movie can consume tens of gigabytes, a modern AAA game can easily exceed 100 GB, and professional design or video editing projects often span terabytes. This burgeoning data landscape necessitates thoughtful storage strategies. While cloud storage offers convenience, it often comes with subscription costs, speed limitations, and dependency on internet connectivity. Local storage, particularly high-capacity HDDs, provides immediate access, greater control, and often a more economical long-term solution for bulk data. Integrating an additional HDD is a forward-thinking step to future-proof your system against the ever-growing demands of digital content.
Benefits of Integrating an Additional Hard Drive
Adding an HDD to your PC brings a multitude of advantages beyond just increased space. Firstly, it allows for better data organization and management. You can dedicate your primary SSD (if you have one) to your operating system and frequently used applications for maximum speed, while the HDD handles large files, backups, and less frequently accessed media. This not only optimizes performance but also prolongs the life of your SSD by reducing write cycles. Secondly, an additional drive facilitates robust backup strategies. You can create a redundant copy of your important files on the secondary HDD, providing a layer of protection against data loss from accidental deletion or primary drive failure. Lastly, it offers flexibility for diverse workloads. For professionals dealing with large datasets, archives, or multiple virtual machines, an HDD provides the necessary capacity without the prohibitive cost of equivalent SSD storage.
HDD vs. SSD: A Brief Comparative Overview
While this guide focuses on HDD installation, it’s crucial to understand its place in the broader storage ecosystem, particularly in relation to Solid State Drives (SSDs). SSDs utilize flash memory, offering significantly faster read/write speeds, lower latency, greater durability (no moving parts), and less power consumption. They are ideal for operating systems, critical applications, and gaming where speed is paramount. However, SSDs come at a higher cost per gigabyte, making large-capacity drives expensive. HDDs, on the other hand, use spinning platters and read/write heads, making them slower, more susceptible to physical shock, and slightly noisier. Yet, their major advantage lies in their cost-effectiveness for large capacities. For storing vast amounts of data where lightning-fast access isn’t the primary concern – think media libraries, document archives, and game installations that don’t require SSD-level loading – HDDs remain the champion. Often, the optimal solution involves a hybrid approach: an SSD for your OS and main programs, complemented by an HDD for bulk storage.
Pre-Installation Essentials: Preparing for a Smooth Upgrade
Before diving into the physical installation, meticulous preparation is key. This stage ensures not only the safety of your hardware and personal data but also a streamlined and successful installation process, minimizing potential frustrations. Skipping these preliminary steps can lead to costly mistakes, hardware damage, or data loss.
Gathering Your Toolkit
A successful installation begins with the right tools. While sophisticated equipment isn’t necessary, a few basic items will make the process considerably easier and safer:
-
Philips Head Screwdriver: This is the primary tool you’ll need for opening your PC case and securing the HDD. Ensure it’s the correct size to avoid stripping screw heads.
-
Anti-Static Wrist Strap: Critical for preventing electrostatic discharge (ESD), which can permanently damage sensitive electronic components. If you don’t have one, regularly touch a grounded metal object (like an unpainted part of your PC case) to discharge any static electricity built up on your body.
-
Flashlight or Headlamp: Internal PC cases can be dark, even with ambient light. A flashlight will help you clearly see connections and mounting points.
-
Zip Ties or Velcro Straps: Useful for cable management after installation, improving airflow and aesthetics.
-
Your New HDD: Naturally, ensure you have the HDD you intend to install. Check its form factor (typically 3.5-inch for desktops) and interface (SATA is standard).
-
SATA Data Cable: Most new HDDs don’t come with a SATA data cable. You’ll need one to connect the drive to your motherboard. Ensure you have a spare or purchase one if needed.
-
PC User Manual (Optional but Recommended): Your PC or case manual might offer specific instructions or diagrams for drive bays and cable routing.
Data Backup and System Preparation
Before performing any internal hardware changes, safeguarding your existing data is paramount. Even though you’re adding a new drive, unforeseen circumstances can occur.
-
Backup Critical Data: Use an external hard drive, cloud storage, or another reliable method to back up all essential files, documents, photos, and any data you cannot afford to lose. This is a crucial step that should never be overlooked.
-
Create a System Restore Point: In Windows, creating a system restore point provides a snapshot of your system files, installed applications, and registry. If any software-related issues arise after installation, you can revert to this stable state.
-
Power Down and Unplug: Completely shut down your PC. Then, unplug the power cable from the wall outlet and from the back of the PC. This eliminates any electrical current and prevents accidental power-ons.
-
Move to a Clean, Well-Lit Workspace: Ensure you have enough space to work comfortably, and that your work surface is clean and non-conductive. Avoid working on carpeted floors, which can generate significant static electricity.
Safety First: Mitigating Risks During Hardware Installation
Working inside a computer carries a few inherent risks, primarily static electricity and physical injury.
-
Electrostatic Discharge (ESD) Prevention: As mentioned, wear an anti-static wrist strap connected to a grounded metal object (like an unpainted part of your PC case or a grounded pipe). Alternatively, frequently touch a metal part of the case to equalize your charge. ESD is invisible but can cause irreversible damage to sensitive components.
-
Power Disconnection: Always ensure the PC is unplugged from the wall. This is non-negotiable for safety.
-
Handle Components Carefully: Avoid touching the gold contacts or circuit boards of your components. Hold the HDD by its frame.
-
Beware of Sharp Edges: PC cases, especially older or cheaper ones, can have sharp edges. Work carefully to avoid cuts.
Familiarizing Yourself with Your PC’s Interior
Before you start, take a moment to look inside your PC.
-
Identify Drive Bays: Locate the available 3.5-inch drive bays where your new HDD will be mounted. These are typically cages or slots. Some cases use tool-less drive trays, while others require screws.
-
Locate SATA Ports on Motherboard: Identify the available SATA data ports on your motherboard. They are usually small, L-shaped connectors. Most motherboards have multiple ports, often labeled SATA0, SATA1, etc.
-
Identify Available SATA Power Connectors: Trace the cables coming from your power supply unit (PSU). Look for SATA power connectors, which are wider, flat L-shaped connectors. Ensure you have a free one. If not, you might need a Molex-to-SATA power adapter (if your PSU has Molex connectors) or a new PSU.
Step-by-Step HDD Installation: From Opening the Case to Securing Connections
With preparations complete, it’s time to physically install the hard drive. This section guides you through each stage, ensuring a secure and functional addition to your system. Patience and careful execution are paramount here.
Accessing Your PC’s Internal Components
The first physical step is to gain access to the interior of your PC.
-
Lay the PC Down: Gently lay your PC case on its side on your clean workspace. This provides a stable platform and easier access.
-
Remove Side Panel: Locate the screws securing the side panel (usually the left side when viewed from the front). Unscrew them, then slide the panel backward and lift it off. Some cases use latches or thumbscrews for easier removal. Set the panel aside in a safe place.
-
Ground Yourself (Again): If you haven’t done so or haven’t been wearing an anti-static wrist strap continuously, touch an unpainted metal part of your PC case to discharge any static electricity.
Mounting the Hard Drive Securely
Properly mounting the HDD is crucial for its longevity and performance, preventing vibrations and ensuring good airflow.
-
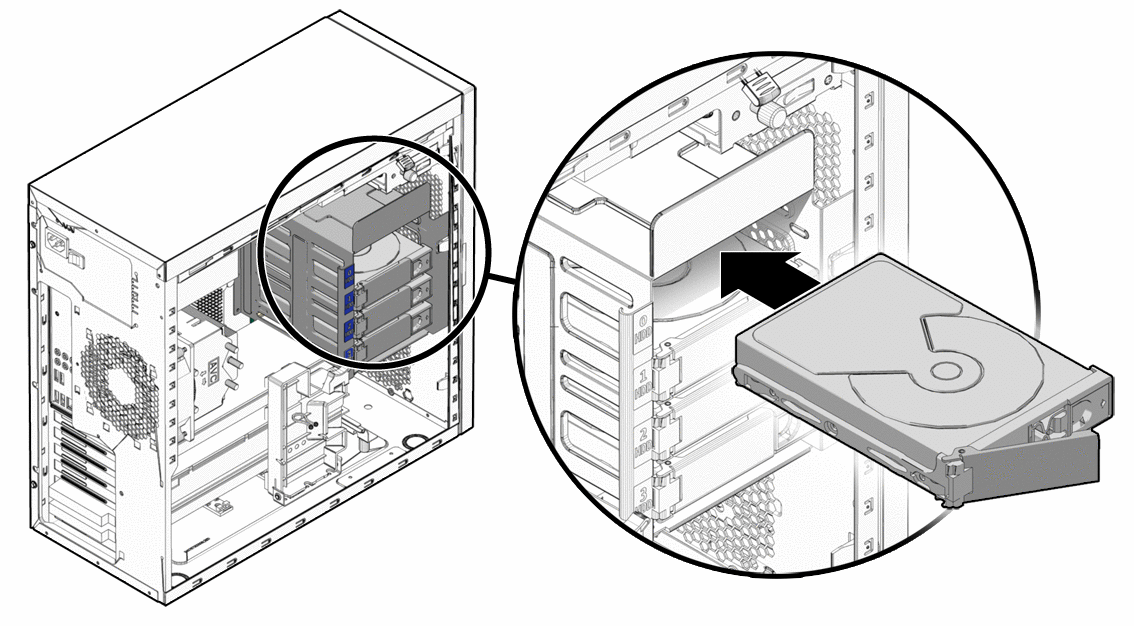
Identify an Empty Drive Bay: Locate a free 3.5-inch drive bay in your PC case. These are often stacked cages near the front of the case.
-
Insert the HDD:
-
Tool-less Bays: If your case has tool-less trays or clips, simply slide the HDD into a tray (ensuring the SATA connectors face the interior of the case) until it clicks into place, or slide the HDD directly into the bay until it locks.
-
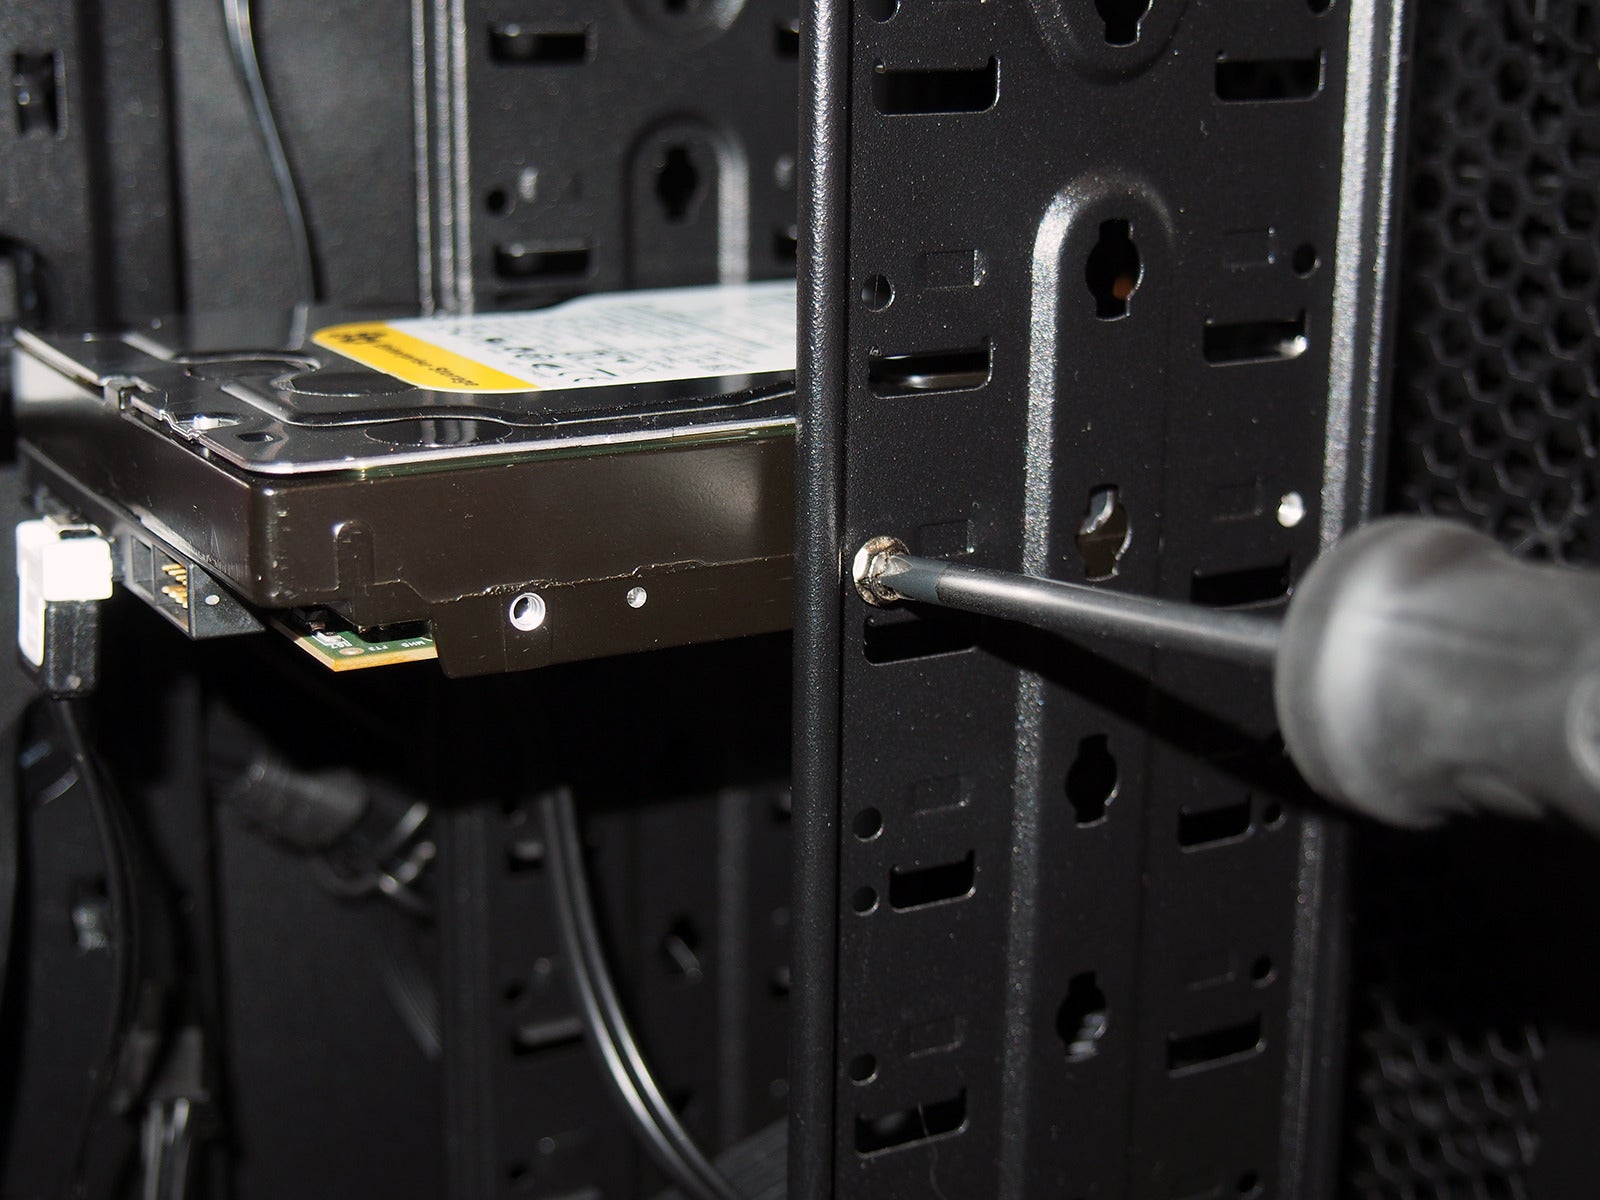
Screw-in Bays: If your case requires screws, slide the HDD into the bay until the screw holes on the drive align with those on the bay. Secure the drive with screws on both sides (typically four screws per drive for maximum stability). Do not overtighten.
-
-
Orientation Matters: Ensure the connectors (SATA data and power) are facing towards the interior of the case, allowing for easy connection to the motherboard and PSU cables.
Connecting Power and Data Cables
This is where the HDD integrates with your PC’s power and data transfer systems.
-
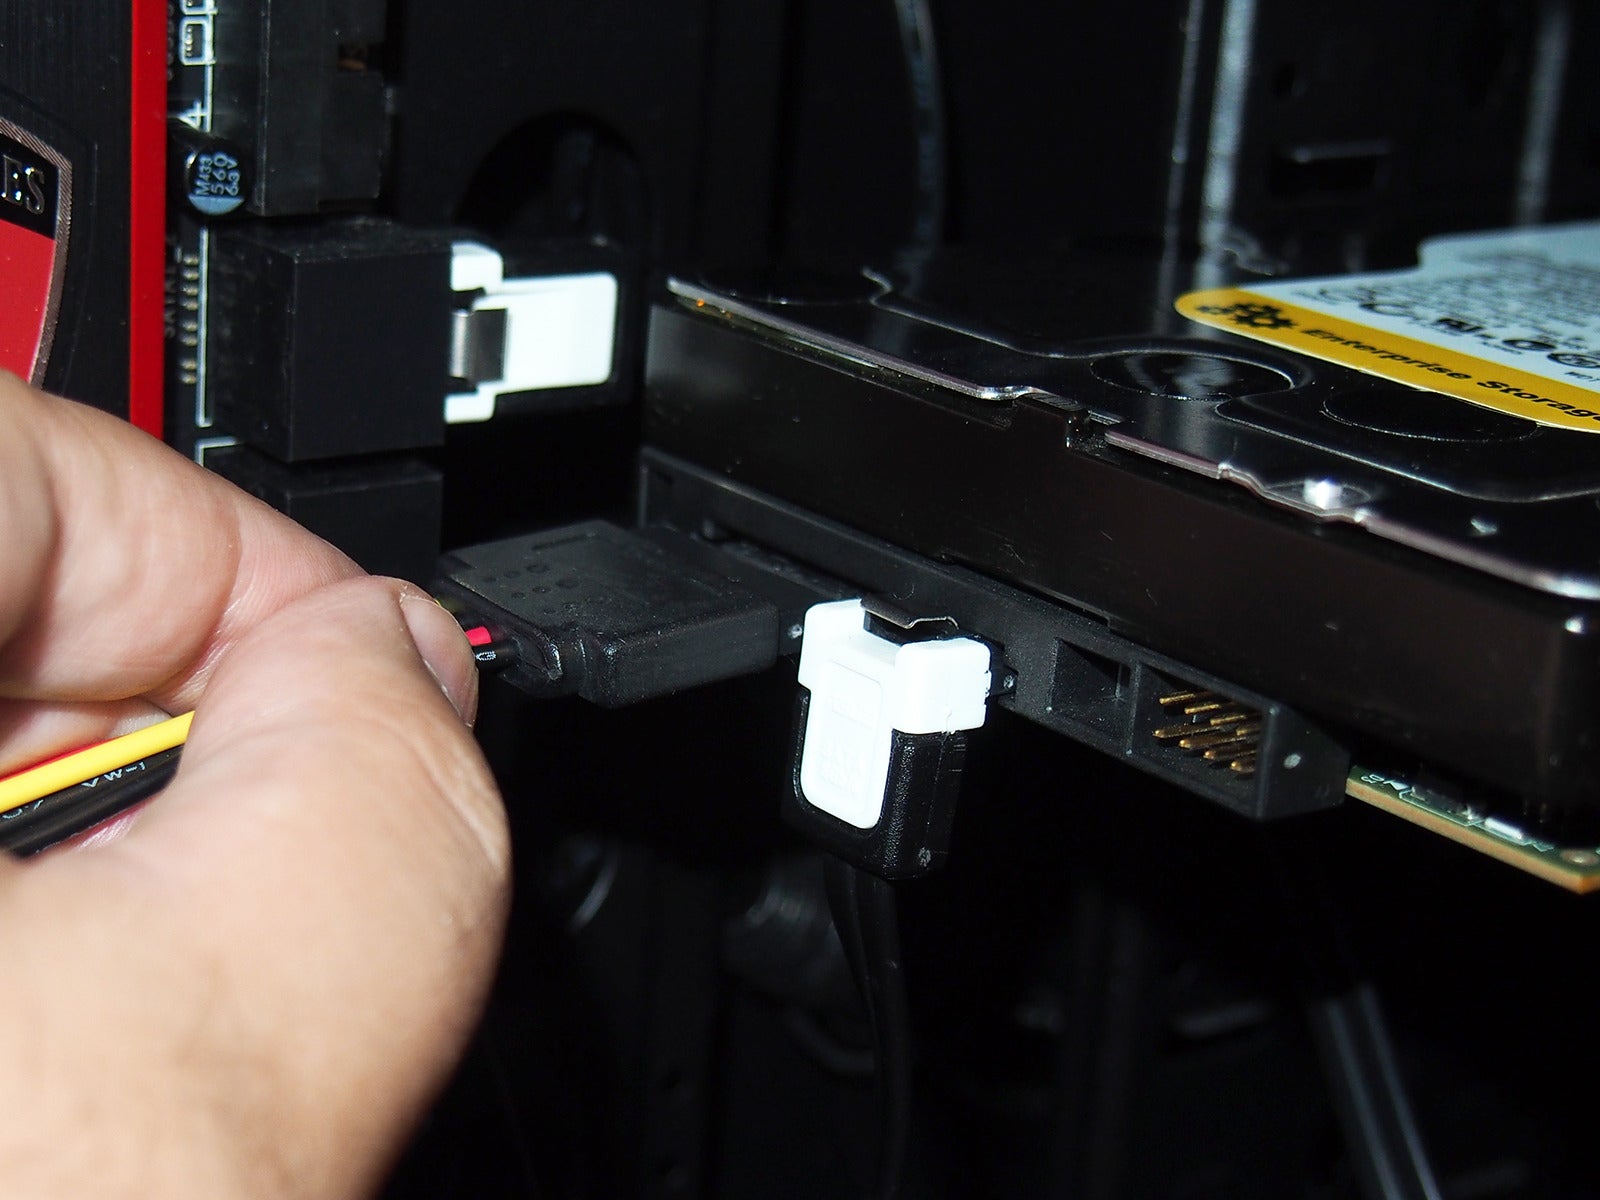
Connect the SATA Data Cable: Take one end of the SATA data cable (the thinner, L-shaped cable) and gently plug it into the corresponding port on your newly installed HDD. It only fits one way.
-
Connect Data Cable to Motherboard: Take the other end of the SATA data cable and connect it to an available SATA port on your motherboard. It’s often good practice to use the lowest numbered available port (e.g., SATA0, SATA1), but any free port will work.
-
Connect the SATA Power Cable: Locate a free SATA power connector coming from your power supply (the wider, flat L-shaped cable). Gently plug it into the corresponding port on your HDD. Like the data cable, it only fits one way. Ensure it’s fully seated.
- Note: If your PSU doesn’t have an available SATA power connector, and you only have Molex connectors, you might need a Molex-to-SATA power adapter. Be cautious with these adapters and ensure they are high quality, as cheap ones have been known to cause issues.
Reassembling Your PC
Once all connections are made and the drive is secure, it’s time to close up the case.
-
Cable Management (Optional but Recommended): If you have extra zip ties or Velcro straps, tidy up the cables to improve airflow and aesthetics. Route cables behind the motherboard tray if your case allows. This isn’t strictly necessary for functionality but is good practice.
-
Replace Side Panel: Carefully slide the side panel back into place, ensuring it aligns correctly. Secure it with the screws or latches you removed earlier.
-
Return to Upright Position: Gently stand your PC upright on your desk or intended location.
-
Reconnect Peripherals: Plug back in all your peripherals (monitor, keyboard, mouse, Ethernet, etc.) and, most importantly, the main power cable.
Post-Installation Procedures: Bringing Your New Drive Online
Physical installation is only half the battle. After the hardware is in place, you need to configure the new HDD within your operating system for it to become usable. This involves checking BIOS settings and then initializing and formatting the drive in Windows.
Initial BIOS/UEFI Verification
Before booting into Windows, a quick check in your system’s BIOS/UEFI can confirm that the motherboard recognizes the new drive.
-
Boot into BIOS/UEFI: Turn on your PC and immediately start pressing the designated key to enter BIOS/UEFI setup (commonly Del, F2, F10, or F12, but check your motherboard manual).
-
Locate Storage Devices: Navigate through the BIOS/UEFI menus to find the section related to storage devices, SATA configuration, or boot devices. Here, you should see your newly installed HDD listed alongside your existing drives.
-
Confirm Detection: If the drive is listed, your motherboard has successfully detected it. You can now save and exit the BIOS/UEFI, allowing your PC to boot into Windows.
- Troubleshooting Note: If the drive isn’t detected, double-check all power and data cable connections, ensure they are fully seated, and try a different SATA port on the motherboard if available.
Initializing and Formatting Your New HDD in Windows
Once Windows loads, the new HDD won’t immediately appear in “This PC” (or “My Computer”). It needs to be initialized and formatted.
-
Open Disk Management:
-
In Windows 10/11: Right-click the Start button and select “Disk Management.”
-
Alternatively, press
Windows Key + R, typediskmgmt.msc, and press Enter.
-
-
Initialize Disk: A “Initialize Disk” window should automatically pop up, detecting your new, uninitialized drive.
-
Choose the correct disk (it will likely be listed as “Disk 1” or a similar number, with a capacity matching your new HDD, and marked as “Unknown” or “Not Initialized”). Be absolutely sure you select the new drive and not your existing boot drive, as this will erase data!
-
Select
GPT (GUID Partition Table)for modern systems and drives larger than 2TB. For older systems or drives 2TB or smaller,MBR (Master Boot Record)is also an option, but GPT is generally recommended. ClickOK.
-
-
Create New Simple Volume: After initialization, the disk will appear as “Unallocated Space.”
-
Right-click on the “Unallocated” space of your new drive.
-
Select “New Simple Volume…” This will launch the New Simple Volume Wizard.
-
Click
Next. -
Specify Volume Size: Unless you have a specific reason to partition the drive into multiple sections, accept the default maximum size for a single partition. Click
Next. -
Assign Drive Letter: Choose an available drive letter (e.g., D:, E:). Click
Next. -
Format Partition:
-
File system: Select
NTFS(standard for Windows). -
Allocation unit size: Leave as
Default. -
Volume label: Give your new drive a descriptive name (e.g., “Data Drive,” “Storage”).
-
Perform a quick format: Keep this checked.
-
-
Click
Next, thenFinish.
-
Windows will now quickly format the drive. Once complete, your new HDD will appear in “This PC” (or “My Computer”) with the assigned drive letter and volume label, ready for use!
Partitioning for Optimal Data Management
While creating a single simple volume is the most common approach, you might consider partitioning your new HDD into multiple logical drives for enhanced data management.
-
Benefits of Partitioning: Creating separate partitions allows you to segment your data (e.g., one partition for games, another for media, a third for backups). This can make file organization easier and sometimes aid in data recovery if one partition becomes corrupted (though it doesn’t protect against full drive failure).
-
How to Partition: When you create a new simple volume, instead of accepting the maximum size, you can specify a smaller size. After creating the first partition, the remaining space will still be “Unallocated.” You can then right-click on the remaining “Unallocated” space and repeat the “New Simple Volume” process to create additional partitions. For most users, a single large partition is sufficient and easier to manage.
Troubleshooting Common Issues and Maximizing Your New Drive’s Potential
Even with careful planning, minor hitches can occur. Knowing how to troubleshoot common issues and optimize your new drive will ensure a seamless experience and extend its lifespan.
Addressing Installation Hurdles
-
Drive Not Detected in BIOS/UEFI:
-
Check Power & Data Cables: The most common culprit. Ensure both the SATA power and data cables are firmly seated at both ends (HDD, PSU, motherboard).
-
Try Different Ports: Connect the data cable to a different SATA port on your motherboard. Some motherboards have specific ports for optical drives or legacy devices that might behave differently.
-
Inspect Cables: Look for any damage to the cables. A faulty cable can prevent detection.
-
Check PSU: Ensure your power supply has enough wattage for the new drive.
-
Drive Faulty: In rare cases, the new HDD might be defective. If possible, test it in another PC or return it to the retailer.
-
-
Drive Detected in BIOS but Not in Windows Disk Management:
- This usually means it’s an initialization or formatting issue. Revisit the “Initialize Disk” and “New Simple Volume” steps in Disk Management. Ensure you’re selecting the correct disk (the one marked “Unknown” or “Not Initialized”).
-
Slow Performance:
-
Check SATA Mode: Ensure your motherboard’s SATA mode is set to AHCI in the BIOS/UEFI for optimal performance.
-
Cable Quality: Use high-quality SATA data cables.
-
Drive Health: Run a diagnostic tool (like CrystalDiskInfo) to check the HDD’s SMART status.
-
Fragmentation: HDDs can become fragmented over time, leading to slower access. Use Windows’ built-in
Optimize Drivestool (search for it in the Start menu) to defragment your HDD regularly.
-
Best Practices for Hard Drive Longevity
-
Avoid Physical Shocks: HDDs are delicate; avoid dropping or bumping your PC, especially when it’s running.
-
Maintain Good Airflow: Ensure your PC case has adequate ventilation to prevent the HDD from overheating. Overheating can significantly shorten a drive’s lifespan.
-
Regular Defragmentation (for HDDs): While SSDs should not be defragmented, HDDs benefit from it. Windows’
Optimize Drivestool can be scheduled to run automatically. -
Monitor Drive Health: Utilize tools like CrystalDiskInfo or your HDD manufacturer’s diagnostic software to periodically check the SMART attributes of your drive, which can warn of impending failure.
-
Regular Backups: This cannot be stressed enough. Even the most robust drive can fail. Always have a backup strategy for your critical data, ideally following the 3-2-1 rule (3 copies of your data, on 2 different media, with 1 offsite).
Leveraging Your Expanded Storage
With your new HDD successfully installed and configured, you now have ample space to manage your digital life more effectively.
-
Designated Storage: Use your HDD for large media files (movies, music), game installations that don’t require SSD speeds, project archives, and general document storage.
-
Backup Destination: Make it your primary destination for system image backups or regular file backups.
-
Steam/Epic Games Library: Many game launchers allow you to create new library folders on different drives. Move larger game installations to your HDD to free up valuable SSD space.
-
Sync Folders: Configure cloud sync services (OneDrive, Google Drive, Dropbox) to synchronize large folders directly to your new HDD to avoid cluttering your primary drive.
Installing an HDD is a practical and rewarding upgrade for any PC user. By following this comprehensive guide, you’ve not only expanded your system’s capabilities but also gained valuable insight into PC hardware and maintenance, empowering you to better manage your digital world.
aViewFromTheCave is a participant in the Amazon Services LLC Associates Program, an affiliate advertising program designed to provide a means for sites to earn advertising fees by advertising and linking to Amazon.com. Amazon, the Amazon logo, AmazonSupply, and the AmazonSupply logo are trademarks of Amazon.com, Inc. or its affiliates. As an Amazon Associate we earn affiliate commissions from qualifying purchases.