
In today’s visually-driven digital landscape, typography plays a crucial role in conveying brand identity, enhancing readability, and adding a touch of personality to everything from professional documents to personal creative projects. Whether you’re a designer looking to expand your creative toolkit, a student crafting a presentation, or simply someone who appreciates the aesthetics of well-chosen fonts, knowing how to install new fonts into Windows is an essential skill. This comprehensive guide will walk you through the straightforward process, ensuring you can effortlessly integrate new typefaces into your Windows operating system and unlock a world of design possibilities.
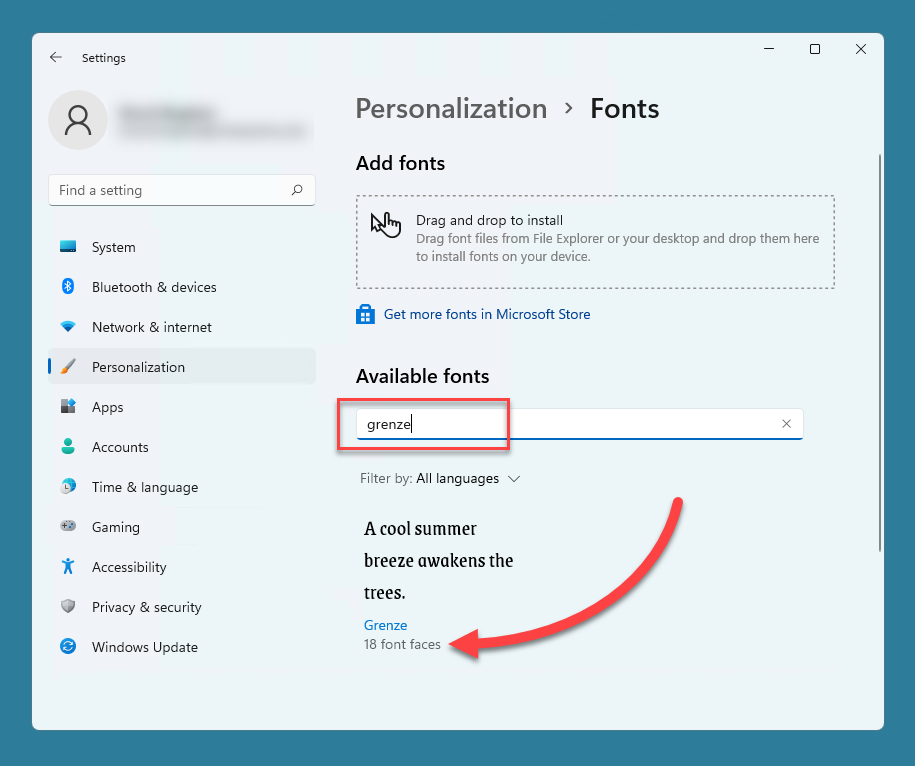
Understanding Font Installation in Windows
Before diving into the “how-to,” it’s beneficial to understand what fonts are and why you might want to install new ones.
What are Fonts?
At its core, a font is a set of characters—letters, numbers, punctuation marks, and symbols—designed in a specific style. Typefaces are the broader design families (like Arial, Times New Roman, or Helvetica), and a font is a particular weight, style, or size within that typeface (e.g., Arial Bold, Times New Roman Italic, Helvetica 12pt).
Why Install New Fonts?
The default fonts included with Windows are functional but can often feel uninspired. Installing custom fonts allows you to:
- Enhance Brand Identity: For businesses, consistent and unique typography is a cornerstone of branding. Using specific fonts across all marketing materials, websites, and internal documents reinforces brand recognition and professionalism. This ties directly into the Brand section of our website, where we explore how design elements, including typography, contribute to a strong corporate identity.
- Improve Readability and Aesthetics: Different fonts are better suited for different purposes. A serif font might be ideal for long-form text in a book, while a sans-serif font could be more effective for web content or headlines. Installing new fonts gives you the flexibility to choose the most appropriate and visually appealing option for any given task.
- Boost Productivity and Creativity: For designers, writers, and anyone working with visual content, having a diverse font library can spark creativity and streamline the design process. Access to a wider range of styles means less time spent searching for the “perfect” font and more time spent on the creative execution. This aligns with the Tech aspect of our website, particularly in tutorials and productivity tools that enhance workflow.
- Personalize Your Digital Experience: Even for everyday use, changing your system fonts can make your computer feel more personal and enjoyable to use. From crafting personalized invitations to designing unique social media graphics, custom fonts add a distinct touch.
Font File Types
Windows supports several common font file formats. The most prevalent are:
- TrueType Fonts (.TTF): A widely compatible and older format, still very common.
- OpenType Fonts (.OTF): A more modern and versatile format, often offering advanced features like ligatures, stylistic alternates, and broader language support. They are generally preferred for professional use.
- Font Collections (.TTC): A single file that can contain multiple fonts, often used for Asian character sets.
For most users, you’ll be dealing with .TTF and .OTF files.
Installing Fonts in Windows: Step-by-Step
Windows offers several intuitive methods for installing new fonts. Whether you’ve downloaded a font from a reputable online source or received one from a colleague, the process is typically quick and painless.
Method 1: The Drag-and-Drop Method (Quickest for Multiple Fonts)
This is often the most efficient way to install several fonts at once.
Step 1: Locate Your Downloaded Fonts
First, ensure that your downloaded font files (.TTF or .OTF) are unzipped and readily accessible in a folder on your computer. If they are in a .zip archive, extract them first.
Step 2: Open the Fonts Folder
Navigate to the dedicated Windows Fonts folder. You can do this in a few ways:
- Using File Explorer: Open File Explorer, then type
C:WindowsFontsinto the address bar and press Enter. - Using the Run Command: Press
Windows Key + Rto open the Run dialog box. Typefontsand press Enter, or typeshell:fontsand press Enter.
Step 3: Drag and Drop Your Fonts
Select the font files you wish to install, then drag them from their current location (e.g., your Downloads folder) and drop them directly into the open C:WindowsFonts folder.
Windows will automatically detect the files and begin the installation process. You’ll see a progress bar as each font is installed.
Method 2: Using the Font Previewer (Ideal for Single Fonts or Review)
This method is useful if you want to preview a font before installing it, or if you’re only installing one or two fonts at a time.
Step 1: Locate and Open the Font File
Find the .TTF or .OTF font file you want to install.
Step 2: Double-Click the Font File
Double-clicking a font file will open the font previewer window. This window displays the font in various sizes and shows all the characters available.
Step 3: Click the “Install” Button
In the upper-left corner of the previewer window, you will see an “Install” button. Click this button.
Windows will then install the font. If the font is already installed, you’ll be prompted to replace it.
Method 3: Using Windows Settings (Modern Approach)
Windows 10 and Windows 11 offer a dedicated section within the Settings app for font management.
Step 1: Open Windows Settings
Press Windows Key + I to open the Settings app.
Step 2: Navigate to Personalization
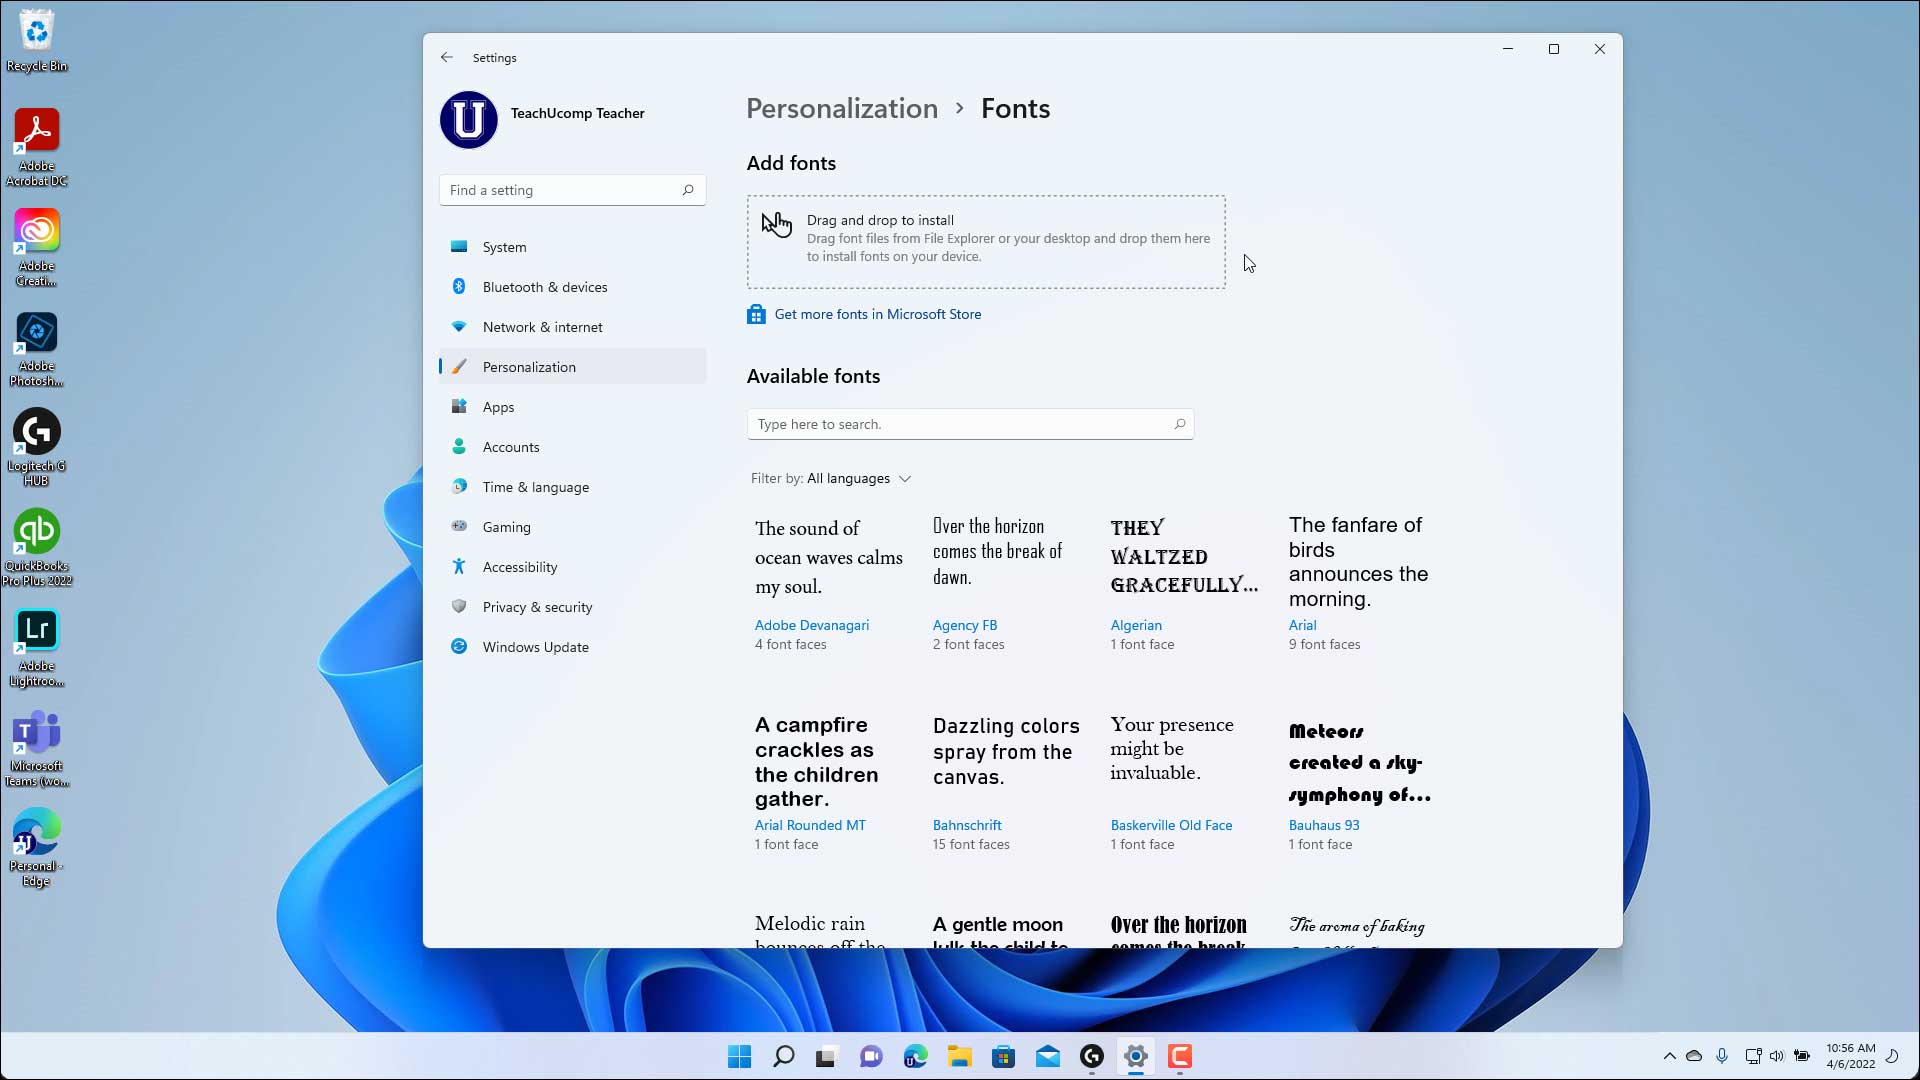
In the Settings app, click on “Personalization.”
Step 3: Select “Fonts”
From the Personalization menu, click on “Fonts.”
Step 4: Install Fonts
You’ll see a list of your currently installed fonts. There’s a dedicated area, often labeled “Add fonts,” which usually includes a drag-and-drop zone and a browse button.
- Drag and Drop: You can drag your font files (.TTF or .OTF) directly into this designated area.
- Browse: Click the “Browse” button to open a File Explorer window, navigate to where your font files are stored, select them, and click “Open.”
Windows will install the fonts, and they will appear in the list below once complete.
Verifying and Using Your New Fonts
Once you’ve completed the installation process using any of the methods above, it’s important to verify that the fonts have been installed correctly and know how to use them.
Verifying Font Installation
The most straightforward way to verify is to check the Fonts folder again.
Step 1: Open the Fonts Folder
Go to C:WindowsFonts or use the shell:fonts command.
Step 2: Search for Your Font
Scroll through the list or use the search bar at the top of the Fonts folder window to find the name of the font you just installed. If it appears in the list, it has been successfully installed.
Using Your New Fonts in Applications
Newly installed fonts become available for use in most applications that allow you to select fonts, such as:
- Microsoft Office Suite: Word, PowerPoint, Excel, Outlook.
- Adobe Creative Suite: Photoshop, Illustrator, InDesign.
- Web Browsers: For website design and development.
- Text Editors: Notepad, WordPad (though limited).
- Graphics and Design Software: Canva, GIMP, etc.
To use a new font:
- Open your desired application.
- Select the text you want to format, or place your cursor where you want to start typing.
- Open the font selection dropdown menu (usually found in the Home tab or a dedicated formatting toolbar).
- Scroll through the list to find your newly installed font. It should appear alphabetically alongside the other fonts on your system.
- Select the font.
If the font doesn’t appear immediately, try closing and reopening the application. In some cases, a system restart might be necessary, though this is rare for font installations.
Troubleshooting Common Font Installation Issues
While font installation is usually seamless, occasional hiccups can occur. Here are some common issues and their solutions:
Font Files are Corrupted or Incomplete
If a font fails to install or causes errors, the font file itself might be damaged or incomplete.
- Solution: Re-download the font from a trusted source. Ensure the download is complete and that you have extracted the entire archive if it was compressed.
Insufficient Permissions
In rare cases, you might encounter permission errors, especially if you’re not logged in as an administrator.
- Solution: Ensure you are logged into your Windows account with administrator privileges. If not, try running the File Explorer or Settings app as an administrator. To do this, right-click on the application’s shortcut and select “Run as administrator.”
Font Already Installed (and Not Wanting to Overwrite)
If you try to install a font that’s already present, Windows will typically prompt you.
- Solution: If you want the new version, click “Yes” or “Replace” to overwrite the existing font. If you don’t want to replace it, click “No” or “Cancel.” You can also uninstall the existing font first if you’re certain you want to start fresh.
Font Doesn’t Appear in Applications
After a successful installation, a font might not show up in your application’s font list.
- Solution:
- Restart the Application: As mentioned, closing and reopening the program often resolves this.
- Restart Your Computer: This is a more drastic step but can refresh the system’s font cache and resolve stubborn issues.
- Check Font Validity: Ensure the font file is a valid .TTF or .OTF file and not a proprietary format or a shortcut.
Licensing and Usage Rights
This is a critical consideration that often gets overlooked. While this guide focuses on the technical installation, it’s vital to be aware of font licensing.
- Solution: Always check the license agreement associated with any font you download, especially for commercial use. Free fonts often come with specific terms, and commercial fonts require purchasing a license. Misusing fonts can lead to legal issues, impacting your Brand and potentially your Money. Understanding these rights is part of responsible digital citizenship and good business practice.

Conclusion
Mastering the art of installing fonts into Windows is a small but significant skill that can greatly enhance your digital productivity, creative output, and personal expression. By following these simple steps, you can transform your computing experience from generic to uniquely yours, empowering you to communicate more effectively and aesthetically. Whether you’re reinforcing a professional brand, personalizing a project, or simply seeking a fresh look, the ability to install and utilize a diverse range of fonts is an invaluable asset in the modern digital toolkit. Now, go forth and explore the vast world of typography!
aViewFromTheCave is a participant in the Amazon Services LLC Associates Program, an affiliate advertising program designed to provide a means for sites to earn advertising fees by advertising and linking to Amazon.com. Amazon, the Amazon logo, AmazonSupply, and the AmazonSupply logo are trademarks of Amazon.com, Inc. or its affiliates. As an Amazon Associate we earn affiliate commissions from qualifying purchases.