
In the dynamic world of digital content creation, design, and even simple document formatting, the ability to customize and personalize is paramount. Fonts play a crucial role in this personalization, influencing the aesthetic appeal, readability, and overall message of your work. Whether you’re a graphic designer crafting a new brand identity, a writer looking for a more engaging typeface for your novel, or simply someone who wants to add a personal touch to their documents, understanding how to install new fonts in Windows 10 is an essential skill. This guide will walk you through the straightforward process, empowering you to expand your typographic toolkit and enhance your digital presence.
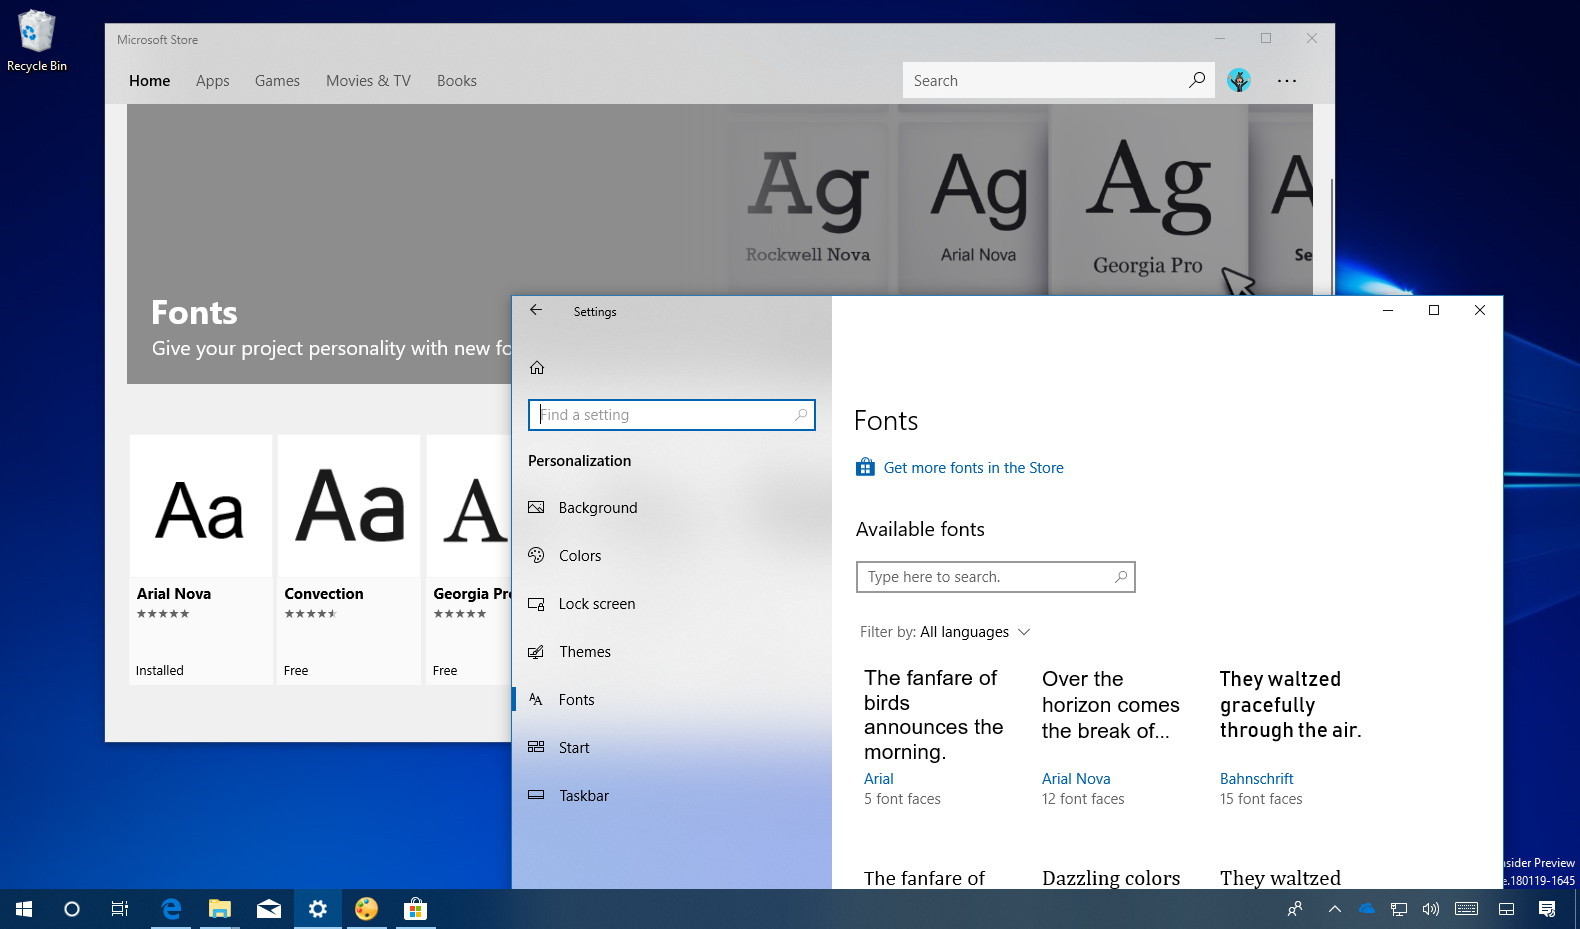
Windows 10 offers a robust and user-friendly interface that makes font installation a breeze. Gone are the days of complex manual file placements; today, it’s largely a matter of a few clicks. This guide will not only cover the fundamental methods of installing fonts but also delve into where to find them, how to manage them, and some best practices to ensure a smooth and productive experience.
Understanding Fonts and Their Impact
Before diving into the installation process, it’s beneficial to briefly touch upon what fonts are and why they matter. In essence, a font is a complete set of characters, numbers, and symbols in a particular typeface. Typefaces, on the other hand, are the design of the letters themselves – think Arial, Times New Roman, or the more distinctive Comic Sans. The choice of typeface significantly impacts the message conveyed. A bold, sans-serif font might convey modernity and professionalism, while a flowing script font could evoke elegance and tradition.
For businesses, font selection is intrinsically linked to Brand identity. A carefully chosen font for a logo, marketing materials, and website can reinforce a brand’s personality, making it instantly recognizable and memorable. For individuals, the ability to use custom fonts can elevate personal projects, from creating invitations for special events to designing eye-catching social media graphics. In the realm of Tech, fonts are integral to user interface design, affecting usability and the overall aesthetic of software applications and websites. Even in the context of Money, clear and readable fonts can improve the presentation of financial reports and investment summaries, making them more accessible to a wider audience.
The ability to install new fonts in Windows 10 is therefore not just a technical task; it’s an enabler of creativity, brand consistency, and effective communication across various digital domains.
Methods for Installing Fonts in Windows 10
Windows 10 provides several intuitive methods for installing new fonts, catering to different user preferences and scenarios. The most common and straightforward approaches involve using the File Explorer and the Settings app.
Method 1: Using File Explorer (Drag and Drop or Right-Click)
This is arguably the simplest and most widely used method for installing fonts. It’s quick, efficient, and requires minimal interaction with system menus.
Drag and Drop Installation
- Locate Your Font Files: First, you’ll need to have your font files downloaded. Font files typically come in formats like
.ttf(TrueType Font),.otf(OpenType Font), or sometimes.ttc(TrueType Collection). It’s best to keep these files organized in a dedicated folder on your computer. - Open the Fonts Folder: Navigate to the Windows Fonts folder. You can do this by opening File Explorer and typing
C:WindowsFontsinto the address bar and pressing Enter. - Drag and Drop: Select the font files you wish to install from their location and drag them directly into the open Fonts folder. As soon as you release the mouse button, Windows will begin the installation process. You’ll see a brief progress bar indicating that the font is being installed.
Right-Click Installation
- Locate Your Font Files: As with the drag-and-drop method, ensure you have your font files readily available.
- Right-Click the Font File: In File Explorer, locate the font file you want to install. Right-click on the
.ttf,.otf, or.ttcfile. - Select “Install”: From the context menu that appears, select the “Install” option. If the font is already installed, you might see an “Install for all users” option as well. Clicking “Install” will automatically add the font to your system.
Important Note: For both drag-and-drop and right-click installations, if you encounter a prompt asking if you want to allow the app to make changes to your device, click “Yes.” This is a standard security measure in Windows.
Method 2: Using the Windows Settings App
The Settings app provides a more graphical interface for managing fonts and offers a slightly different approach to installation.
- Open Settings: Click the Start button, then click on the Gear icon to open the Settings app. Alternatively, you can press
Windows key + I. - Navigate to Personalization: In the Settings window, click on “Personalization.”
- Select Fonts: On the left-hand sidebar of the Personalization settings, click on “Fonts.”
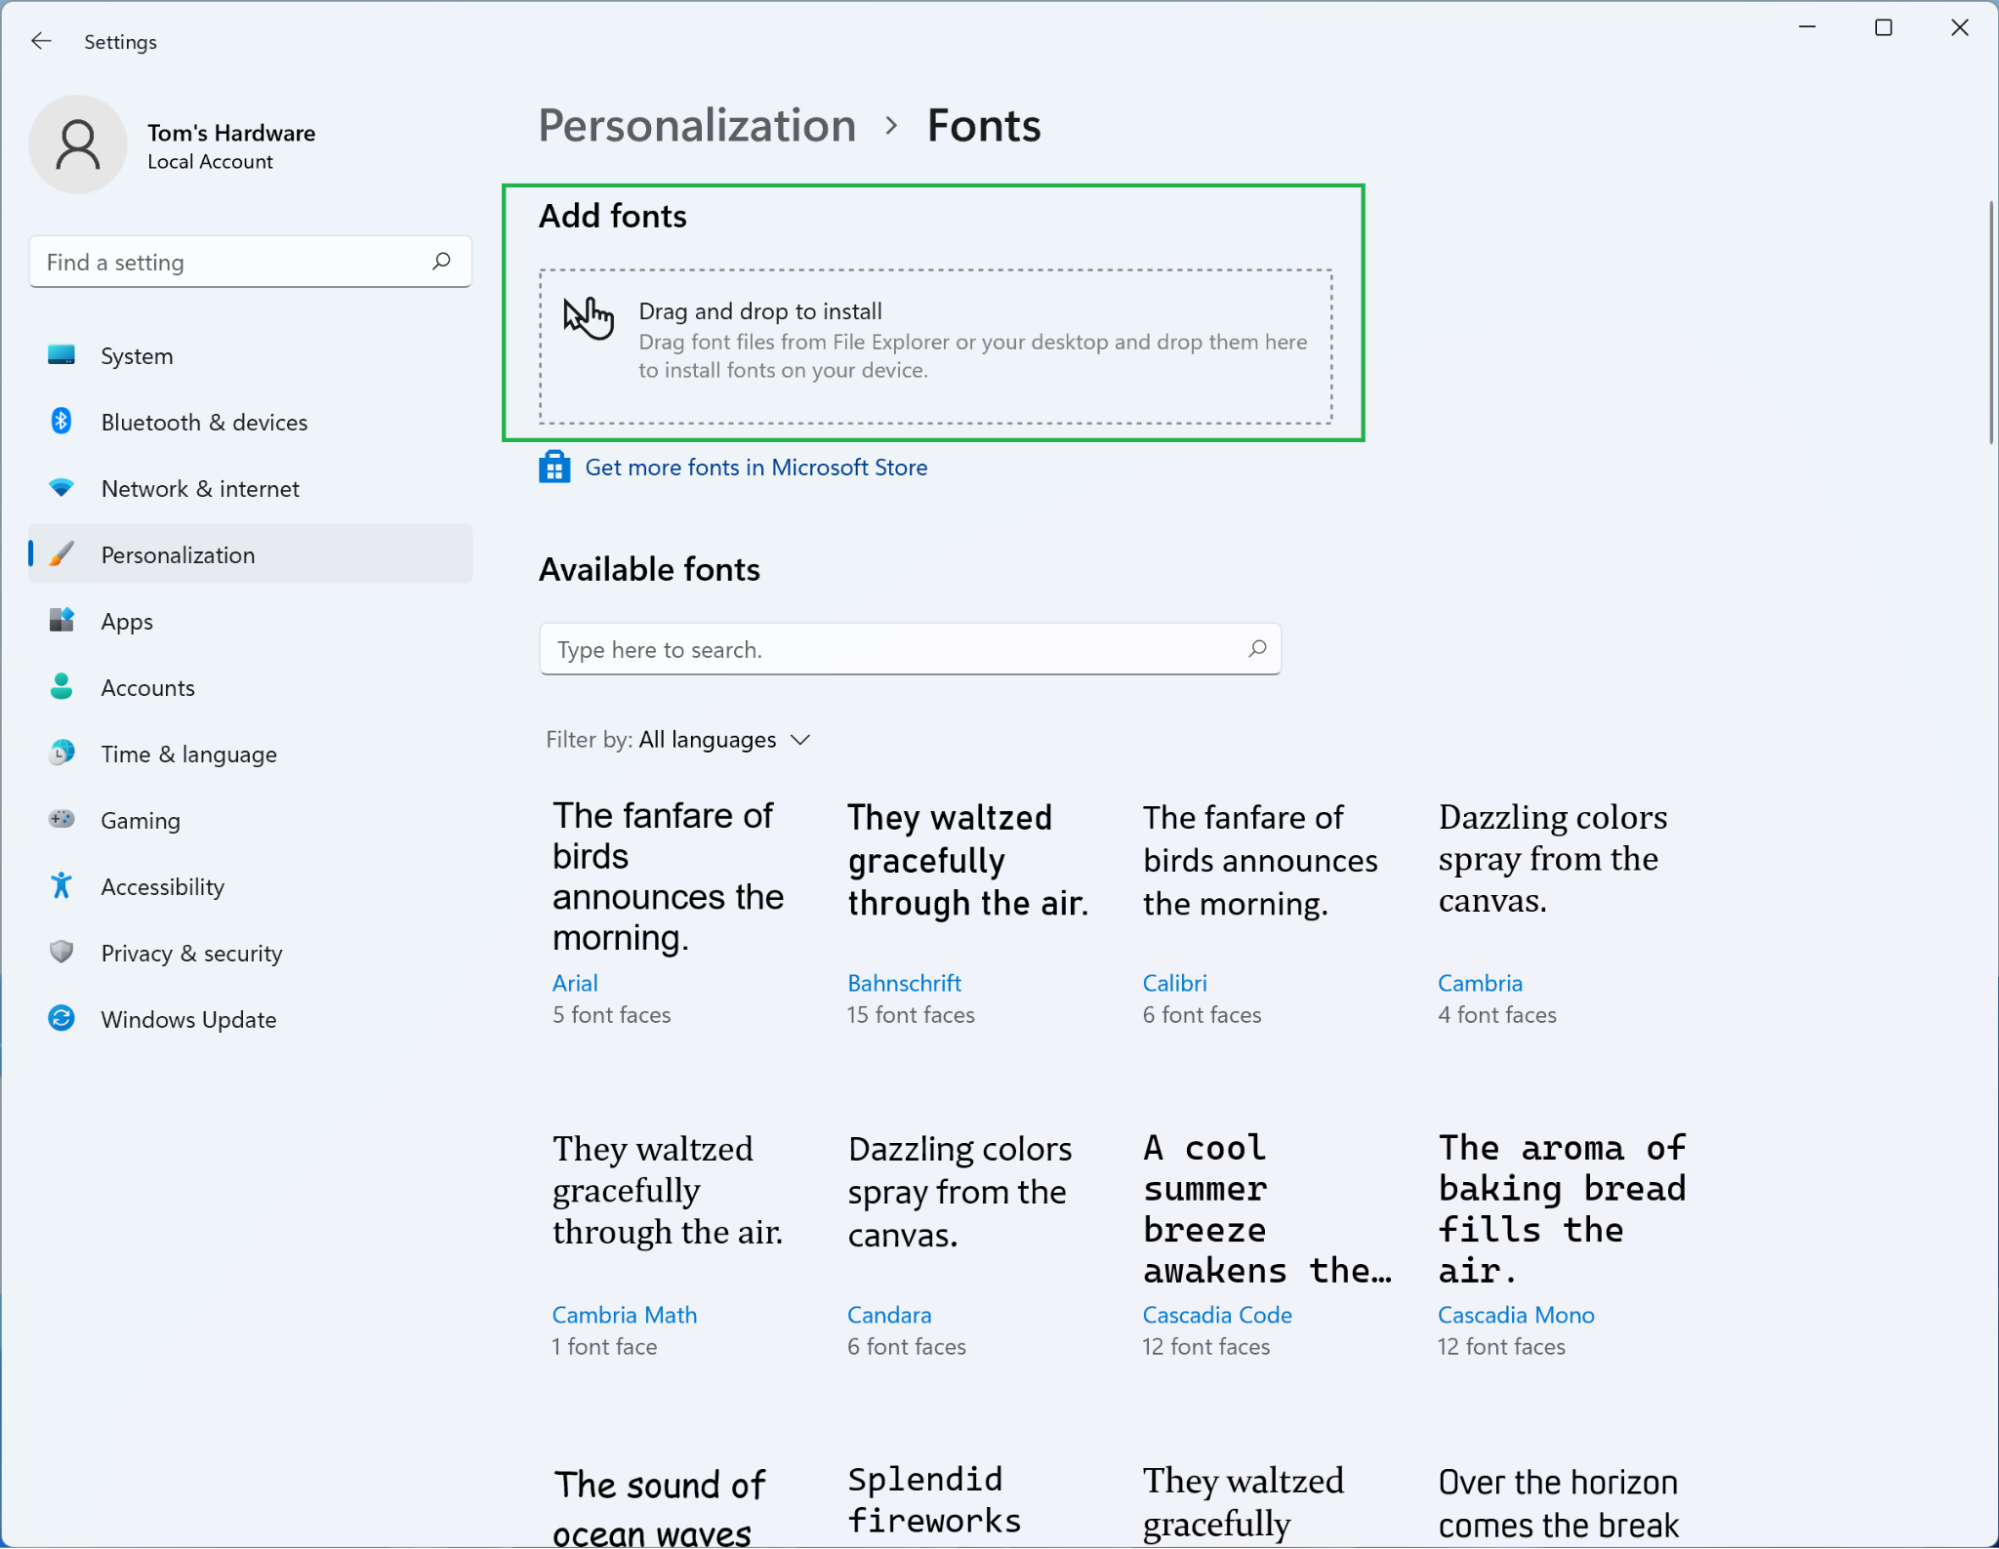
- Drag and Drop into Settings: At the top of the Fonts settings page, you will see a section labeled “Add fonts” with a drag-and-drop area. You can drag your font files directly into this area.
- Click “Install” (if prompted): Once the font is recognized, it will appear in the list of available fonts. If you installed via drag-and-drop directly into the Settings app’s designated area, it usually installs automatically. However, sometimes a confirmation or an “Install” button might appear.
Both methods achieve the same result: making the new font available for use in all your Windows applications. The choice between them often comes down to personal preference and how you have your files organized.
Finding and Obtaining New Fonts

The process of installing fonts is only half the equation; the other crucial aspect is knowing where to find high-quality and suitable fonts. Fortunately, the internet is a treasure trove of typographic resources, offering a vast array of options for every need and budget.
Free Font Resources
For many users, free fonts are an excellent starting point. These are often provided by independent designers or found on platforms dedicated to free digital assets.
- Google Fonts: This is an indispensable resource for designers and developers alike. Google Fonts offers a massive library of open-source fonts that are free to use for both personal and commercial projects. The website is user-friendly, allowing you to preview fonts, adjust text size, and even compare different typefaces side-by-side before downloading. The fonts are typically provided in
.ttfor.otfformats, making them easy to install in Windows. - DaFont: A long-standing and popular website for free fonts, DaFont hosts a huge collection categorized by style (serif, sans-serif, script, display, etc.). While many fonts are free for personal use, it’s crucial to check the license of each font, as commercial use might require a license purchase.
- Font Squirrel: Font Squirrel curates high-quality free fonts that are specifically licensed for commercial use. This is a fantastic resource if you’re looking for professional-grade fonts without the cost. They often provide web font kits as well, which are useful for website design.
- Creative Commons Licensed Fonts: Many designers release their work under Creative Commons licenses, allowing for free use under certain conditions. Searching for “Creative Commons fonts” can lead you to various independent designers’ websites and repositories.
Premium Font Marketplaces
If you’re looking for unique, professionally designed fonts or require specific licensing for commercial projects, premium font marketplaces are the way to go.
- MyFonts: One of the largest and most reputable online font retailers, MyFonts offers an extensive collection of fonts from foundries worldwide. You can find everything from classic serifs to cutting-edge display fonts, with clear licensing options for various usage scenarios.
- FontSpring: Another excellent marketplace known for its user-friendly licensing and a wide selection of fonts. FontSpring often features sales and promotions, making premium fonts more accessible.
- Adobe Fonts (formerly Typekit): If you are an Adobe Creative Cloud subscriber, you have access to Adobe Fonts, a curated library of thousands of high-quality fonts that can be activated directly within your Adobe applications and are available for use across your desktop and web projects.
When downloading fonts, always pay close attention to the licensing terms. Free fonts may have restrictions on commercial use, and premium fonts come with different license tiers that dictate how and where you can use them. Understanding these terms is crucial for legal compliance, especially when working on professional or business-related projects.
Managing and Using Your Installed Fonts
Once you’ve installed new fonts, they become available for use in most Windows applications that support font selection. This includes popular programs like Microsoft Word, PowerPoint, Photoshop, and even web browsers for certain purposes.
Accessing Fonts in Applications
To use an installed font:
- Open your application.
- Select the text you want to format.
- Locate the font selection dropdown menu. This is typically found in the “Home” tab or toolbar of most applications.
- Scroll through the list of available fonts. Your newly installed fonts will appear in alphabetical order alongside the default Windows fonts.
- Select the desired font. The text you had selected will immediately update to reflect the new typeface.
Managing Fonts in Windows Settings
The Windows Settings app’s “Fonts” section is not just for installation; it also serves as a font manager.
- Previewing Fonts: You can click on any font in the list to see a preview of how it looks with sample text. This is useful for remembering what a font looks like or for demonstrating it to others.
- Uninstalling Fonts: If you find you no longer need a particular font, or if it’s causing issues, you can uninstall it from this section. Click on the font you want to remove, and then click the “Uninstall” button. This frees up disk space and can help keep your system running smoothly.
- Font Size Adjustment: For preview purposes, you can adjust the size of the sample text to see how the font behaves at different scales.
Best Practices for Font Management
- Keep it Organized: Create a dedicated folder for your font downloads. This makes it easy to locate them for installation and backup.
- Avoid Over-Installation: While it’s tempting to install every font you find attractive, a massive font library can slow down your system and make it difficult to find the fonts you actually use. Only install fonts that you have a genuine need for.
- Check for Duplicates: Sometimes, downloading fonts from different sources might lead to duplicates. Windows will usually prompt you if a font is already installed, but it’s good practice to be mindful.
- Back Up Your Fonts: If you have a significant collection of premium or hard-to-find fonts, consider backing them up to an external drive or cloud storage. This protects your investment in case of hardware failure or system reinstallation.
- Understand Font Formats: Be aware of the common font file formats (
.ttf,.otf). While Windows 10 generally supports them well, some older applications might have better compatibility with one format over the other. OpenType (.otf) fonts are generally considered more advanced and versatile.
Conclusion
Installing fonts in Windows 10 is a simple yet powerful way to enhance your digital creativity and professional output. By mastering the drag-and-drop method in File Explorer or utilizing the intuitive Settings app, you can effortlessly expand your typographic palette. Whether you’re aiming to refine your Brand’s visual identity, improve the readability of your documents, or simply express your personal style, a well-chosen font can make a significant difference.
Remember that the journey doesn’t end with installation. Exploring the vast resources available for free and premium fonts allows you to curate a collection that perfectly suits your needs. By adhering to best practices for font management and understanding licensing, you can ensure a seamless and productive experience. So go forth, experiment with new typefaces, and let your creativity flow freely through the power of well-crafted characters. The ability to install and utilize custom fonts is a fundamental skill in today’s visually driven digital landscape, empowering you to communicate more effectively and creatively across all your technological endeavors.
aViewFromTheCave is a participant in the Amazon Services LLC Associates Program, an affiliate advertising program designed to provide a means for sites to earn advertising fees by advertising and linking to Amazon.com. Amazon, the Amazon logo, AmazonSupply, and the AmazonSupply logo are trademarks of Amazon.com, Inc. or its affiliates. As an Amazon Associate we earn affiliate commissions from qualifying purchases.