Typography is more than just a stylistic choice; in the world of web development, it is a critical component of user experience (UX), site performance, and technical architecture. WordPress, the world’s most popular Content Management System (CMS), offers a robust framework for customization, but its default font selections can often feel limiting for developers and power users. Installing custom fonts allows you to transcend these limitations, ensuring your technical stack aligns with your specific design requirements.
Whether you are looking to integrate a premium typeface from a foundry or leverage the vast library of Google Fonts, understanding the technical pathways to font installation is essential. This guide explores the diverse methods of font integration in WordPress, from beginner-friendly plugins to manual code injections and the latest advancements in the WordPress Site Editor.

Leveraging the Power of Plugins for Font Integration
For many developers and site administrators, plugins offer the most efficient route for font management. They abstract the complexity of CSS and file directory management, providing a GUI (Graphical User Interface) that handles the heavy lifting of script enqueueing and cross-browser compatibility.
Using the “Use Any Font” Plugin
The “Use Any Font” plugin is a staple in the WordPress community for those who need to upload custom font files directly to their server without touching a line of code. It supports various formats, including EOT, TTF, and WOFF. The technical advantage of this plugin is its ability to automatically convert your fonts into web-ready formats and generate the necessary @font-face CSS rules. This ensures that your typography renders correctly across different operating systems and browsers.
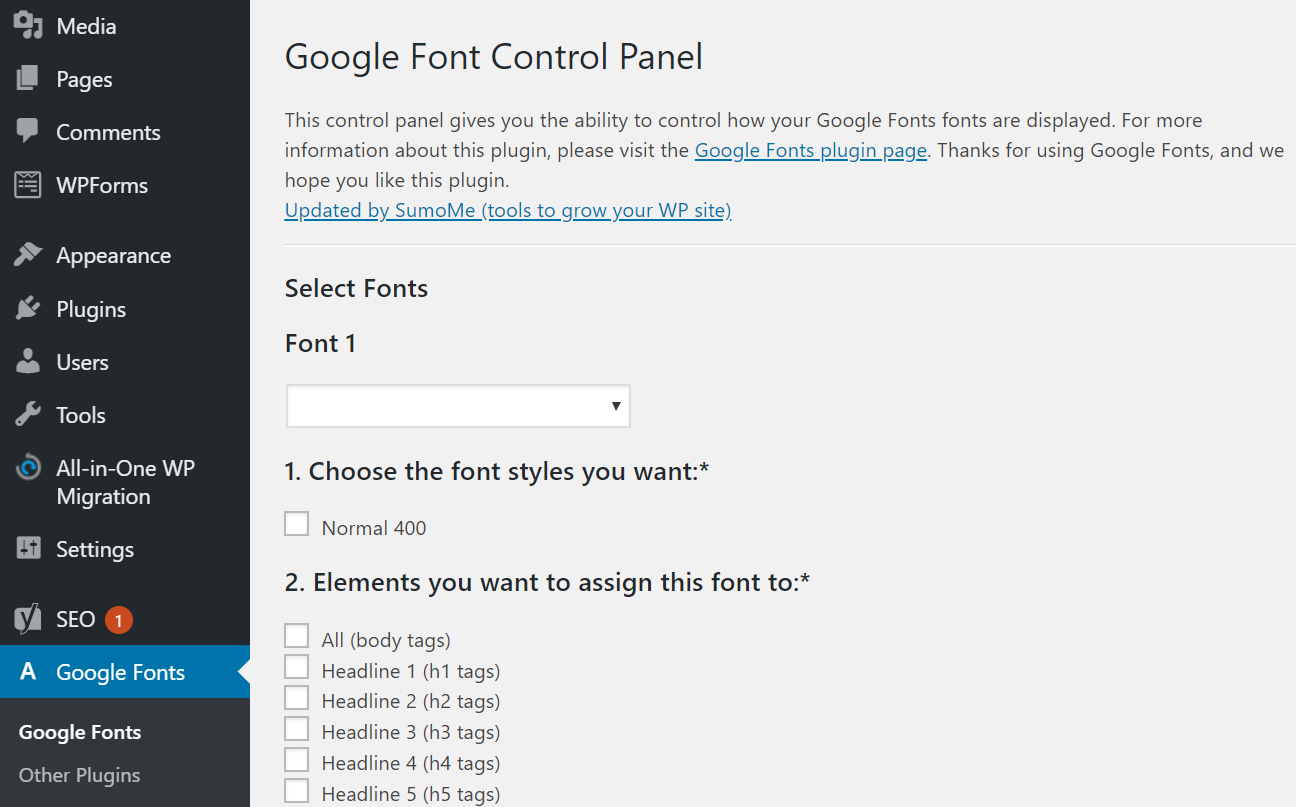
Implementing Google Fonts via Typography Plugins
While Google Fonts is often integrated into modern themes, using a dedicated plugin like “Easy Google Fonts” provides granular control. This tool integrates directly with the WordPress Customizer, allowing you to preview font changes in real-time. Technically, these plugins work by fetching the font API from Google’s servers and injecting the link into the <head> section of your HTML, ensuring that the browser requests the assets as soon as the page begins to load.
Benefits of Plugin-Based Solutions
The primary benefit of using plugins is speed and safety. You don’t risk breaking your functions.php file or losing your changes during a theme update. Furthermore, high-quality font plugins often include optimization features, such as font-display swap settings, which help mitigate “Flash of Unstyled Text” (FOUT) and improve your Core Web Vitals.
Manual Installation via Theme Editor and CSS
For developers who prefer a “clean” installation with minimal overhead, manual integration is the gold standard. This method involves hosting font files locally on your server, which provides better control over privacy (GDPR compliance) and eliminates dependencies on third-party CDNs.
Preparing Font Files for the Web
Before uploading fonts, they must be optimized for web use. Desktop formats like OTF or TTF are often too heavy for fast web performance. The technical best practice is to use WOFF (Web Open Font Format) or WOFF2. WOFF2, in particular, offers superior compression (approximately 30% better than WOFF), which significantly reduces the data payload for mobile users. You can use tools like Font Squirrel’s Webfont Generator to convert your files and generate the required CSS snippets.
Uploading to the Server via FTP or File Manager
Once your files are ready, you need to upload them to your WordPress directory. The most common practice is to create a folder named fonts within your child theme’s directory (e.g., /wp-content/themes/your-child-theme/fonts/). Using an FTP client like FileZilla or your hosting provider’s File Manager, transfer the WOFF2 files into this folder. Keeping these files within the child theme directory ensures that they are not overwritten when the parent theme receives an update.
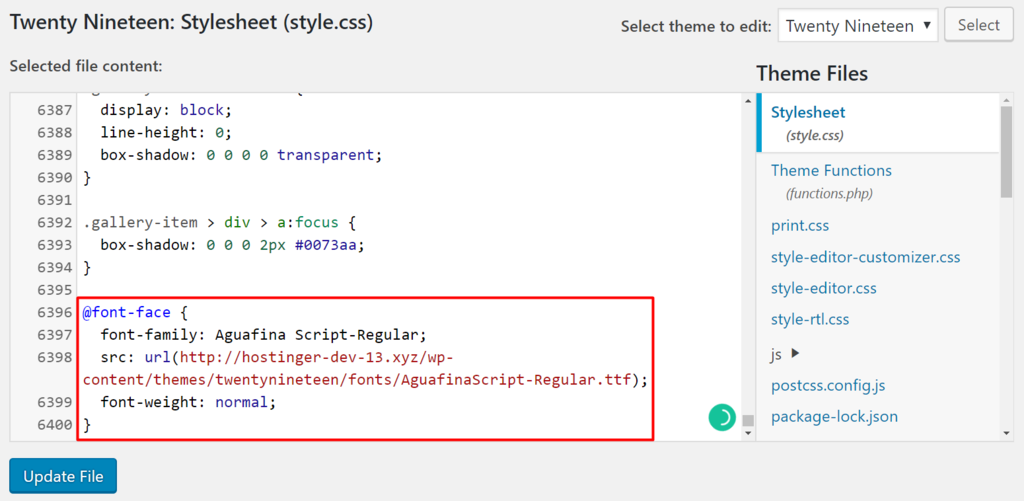
Defining @font-face in the Stylesheet
The heart of manual font installation lies in the @font-face rule within your style.css file. This rule tells the browser where to find the font file and how to name it. A typical technical implementation looks like this:
@font-face {
    font-family: 'CustomFont';
    src: url('fonts/customfont.woff2') format('woff2');
    font-weight: normal;
    font-style: normal;
    font-display: swap;
}
By including font-display: swap;, you instruct the browser to use a system font until the custom font has fully downloaded, preventing an invisible text layer during the initial render.
Implementing Google Fonts Without Plugins
If you want to use Google Fonts but wish to avoid the bloat of an extra plugin, you can manually enqueue the scripts. This is a highly efficient method that utilizes WordPress’s built-in script handling system.
Selecting Fonts from the Google Library
The first step is to visit the Google Fonts website and select your desired weights (e.g., Regular 400, Bold 700). Google provides a snippet of code, but rather than pasting this directly into your header.php, the technically sound approach is to “enqueue” the style in your theme’s logic.
Enqueueing Fonts in functions.php
The wp_enqueue_style function is the proper way to add stylesheets to a WordPress site. This ensures that scripts are loaded in the correct order and prevents duplicate requests. By adding a function to your functions.php file, you can register the Google Font URL and hook it into wp_enqueue_scripts. This method allows for better caching and ensures that the font is only loaded when necessary, streamlining the site’s performance.
Local Hosting for GDPR and Speed
In the modern technical landscape, many developers choose to download Google Fonts and host them locally. This avoids sending the user’s IP address to Google’s servers, which is a requirement for strict GDPR compliance. Tools like the “Google Webfonts Helper” allow you to download the files and provide the CSS required to serve them directly from your own server, combining the vast library of Google with the performance benefits of local hosting.
Optimization and Performance Best Practices
Installing a font is only half the battle; the other half is ensuring that the font does not degrade the site’s performance. Heavy font files are one of the leading causes of high Largest Contentful Paint (LCP) scores and Cumulative Layout Shift (CLS).
The Impact of Fonts on Page Load Speed
Every font weight and style (italic, bold, thin) is a separate file that the browser must download. If a developer mistakenly loads 10 different weights of a font, it can add several hundred kilobytes to the total page size. From a technical standpoint, you should only load the specific weights you intend to use. Using “Variable Fonts” is a modern solution to this problem, as a single file can contain multiple weights and styles, drastically reducing the number of HTTP requests.
Local Hosting vs. CDNs
While CDNs (Content Delivery Networks) are fast, local hosting on a well-configured server (especially those using HTTP/2 or HTTP/3) can be even faster. Local hosting allows for “Preloading,” a technique where you add a <link rel="preload"> tag to your header. This tells the browser to prioritize the font download, ensuring the text is rendered as quickly as possible.
Managing Layout Shifts (CLS)
One of the most frustrating user experiences is when a font loads and causes the entire page content to “jump.” This is a key metric in Google’s Core Web Vitals. To prevent this, developers should use CSS to match the size and line height of the fallback system font (like Arial or Helvetica) to the custom font. This ensures that when the transition happens, the layout remains stable.
Future-Proofing with the WordPress Site Editor (FSE)
With the advent of Block Themes and the Site Editor (formerly Full Site Editing), WordPress has introduced a native way to handle fonts through the theme.json file and the new Font Library.
Utilizing the Font Library in WordPress 6.5+
Introduced in version 6.5, the WordPress Font Library allows users to manage fonts much like they manage media. This technical addition means you can upload, install, and activate fonts directly through the administrative interface without writing CSS or using third-party plugins. The Font Library handles the file storage and the generation of the @font-face rules automatically, storing the files in the wp-content/uploads/fonts directory.
Managing Global Styles via theme.json
In block-based themes, the theme.json file acts as the central configuration hub. By defining your font families within this file, you can ensure that the custom fonts are available throughout the Site Editor’s typography settings. This provides a unified technical framework where fonts are declared once and utilized globally, reducing code redundancy and making the site much easier to maintain as it scales.
Conclusion
Installing a font in WordPress is a multi-faceted technical task that ranges from simple plugin usage to complex manual coding and server-side optimization. For beginners, plugins provide an accessible entry point. For professional developers, manual @font-face implementation or the use of theme.json offers the precision needed for high-performance websites. Regardless of the method chosen, the priority should always remain on performance optimization and cross-browser stability, ensuring that your custom typography enhances the digital experience without compromising technical integrity.