
FFmpeg is a powerful, open-source multimedia framework that handles audio, video, and other multimedia streams. It’s a command-line tool, meaning you interact with it by typing commands rather than clicking buttons. This might sound intimidating, but its versatility and the sheer number of tasks it can accomplish make it an indispensable tool for many tech enthusiasts, content creators, developers, and anyone who frequently works with media files. From converting video formats and resizing clips to extracting audio, applying filters, and even streaming content, FFmpeg is the Swiss Army knife of multimedia processing.

While its power is undeniable, the initial hurdle for many Windows users is the installation process. Unlike most Windows applications that come with a simple double-click installer, FFmpeg requires a slightly more hands-on approach. This guide will walk you through every step, demystifying the process and ensuring you can get FFmpeg up and running on your Windows machine smoothly. We’ll cover everything from understanding what FFmpeg is and why you might need it, to downloading the correct version, setting it up for command-line access, and finally, verifying your installation.
Understanding FFmpeg and Its Relevance in the Tech Landscape
Before we dive into the installation process, it’s crucial to understand what FFmpeg is and why it holds such a significant place in the current technological landscape. At its core, FFmpeg is a collection of libraries and programs for handling multimedia data. It’s renowned for its speed, efficiency, and broad support for a vast array of codecs and file formats.
Why You Need FFmpeg
The applications of FFmpeg are incredibly diverse. Here are just a few scenarios where FFmpeg shines:
- Video Conversion: Need to convert a video from MP4 to MOV, AVI to MKV, or any other format? FFmpeg handles it with ease. This is particularly useful when preparing videos for different platforms or editing software that only supports specific formats.
- Audio Extraction: Want to extract the audio track from a video file and save it as an MP3 or WAV? FFmpeg can do this quickly and efficiently.
- Resizing and Cropping: Easily change the resolution of your videos or crop out unwanted sections to fit specific aspect ratios for social media or other uses.
- Applying Filters and Effects: FFmpeg supports a wide range of filters that can be applied to video and audio. This includes everything from simple brightness and contrast adjustments to more complex operations like deinterlacing, noise reduction, and even watermarking.
- Screen Recording: FFmpeg can be used to record your screen, offering a powerful alternative to dedicated screen recording software, especially for developers or those who need specific recording parameters.
- Streaming: For more advanced users, FFmpeg is a cornerstone for setting up live streams to platforms like Twitch or YouTube, or for creating custom streaming solutions.
- Batch Processing: Its command-line nature makes it ideal for automating repetitive tasks. You can write scripts to process hundreds of files at once, saving immense amounts of time.
In the broader tech ecosystem, FFmpeg is often the engine powering many popular applications and services. Video editing software, media players, video transcoding services, and even some cloud-based video processing platforms rely on FFmpeg’s robust capabilities under the hood. Its open-source nature means it’s constantly being developed and improved by a global community, ensuring its relevance and adaptability to new codecs and technologies.
Key Components of FFmpeg
When you download FFmpeg, you’re not just getting one program. You’re getting a suite of tools, the most prominent being:
ffmpeg: The primary command-line tool for converting, manipulating, and streaming audio and video. This is the workhorse you’ll be using most often.ffplay: A simple media player that uses FFmpeg libraries. It’s useful for quickly playing back files or testing your FFmpeg commands.ffprobe: A tool for analyzing multimedia streams. It can extract detailed information about codecs, formats, duration, bitrate, and more, which is invaluable for troubleshooting and understanding your media files.
Step-by-Step Installation Guide for FFmpeg on Windows
Installing FFmpeg on Windows primarily involves downloading the necessary files and then configuring your system to recognize the ffmpeg command from any directory in the Command Prompt or PowerShell. We’ll break this down into manageable steps.
Downloading the Correct FFmpeg Build
The first crucial step is to download the right version of FFmpeg for your Windows system.
-
Visit the Official FFmpeg Website: Navigate to the official FFmpeg download page. You can usually find this by searching for “FFmpeg download” or by going directly to https://ffmpeg.org/download.html.
-
Choose Your Windows Build: On the download page, scroll down to the “Windows builds” section. You’ll typically find links to builds provided by third parties, as FFmpeg themselves don’t compile Windows binaries. Two popular and reliable sources are often mentioned:
- gyan.dev: This is a highly recommended source for FFmpeg builds. They provide static builds, which are generally easier to work with. Look for links like “release builds” or “essentials build” (which usually includes
ffmpeg,ffplay, andffprobe). - BtbN: Another reliable source for FFmpeg builds.
- gyan.dev: This is a highly recommended source for FFmpeg builds. They provide static builds, which are generally easier to work with. Look for links like “release builds” or “essentials build” (which usually includes
-
Select the Correct Architecture (32-bit vs. 64-bit): Most modern Windows systems are 64-bit. To check which version you have, go to
Settings>System>About. Under “Device specifications,” look for “System type.” If it says “64-bit operating system,” you need the 64-bit FFmpeg build. Otherwise, download the 32-bit version. -
Choose the Build Type (Release vs. Development): For most users, the “release” builds are recommended. These are stable versions. Development builds (often labeled “git-master” or similar) contain the latest features but might be less stable.
-
Download the ZIP Archive: Download the chosen
.zipfile. It will contain all the necessary executables and libraries.
Extracting and Organizing FFmpeg Files
Once the ZIP file is downloaded, you need to extract its contents to a permanent location on your computer.
-
Create a Dedicated Folder: It’s good practice to create a specific folder for FFmpeg. A common location is
C:ffmpeg. This makes it easy to manage and locate. You can also place it inC:Program Filesor a custom directory, butC:ffmpegis straightforward for this guide. -
Extract the Contents:
- Locate the downloaded
.zipfile. - Right-click on the
.zipfile and select “Extract All…” - In the extraction dialog, browse to the folder you created (e.g.,
C:ffmpeg) and click “Extract.”
- Locate the downloaded
-
Verify the Extraction: After extraction, navigate into your
C:ffmpegfolder. You should see a folder named something likeffmpeg-xxxx-essentials_build(wherexxxxrepresents version numbers and build details). Inside this folder, you should find abinfolder. Thebinfolder is where the executable files (ffmpeg.exe,ffplay.exe,ffprobe.exe) are located. It’s a good idea to copy the contents of thisffmpeg-xxxx-essentials_buildbinfolder directly into yourC:ffmpegfolder. This way,C:ffmpegwill directly contain thebinfolder and the executables, simplifying the next step.- Simplified Structure: After copying, your
C:ffmpegfolder should look like this:
C:ffmpeg

├── bin

│   ├── ffmpeg.exe

│   ├── ffplay.exe

│   └── ffprobe.exe

│   └── ... (other .dll files)

└── ... (other folders like doc, licenses if present)
- Simplified Structure: After copying, your
Adding FFmpeg to Your System’s PATH Environment Variable
This is the most critical step for making FFmpeg accessible from any command prompt. The PATH environment variable tells Windows where to look for executable files when you type a command.
-
Open System Properties:
- Search for “environment variables” in the Windows search bar and select “Edit the system environment variables.”
- Alternatively, right-click “This PC” (or “My Computer”), select “Properties,” and then click “Advanced system settings.”
-
Access Environment Variables: In the “System Properties” window, click the “Environment Variables…” button.
-
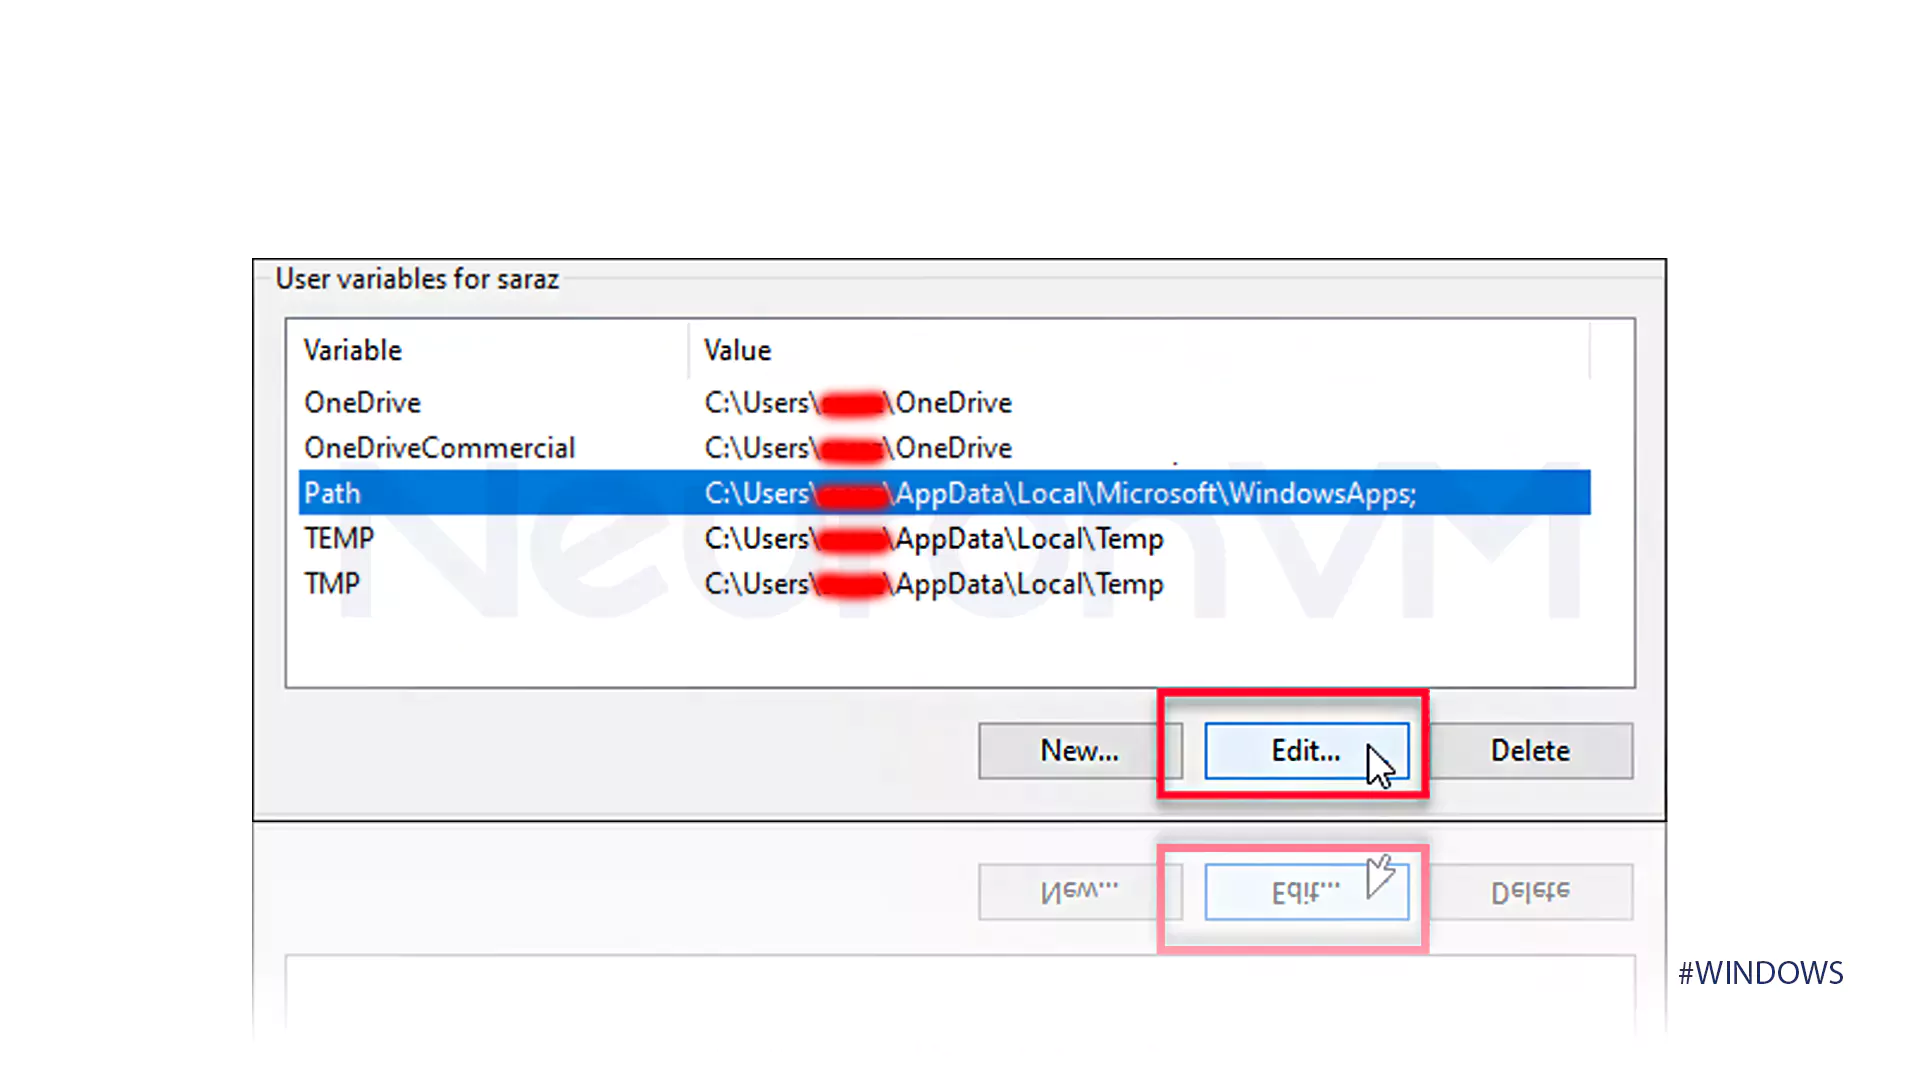
Edit the PATH Variable:
- Under “System variables” (or “User variables” if you only want to make FFmpeg available for your current user account), find the variable named
Path. - Select
Pathand click the “Edit…” button.
- Under “System variables” (or “User variables” if you only want to make FFmpeg available for your current user account), find the variable named
-
Add FFmpeg’s Bin Directory:
- In the “Edit environment variable” window, click “New.”
- Paste the full path to the
binfolder where yourffmpeg.exeis located. Based on our previous step, this would beC:ffmpegbin. - Click “OK” on all open windows (Edit environment variable, Environment Variables, System Properties) to save your changes.
Verifying Your FFmpeg Installation
Now, it’s time to test if everything has been set up correctly.
-
Open Command Prompt or PowerShell:
- Search for “cmd” or “PowerShell” in the Windows search bar and open it.
-
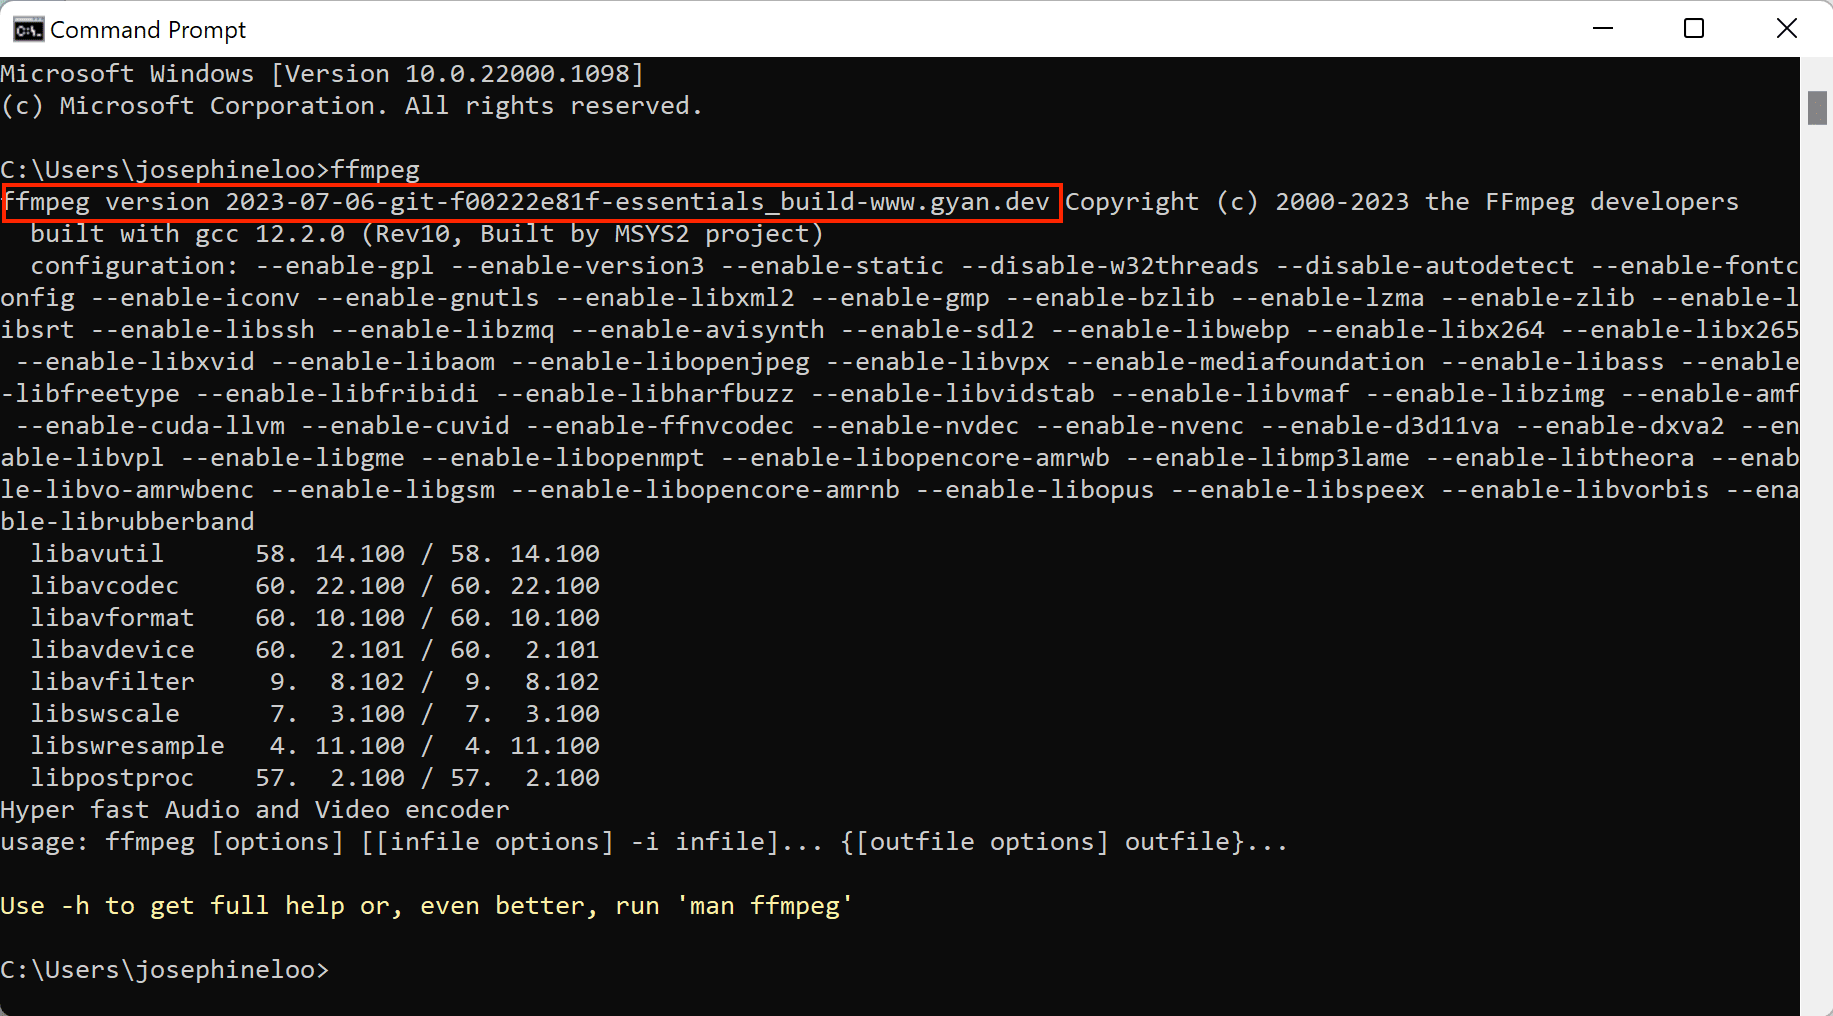
Type the FFmpeg Command: In the command prompt window, type the following command and press Enter:
ffmpeg -version -
Check the Output:
- If FFmpeg is installed correctly and the PATH variable is set up properly, you should see a lot of information displayed. This includes the FFmpeg version number, compiler information, configuration options, and licensed under the LGPL or GPL.
- If you see an error like “
ffmpegis not recognized as an internal or external command, operable program or batch file,” it means Windows can’t find theffmpeg.exefile. Double-check that you added the correct path to your environment variables and that thebinfolder contains the executables. You might need to close and reopen your command prompt window for the changes to take effect.
You can also test
ffplayandffprobe:ffplay -version ffprobe -versionThese commands should also display their respective version information.
Common Issues and Troubleshooting
While the installation process outlined above is generally straightforward, you might encounter a few hiccups. Here’s how to address them.
“ffmpeg is not recognized…” Error
This is the most common issue. It usually stems from one of two problems:
- Incorrect PATH: You might have mistyped the path to the
binfolder, or you might have added the path to the wrong variable (e.g., a user variable when you intended a system variable, or vice-versa). Carefully re-trace the steps for editing environment variables. - Command Prompt Not Refreshed: Environment variable changes don’t always apply to already open command prompt windows. Close any open
cmdorPowerShellwindows and open a new one after setting the PATH.
Incorrect FFmpeg Build
If you’re trying to perform a specific operation and it fails with cryptic errors, or if -version shows unexpected information, you might have downloaded a build that’s missing certain libraries or encoders.
- Re-download: Visit the
gyan.devorBtbNdownload pages again. Ensure you’re downloading a “release” build and that it’s the correct architecture (32-bit or 64-bit). Look for builds that explicitly mention “full” or “essentials” which are more likely to have all common codecs included.
Permissions Issues
On rare occasions, especially if you try to install FFmpeg in protected system directories, you might run into permission errors.
- Choose a User-Writable Location: Installing FFmpeg in
C:ffmpegor a similar directory that doesn’t require administrator privileges for modification is usually best. If you must install inProgram Files, ensure you have the necessary administrator rights.
Using FFmpeg Effectively: Basic Command Examples
Once installed, you can start using FFmpeg’s power. Here are a few very basic examples to get you started:
1. Convert a Video to a Different Format:
ffmpeg -i input.mp4 output.avi
This command converts input.mp4 to output.avi. FFmpeg will attempt to choose reasonable default settings for the output format.
2. Extract Audio from a Video:
ffmpeg -i input.mp4 -vn output.mp3
The -vn flag tells FFmpeg to disable video recording, effectively extracting only the audio.
3. Change Video Resolution:
ffmpeg -i input.mp4 -vf scale=1280:720 output_720p.mp4
The -vf flag specifies video filters. scale=1280:720 resizes the video to 1280 pixels wide by 720 pixels high.
4. Get Information About a Media File:
ffprobe input.mp4
This will output detailed information about the input.mp4 file.
Conclusion
Installing FFmpeg on Windows, while requiring a few extra steps compared to standard applications, is a rewarding process that unlocks a world of multimedia manipulation possibilities. By carefully following the steps to download, extract, and, most importantly, configure your system’s PATH environment variable, you’ll have this powerful command-line tool ready for action. Whether you’re a seasoned developer, a content creator looking to streamline your workflow, or simply someone who needs to convert or edit media files, FFmpeg is an essential addition to your software arsenal. Don’t be intimidated by the command line; with a bit of practice, FFmpeg will become an indispensable part of your digital toolkit, enhancing your productivity and creative output in countless ways.
aViewFromTheCave is a participant in the Amazon Services LLC Associates Program, an affiliate advertising program designed to provide a means for sites to earn advertising fees by advertising and linking to Amazon.com. Amazon, the Amazon logo, AmazonSupply, and the AmazonSupply logo are trademarks of Amazon.com, Inc. or its affiliates. As an Amazon Associate we earn affiliate commissions from qualifying purchases.